JUKI HZL-353Z Series Instruction Manual
Hide thumbs
Also See for HZL-353Z Series:
- Instruction manual (78 pages) ,
- Service manual (35 pages) ,
- Instruction manual (78 pages)
Table of Contents
Advertisement
Quick Links
HZL - 353Z, 355Z, 357Z Series
INSTRUCTION MANUAL
INSTRUKCJA OBS£UGI
NÁVOD K OBSLUZE
KULLAN M K LAVUZU
Please read this instruction manual before using
the machine as it contains important operational
and safety information.
Attention
Keep this manual accessible so that you may refer
to it at anytime while operating the machine.
Przed u¿yciem maszyny przeczytaæ instrukcjê
obs³ugi, poniewa¿ zawiera ona wa¿ne informacje
na temat bezpieczeñstwa i eksploatacji urz¹dzenia.
Uwaga!
Instrukcjê przechowywaæ w ³atwo dostêpnym
miejscu, aby móc korzystaæ z niej podczas
u¿ytkowania maszyny.
Pøed pou itím stroje si pøeètìte tento návod k
obsluze, proto e obsahuje dùle ité informace
týkající se provozu a bezpeènosti.
Upozornìní
Ulo te tento návod tak, aby byl neustále k dispozici
a mohli jste ho vyu ít kdykoliv pøi pou ívání stroje.
Bu kýlavuz önemli iþletim ve güvenlik bilgileri
içerdiðinden, makineyi kullanmadan önce lütfen
bu kullaným kýlavuzunu okuyun.
Dikkat
Makineyi kullanýrken her an bakmanýz gerekebileceði
için bu kýlavuzu eriþilebilir bir yerde tutun.
Advertisement
Table of Contents

Subscribe to Our Youtube Channel
Related Manuals for JUKI HZL-353Z Series


Summary of Contents for JUKI HZL-353Z Series
- Page 1 HZL - 353Z, 355Z, 357Z Series INSTRUCTION MANUAL INSTRUKCJA OBS£UGI NÁVOD K OBSLUZE KULLAN M K LAVUZU Please read this instruction manual before using the machine as it contains important operational and safety information. Attention Keep this manual accessible so that you may refer to it at anytime while operating the machine.
-
Page 2: Important Safety Instructions
“ IMPORTANT SAFETY INSTRUCTIONS ” When using an electrical appliance, basic safety precautions should always be followed, including the following: Read all instructions before using this sewing machine. “DANGER ____ To reduce the risk of electric shock:” 1. The appliance should never be left unattended when plugged in. 2. - Page 3 10. Always unplug the machine from the electrical outlet when removing covers, when lubricating or when making any other user servicing adjustments mentioned in the instruction manual. 11. Never drop or insert any object into any opening. 12. Do not use outdoors. 13.
- Page 4 "SAVE THESE INSTRUCTIONS" "This sewing machine is intended for household use only." Congratulations on your purchase of a JUKI sewing machine. Please be sure to read safety precautions in "To use the sewing machine safely" in the Instruction Manual before use to fully understand the functions and operating procedures of the sewing machine so as to use the sewing machine for a long time.
- Page 5 WARNING For the combination of the material and the thread and needle, in particular, refer to the explanation table in "Replacement of the needle". If the needle or thread does not match the material used such as in the case that an extra heavyweight material (e.g., denim) is sewn with a thin needle (#11 or higher), the needle can break resulting in an unexpected personal injury.
- Page 6 “WA¯NE INSTRUKCJE DOTYCZ¥CE BEZPIECZEÑSTWA” Podczas u¿ywania urz¹dzeñ elektrycznych zawsze stosowaæ podstawowe œrodki ostro¿noœci, w tym nastêpuj¹ce: przed u¿yciem maszyny do szycia przeczytaæ wszystkie instrukcje. “ NIEBEZPIECZEÑSTWO ____ Aby zmniejszyæ ryzyko pora¿enia pr¹dem: ” 1. Jeœli urz¹dzenie jest pod³¹czone do zasilania, nie pozostawiaæ go bez nadzoru.
- Page 7 9. Wy³¹czyæ maszynê (przestawiæ wy³¹cznik w pozycjê "O") przed dokonaniem jakichkolwiek regulacji w okolicach ig³y, takich jak nawlekanie ig³y lub szpulki, wymiana ig³y lub zmiana stopki. 10. Zawsze od³¹czaæ maszynê od gniazdka elektrycznego przed zdjêciem pokryw, przed smarowaniem lub wykonywaniem innych czynnoœci serwisowych wymienionych w instrukcji obs³ugi.
- Page 8 "ZACHOWAÆ TÊ INSTRUKCJÊ" "Maszyna do szycia jest przeznaczona wy³¹cznie do u¿ytku domowego." Gratulujemy zakupu maszyny do szycia JUKI. Przed u¿yciem maszyny do szycia koniecznie nale¿y przeczytaæ wskazówki dotycz¹ce bezpieczeñstwa w czêœci ?Bezpieczne u¿ytkowanie maszyny do szycia" w instrukcji obs³ugi. Pozwoli to zrozumieæ funkcje i procedury obs³ugi maszyny, dziêki czemu bêdzie mo¿na z niej korzystaæ...
- Page 9 OSTRZE¯ENIE Informacje na temat odpowiednich materia³ów, nici i igie³ znajduj¹ siê w tabeli w czêœci "Dobór igie³/ materia³ów/nici". Jeœli ig³a lub nici s¹ nieodpowiednie do u¿ywanego materia³u, np. w razie szycia bardzo grubego materia³u (np. jeansu) za pomoc¹ cienkiej ig³y (nr 11 lub wy¿szy), ig³a mo¿e siê z³amaæ i spowodowaæ uraz cia³a u¿ytkownika.
- Page 10 “DÙLE ITÉ BEZPEÈNOSTNÍ POKYNY” Pou íváte-li elektrický pøístroj, je nutné dodr ovat základní bezpeènostní opatøení vèetnì následujících: pøeètìte si všechny pokyny pøed pou íváním šicího stroje. “ NEBEZPEÈÍ ____ Chcete-li sní it riziko zásahu elektrickým proudem: ” 1. Je zakázáno nechávat pøístroj bez dozoru, kdy je zapojen do zásuvky. 2.
- Page 11 10. Pokud snímáte kryty, pøi promazávání nebo pokud provádíte jakákoli seøízení popsaná v tomto návodu k obsluze, v dy odpojte stroj od elektrické zásuvky. 11. Do otvoru nikdy nevhazujte ani nevkládejte ádné pøedmìty. 12. Nepou ívejte stroj venku. 13. Nepou ívejte stroj v místech, kde se pou ívají aerosolové produkty (spreje) nebo kyslík.
- Page 12 "ULO TE TENTO NÁVOD K OBSLUZE" "Tento šicí stroj je urèen pouze k domácímu pou ití." Gratulujeme k zakoupení šicího stroje JUKI. Pøed pou itím stroje si nezapomeòte pøeèíst bezpeènostní opatøení v èásti ?Jak bezpeènì pou ívat šicí stroj" návodu k obsluze, abyste plnì pochopili funkce a provozní postupy šicího stroje a také jak dlouhodobì...
- Page 13 VÝSTRAHA Pro vhodné kombinování materiálu s nití a jehlou se informujte ve výkladové tabulce v èásti "Výmìna jehly". Pokud jehla nebo ni neodpovídají pou ívanému materiálu, napøíklad v pøípadì šití velmi silného materiálu (napø. d ínsovina) velmi tenkou jehlou (è. 11 nebo vyšší), mù e dojít ke zlomení jehly a zpùsobení neoèekávaného zranìní.
- Page 14 “ÖNEMLÝ GÜVENLÝK TALÝMATLARI” Bir elektrikli cihazý kullanýrken, aþaðýdakiler de dahil olmak üzere temel güvenlik önlemlerine her zaman uyulmalýdýr: Bu dikiþ makinesini kullanmadan önce tüm talimatlarý okuyun. “ TEHLÝKE ____ Elektrik çarpmasý riskini azaltmak için: ” 1. Cihaz fiþi takýlýyken kesinlikle gözetimsiz býrakýlmamalýdýr. 2.
- Page 15 10. Kapaklarý çýkarýrken, makineyi yaðlarken veya kullaným kýlavuzunda belirtilen kullanýcý bakým ayarlamalarýndan herhangi birini yaparken daima dikiþ makinesinin fiþini prizden çekin. 11. Herhangi bir açýklýða kesinlikle bir nesne düþürmeyin veya sokmayýn. 12. Dýþ mekanda kullanmayýn. 13. Aerosol (sprey) ürünlerin kullanýldýðý ya da oksijen uygulamasý yapýlan ortamlarda çalýþtýrmayýn.
- Page 16 "BU TALÝMATLARI SAKLAYIN" "Bu dikiþ makinesi sadece evde kullaným için tasarlanmýþtýr." Bir JUKI dikiþ makinesi satýn aldýðýnýz için tebrikler. Dikiþ makinesini uzun süre kullanmak üzere dikiþ makinesinin iþlevleri ve kullaným prosedürlerini iyice anlamak için makineyi kullanmadan önce, lütfen Kullaným Kýlavuzu'ndaki "Dikiþ makinesini güvenli bir þekilde kullanmak için"...
- Page 17 UYARI Kumaþ, iðne ve iplik kombinasyonu için, özellikle, "Ýðnenin deðiþtirilmesi" bölümündeki açýklama tablosuna bakýn. Ýðne ya da iplik kullanýlan kumaþ ile eþleþmiyorsa, örneðin ekstra aðýr bir kumaþýn (ör., kot kumaþý) ince bir iðne (11 numara ya da daha üstü) ile dikilmesi durumunda, iðne beklenmeyen yaralanma vakalarýna neden olacak þekilde kýrýlabilir.
-
Page 18: Table Of Contents
List of contents Details of the machine..........................22 Fitting the snap-in sewing table........................24 Accessories..............................24 Connecting machine to power source......................26 Two-step presser foot lever........................28 Attaching the presser foot holder .......................28 Winding the bobbin ............................30 Inserting the bobbin............................32 Threading the upper thread ........................34 Automatic needle threader .........................36 Bringing up the lower thread ........................36 Reverse sewing............................38... - Page 19 SPIS TREŒCI Poszczególne czêœci maszyny........................23 Zamocowanie przed³u¿ki wysiêgu......................25 Akcesoria ..............................25 Pod³¹czanie maszyny do Ÿród³a zasilania ....................27 Dwustopniowa dŸwignia docisku stopki .....................29 Mocowanie uchwytu stopki ........................29 Nawijanie szpuleczki bêbenka ........................31 Mocowanie bêbenka ..........................33 Nawlekanie nitki górnej ..........................35 Automatyczny nawlekacz ig³y ........................37 Wyci¹ganie dolnej nitki ..........................37 Szycie wsteczne...
- Page 20 Obsah Souèásti šicího stroje ..........................23 Montá vysouvací pracovní plochy ......................25 Pøíslušenství...............................25 Pøipojení šicího stroje ke zdroji elektrického napájení ................27 Dvoupolohová zdvíhací páèka pøítlaèné patky...................29 Upevnìní dr áku pøítlaèné patky........................29 Navíjení cívky.............................31 Zalo ení cívky ............................33 Navlékání horní nitì ..........................35 Automatický navlékaè jehel ........................37 Vyta ení...
- Page 21 Indice Parti principali della Macchina........................23 Inserimento piano estraibile ........................25 Accessori..............................25 Collegamento della Macchina ........................27 Regolazione leva alza-piedino in due posizioni ..................29 Inserimento del gambo del piedino ......................29 Avvolgimento della bobina .........................31 Inserimento della bobina avvolta........................33 Come infilare la Macchina..........................35 Infila-ago automatico..........................37 Recupero del filo della bobina........................37 Cucitura a marcia indietro ..........................39 Rimozione del lavoro..........................39...
-
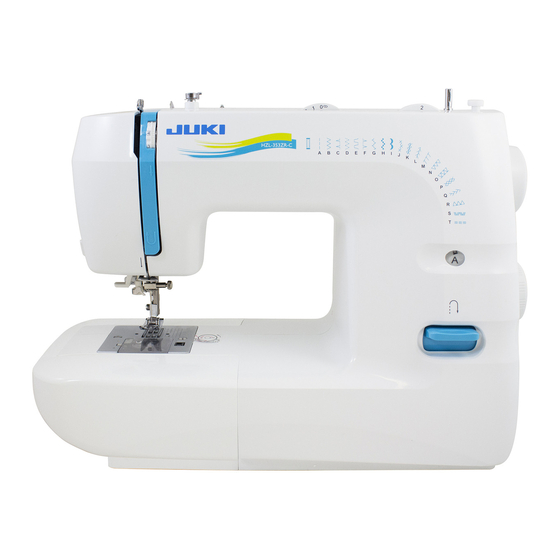
Page 22: Details Of The Machine
Details of the machine 1. Tension dial 2. Presser foot pressure 3. Thread take up lever 4. Thread cutter 5. One step buttonhole lever 6. Automatic threader 7. Presser foot 8. Needle plate cover 9. Sewing table and accessory 10. Stitch width dial 11. -
Page 23: Poszczególne Czêœci Maszyny
Poszczególne czêœci Souèásti šicího stroje Makinenin Ana Parçalarý maszyny 1. Tarcza naprê¿acza 1. Napínací koleèko nitì 1. Ýplik gerginliði ayarlama düðmesi 2. Regulator docisku stopki Pøítlak patky 2. Baský ayaðý basýncý 3. Podci¹gacz nici Napínák nitì 3. Horoz 4. Obcinacz nici Nù... -
Page 24: Fitting The Snap-In Sewing Table
Fitting the snap-in sewing table Keep the snap-in sewing table horizontal, and push it in the direction of the arrow. (1) The inside of the snap-in sewing table can be utilized as an accessory box. To open, flip cover down as shown. -
Page 25: Zamocowanie Przed³U¿Ki Wysiêgu
Zamocowanie przed³u¿ki Montá vysouvací Sürgülü Dikiþ Tablasýnýn pracovní plochy wysiêgu Yerleþtirilmesi Zachowuj¹c po³o¿enie poziome Pøidr te násuvnou desku ve Sürgülü dikiþ tablasýný yatay przed³u¿ki zamocuj j¹ w vodorovné poloze a konumda tutun ve okun maszynie zgodnie z kierunkiem zamáèknìte ji ve smìru šipky gösterdiði yöne doðru itin.(1) strza³ki. -
Page 26: Connecting Machine To Power Source
Connecting machine to power source Connect the machine to a power source as illustrated. (1) The sewing machine is equipped with a polarized plug which must be used with an appropriate polarized outlet. (2) Attention: Unplug the power cord when machine is not in use. -
Page 27: Pod³¹Czanie Maszyny Do Ÿród³A Zasilania
Pod³¹czanie maszyny Pøipojení šicího stroje Makinenin elektrik do Ÿród³a zasilania ke zdroji elektrického beslemesine napìtí baðlanmasý W³¹czyæ wtyczkê do gniazda w Pøístroj pøipojte do zásuvky na Fiþi,þekilde gösterildiði gibi maszynie. Pod³¹czyæ maszynê zdi podle obrázku. (1)Šicí stroj prize takýn.(1) do Ÿród³a jak przedstawiono na je vybaven polarizovanou Bu cihazýn, uygun kutuplu bir (rys. -
Page 28: Two-Step Presser Foot Lever
Two-step presser foot lever When sewing several layers or thick fabrics, the presser foot can be raised a second stage for easy positioning of the work. (A) Attaching the presser foot holder Raise the presser foot bar (a). (1) Attach the presser foot holder (b) as illustrated. -
Page 29: Dwustopniowa Dÿwignia Docisku Stopki
Ýki kademeli baský ayaðý Dvoupolohová zdvíhací Dwustopniowa dŸwignia kaldýrma kolu páèka pøítlaèné patky docisku stopki Przy szyciu grubych tkanin lub Pro zjednodušení zasouvání Birkaç katlý kalýn kumaþlarý wielu warstw materia³u, stopka velmi silných látek pod dikerken,iþin kolay yerleþtirilmesi dociskowa mo¿e byæ pøítlaènou patku je mo né... -
Page 30: Winding The Bobbin
Winding the bobbin - Place the thread and spool cap onto the spool pin. For small thread spools, place small side of spool cap next to spool. (1) - Snap thread into thread guide. - Wind thread clockwise around bobbin winder tension discs. - Thread bobbin as illustrated and place on spindle. -
Page 31: Nawijanie Szpuleczki Bêbenka
Nape³nianie dolnej Navíjení cívky Masuranýn sarýlmasý szpulki ³o¿yæ szpulkê z nitk¹ tak, asaïte cívku, aby se nit - Ýpliði ve makara desteðini aby nitka rozwija³a siê jak na odvíjela podle obrázku a na ni makara yuvasýna yerleþtirin. rysunku i na³o¿yæ kr¹¿ek èepièku. -
Page 32: Inserting The Bobbin
Inserting the bobbin When inserting or removing the bobbin, the needle must be fully raised. 1. Inserting the bobbin in the bobbin holder with the thread running counter clockwise direction (arrow). 2. Pull the thread through the slit (A). 3. Draw the thread clockwise until it slips into the notch (B). -
Page 33: Mocowanie Bêbenka
Wk³adanie szpuleczki Zalo ení cívky Masuranýn takýlmasý do bêbenka Przy wk³adaniu lub Pøi zakládání nebo vyjímání Masurayý takarken veya wyjmowaniu szpuleczki z cívky musí být jehla zcela çýkarýrken, iðne tam yukarý bêbenka ig³a musi byæ zdvi ena. konumda olmalýdýr. ustawiona w najwy¿szym po³o¿eniu. -
Page 34: Threading The Upper Thread
Threading the upper thread This is a simple operation but it is important to carry out correctly as by not doing so several sewing problems could result. - Start by raising the needle to its highest point, and also raise the presser foot to release the tension discs. -
Page 35: Nawlekanie Nitki Górnej
Nawlekanie nitki górnej Navleèení horní nitì Üst ipliðin takýlmasý Jest to bardzo prosta czynnoœæ, Navlékání je jednoduchá Bu basit bir iþlemdir, ancak ale jest bardzo wa¿ne, aby operace, ale je nutné ji doðru yapýlmasý gerekir. Ýþlemin przeprowadziæ j¹ prawid³owo. provádìt správnì, jinak by doðru yapýlmamasý... -
Page 36: Automatic Needle Threader
Automatic needle threader - Raise the needle to its highest position. - Press lever (A) right down. - The threader automatically swings to the threading position (B). - Take the thread round the hook (C). - Take the thread in front of the needle so that the thread will insert into the hook (D) from bottom to top... -
Page 37: Automatyczny Nawlekacz Ig³Y
Automatyczny Automatický navlékaè Otomatik iplik takýcý nití nawlekacz ig³y - Podnieœæ ig³ê do jej - Zdvihnìte jehlu do nejvyššího - Ýðneyi en üst düzeye kadar najwy¿szej pozycji. bodu. kaldýrýn. - Stisknìte na (A) co nejsilnìji. - Aþaðý doðru kolu (A) bastýrýn. - Opuœciæ... -
Page 38: Reverse Sewing
Reverse sewing At the end of seam, press down the reverse sewing lever. Sew a few reverse stitches. Release the lever and the machine will sew forwards again. (A) Removing the work Turn the handwheel towards to bring the thread take up lever to its highest position, raise the presser foot and remove work towards the back. -
Page 39: Szycie Wsteczne
Szycie wsteczne Vratný steh Geri dikiþ Aby zakoñczyæ lub wzmocniæ Pro zpevnìní zaèátku a konce Dikiþin baþýný ve sonunu szef, nacisn¹æ dŸwigniê œciegu švu stisknìte páèku pro šití saðlamlaþtýrmak için, geri dikiþ wstecznego do ty³u. Przeszyæ zpìt. Ušijte nìkolik stehù zpìt. kolunu aþaðý... -
Page 40: Inserting The Needle
Inserting the needle Change the needle regularly, especially if it is showing signs of wear and causing problems. Insert the needle as illustrated as follows: A. Loosen the needle clamp screw and tighten again af- ter inserting the new needle. B. -
Page 41: Mocowanie I Zmienianie Ig³Y
Ýðnelerin takýlmasý ve Zak³adanie ig³y Nasazení jehly deðiþtirilmesi Nale¿y regularnie wymieniaæ Jehlu mìòte pravidelnì, Ýðneyi düzenli olarak, özellikle ig³y, szczególnie je¿eli nosz¹ zejména, vykazuje-li známky aþýnma belirtileri gösterdiðinde œlady zu¿ycia lub s¹ przyczyn¹ opotøebení nebo zpùsobuje-li veya sorunlara sebep problemów. problémy. -
Page 42: Adjusting Presser Foot Pressure
Adjusting presser foot pressure The presser foot pressure of the machine has been pre-set and requires no particular readjustment according to the type of fabric (light-or-heavy weight). However, if you need to adjust the presser foot pressure, turn the presser adjusting screw with a coin. -
Page 43: Regulacja Docisku Stopki
Regulacja docisku s Nastavení pøítlaku patky Regolazione della topki pressione del piedino Docisk stopki maszyny zosta³ Pøítlak patky je nastaven z La pressione del piedino può fabrycznie ustawiony i nie továrny a nevy aduje ádné essere preregolata senza wymaga szczególnej regulacjiw úpravy podle typu látky (tenké... -
Page 44: Matching Needle / Fabric / Thread
Matching needle / fabric / thread NEEDLE, FABRIC, THREAD SELECTION GUIDE NEEDLE SIZE FABRICS THREAD 9-11(65-75) Lightweight fabrics-thin cottons, voile, Light-duty thread in cotton, nylon or serge, silk , muslin, Qiana, interlocks, polyester. cotton knits, tricots, jerseys, crepes, woven polyester, shirt & blouse fabrics. 12(80) Medium weight fabrics-cotton, satin, Most threads sold are medium size... -
Page 45: Dobór Ig³Y/ Materia³U/ Nici
Dobór igie³/materia³ów/nici Tabela doboru igie³, materia³ów i nici ROZMIAR IG£Y MATERIA£ NITKA 9-11(65-75) Lekka, cienka bawe³na, woal, jedwab, Cienka nitka bawe³niana, nylonowa muœlin, cienkie dzianiny, trykoty, jersey, lub poliestrowa. krepa, poliester, tkaniny koszulowe. 12(80) Œredniej gruboœci bawe³na, satyna, p³ótno Wiêkszoœæ dostêpnych nici to nici ¿aglowe, podwójne dzianiny, cienka we³na. -
Page 46: Odpovídající Jehla / Látka / Nit
Odpovídající jehla / látka / nit PRÙVODCE VÝBÌREM JEHLY, LÁTKY A NITI VELIKOST JEHLY LÁTKY NITÌ 9-11(65-75) Lehké látky: Lehká bavlna, závoje, kepr, Bavlnìná nit, hedvábná nit, mušelín, bavlnìné úplety, erzej, tkaný nylonová nit nebo syntetická nit. polyester, látky na halenky nebo košile. Støednì... - Page 47 Ýðne/ kumaþ/ iplik seçimi ÝÐNE,KUMAÞ, ÝPLÝK SEÇME KILAVUZU ÝÐNE BÜYÜKLÜÐÜ KUMAÞLAR ÝPLÝK 9-11(65-75) Hafif kumaþlar-ince pamuk,inceyün, sürfile, Pamuk, naylon, polyester veya ipek, müslin, Qiana, interlok, pamuk pamuk kaplama. Polyester örgüleri, triko, jarse, krep, dokuma polyester, esaslý hafif gövde ipliði. gömlek & bluz kumaþlarý. 12(80) Orta aðýrlýktaki kumaþlar-pamuk, saten, Satýlan çoðu iplikler normal...
-
Page 48: How To Choose Your Pattern
To obtain any of the other patterns shown in the upper row on the stitch selection HZL-353Z Series panel, select the letter above the stitch with the stitch selector dial. Adjust the stitch length and the stitch width with the control dials according to the result desired. -
Page 49: Jak Wybraæ Œcieg
Jak wybraæ œcieg Volba stehù Dikiþ tipinin seçilmesi Aby szyæ œciegiem prostym Rovné stehy: otoète volièem Düz dikiþ için,dikiþ tipi seçme nale¿y wybraæ wzór "A" stehù na po adovaný symbol düðmesini, "A" konumuna pokrêt³em wyboru œciegu. nebo tak, aby se v okýnku getirin. -
Page 50: Straight Stitching And Needle Position
Straight stitching and needle position Turn the stitch selection dial so that the pointer is set to the straight stitch. Generally speaking, the thicker the fabric, thread and needle, the longer the stitch should be. Choose your needle position, from center position to left needle position by changing the stitch width dial from "0"... -
Page 51: Szycie Œciegiem Prostym I Wybór Po³O¿Enia Ig³Y
Szycie œciegiem prostym Šití rovným stehem a Düz dikiþ ve iðne I wybór po³o¿enia ig³y poloha jehly pozisyonu Pokrêt³em wyboru œciegu Otoète volièem tak, aby se v Dikiþ seçim kadranýný, iþaretçi wybraæ literê œciegiem prostym. okýnku pro zobrazení stehu düz dikiþe gelecek þekilde objevil steh rovný. -
Page 52: Sewing On Buttons
Sewing on buttons Change presser foot to button sewing foot. Move the drop feed control to " .." to lower the feed dogs. (1) Position the work under the foot. Place the button in the desired position, lower the foot. Set the pattern selector knob on zig zag stitch. -
Page 53: Przyszywanie Guzików
Przyszywanie guzików Pøišívání knoflíkù Düðme dikme Wymieniæ stopkê na specjaln¹ Nainstalujte patku pro pøišívání Baský ayaðýný düðme dikme stopkê do przyszywania knoflíkù. ayaðý ile deðiþtirin. guzików. Diþliyi indirmek için diþli kontrol Posuòte zápustkovou páku kolunu saða getirin. (1) Przesun¹æ " "... -
Page 54: How To Sew Buttonholes
How to sew buttonholes Buttonhole-making is a 0.4~0.6 simple process that provides reliable results. Making a Buttonhole - Using tailor's chalk, mark the position of the buttonhole on the fabric. - Attach the buttonhole foot and set the pattern selection dial to "... -
Page 55: Obszywanie Dziurek
Obszywanie dziurek Obšívání knoflíkových Tek adýmda ilik açma dírek Obszywanie dziurek jest Obšívání knoflíkových dírek Ýlik açma dikiþi güvenilir sonuçlar saðlayan basit bir prostym procesem, je jednoduchým úkonem, iþlemdir. gwarantuj¹cym ³adne který vykazuje velmi dobré wykoñczenie dziurki. výsledky. Ýlik Açmak Wykonanie dziurki - Terzi tebeþiri kullanarak, Postup pøi obšívání... -
Page 56: Left And Right Side Balance For Buttonhole
Left and right side balance for buttonhole Stitch density on right and left sides of buttonhole can be adjusted by button-hole balance control dial. This dial should usually be in a neutral position. (between "+" and " ") If the stitches on the left side of the buttonhole are too close together, turn the dial to the left (+). -
Page 57: Korygowanie Gêstoœci Œciegu Przy Obszywaniu Dziurk
Korygowanie gêstoœci Vyrovnání levé a pravé Ýlik için sað ve sol köþe œciegu przy obszywaniu èásti knoflíkové dírky dengesi dziurki Gêstoœæ œciegu kolumn dziurki Hustota levé a pravé strany Ýliðin sað ve sol kenarýndaki mo¿e byæ regulowana knoflíkové dírky mù e být dikiþ... -
Page 58: Stitch Selection
Stitch selection Turn the stitch length dial to "4". 4 , S (HZL-353Z) Turn the stitch length dial to "S". (HZL-355Z, HZL-357Z) Triple straight stitch: (1/2) For hardwearing seams. The machine sews two stitches forwards and one stitch backwards. This gives triple reinforcement. Triple zig-zag: (3/4) For hardwearing seams, hems... -
Page 59: Wybór Œciegu
Wybór œciegu Volba stehù Düz dikiþ ve Rikrak dikiþ Ustawiæ pokrêt³o d³ugoœci Otoète volièem délky stehu do Dikiþ uzunluðu düðmesini "4" œciegu w pozycji "4". polohy "4". (HZL-353Z) konumuna getirin. (HZL-353Z) (HZL-353Z) Otoète volièem délky stehu do Dikiþ uzunluðu düðmesini "S" polohy "S". -
Page 60: Blind Hem
Blind hem For hems on curtains, trousers, skirts, etc. Blind hem for stretch fabrics. (HZL-355Z, HZL-357Z) Blind hem for firm fabrics. Turn up the hem to the desired width and press. Fold back (as shown in Fig. 1) against the right side of the fabric with the top edge of the hem extending about 7 mm (1/4") to the right... -
Page 61: Szycie Œciegiem Obrêbiajacym Krytym
Œcieg kryty Slepý steh Gizli dikiþ S³u¿y do niewidocznych Pro lemování závìsù, Kenarlar, perde, pantolon, etek podwiniêæ zas³on, skracania zakládání kalhot, sukní atd. vs. için. spodni, spódnic itp. Slepý steh pro pru né Esnek kumaþlar için gizli Œcieg kryty dla materia³ów látky. -
Page 62: Overlock Stitches
Overlock stitches Turn the stitch length dial to "4". 4 , S (HZL-353Z) Turn the stitch length dial to "S". (HZL-355Z, HZL-357Z) Seams, neatening, visible hems. Double overlock stitch (1): For fine knits, handknits, seams. Standard overlock (2): For fine knits, jerseys, neck edges, ribbing. -
Page 63: Œciegi Owerlokowe
Œciegi owerlokowe Obnitkovacíe stehy Sürfile dikiþleri Ustawiæ pokrêt³o d³ugoœci œciegu Otoète volièem délky stehu do Dikiþ uzunluðu düðmesini "4" w pozycji "4". (HZL-353Z) polohy "4". (HZL-353Z) konumuna getirin. (HZL-353Z) Ustawiæ pokrêt³o d³ugoœci œciegu Otoète volièem délky stehu do Dikiþ uzunluðu düðmesini "S" w pozycji "S". -
Page 64: Patch Work
Patch work Turn the stitch length dial to "4". 4 , S (HZL-353Z) Turn the stitch length dial to "S". (HZL-355Z, HZL-357Z) These stitches are used to join two pieces of fabric while leaving a space between their edges. - Fold over the edges of the two pieces of fabric for the hem and baste the edges to a thin piece of paper leaving a small... -
Page 65: Patchworki
Patchworki Patchwork Yama-Ek yapma Ustawiæ pokrêt³o d³ugoœci Otoète volièem délky stehu do Dikiþ uzunluðu düðmesini "4" œciegu w pozycji "4. (HZL-353Z) polohy "4". (HZL-353Z) konumuna getirin. (HZL-353Z) Ustawiæ pokrêt³o d³ugoœci Otoète volièem délky stehu do Dikiþ uzunluðu düðmesini "S" œciegu w pozycji "S". polohy "S". -
Page 66: Practical Stitches
Practical stitches Set the machine as illustrated. Turn the stitch width dial and stitch length dial to suit the fabric. Feather stitch (1) For decorative joining seam for a fagoted effect. (HZL-353Z, HZL-357Z) Bridging (2) For seams, place mats, tablecloths. Decorative joining seam for a fagotted effect. -
Page 67: Praktyczne Œciegi
Praktyczne œciegi Ozdobné stehy Pratik dikiþler Ustawiæ maszynê jak pokazano Nastavte šicí stroj tak, jak je Makineyi þekilde gösterildiði na rysunku. znázornìno na schématu. gibi ayarlayýn. Ustawiæ d³ugoœæ i szerokoœæ Dikiþ uzunluðunu kumaþa Šíøka a délka stehu by mìly být œciegu odpowiedni¹... -
Page 68: Darning
Darning - Turn stitch length dial to the desired length. - Turn stitch selector to straight stitch, center needle position. - Position the fabric to be darned under the presser foot together with the under laying fabric to be used. - Lower the presser foot and alternately sew forward or reverse using the lever. -
Page 69: Cerowanie
Cerowanie Prošívání Örgü - Ustawiæ pokrêt³o d³ugoœci - Nastavte délku stehu podle - Dikiþ uzunluðunu istenilen œciegu na ¿¹dan¹ d³ugoœæ. po adavkù. düzeyde ayarlayýn. - Pokrêt³o wyboru œciegu - Nastavte voliè stehu na pravý - Dikiþ tipi seçme düðmesini ustawione na œcieg prosty z šev s jehlou uprostøed. -
Page 70: Monogramming And Embroidering With Embroidery Hoop
Monogramming and embroidering with embroidery hoop* Drop the feed dogs. (1) - Remove the presser foot and the presser foot holder. - Lower presser foot lever before starting to sew. - Adjust the stitch width according to the size of lettering or design. -
Page 71: Monogramy I Hafty Na Tamborku
Monogramy i hafty Monogramy a výšivky Monogramlama ve nakýþ na tamborku* provádìné s vyšívacím kasnaðýyla nakýþçýlýk * rámeèkem* Opuœciæ z¹bki transportera Spus te podavaè. (1) Diþliyi indirmek için diþli kontrol przesuwaj¹c dŸwigniê (1). kolunu saða getirin. (1) - Odstraòte pøítlaènou patku a -Zdj¹æ... -
Page 72: Maintenance
Maintenance Disconnect the machine from the mains before carrying out any maintenance or changing the sewing light bulb. Cleaning If lint and bits of thread accumulate in the hook, this will interfere with the smooth operation of the machine. Check regularly and clean the stitching mechanism when necessary. -
Page 73: Konserwacja Maszyny
Konserwacja maszyny Údr ba šicího stroje Maintenance Maszynê nale¿y wy³¹czyæ z Pøed zahájením údr by nebo Fiþi prizden çekerek makineyi gniazda zasilaj¹cego oraz výmìnou šicí árovky elektrik beslemesinden ayýrýn ! prze³¹cznikiem g³ównym do odpojte stroj od napájení. Makineyi temizlemeden ve pozycji "O"... -
Page 74: Trouble Shooting Guide
Trouble shooting guide Problem Cause Correction Upper thread 1. The machine is not threaded 1. Rethread the machine breaks correctly 2. Reduce the thread tension (lower 2. The thread tension is too tight number) 3. The thread is too thick for the 3. -
Page 75: Usuwanie Usterek
Usuwanie usterek Usterka Przyczyna Korekta Zrywanie górnej 1. Nieprawid³owo za³o¿ona nitka. 1. Ponownie za³o¿yæ nitkê. nitki 2. Zbyt silne naprê¿enie 2. Obni¿yæ naprê¿enie. 3. Zbyt gruba nitka do ig³y 3. Za³o¿yæ grubsz¹ ig³ê. 4. Nieprawid³owo za³o¿ona ig³¹ 4. Ponownie za³o¿yæ ig³ê (p³ask¹ stron¹ 5. -
Page 76: Odstraòování Drobných Problémù
Odstraòování drobných problémù Závada Pøíèiny Øešení Horní nit se trhá 1. Nit nebyl správnì navleèena. 1. Navleète nit znovu do stroje a do jehly. 2. Nit je pøíliš napnutá. 2. Sni te napnutí horní nitì (na menší 3. Nit je pro danou jehlu pøíliš silná. èíslo). - Page 77 Arýza giderme kýlavuzu Sorun Sebebi Yapýlmasý gereken iþlem Üst iplik kopuyor 1. Makinenin ipliði düzgün 1. Makinenin ipliðini yeniden takýn. takýlmamýþ. 2. Ýpliði gevþetin (daha düþük bir numara) 2. Ýplik çok fazla gergin. 3. Daha büyük bir iðne seçin. 3. Ýplik, iðne için çok kalýn. 4.
- Page 78 2-11-1, Tsurumaki, Tama-shi, Tokyo 206-8551, JAPAN PHONE : (81)42-357-2341 FAX : (81)42-357-2379 Copyright © 2014 JUKI CORPORATION. All rights reserved throughout the world. Reservados todos los derechos en todo el mundo. Tous les droits sont réservés à travers le monde.
Need help?
Do you have a question about the HZL-353Z Series and is the answer not in the manual?
Questions and answers