Yanmar 3JH5E Operation Manual
Hide thumbs
Also See for 3JH5E:
- Operation manual (169 pages) ,
- Operation manual (164 pages) ,
- Operation manual (164 pages)
Table of Contents
Advertisement
Quick Links
Advertisement
Table of Contents
Troubleshooting

Related Manuals for Yanmar 3JH5E


Summary of Contents for Yanmar 3JH5E
-
Page 1: Marine Engines
OPERATION MANUAL MARINE ENGINES 3JH5E 4JH5E 4JH4-TE 4JH4-HTE1 4JH4-HTE English DA Danish DE German ES Spanish FR French Finnish Greek Italian NO Norwegian NL Dutch Portuguese 0AJHM-M00201 http://www.yanmar.co.jp PRINTED IN JAPAN SV Swedish... - Page 2 3JH5E, 4JH5E, 4JH4-TE, 4JH4-HTE1, 4JH4-HTE Aug 2009: 1st edition Dec 2011: 2nd edition 3JH5E, 4JH5E, 4JH4-TE, 4JH4-HTE1, 4JH4-HTE Model OPERATION MANUAL Code 0AJHM-M00201 Issued by : YANMAR CO.,LTD. Marine Operations Division Edited by : YANMAR TECHNICAL SERVICE CO.,LTD. All Rights Reserved, Copyright...
- Page 3 OPERATION MANUAL MARINE ENGINES 3JH5E 4JH5E 4JH4-TE 4JH4-HTE1 4JH4-HTE English...
- Page 4 We reserve the right to make any change at any time without notice. Yanmar and are registered trademarks of YANMAR CO., LTD. in Japan, the United States and/or other countries. All Rights Reserved:...
-
Page 5: Table Of Contents
New Engine Break-In......... 16 COMPONENT IDENTIFICATION ......17 Right Side (Viewed from Flywheel) - 3JH5E..17 Left Side (Viewed from Flywheel) - 3JH5E ..17 Right Side (Viewed from Flywheel) - 4JH5E..18 Left Side (Viewed from Flywheel) - 4JH5E ..18 Right Side (Viewed from Flywheel) - 4JH4-TE .. - Page 6 TABLE OF CONTENTS CONTROL EQUIPMENT.......... 23 Instrument Panel (Optional) ....... 23 Single-Lever Remote Control Handle ....31 BEFORE YOU OPERATE ..........33 INTRODUCTION ............33 SAFETY PRECAUTIONS......... 33 DIESEL FUEL............34 Diesel Fuel Specifications ........34 Filling the Fuel Tank........... 37 Bleeding the Fuel System ........
- Page 7 Keep a Log of Engine Hours and Daily Checks 61 Yanmar Replacement Parts ......61 Tools Required ..........61 Ask Your Authorized Yanmar Marine Dealer or Distributor for Help ........61 EPA MAINTENANCE REQUIREMENTS....63 EPA Requirements for USA and Other Applicable Countries........
- Page 8 SYSTEM DIAGRAMS........... 107 PIPING DIAGRAMS ..........107 WIRING DIAGRAMS ..........137 EPA WARRANTY USA ONLY ........149 YANMAR CO., LTD. LIMITED EMISSION CONTROL SYSTEM WARRANTY - USA ONLY ...... 149 Your Warranty Rights and Obligations:.... 150 Warranty Period: ..........150 Warranty Coverage: .........
-
Page 9: Introduction
• Make sure this manual is transferred to manufacture. subsequent owners. This manual should To help you enjoy your Yanmar JH series be considered a permanent part of the engine for many years to come, please engine and remain with it. -
Page 10: Jh Series Emission Control System Warranty-Usa, The Environmental Protection Agency (Epa) Only
JH series engines come with an emission control system warranty. In all states, 2009 and later compression-ignition engines must be designed, built and equipped to meet the United States EPA emissions standards. Yanmar warrants the emission control system on your JH series engine for the periods of time listed below. -
Page 11: Record Of Ownership
INTRODUCTION 12/05 RECORD OF OWNERSHIP Take a few moments to record the information you need when you contact Yanmar for service, parts or literature. Engine Model: __________________________________________________________ Engine Serial No.: _______________________________________________________ Date Purchased: ________________________________________________________ Dealer: ________________________________________________________________ Dealer Phone: __________________________________________________________ JH Series Operation Manual... - Page 12 INTRODUCTION This Page Intentionally Left Blank JH Series Operation Manual...
-
Page 13: Safety
SAFETY Yanmar considers safety of great DANGER importance and recommends that anyone that comes into close contact with its Indicates a hazardous situation which, products, such as those who install, if not avoided, will result in death or operate, maintain or service Yanmar serious injury. -
Page 14: Safety Precautions
• Safety signs and labels are additional reminders for safe operating and maintenance techniques. Store any containers containing fuel or • See your authorized Yanmar Marine other flammable products in a dealer or distributor for additional well-ventilated area, away from any training. - Page 15 SAFETY 12/05 Exhaust Hazard WARNING NEVER block windows, vents or other means of Sever Hazard ventilation if the engine is Rotating parts can cause operating in an enclosed severe injury or death. area. All internal combustion engines NEVER wear jewelry, create carbon monoxide gas during unbuttoned cuffs, ties or operation and special precautions are...
- Page 16 If a Yanmar Marine Engine is installed at an angle that exceeds the specifications stated in the Yanmar Marine Installation Manuals, engine oil may enter the...
- Page 17 This water could cause seizure of the non-running engine(s). See your authorized Yanmar Marine dealer or distributor for a complete explanation of this condition. If you have an installation with two or three...
-
Page 18: Location Of Safety Decals
SAFETY LOCATION OF SAFETY DECALS Figure 1, Figure 2, Figure 3 and Figure 4 show the location of safety decals on Yanmar JH series marine engines. 3JH5E Engines WARNING 196630-12980 043811-00X00 Figure 1 1–Part Number: 128377-07350 2–Part Number: 128990-07270 3–Part Number: 196630-12980... - Page 19 SAFETY 12/05 4JH5E Engines WARNING 196630-12980 043812-00X00 Figure 2 1–Part Number: 128377-07350 2–Part Number: 128990-07270 3–Part Number: 196630-12980 4–Part Number: 128377-07150 JH Series Operation Manual...
- Page 20 SAFETY 4JH4-TE Engines WARNING 128296-07300 008830-03X Figure 3 1–Part Number: 128377-07350 2–Part Number: 128990-07270 3–Part Number: 196630-12980 4–Part Number: 128296-07300 JH Series Operation Manual...
- Page 21 SAFETY 12/05 4JH4-HTE1 / 4JH4-HTE Engines WARNING 128296-07300 014387-01X Figure 4 1–Part Number: 128377-07350 2–Part Number: 128990-07270 3–Part Number: 128296-07300 4–Part Number: 196630-12980 JH Series Operation Manual...
- Page 22 SAFETY This Page Intentionally Left Blank JH Series Operation Manual...
-
Page 23: Product Overview
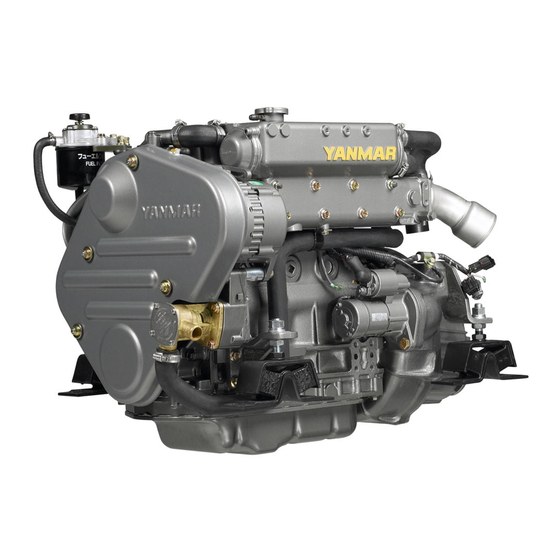
(including the propeller) and other inboard liquid coolant systems. equipment, always observe the instructions and cautions given in the The 3JH5E is 3-cylinder and naturally operation manuals supplied by the aspirated. shipyard and equipment manufacturers. The 4JH5E is 4-cylinder and naturally The JH series engines are designed to be aspirated. -
Page 24: New Engine Break-In
• With the clutch in NEUTRAL, accelerate lifetime. from the low-speed position to the high-speed position briefly. A new Yanmar diesel engine must be operated at suitable speeds and power • Repeat this process five times. settings during the break-in period to make... -
Page 25: Component Identification
Left Side (Viewed from Flywheel) - 3JH5E IDENTIFICATION (10) Right Side (Viewed from Flywheel) - 3JH5E Figure 1 and Figure 2 illustrate a typical version of a 3JH5E engine. Your engine may have different equipment from that illustrated. (12) (11) (10) 026098-00X Figure 2 1 –... -
Page 26: Right Side (Viewed From Flywheel) - 4Jh5E
PRODUCT OVERVIEW Right Side (Viewed from Left Side (Viewed from Flywheel) Flywheel) - 4JH5E - 4JH5E Figure 3 and Figure 4 illustrate a typical version of a 4JH5E engine. Your engine may have different equipment from that illustrated. 027143-00X (10) Figure 4 1 –... -
Page 27: Right Side (Viewed From Flywheel) - 4Jh4-Te
PRODUCT OVERVIEW 12/05 Right Side (Viewed from Left Side (Viewed from Flywheel) Flywheel) - 4JH4-TE - 4JH4-TE Figure 5 and Figure 6 illustrate a typical version of a 4JH4-TE engine. Your engine may have different equipment from that illustrated. (12) (11) (10) 0004547... -
Page 28: Right Side (Viewed From Flywheel) - 4Jh4-Hte1 / 4Jh4-Hte
PRODUCT OVERVIEW Right Side (Viewed from Left Side (Viewed from Flywheel) Flywheel) - 4JH4-HTE1 / - 4JH4-HTE1 / 4JH4-HTE 4JH4-HTE (10) Figure 7 and Figure 8 illustrate a typical version of a 4JH4-HTE1, 4JH4-HTE engine. Your engine may have different equipment from that illustrated. -
Page 29: Nameplates
NAMEPLATES The marine gear nameplate (Figure 10) is attached to the marine gear. Check the The nameplates of Yanmar JH series marine gears model, gear ratio, oil used, engines are shown in Figure 9. Check the oil quantity and serial number. -
Page 30: Function Of Major Components
PRODUCT OVERVIEW FUNCTION OF MAJOR COMPONENTS Name of Component Function Fuel Filter Removes dirt and water from the fuel. Drain the filter periodically. The filter element should be replaced periodically. The water separator (if equipped) should be drained periodically. See Draining Fuel Filter / Water Separator on page 76. -
Page 31: Control Equipment
PRODUCT OVERVIEW 12/05 CONTROL EQUIPMENT The equipment in the control room makes remote control operation possible. It consists of the instrument panel, which is connected to the engine by a wire harness, and the remote control handle, which is connected by control cables to the engine control lever and marine gear. - Page 32 PRODUCT OVERVIEW Meters Instrument Function Tachometer Shows engine rotation speed. Hourmeter Shows number of operating hours. Can be used as a guide for periodic maintenance checks. The hourmeter is located at the bottom of the tachometer. Coolant Temperature Gauge Shows the coolant temperature. Engine Oil Pressure Gauge Shows the engine oil pressure.
- Page 33 PRODUCT OVERVIEW 12/05 Instrument Panel The formats for the instrument panel are shown below. 042563-00X00 Figure 14 1 – Alarm lamp 3 – LCD 4 – Switches (push-buttons) 2 – Tachometer Control panel switches All switches are push-buttons. Glow switch Start switch Pushing this switch for the Pushing this switch...
- Page 34 PRODUCT OVERVIEW Indicators and Alarms (Optional) When a sensor detects a problem during operation, the indicator on the instrument panel will light and an alarm will sound. Indicators are located on the instrument panel and the alarms are located on the back of the panel. Under normal operating conditions, the indicators are off.
- Page 35 PRODUCT OVERVIEW 12/05 LCD control (hourmeter, coolant temperature, display brightness, oil pressure, battery voltage) Figure 1 You can switch (scroll) between displays by pressing the buttons on the bottom. Scroll Press the power switch. hourmeter. Pressing the right button on the bottom of Imperial units (°F) at the "System Units Metric English...
- Page 36 PRODUCT OVERVIEW Setup screen access and control (Setting the temperature and pressure units and engine speed pulse) Use the buttons on the bottom of the LCD display to set the instrument panel. Press the left button to switch between displays. Press and hold both buttons until "SET UP"...
- Page 37 Instrument panel (power switch) Power ON Immediately After 2 seconds After 4 seconds Before start After start Starter switch Alarm buzzer Charge lamp Coolant temperature lamp Engine lubricating oil pressure lamp LCD display Yanmar Full display Hourmeter JH Series Operation Manual...
-
Page 38: Accessory Power Output
PRODUCT OVERVIEW NOTICE When the warning devices are activated and normal operation is impossible, stop the engine and do not use it until the problem has been solved. Accessory power output The harness attached to the panel has a terminal where the signal that is synchronized to the panel power supply can be taken off. -
Page 39: Single-Lever Remote Control Handle
Single-Lever Remote Control Handle Figure 3 0004511 0004504 Figure 17 Figure 16 Note: Yanmar recommends the use of Note: Direction of travel will vary a single-lever type for the remote depending on installation control system. If only a location. two-lever type is available in the 1 –... - Page 40 PRODUCT OVERVIEW This Page Intentionally Left Blank JH Series Operation Manual...
-
Page 41: Before You Operate
BEFORE YOU OPERATE INTRODUCTION SAFETY PRECAUTIONS This section of the Operation Manual Before performing any operations within describes the diesel fuel, engine oil and this section, review the Safety section on engine coolant specifications and how to page 5. replenish them. JH Series Operation Manual... -
Page 42: Diesel Fuel
Biodiesel Fuels • High viscosity at low temperatures may result in fuel delivery problems, injection Yanmar approves the use of biodiesel fuels pump seizures and poor injection nozzle that do not exceed a blend of 7% spray atomization. - Page 43 BEFORE YOU OPERATE 12/05 Handling of Diesel Fuel • Even biodiesel fuels that comply with a suitable standard as delivered will WARNING require additional care and attention to maintain the quality of the fuel in the Fire and Explosion Hazard. equipment or other fuel tanks.
- Page 44 BEFORE YOU OPERATE Fuel System - 4JH4-TE and 2. Keep the fuel container stationary for several hours to allow any dirt or water 4JH4-HTE1, 4JH4-HTE to settle to the bottom of the container. Use a pump to extract the clear, filtered fuel from the top of the container.
-
Page 45: Filling The Fuel Tank
BEFORE YOU OPERATE 12/05 Fuel System - 3JH5E and 4JH5E To fill the fuel tank: WARNING (11) Fire and Explosion Hazard. Operate bilge ventilation (blowers) for a minimum of 5 minutes to purge fumes from engine compartment after refueling. Never operate bilge blower (10) while refueling. -
Page 46: Bleeding The Fuel System
Bleeding the Fuel System - 4JH4-TE (replacement of fuel filter, etc.) or if the and 4JH4-HTE1, 4JH4-HTE engine does not start after several attempts. Figure 5 applies to both 4JH5E and 3JH5E. 0004494 Figure 6 1 – Priming Pump 2 – Air Bleed Screw 3 –... -
Page 47: Engine Oil
• Select the oil viscosity based on the ambient temperature where the engine is being operated. See the SAE Service Grade Viscosity Chart (Figure 7). • Yanmar does not recommend the use of engine oil “additives”. JH Series Operation Manual... -
Page 48: Engine Oil Viscosity
If you operate your equipment at temperatures outside the limits shown, 1. Remove the yellow oil filler port cap consult your authorized Yanmar dealer or from filler port (Figure 8, (1)) and fill distributor for special lubricants or starting with engine oil. -
Page 49: Marine Gear Or Sail Drive Oil
Refer to the Operation Manual of the sail drive for the procedure to fill or replace the sail drive oil. 4. Hand-tighten the filler port cap securely. 3JH5E, 4JH5E (SD50): ® 1 • Quick Silver High Performance Gear Lube 4JH4-TE (SD50-4T): ®... -
Page 50: Adding Marine Gear Oil
BEFORE YOU OPERATE ENGINE COOLANT Note: 4JH4-TE with KMH4A marine gear shown. Engine Coolant Specifications Note: In the U.S., LLC is required for 1. Make sure engine is level. the warranty to be valid. 2. Remove the filler cap (Figure 9, (1)) at the top of the housing. -
Page 51: Coolant (Closed Cooling System)
BEFORE YOU OPERATE 12/05 Coolant (Closed Cooling System) Checking and Adding Coolant 3JH5E NOTICE ALWAYS add LLC to soft water especially when operating in cold weather. NEVER use hard water. Water should be clean and free from sludge or particles. Without LLC, cooling performance will decrease due to scale and rust in the coolant system. - Page 52 BEFORE YOU OPERATE 4JH5E 4JH4-TE 0004514 Figure 14 027140-00X 1 – Coolant Tank (heat exchanger) Figure 12 2 – Coolant Pump 1 – Coolant Pump 3 – Seawater Drain from Seawater 2 – Seawater Drain from Seawater Pump Cover Pump Cover 4 –...
- Page 53 BEFORE YOU OPERATE 12/05 4JH4-HTE1 / 4JH4-HTE 1. Ensure all drain cocks are closed. Note: The drain cocks are opened before shipping from the factory. Marine gear ZF25A does not have a drain cock on the clutch cooler. 2. Loosen the filler cap of reservoir to relieve the pressure, then remove the filler cap.
- Page 54 Note: The coolant level rises in the cooling system. See your reservoir during operation. After authorized Yanmar dealer or stopping the engine, the coolant distributor. will cool down and the extra coolant will return to reservoir.
-
Page 55: Cranking The Engine
12/05 CRANKING THE ENGINE Crank the engine 5 seconds. NOTICE 3JH5E / 4JH5E models: When the engine has not been used for a long period of time, engine oil will not be distributed to all of the operating parts. Using the engine in this condition will lead to seizure. - Page 56 BEFORE YOU OPERATE Start switch Power switch 042590-00E00 Figure 22 WARNING Never touch or allow your clothes to touch the moving parts of the engine during operation. If a part of your body or clothing is caught in the front drive shaft, V-belt, propeller shaft, etc.
-
Page 57: Engine Operation
ENGINE OPERATION INTRODUCTION SAFETY PRECAUTIONS This section of the Operation Manual Before performing any operations within describes the diesel fuel, engine oil and this section, review the Safety section on engine coolant specifications and how to page 5. replenish them. It also describes the daily engine checkout. - Page 58 If the alarm indicater with audible alarm WARNING fails to display and go out about 3 seconds after the ignition switch is turned on, see Fire and Explosion your authorized Yanmar Marine dealer or Hazard distributor for service before operating the NEVER jump-start the engine engine.
-
Page 59: Starting The Engine
12/05 STARTING THE ENGINE NOTICE 1. Open the seacock (if equipped). • Contact your authorized Yanmar Marine 2. Open the fuel tank cock. engine dealer or distributor if the engine will be operated outside of this standard 3. Put remote control handle in temperature range. -
Page 60: If The Engine Fails To Start
ENGINE OPERATION If the Engine Fails to Start Air Bleeding the Fuel System After Starting Failure Before pushing the start switch again, be sure to confirm that the engine has If the engine does not start after several stopped completely. If an attempt to restart attempts, there may be air in the fuel is made while the engine is running, the system. -
Page 61: After The Engine Has Started
For troubleshooting assistance, see Troubleshooting After Starting on page 89 or Troubleshooting Chart on page 91 . If necessary, see your authorized Yanmar dealer or distributor. JH Series Operation Manual... -
Page 62: Remote Control Handle Operation
ENGINE OPERATION REMOTE CONTROL NOTICE HANDLE OPERATION Shifting the marine gear while operating at high speed or not pushing the handle fully Acceleration and Deceleration into position (partial engagement) will result in damage to marine gear parts and abnormal wear. 1. -
Page 63: Cautions During Operation
ENGINE OPERATION 12/05 CAUTIONS DURING OPERATION NOTICE Engine trouble can arise if the engine is operated for a long time under overloaded conditions with the control handle in the full throttle position (maximum engine speed position), exceeding the continuous rated output engine speed. - Page 64 ENGINE OPERATION • Are there abnormal vibrations or noise? NOTICE NOTICE Racing the engine: With the gear in NEUTRAL, accelerate from the Excessive vibration may cause damage low-speed position to the high-speed to the engine, marine gear, hull and position and repeat this process about onboard equipment.
-
Page 65: Shutting Down The Engine
5 minutes. NOTICE NOTICE •Be sure to close the seacock. For maximum engine life, Yanmar Neglecting to close the seacock could recommends that when shutting the allow water to leak into the boat and engine down, you allow the engine to may cause it to sink. -
Page 66: Emergency Shutdown
WARNING Sever Hazard. 3JH5E / 4JH5E ALWAYS keep hands, body parts and loose-fitting clothes away from moving / rotating parts such as the flywheel or PTO shaft. -
Page 67: Periodic Maintenance
PERIODIC MAINTENANCE INTRODUCTION SAFETY PRECAUTIONS This section of the Operation Manual Before performing any maintenance describes the procedures for proper care procedures within this section, read the and maintenance of the engine. following safety information and review the Safety section on page 5. WARNING Crush Hazard If the engine needs to be... - Page 68 Any • When welding is completed, alterations to this engine may void its reconnect the alternator and engine warranty. Be sure to use Yanmar genuine control unit prior to reconnecting the replacement parts. batteries. Entanglement Hazard...
-
Page 69: Precautions
Yanmar Replacement Parts operating in an enclosed area. All internal combustion engines create Yanmar recommends that you use genuine carbon monoxide gas during operation. Yanmar parts when replacement parts are Accumulation of this gas within an needed. -
Page 70: Tightening Fasteners
88.2 ± 5 (65.1 ± 3.7) (Material of pulley: FC300) Nozzle fastening bolt M8x1.25 — 26.4 ± 2 (19.5 ± 1.5) FIP gear 3JH5E, 4JH5E M8x1.0 — 34.3 ± 2 (25.3 ± 1.5) fastening 4JH4-TE M14x1.5 64 ± 5 (41.6 ± 3.7) -
Page 71: Epa Maintenance Requirements
PERIODIC MAINTENANCE 12/05 EPA MAINTENANCE REQUIREMENTS To maintain optimum engine performance and compliance with the Environmental Protection Agency (EPA) Regulations for Engines, it is essential that you follow the Periodic Maintenance Schedule on page 66 and the Periodic Maintenance Procedures on page 70 . -
Page 72: Conditions To Ensure Compliance With Epa Emission Standards
The lubricating oil should be: • 4JH4-TE and 4JH4-HTE1: Type API, Class CD, CF, CF-4 and CI-4 • 3JH5E and 4JH5E: Type API, Class CF, CF-4 and CI-4 Be sure to perform inspections as outlined in Periodic Maintenance Procedures on page 70 and keep a record of the results. -
Page 73: Installation Of Exhaust Sampling Port
PERIODIC MAINTENANCE 12/05 Inspection and Maintenance See Inspection and Maintenance of EPA Emission-Related Parts on page 69 for the EPA emission-related parts. Inspection and maintenance procedures not shown in Inspection and Maintenance of EPA Emission-Related Parts on page 69 are covered in Periodic Maintenance Schedule on page 66 . -
Page 74: Periodic Maintenance Schedule
See your authorized Yanmar Marine dealer or distributor for assistance when checking items marked with a ●. - Page 75 PERIODIC MAINTENANCE 12/05 : Check or Clean : Replace ●: Contact your authorized Yanmar Marine dealer or distributor System Item Periodic Maintenance Interval Daily Every 50 Every 250 Every 500 Every 1000 hours or hours or 1 hours or 2...
- Page 76 PERIODIC MAINTENANCE : Check or Clean : Replace ●: Contact your authorized Yanmar Marine dealer or distributor System Item Periodic Maintenance Interval Daily Every 50 Every 250 Every 500 Every 1000 hours or hours or 1 hours or 2 hours or 4...
- Page 77 12/05 Inspection and Maintenance of EPA Emission-Related Parts • Marine diesel engines less than 37 kW: 3JH5E is certified as EPA CI marine engine and CARB non-road engine • Marine diesel engines greater than 37 kW: 4JH5E, 4JH4-TE and 4JH4-HTE1 are...
-
Page 78: Periodic Maintenance Procedures
6. Check the electrical harnesses for Before you head out for the day, make sure cracks, abrasions, and damaged or the Yanmar engine is in good operating corroded connectors. condition. 7. Check hoses for cracks, abrasions, and damaged, loose or corroded clamps. -
Page 79: After Initial 50 Hours Of Operation
PERIODIC MAINTENANCE 12/05 Checking and Refilling Marine Gear After Initial 50 Hours of Operation Refer to the Operation Manual for the marine gear. Perform the following maintenance after the initial 50 hours of operation. Checking the Battery Electrolyte Level • Draining the Fuel Tank •... - Page 80 PERIODIC MAINTENANCE 1. Put a pan under the drain cock 3. Remove the engine oil filter (Figure 2) with (Figure 1, (2)) to catch fuel. a filter wrench (turn counterclockwise). 2. Open the drain cock and drain water and sediment. Close the drain cock when the fuel is clean and free of air bubbles.
- Page 81 PERIODIC MAINTENANCE 12/05 Changing the Marine Gear Oil and 4. Perform a trial run and check for oil leaks. Replacing the Marine Gear Oil Filter 5. Approximately 10 minutes after (If Equipped) stopping the engine, remove the oil dipstick and check the oil level. Add oil if the level is too low.
- Page 82 4JH4-TE / 4JH4-HTE1 / 4JH4-HTE resulting in poor engine performance and engine damage. See your authorized Yanmar Marine dealer or distributor to adjust the intake / exhaust valve clearance. Checking and Adjusting Remote Control Cables...
- Page 83 (Figure 5, (1)) or (Figure 6, (5)). Adjusting Trolling Remote Control Handle - If Equipped Adjusting Clutch Remote Control Cable 3JH5E / 4JH5E 2 6 1 Figure 7 4JH4-TE / 4JH4-HTE1 / 4JH4-HTE 0004498 Figure 9 1 –...
-
Page 84: Every 50 Hours Of Operation
Consult your authorized Yanmar Marine dealer or distributor. Exposure Hazard. Check for any unusual noise and vibration Wear eye protection. The fuel system is in the engine / boat hull, while increasing... - Page 85 PERIODIC MAINTENANCE 12/05 3JH5E and 4JH5E (Attach to Hull) 4JH4-TE and 4JH4-HTE1, 4JH4-HTE 0004565 Figure 11 043823-00X00 Note: 4JH4-TE shown. Figure 10 1. Close the fuel tank cock. NOTICE 2. Loosen the drain plug (Figure 10, (1)) If the fuel filter / water separator is...
- Page 86 PERIODIC MAINTENANCE 4. Loosen the drain plug (Figure 11, (4)) NOTICE at the bottom of the fuel filter / water separator by turning counterclockwise NEVER turn off the battery switch (if and drain off any water or sediment. equipped) or short the battery cables during operation.
-
Page 87: Every 250 Hours Of Operation
PERIODIC MAINTENANCE 12/05 Every 250 Hours of Operation Perform the following maintenance every 250 hours or 1 year of operation, whichever comes first. • Draining the Fuel Tank U P P E R L E V E L L O W E R L E V E L •... - Page 88 Wipe up any spilled fuel immediately. 3. Apply a thin film of clean diesel fuel to 3JH5E / 4JH5E the sealing surface of the new filter When there is not enough tension in the gasket. V-belt, it will slip and the coolant pump will fail to supply coolant.
- Page 89 ALWAYS use a piece of wood or 8. Install the alarm switch to the fuel filter. cardboard. Have your authorized Apply clean fuel to the gasket of the Yanmar Marine dealer or distributor new fuel filter. repair any damage. 9. Install filter housing into engine and hand-tighten until the gasket comes into contact with the seat.
- Page 90 2. Install puller (Figure 16, (A)) in the See your authorized Yanmar Marine impeller. dealer or distributor. 3. Turn the jack screw (Figure 16, (B)) clockwise to remove the impeller from Replacing the Seawater Pump Impeller the pump body.
-
Page 91: Changing The Coolant
PERIODIC MAINTENANCE 12/05 Puller B (option) Part No. 129671-92100 0004502 0004567 Figure 19 Figure 17 110 mm (4.33 in.) 140 mm (5.51 in.) Changing the Coolant CAUTION Coolant Hazard. Wear eye protection and rubber gloves when you handle engine coolant. If contact with the eyes or skin should occur, flush eyes and wash immediately with clean water. - Page 92 PERIODIC MAINTENANCE 3JH5E 4JH5E 026099-00X 027140-00X Figure 20 Figure 22 1 – Coolant Pump 1 – Coolant Pump 2 – Seawater Drain from Seawater 2 – Seawater Drain from Seawater Pump Cover Pump Cover 3 – Coolant Drain Cock 3 – Coolant Tank (heat exchanger) 4 –...
- Page 93 PERIODIC MAINTENANCE 12/05 4JH4-TE 4JH4-HTE1 / 4JH4-HTE 0004560 Figure 26 0004571 1 – Coolant Tank (heat exchanger) Figure 24 2 – Coolant Pump 1 – Coolant Tank (heat exchanger) 3 – Seawater Drain from Seawater 2 – Coolant Pump Pump Cover 3 –...
- Page 94 V-Belt Tension on page 73. 1. Disassemble the intake silencer (air Checking the Wiring Connectors cleaner). See your authorized Yanmar Marine dealer 2. Remove element. Clean element and or distributor. housing with a neutral detergent. Tightening All Major Nuts and Bolts 3.
-
Page 95: Every 500 Hours Of Operation
500 hours or 2 years, whichever comes first, even if no damage is found. • Checking Diaphragm Assembly (3JH5E / 4JH5E Only) See your authorized Yanmar Marine dealer or distributor. • Replacing the Alternator V-Belt • Adjusting Intake / Exhaust Valve... - Page 96 Adjusting Intake / Exhaust Valve other contaminants that collect in the Clearance cooling water passages. This can cause declining cooling performance. The See your authorized Yanmar Marine dealer following items need to be inspected: or distributor. • Heat Exchanger Checking the Remote Control Cable •...
-
Page 97: Troubleshooting
TROUBLESHOOTING SAFETY PRECAUTIONS TROUBLESHOOTING AFTER STARTING Before performing any troubleshooting procedures within this section, review the Just after the engine has started, check Safety section on page the following items at a low engine speed: If a problem occurs, stop the engine Is sufficient water being discharged immediately. -
Page 98: Troubleshooting Information
Is there sufficient fuel in the fuel tank? page 91 or see your authorized Yanmar Marine dealer or distributor. Refill fuel in advance to avoid running out of fuel. If the tank runs out of fuel, bleed Supply the authorized Yanmar Marine the fuel system. -
Page 99: Troubleshooting Chart
Replacing the Engine Oil Filter Element on page 72 • Water in sail drive seal Rubber sail drive seal broken. See your authorized Yanmar indicator comes on Marine dealer or distributor. • Coolant high temperature Coolant level is low. Check coolant level and refill. - Page 100 TROUBLESHOOTING Symptom Probable Cause Measure Reference Compression leakage from See your authorized Yanmar Marine intake / exhaust valve. dealer or distributor. • Starter does not turn or Faulty clutch position. Shift to NEUTRAL and start. turns slowly (engine can Insufficient battery charge.
-
Page 101: Long-Term Storage
6 months. If it remains unused for longer than this, please contact your authorized 1. Wipe off any dust or oil from the outside Yanmar Marine dealer or distributor. of engine. Before performing any storage procedures 2. Drain water from fuel filters. -
Page 102: Drain Seawater Cooling System
LONG-TERM STORAGE DRAIN SEAWATER 4JH5E COOLING SYSTEM 3JH5E 027140-00X Figure 3 026099-00X 1 – Coolant Pump 2 – Seawater Drain from Seawater Figure 1 Pump Cover 1 – Coolant Pump 3 – Coolant Tank (heat exchanger) 2 – Seawater Drain from Seawater 4 –... - Page 103 LONG-TERM STORAGE 12/05 4JH4-TE 4JH4-HTE1 / 4JH4-HTE 0004560 Figure 7 0004571 1 – Coolant Tank (heat exchanger) Figure 5 2 – Coolant Pump 1 – Coolant Tank (heat exchanger) 3 – Seawater Drain from Seawater 2 – Coolant Pump Pump Cover 3 –...
-
Page 104: Returning The Engine To Service
LONG-TERM STORAGE RETURNING THE ENGINE NOTICE TO SERVICE If seawater is left inside, it may freeze and damage parts of the cooling system (heat 1. Replace the oil and the oil filter before exchanger, seawater pump, etc.) when running the engine. ambient temperature is below 32°F (0°C). -
Page 105: Specifications
SPECIFICATIONS PRINCIPAL ENGINE SPECIFICATIONS JH Series Operation Manual... -
Page 106: 3Jh5E Engine
SPECIFICATIONS 3JH5E Engine Specification 3JH5E Marine Gear Model KM35P KM35A SD50 Bobtail Pleasure use Type Vertical water cooled 4-cycle diesel engine Combustion System Direct injection Air Charging Natural aspiration Number of Cylinders Bore x Stroke 88 mm x 90 mm (3.46 in. x 3.54 in.) Displacement 1.642 L (100.20 cu in.) -
Page 107: 3Jh5E Marine Gears
SPECIFICATIONS 12/05 3JH5E Marine Gears Model KM35P KM35A SD50 (coupled at boat builder) Type Mechanical cone clutch Reduction Ratio (forward / reverse) 2.36 / 3.16, 2.33 / 3.04, 2.32 2.61 / 3.16 2.64 / 3.04 Propeller Speed (forward / reverse) -
Page 108: 4Jh5E Engine
SPECIFICATIONS 4JH5E Engine Engine Model 4JH5E Marine Gear Model KM35P ZF30M KM35A2 KM4A1 Pleasure use Type Vertical water cooled 4-cycle diesel engine Combustion System Direct injection Air Charging Natural aspiration Number of Cylinders Bore x Stroke 88 mm x 90 mm (3.46 in. x 3.54 in.) Displacement 2.190 L (133.64 cu in.) Continuous Output Rating at Crankshaft... - Page 109 SPECIFICATIONS 12/05 4JH5E (Continued) Engine Model 4JH5E Marine Gear Model SD50 Bobtail Pleasure use Type Vertical water cooled 4-cycle diesel engine Combustion System Direct injection Air Charging Natural aspiration Number of Cylinders Bore x Stroke 88 x 90 mm (3.46 x 3.54 in.) Displacement 2.190 L 133.6 cu in.
-
Page 110: 4Jh5E Marine Gear Or Sail Drive
SPECIFICATIONS 4JH5E Marine Gear or Sail Drive Model KM35P ZF30M Type Mechanical cone clutch Mechanical wet maliple disk clutch Reduction Ratio (forward / reverse) 2.36 / 3.16 2.61 / 3.16 2.15 / 2.64 2.70 / 2.64 Propeller Speed (forward / reverse) 1232 / 921 min 1114 / 921 min 1353 / 1103 min... -
Page 111: 4Jh4-Te Engine
SPECIFICATIONS 12/05 4JH4-TE Engine Engine Model 4JH4-TE Marine Gear Model ZF30M KM4A2 KMH4A ZF25A SD50-4T Bobtail Pleasure use Type Vertical water cooled 4-cycle diesel engine Combustion System Direct injection Air Charging Turbocharged Number of Cylinders Bore x Stroke 84 x 90 mm (3.31 x 3.54 in.) Displacement 1.995 L (121.74 cu in.) Continuous Output Rating at... -
Page 112: 4Jh4-Hte1 Engine
SPECIFICATIONS 4JH4-HTE1 Engine Engine Model 4JH4-HTE1 Marine Gear Model ZF30M KM4A2 KMH4A ZF25A Bobtail Pleasure use Type Vertical water cooled 4-cycle diesel engine Combustion System Direct injection Air Charging Turbocharged Number of Cylinders Bore x Stroke 84 x 90 mm (3.31 x 3.54 in.) Displacement 1.995 L (121.74 cu in.) -1 *... -
Page 113: 4Jh4-Hte Engine
SPECIFICATIONS 12/05 4JH4-HTE Engine Engine Model 4JH4-HTE Marine Gear Model ZF30M KM4A2 KMH4A ZF25A Bobtail Pleasure use Type Vertical water cooled 4-cycle diesel engine Combustion System Direct injection Air Charging Turbocharged Number of Cylinders Bore x Stroke 84 x 90 mm (3.31 x 3.54 in.) Displacement 1.995 L (121.74 cu in.) -1 *... -
Page 114: 4Jh4-Te, 4Jh4-Hte1 And 4Jh4-Hte Marine Gear Or Sail Drive
SPECIFICATIONS 4JH4-TE, 4JH4-HTE1 and 4JH4-HTE Marine Gear or Sail Drive SD50-4T (coupled at Model ZF30M KM4A2 KMH4A ZF25A boat builder) Down Angle 0° 7° 8° 8° Type Mechanical wet Mechanical cone clutch Hydraulic wet Hydraulic wet Mechanical multiple disk multiple disk multiple disk cone clutch clutch... -
Page 115: System Diagrams
SYSTEM DIAGRAMS PIPING DIAGRAMS Notation Description Screw Joint (Union) Flange Joint Eye Joint Insertion Joint Drilled Hole Coolant Piping Cooling Seawater Piping Lubricating Oil Piping Diesel Fuel Piping Note: • Dimension of steel pipe: outer diameter x thickness. • Dimension of rubber pipe: inner diameter x thickness. •... - Page 116 SYSTEM DIAGRAMS 3JH5E with KM35P, KM35A Marine Gear 026104-00X Figure 1 JH Series Operation Manual...
- Page 117 SYSTEM DIAGRAMS 12/05 1 – * 7 x t4.5 Rubber Hose 2 – Fuel Injection Pump 3 – * 5 x t4.5 Rubber Hose 4 – * 4.76 x t0.7 Steel Pipe 5 – * 9 x t3.5 Rubber Hose 6 –...
- Page 118 SYSTEM DIAGRAMS 3JH5E with KM4A1 Marine Gear 026114-00X Figure 2 JH Series Operation Manual...
- Page 119 SYSTEM DIAGRAMS 12/05 1 – * 7 x t4.5 Rubber Hose 23 – Cooling Water Pump (seawater) 24 – 28 x t4 Rubber Hose 2 – Fuel Injection Pump 25 – 28 x t4 Rubber Hose 3 – * 5 x t4.5 Rubber Hose 26 –...
- Page 120 SYSTEM DIAGRAMS 3JH5E with SD50 Sail Drive 026105-00X Figure 3 JH Series Operation Manual...
- Page 121 SYSTEM DIAGRAMS 12/05 1 – * 7 x t4.5 Rubber Hose 2 – Fuel Injection Pump 3 – * 5 x t4.5 Rubber Hose 4 – 4.76 x t0.7 Steel Pipe 5 – * 9 x t3.5 Rubber Hose 6 – Lubricating Oil Filter (cartridge type) 7 –...
- Page 122 SYSTEM DIAGRAMS 4JH5E with KM35P, KM35A2 Marine Gear 026106-00X Figure 4 JH Series Operation Manual...
- Page 123 SYSTEM DIAGRAMS 12/05 1 – * 7 x t4.5 Rubber Hose 2 – Fuel Injection Pump 3 – * 5 x t4.5 Rubber Hose 4 – 4.76 x t0.7 Steel Pipe 5 – 9 x t3.5 Rubber Hose 6 – Lubricating Oil Filter (cartridge type) 7 –...
- Page 124 SYSTEM DIAGRAMS 4JH5E with KM4A1 Marine Gear 026107-00X Figure 5 JH Series Operation Manual...
- Page 125 SYSTEM DIAGRAMS 12/05 1 – * 7 x t4.5 Rubber Hose 2 – Fuel Injection Pump 3 – * 5 x t4.5 Rubber Hose 4 – 4.76 x 0.7 Steel Pipe 5 – 9 x t3.5 Rubber Hose 6 – Lubricating Oil Filter (cartridge type) 7 –...
- Page 126 SYSTEM DIAGRAMS 4JH5E with ZF30M Marine Gear 026108-00X Figure 6 JH Series Operation Manual...
- Page 127 SYSTEM DIAGRAMS 12/05 1 – * 7 x t4.5 Rubber Hose 2 – Fuel Injection Pump 3 – * 5 x t4.5 Rubber Hose 4 – 4.76 x t0.7 Steel Pipe 5 – 9 x t3.5 Rubber Hose 6 – Lubricating Oil Filter (cartridge type) 7 –...
- Page 128 SYSTEM DIAGRAMS 4JH5E with SD50 Sail Drive 026109-00X Figure 7 JH Series Operation Manual...
- Page 129 SYSTEM DIAGRAMS 12/05 1 – * 7 x t4.5 Rubber Hose 2 – Fuel Injection Pump 3 – * 5 x t4.5 Rubber Hose 4 – 4.76x t0.7 Steel Pipe 5 – 9 x t3.5 Rubber Hose 6 – Lubricating Oil Filter (cartridge type) 7 –...
- Page 130 SYSTEM DIAGRAMS 4JH4-TE with ZF30M ( 1 ) ( 3 ) ( 45 ) ( 2 ) ( 44 ) ( 4 ) ( 47 ) ( 5 ) ( 52 ) ( 8 ) ( 43 ) ( 9 ) ( 42 ) ( 46 ) ( 10 )
- Page 131 SYSTEM DIAGRAMS 12/05 1 – * 7 x t4.5 Rubber Hose 45 – 5 x t4.5 Rubber Hose 46 – Diesel Fuel Inlet 2 – W-C S.D. 47 – Fuel Overflow 3 – Fuel Injection Pump 48 – To Block 4 –...
- Page 132 SYSTEM DIAGRAMS 4JH4-TE with KM4A2 ( 1 ) ( 3 ) ( 48 ) ( 2 ) ( 47 ) ( 4 ) ( 5 ) ( 50 ) ( 55 ) ( 8 ) ( 46 ) ( 6 ) ( 49 ) ( 9 ) ( 45 )
- Page 133 SYSTEM DIAGRAMS 12/05 1 – * 7 x t4.5 Rubber Hose 45 – Diesel Fuel Filter (cartridge type) 2 – W-C S.D. 46 – * 7 x t4.5 Rubber Hose 3 – Fuel Injection Pump 47 – * 7 x t4.5 Rubber Hose 4 –...
- Page 134 SYSTEM DIAGRAMS 4JH4-TE with KM4A / ZF25A ( 1 ) ( 3 ) ( 45 ) ( 2 ) ( 44 ) ( 4 ) ( 47 ) ( 5 ) ( 52 ) ( 8 ) ( 43 ) ( 6 ) ( 46 ) ( 9 )
- Page 135 SYSTEM DIAGRAMS 12/05 1 – * 7 x t4.5 Rubber Hose 45 – * 5 x t4.5 Rubber Hose 46 – Diesel Fuel Inlet 2 – W-C S.D. 47 – Fuel Overflow 3 – Fuel Injection Pump 48 – To Block 4 –...
- Page 136 SYSTEM DIAGRAMS 4JH4-TE with SD50 (SD40) ( 1 ) ( 3 ) ( 43 ) ( 44 ) ( 4 ) ( 46 ) ( 5 ) ( 8 ) ( 6 ) ( 42 ) ( 9 ) ( 45 ) ( 51 ) ( 41 ) ( 10 )
- Page 137 SYSTEM DIAGRAMS 12/05 1 – * 7 x t4.5 Rubber Hose 45 – Diesel Fuel Inlet 46 – Fuel Overflow 2 – W-C S.D. 47 – To Block 3 – Fuel Injection Pump 48 – From Head 4 – Fuel High-Pressure Pipe 6.35 x 49 –...
- Page 138 SYSTEM DIAGRAMS 4JH4-HTE1 / 4JH4-HTE with KM4A2 ( 3 ) ( 52 ) ( 51 ) ( 1 ) ( 4 ) ( 54 ) ( 2 ) ( 5 ) ( 8 ) ( 59 ) ( 6 ) ( 50 ) ( 53 ) ( 9 )
- Page 139 SYSTEM DIAGRAMS 12/05 1 – * 7 x t4.5 Rubber Hose 46 – Pressure Control Valve 47 – 13 x t3.5 Rubber Hose 2 – W-C S.D. 48 – 10 x t3 Rubber Hose 3 – Fuel Injection Pump 49 – Diesel Fuel Filter (cartridge 4 –...
- Page 140 SYSTEM DIAGRAMS 4JH4-HTE1 / 4JH4-HTE with KMH4A / ZF25A ( 3 ) ( 49 ) ( 48 ) ( 1 ) ( 4 ) ( 51 ) ( 2 ) ( 5 ) ( 56 ) ( 8 ) ( 6 ) ( 47 ) ( 9 ) ( 50 )
- Page 141 SYSTEM DIAGRAMS 12/05 1 – * 7 x t4.5 Rubber Hose 46 – Diesel Fuel Filter 47 – * 7 x t4.5 Rubber Hose 2 – W-C S.D. 48 – * 7 x t4.5 Rubber Hose 3 – Fuel Injection Pump 49 –...
- Page 142 SYSTEM DIAGRAMS 4JH4-HTE1 / 4JH4-HTE with ZF30 ( 3 ) ( 49 ) ( 48 ) ( 1 ) ( 4 ) ( 51 ) ( 2 ) ( 5 ) ( 56 ) ( 8 ) ( 6 ) ( 47 ) ( 9 ) ( 50 )
- Page 143 SYSTEM DIAGRAMS 12/05 1 – * 7 x t4.5 Rubber Hose 46 – Diesel Fuel Filter 47 – * 7 x t4.5 Rubber Hose 2 – W-C S.D. 48 – * 7 x t4.5 Rubber Hose 3 – Fuel Injection Pump 49 –...
- Page 144 SYSTEM DIAGRAMS This Page Intentionally Left Blank JH Series Operation Manual...
-
Page 145: Wiring Diagrams
SYSTEM DIAGRAMS 12/05 WIRING DIAGRAMS Allowable length by cross sectional area of battery cable Section of cable Allowable length (in. L = 1 + 2 + 3 m (ft.) 15 (0.023) < 0.86 (0.26) 20 (0.031) < 1.3 (0.40) 30 (0.046) <... - Page 146 SYSTEM DIAGRAMS 3JH5E / 4JH5E with C-Type Instrument Panel (Optional) Figure 15 JH Series Operation Manual...
- Page 147 SYSTEM DIAGRAMS 12/05 3JH5E / 4JH5E with C-Type Instrument 21 – ACC GND 22 – Coolant temperature gauge Panel (Optional) 23 – Engine oil pressure gauge Color Coding Engine Harness 24 – Control unit (Coolant temperature gauge) 25 – Control unit (Engine oil...
- Page 148 SYSTEM DIAGRAMS 3JH5E / 4JH5E with 12V B and B x B Type Instrument Panel (Optional) Figure 16 JH Series Operation Manual...
- Page 149 SYSTEM DIAGRAMS 12/05 3JH5E / 4JH5E with 12V B and B x B 19 – Control unit (Switch module) 20 – Fuel tank level sensor input Type Instrument Panel (Optional) 21 – ACC power Color Coding Engine Harness 22 – ACC GND 23 –...
- Page 150 SYSTEM DIAGRAMS 3JH5E / 4JH5E with 12V C x B Type Instrument Panel (Optional) Figure 17 JH Series Operation Manual...
- Page 151 SYSTEM DIAGRAMS 12/05 3JH5E / 4JH5E with 12V C x B Type 20 – Fuel tank level sensor input 21 – ACC Power Instrument Panel (Optional) 22 – ACC GND Color Coding Engine Harness 23 – Coolant temperature gauge 24 – Oil pressure gauge 25 –...
- Page 152 SYSTEM DIAGRAMS 4JH4-TE / 4JH4-HTE1 / 4JH4-HTE with B x B Type Panel (Optional) Figure 18 JH Series Operation Manual...
- Page 153 SYSTEM DIAGRAMS 12/05 4JH4-TE / 4JH4-HTE1 / 4JH4-HTE with B 20 – Fuel tank level sensor input 21 – ACC power x B Type Panel (Optional) 22 – ACC GND Color Coding Engine Harness 23 – Conversion harness 24 – Wire harness 25 –...
- Page 154 SYSTEM DIAGRAMS 4JH4-TE / 4JH4-HTE1 / 4JH4-HTE with C x B Type Panel (Optional) Figure 19 JH Series Operation Manual...
- Page 155 SYSTEM DIAGRAMS 12/05 4JH4-TE / 4JH4-HTE1 / 4JH4-HTE with C 20 – Fuel tank level sensor input 21 – ACC power x B Type Panel (Optional) 22 – ACC GND Color Coding Engine Harness 23 – Coolant temperature gauge 24 – Oil pressure gauge 25 –...
- Page 156 SYSTEM DIAGRAMS This Page Intentionally Left Blank JH Series Operation Manual...
-
Page 157: Epa Warranty Usa Only
EPA WARRANTY USA ONLY YANMAR CO., LTD. LIMITED EMISSION CONTROL SYSTEM WARRANTY - USA ONLY 3JH5E EPA and ARB Nameplate 4JH4-TE EPA Nameplate EMISSION CONTROL INFORMATION EMISSION CONTROL INFORMATION THIS MARINE ENGINE COMPLIES WITH U.S. EPA THIS ENGINE COMPLIES WITH U.S. EPA MARINE AND CALIFORNIA OFF-ROAD REGULATIONS FOR 2012. -
Page 158: Your Warranty Rights And Obligations
UNITED STATES EPA 40 CFR AND SOLD replacement of emission control systems BY YANMAR THAT ARE INSTALLED IN are Yanmar parts. The owner may elect to VESSELS FLAGGED OR REGISTERED have maintenance, replacement or repair IN THE UNITED STATES. -
Page 159: Warranty Coverage
12/05 Warranty Coverage: Owner’s Responsibility: Repair or replacement of any warranted As the Yanmar Marine engine owner, you parts will be performed at an authorized are responsible for the performance of the Yanmar dealer or distributor. This limited required maintenance listed in your emission control system warranty covers Operation Manual. - Page 160 EPA WARRANTY USA ONLY This Page Intentionally Left Blank JH Series Operation Manual...
-
Page 161: Emission System Warranty
Environmental Protection Agency (EPA) engines are warranted for the periods and Yanmar Co., Ltd. hereafter referred to listed below. If any emission-related part as Yanmar, are pleased to explain the on your engine is found to be defective... -
Page 162: Warranted Parts
Repair or replacement system of the engine as delivered by of any warranted part will be performed at Yanmar to the original retail purchaser. an authorized Yanmar Marine engine Such components may include the dealer or distributor. -
Page 163: Owners Warranty Responsibilities
You are responsible for initiating the warranty process. You must present your engine to a Yanmar dealer as soon as a problem exists. The warranty repairs should be completed by the dealer as expeditiously as possible. -
Page 164: Maintenance Log
EMISSION SYSTEM WARRANTY Maintenance Log Stamp or Date Operating Hours Maintenance Performed Dealer Name Signature JH Series Operation Manual... - Page 165 EMISSION SYSTEM WARRANTY 12/05 Stamp or Date Operating Hours Maintenance Performed Dealer Name Signature JH Series Operation Manual...
- Page 166 EMISSION SYSTEM WARRANTY JH Series Operation Manual...
Need help?
Do you have a question about the 3JH5E and is the answer not in the manual?
Questions and answers