EverFocus EDN850H User Manual
Hide thumbs
Also See for EDN850H:
- User manual (60 pages) ,
- Installation manual (18 pages) ,
- Specifications (11 pages)
Table of Contents
Advertisement
Quick Links
Download this manual
See also:
Installation Manual
Advertisement
Table of Contents

Related Manuals for EverFocus EDN850H


Summary of Contents for EverFocus EDN850H
- Page 1 EDN850H User’s Manual Copyright © EverFocus Electronics Corp, Release: Dec. 2009 Rev.A Downloaded from www.Manualslib.com manuals search engine...
- Page 2 - Consult the dealer or an experienced radio/TV technician for help. Warning: Changes or modifications made to this equipment, not expressly approved by EverFocus or parties authorized by EverFocus could void the user's authority to operate the equipment. This device complies with part 15 of the FCC Rules. Operation is subject to the...
- Page 3 EDN850H About this document All the safety and operating instructions should be read and followed before the unit is operated. This manual should be retained for future reference. The information in this manual was current when published. The manufacturer reserves the right to revise and improve its products.
- Page 4 Sun Microsystems, Inc. in the United States and other countries. Support If the unit ever needs repair service, the customer should contact the nearest EverFocus Electronics Corp. Service Center for return authorization and shipping instruction. About AC Adaptor...
-
Page 5: Table Of Contents
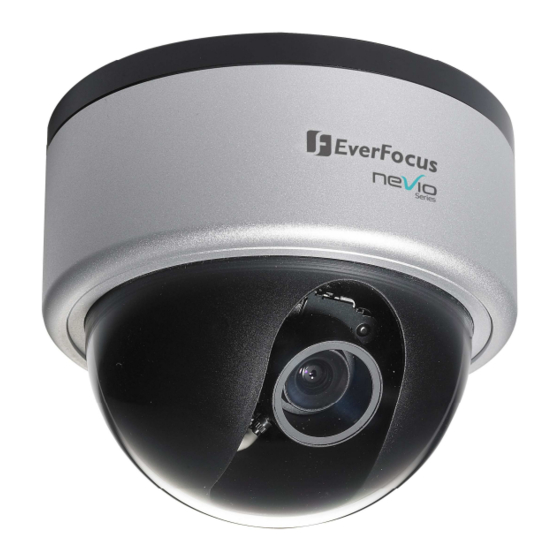
EDN850H External Dimensions: 56 mm x 68 mm x 101 mm / 2.24” x 2.72” x 4.04” TABLE OF CONTENTS 1. INTRODUCTION....................7 2. FEATURES ......................7 3. ACCESSING THE CAMERA MENU ..............8 4. SETTING........................ 11 4.1 S ......................12 YSTEM 4.1.1 Information ....................12 4.1.2 Log ......................13... - Page 6 EDN850H 4.8 SYSTEM ......................51 4.8.1 Date/Time....................51 4.8.2 Daylight Saving ..................53 4.8.3 SD Card.......................54 4.8.4 Maintenance....................56 5. SPECIFICATIONS....................58 Downloaded from www.Manualslib.com manuals search engine...
-
Page 7: Introduction
SD card slot, it offers local storage in which videos can be transferred to local PC. IP66 rated weather-proof and vandal-resistant design, and Power over Ethernet (PoE), the EDN850H is a durable network dome camera suited with features for the most demanding environments. -
Page 8: Accessing The Camera Menu
Step 1.Start an Internet Explorer browser. Step 2. Enter the IP address or host name of the camera in the Location/Address field of your Internet Explorer browser. (Please refer to EDN850H Installation Guide for how to find the IP address) Step 3. - Page 9 EDN850H ○ Press button to close EDN850H network page. ○ Video Stream Select Video Stream from Stream 1 / Stream 2, Stream 3 and Stream 4. Please refer to “4.4.1 Multi Streaming” for further information. ○ View Size You can select View size to either reduce or enlarge the image to the appropriate view size.
- Page 10 EDN850H ○ Snapshot The Snapshot button saves a snapshot of the video image currently being displayed. The location where the snapshot data is saved can be specified in Setting -> User’s Config. Please refer to “4.2 User Config” for further information.
-
Page 11: Setting
EDN850H 4. SETTING Click this button to display the setup menu. Downloaded from www.Manualslib.com manuals search engine... -
Page 12: System Info
EDN850H 4.1 System Info System information and system log check of the setup menu can be performed on this page. The “System Info” page has 2 tabs: [Information] tab and the [Log] tab. 4.1.1 Information System Information: Firmware version, MAC address, Video Type, Model number. -
Page 13: Log
EDN850H 4.1.2 Log System Log: Date/Time: displaying date and time of the log. Log message: all information and event message, including login, user’s IP, reboot, firmware upgrade, load factory default, configuration reset and event detected. System will keep the newest 256 records. -
Page 14: User Config
EDN850H 4.2 User Config Live view configuration is to be set by user. Each login user can make his/her own settings for the following items: Text Setting Check the box for text of Machine name, Date/Time or Frame Rate to be displayed on the screen. - Page 15 EDN850H Position: Select the position where the text will be displaying from Upper Left / Lower Right / Lower Left. Press Apply to apply the setting changes or Reset to reset without saving the change. Date/Time Format Used in Text Select Date/Time Format from the following options: Time Format: 24 Hours or 12 Hours.
-
Page 16: Network
EDN850H Language: Select the language to be displayed in web page. Default language is English. To add a new language which is not listed in the original configuration, press the Browse button to locate the new language file (.evb) and then click the Load button. - Page 17 EDN850H • IP Type • IP address • Subnet mask • Gateway (when using the gateway server/router) • Primary DNS, Secondary DNS (when using DNS) • HTTP Port IP SETTING IP Type DHCP: Configure the DHCP server not to assign the same IP addresses used for the other network cameras and PCs whose IP address is unique.
-
Page 18: Ddns
EDN850H Primary DNS An IP address of DNS server that is provided by ISP. Secondary DNS If your ISP provides you an IP address secondary DNS, please set it here. Username Enter User name of the account (used only for PPPoE). - Page 19 ○ www.dyndns.com ○ www.no-ip.com Enable: Check the box to enable DDNS setting. Service ISP: If you choose EverFocus DDNS server, you can obtain a free account name from EverFocus ”www.everfocusddns.com”. Enter an IP Cam Account Name: .everfocusddns.com Press button to register or update DDNS account.
-
Page 20: Bandwidth
EDN850H Press Apply to apply the setting changes or Reset to reset without saving the change. 4.3.3 Bandwidth Bandwidth Setting Max. Bandwidth: Specify, Unlimited / 64 K/ 128 K/ 256 K / 512 K / 1M / 2M / 4M / 8M bps. -
Page 21: Smtp/Ftp
EDN850H 4.3.4 SMTP/FTP Set SMTP The settings relating to the mail server used to send the e-mail notification from the camera to predefined addresses via SMTP can be configured. SMTP Server: Enter the IP address or the host name of the SMTP server used to send e-mails SMTP Port: Enter the port number for SMTP. - Page 22 EDN850H Send Test Mail: Press button to send a testing mail to the assigned address. Set FTP The settings relating to the FTP server used to transmit the alarm images can be configured. FTP Server: Enter the IP address or the host name of the FTP server.
-
Page 23: Network Alarm (Reserved For Powercon)
EDN850H 4.3.5 Network Alarm (reserved for PowerCon) Set Network Alarm This function is reserved for PowerCon software, for the detail setting please refer to PowerCon network alarm protocol. 4.4 Video The settings relating video such as streaming, camera OSD can be configured on this page. -
Page 24: Multi Streaming
EDN850H 4.4.1 Multi Streaming Stream Setting The system can output 4 video streams simultaneously. For each of them, user can set compression format, resolution, quality and frame rate individually. Stream 1 is always enabled for live view. Check “Enable” box to enable other streams. -
Page 25: Camera
EDN850H Note: 1. Total frame rate cannot exceed 60 fps. 2. System performance may be influenced if user enables 4 video streams simultaneously. Press Apply to apply the setting changes or Reset to reset without saving the change. Video Recording Setting User can set video recording by selecting one of the enabled video streamings. - Page 26 EDN850H OSD setting: Use the following buttons on the operation panel to operate the "Camera OSD setting" using a PC. (Please refer to 4.4.2.1 for detail guide of Camera OSD Setting) [SET] button: Click this button to move to the submenu.
-
Page 27: Lens
SPECIAL <┘ EXIT Note: Since DC lens is a built-in lens for EDN850H camera, it does not support Manual lens, please do not select lens as Manual mode, it disables sens-up and may cause malfunction of lens. Please press SET button for saving setting and return to the previous menu. - Page 28 EDN850H SETUP LENS MANUAL > SHUTTER WHITE BAL. BACKLIGHT MIDDLE SENS-UP SPECIAL <┘ EXIT ESC: (Reserved). SETUP BRIGHTNESS LENS MANUAL BRIGHTNESS |+++++++++| 25 ESC <┘ > SHUTTER WHITE BAL. BACKLIGHT MIDDLE AUTO <┘ SENS-UP SPECIAL <┘ EXIT Manual: (Reserved) SETUP...
-
Page 29: White Balance Control
EDN850H 4.4.2.3 WHITE BALANCE Control The screen color can be adjusted by using the WHITE BALANCE function. 1. Please direct the arrow to point to “WHITE BAL” on the SETUP menu by using the UP and DOWN buttons. 2. Please select the mode you would like to operate by pressing the LEFT or RIGHT button. -
Page 30: Backlight
EDN850H 4.4.2.4 BACKLIGHT Even there is a massive backlight behind the object, bright images of the background and the object can still be obtained by using the BACKLIGHT function. 1. Please direct the arrow to point to “BACKLIGHT” on the SETUP menu by using the UP and DOWN buttons. -
Page 31: Dnr (Dynamic Noise Reduction)
EDN850H 4.4.2.6 DNR (Dynamic Noise Reduction) Dynamic Noise Reduction in video images has the following effects. 1. Images are brighter and sharper. 2. When the level of noise is reduced, the performance of a camera can apparently be improved. 3. When it is recorded digitally, reduced noise can reduce image file size. -
Page 32: Sens-Up
EDN850H 4.4.2.7 SENS-UP SENS UP is used to keep a brilliant, vivid screen image by automatically detecting changes in the level of light under low light level conditions. The value is from x2 ~x128. 1. Please direct the arrow to point to “SENS UP” on the SETUP menu by using the UP and DOWN buttons. -
Page 33: Special
EDN850H 4.4.2.8 SPECIAL 1. Please direct the arrow to point to “SPECIAL” on the SETUP menu by using the UP and DOWN buttons. SETUP DC <┘ LENS SHUTTER WHITE BAL. BACKLIGHT MIDDLE AUTO <┘ SENS-UP > SPECIAL <┘ EXIT 2. Select the mode you would like to operate by pressing the LEFT or RIGHT button. - Page 34 EDN850H 6) If you would like to cancel the ID inputted, please move the cursor to “CLR”, and all the letters inputted will be deleted. 7) Select “END” and press SET button to complete ID input. SPECIAL > CAMERA ID COLOR ADJ.
- Page 35 RETURN <┘ 4.4.2.8.4 MOTION DETECTION EDN850H enables you to observe movements of objects in 4 different places on the screen, the message “MOTION DETECTED” appears on the screen when movement is detected; therefore this helps to improve supervision efficiency. The camera detects an object’s movement by sensing discrepancy of outline.
- Page 36 EDN850H Please use the UP or DOWN button to move between TOP, DOWN, LEFT and RIGHT for adjusting the size of the area. Please use the LEFT or RIGHT button to adjust the value for size of the area. AREA1...
- Page 37 EDN850H 3. Increase TOP scale value by 20. AREA1 position after change is: TOP: 30, DOWN: 45, LEFT: 20 and RIGHT: 40. AREA1 4. Increase RIGHT scale value by 20. AREA1 position after change is: TOP: 30, DOWN: 45, LEFT: 20 and RIGHT: 60.
- Page 38 EDN850H SPECIAL PRIVACY CAMERA ID COLOR ADJ. <┘ > AEREA SEL AREA1 SYNC. AREA STATE. MOTIION DET AREA TONE |+++++++++| 80 ON <┘ > PRIVACY |++++++++| 10 MIRROR DOWN |+++++++++| 25 ON <┘ SHARPNESS LEFT |+++++++++| 20 RESET RIGHT |+++++++++| 40 RETURN <┘...
- Page 39 EDN850H 1. The original position of AREA1 was TOP: 10, DOWN: 25, LEFT: 20 and RIGHT: AREA1 2. Increase DOWN scale value by 20. AREA1 position after change is: TOP: 10, DOWN: 45, LEFT: 20 and RIGHT: 40. AREA1 3. Increase TOP scale value by 20. AREA1 position after change is: TOP: 30, DOWN: 45, LEFT: 20 and RIGHT: 40.
- Page 40 EDN850H 5. Increase LEFT scale value by 20. AREA1 position after change is: TOP: 30, DOWN: 45, LEFT: 40 and RIGHT: 60. AREA1 In order to save the changes and complete the setting, press the SET button. This allows you to return to the previous menu.
-
Page 41: Exit
EDN850H 4.4.2.8.8 RESET Press the SET button on RESET for 3 seconds until it restarts. It will go to factory default value. SPECIAL CAMERA ID COLOR ADJ. <┘ SYNC. MOTIION DET PRIVACY MIRROR ON <┘ SHARPNESS > RESET RETURN <┘... -
Page 42: Audio
EDN850H 4.5 Audio The EDN850H camera can transmit audio to other clients using a built-in microphone or connecting to external microphone to play audio received from other clients via connected speakers. This section describes how to configure the basic audio settings. -
Page 43: User
EDN850H 4.6 USER User Information Maximum 10 users can be set for using the IP camera. The user information displays the authorized users and access levels: • Supervisor/Administrator –a supervisor/administrator has unrestricted access to the Setting menu and can determine the registration of all other users. However, administrator is not allowed to change supervisor’s account and password. -
Page 44: Event
EDN850H 4.7 EVENT An event in the camera is when an Event Type is activated and causes certain actions to be performed. The event type is the set of conditions that specifies how and when which actions will be performed. -
Page 45: Event
EDN850H 4.7.1 Event The settings relating to event occurrences such as settings for the event occurrence, motion, alarm and time mask can be configured on this page. The "Event” page has 4 tabs: [Event] tab, the [Motion] tab, the [Alarm] tab and the [Time Mask] tab. - Page 46 EDN850H To change the priority of events, click on the event and it will be highlighted. Press button to move between events. The event that has highest priority will be activated first. Press Apply to apply the setting changes or Reset to reset without saving the change.
-
Page 47: Motion
EDN850H 5. Check “Enable Pre-alarm Buffer” and “Enable Post-alarm Buffer”. For pre-and post alarm buffer setting, please refer to “4.7.3 Alarm”. 6. Check “Enable This Event”. 7. Select “Always” for time mask. For detail about Time Mask, please refer to “4.7.4 Time Mask”. -
Page 48: Alarm
EDN850H There are 5 motion trigger areas, which can be distinguished by 5 different colors. Check Enable checkbox to enable event action. For each of them, you can set the event action to be activated. Event action can be set in “Event” section. -
Page 49: Time Mask
EDN850H preceding the trigger. Input the desired length of pre-trigger buffer time. It can be set up to 120 seconds. Post-Alarm Buffer: Image saved internally in the server from the time immediately after the trigger. Input the desired length of post-trigger buffer time. It can be set up to 120 seconds. - Page 50 EDN850H Press button to add new time period. Mask name: Input a mask name for the new time period. Check the check box for the day to be scheduled: Sun, Mon, Tue, Wed, Thu, Fri & Sat. Set the Start time and End time for time mask by clicking Up arrow or Down arrow.
-
Page 51: System
EDN850H 4.8 SYSTEM Date/Time, Daylight Saving, SD card and Maintenance settings can be performed on this page. The "System" page has 4 tabs of the [Date/Time] tab, the [Daylight Saving] tab, the [SD card] tab and the [Maintenance] tab. 4.8.1 Date/Time Machine Name Setting Machine Name: Enter the name of the camera. - Page 52 EDN850H previous month, > to go next month and >> to go next year. Time: Click on Hour, Minute, Seconds, am/pm; then use up arrow to increase value and down arrow to decrease value. Press Apply to apply the setting changes or Reset to reset without saving the change.
-
Page 53: Daylight Saving
EDN850H 4.8.2 Daylight Saving Set Daylight Saving Check Enable Daylight Saving checkbox to enable daylight saving. Set the start time to daylight saving time. Set the start week of daylight saving time: 1 / Last Set the start date of daylight saving time: Sunday / Monday / Tuesday / Wednesday... -
Page 54: Sd Card
EDN850H Press Apply to apply the setting changes or Reset to reset without saving the change. 4.8.3 SD Card Setup SD Card Notification: Notification will be made via e-mail when the remaining space of the SD memory card reached the value selected from the following. - Page 55 EDN850H Normal: Follow the event actions settings you have made in “Event” menu to record event video to SD card. Overwrite: Select ON for overwriting data when SD card memory is full. Select OFF for not overwriting SD card data.
-
Page 56: Maintenance
EDN850H 4.8.4 Maintenance Maintenance Server Reboot: The unit is rebooted without changing any of the settings. Use this method by pressing Reboot button if the unit is not behaving as expected. Restore: The unit is restarted and most current settings are reset to the factory default values by pressing Restore button. - Page 57 EDN850H the Load button. The settings will be restored to the previous configuration. Upgrade Firmware Upgrade the EDN850H with the latest firmware. Press Browse button to search firmware file. Press Upgrade button to upgrade the firmware. Note 1: Do not disconnect power to the unit during the upgrade. The unit reboots automatically after the upgrade has completed.
-
Page 58: Specifications
EDN850H 5. SPECIFICATIONS CAMERA Pickup Device 1/3" Sony Super HAD Interlaced CCD Picture Elements NTSC: 768 (H) x 494 (V); PAL: 752 (H) x 582 (V) Sensitivity 0.002 Lux (SENS-UP 128x); 0.25 Lux/F=1.2 Day & Night Yes (with IR cut filter) Lens Vari-Focal Lens with Auto Iris (2.8~10mm) - Page 59 EDN850H PHYSICAL Weight 0.74 kg / 1.6 lbs Dimensions 123mm (O.D.) x 107.8mm (H) ; 4.8” (O.D.) x 4.2” (H) ENVIRONMENTAL Operating Temp. -10°C ~50°C / 14°F~122°F Humidity (20%~80% Humidity) OTHERS Waterproof IP66 Vandal Resistant Downloaded from www.Manualslib.com manuals search engine...
- Page 60 2-6 Nakase.Mihama-ku. www.everfocus.com Chiba city 261-7118, Japan TEL: 81-43-212-8188 FAX: 81-43-297-0081 www.everfocus.co.jp Ihr EverFocus Produkt wurde entwickelt Your EverFocus product is designed und hergestellt mit qualitativ and manufactured with high quality hochwertigen Materialien und materials and components which can Komponenten, die recycelt und wieder be recycled and reused.
Need help?
Do you have a question about the EDN850H and is the answer not in the manual?
Questions and answers