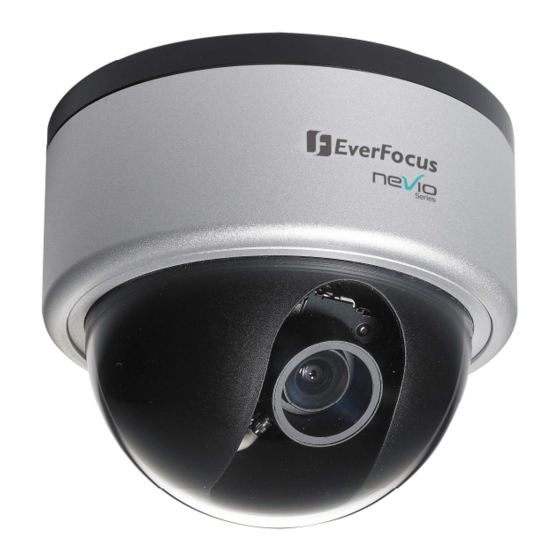
EverFocus EDN850H Installation Manual
Hide thumbs
Also See for EDN850H:
- User manual (60 pages) ,
- Specifications (11 pages) ,
- Specifications (6 pages)
Summary of Contents for EverFocus EDN850H
-
Page 1: Installation Guide
EDN850H Installation Guide Copyright © EverFocus Electronics Corp. Release: Jun. 2009 Ver. A... -
Page 2: Installation Steps
EDN850H This installation guide provides instructions for installing the EDN850H IP Camera. For all other aspects of using this product, please refer to EDN850H User’s Manual, which is available on the CD included in this package. Installation steps 1. Confirm that all of the accessories have been supplied with the network camera from the list below. - Page 3 -Operating system: Windows XP, service pack 3 or higher -Software: DirectX9,0c, Internet Explorer 6.0 or higher Note: Please connect to Microsoft’s Web Site for downloading. For example: (This web site may change without notices.) http://www.microsoft.com/downloads Interior View of EDN850H Base Outer Cover ring Rotatable cover...
- Page 4 EDN850H Focus lever Zoom lever Reset button SD card slot...
- Page 5 EDN850H 1. Installation 1.1 Mounting Camera 1.1.1 Drill the Holes 1. Paste the drilling template on the ceiling or wall 2. Use the tool to drill 4 holes, 3 for screw A, B and C, 1 for power/video cable. Screw hole A...
- Page 6 EDN850H 1.1.2 Mounting 1. Take off camera’s cover. Loose outer cover ring first Take off camera’s cover.
- Page 7 EDN850H 2. Fix the camera base to ceiling or wall by using 3 screws. Ceiling Mount: Wall Mount:...
- Page 8 EDN850H 1.2 Adjusting Camera 1.2.1 Adjusting Camera Position Adjust the camera to any angle that you wish. Pan and tilt to aim the camera at what you need to watch until the best angle of image is obtained. Adjust the camera to best angle for viewing.
- Page 9 EDN850H When you install on the ceiling, Change angle of view by turning this joint Module can be adjusted up and down NOTE: 1. If necessary, you can put desiccant pack in bracket side. Use cable to fix it before placing the cover back to camera.
-
Page 10: Connecting The Cables
EDN850H 2. Connecting the Cables ○ ○ ○ ○ ○ ○ 1 Network cable: Connect to LAN via this standard RJ-45 connector. Optional: This socket can also be used to power via PoE (Power over Ethernet) ○ Audio cable: For connecting to Audio In/Out device. - Page 11 EDN850H Terminal connector schematic diagram...
-
Page 12: Network Connection
EDN850H 3. Network Connection This section tells you how to do different types of network connections to IP cameras. a. Router or LAN connection This is the most common connection that allows multiples PC to see IP cameras/ video servers in pre-existing LAN through a router. - Page 13 EDN850H c. One to one connection from PC to IP camera You can connect directly without switch. However, only the PC connecting to camera can view the IP camera.
- Page 14 This helps to automatically obtain the EDN850H network configuration details including Mac Address, Machine Name, Machine Type, IP Type, Subnet Mask, Gateway Address, DNS1 Address, and DNS2 Address. 3. The IP address of EDN850H will be automatically detected and shown in the...
- Page 15 “User ID” and “Password”. This is a security measure of configuration setting, in order to modify those network configurations of EDN850H. EDN850H administrator can only do the setting. Therefore only who has admin authority could modify these settings. The ID & password must be the admin user and be sent to the device when you click "Set configuration".
- Page 16 EDN850H 5. To change configurations, double click on the value that you wish to make change and enter the desired new value. After the change is done, press “Set Configuration” to confirm setting. Note: Most router support DHCP. However, when you have difficulty of selecting IP...
- Page 17 7. You will be asked to enter User ID and Password first. Note: Default user name is “user1” and default password is “11111111”. 8. Now, you will be lead to the live view page of EDN850H. 9. Exit: Close IP Utility window to finish your setting.
- Page 18 Chiba city 261-7118, Japan www.everfocus.com TEL: +81-43-212-8188 FAX: +81-43-297-0081 www.everfocus.co.jp Your EverFocus product is designed and Ihr EverFocus Produkt wurde entwickelt und manufactured with high quality materials and hergestellt mit qualitativ hochwertigen Materialien components which can be recycled and reused.


Need help?
Do you have a question about the EDN850H and is the answer not in the manual?
Questions and answers