Table of Contents
Advertisement
Advertisement
Table of Contents

Related Manuals for a2b Shima


Summary of Contents for a2b Shima
- Page 1 Shima Owner´s manual...
-
Page 3: Table Of Contents
Contents Introduction Important notes Your A2B Getting to Know your A2B Using, Storing and Disposing of the Battery Important Safety Instructions Before Your First Ride Maintenance Cleaning the Vehicle Troubleshooting 10.0 Technical Data 11.0 Warranty and Safety Notes 12.0 Disposal 13.0... -
Page 4: Introduction
Your A2B will give you the freedom to go your own way. Whether to work, to go shopping or simply for a breath of fresh air - the A2B is the revolutionary new solution of getting from A to B. -
Page 5: Important Notes
This indicates a potentially hazardous situation, which if not avoided, may result in serious injury, property or equipment damage or inadvertent system failure. Refers to useful or other important relevant information. If you have questions or do not completely understand any of the instructions in this owner's manual, please ask your A2B specialist dealer. - Page 6 These electric bicycles with assistance up to 45 km/h are also generally called fast pedelecs (S-Pedelec or Speed Pedelec). The A2B has an operating permit with Type Approval Number e13*2002/24*0639. The applicable existing statutory regulations and legal provisions are explained in the following.
- Page 7 The rules and principles described here refer to the use of your Specific components may only be used if approved for use with an A2B in the European Union. For use outside the EU you should S-Pedelec in the type approval documents. When changing compo- obtain information beforehand about possible deviations.
-
Page 8: Your A2B
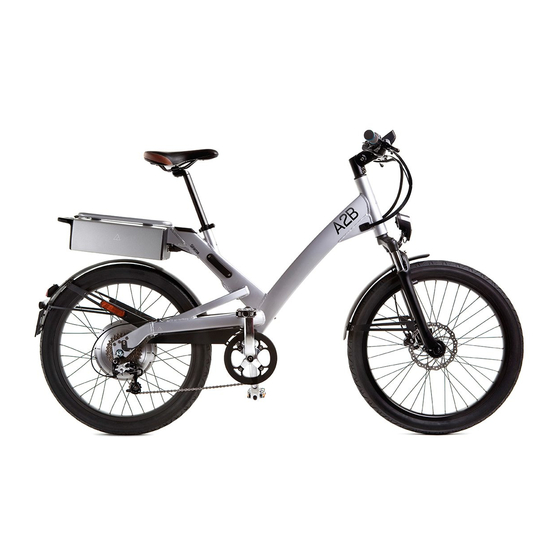
Owner´s manual 3.0 Your A2B 3.1 Components Saddle (seat) Seat post Seat post clamp Frame Display VIN (Vehicle Identification Number) Front light Splash guard front Front wheel 10. Front rim 11. Quick release front wheel 12. Front disk brake and rotor 13. - Page 9 A. Right side brake lever (for rear brake) B. Left side brake lever (for front brake) C. Gear shifter D. Right pedal E. Left pedal F. Rear view mirror...
- Page 10 Can you comfortably operate the brake lever? If not, take your A2B loads, attention must be paid to wear characteristics. When to your A2B specialist dealer and ask them to adjust the angle of the the useful life of a component is exceeded it can cause the brake levers.
- Page 11 180° and then try again. 4. After the height adjustment, check to see if the seat can be 1. Stand over your assembled A2B, your feet placed flat on the moved in any other direction. ground approximately shoulder width apart.
- Page 12 Make certain that the handlebar has no play stem. and that it can be easily operated. 3. Rotate the handlebar to the required Please consult your A2B specialist dealer angular position. if you require further help in adjusting the 4. Evenly tighten screws A using 5 Nm.
- Page 13 3.7 Adjusting the display 1. Loosen the adjusting screw E on the underside of the display with an appropriate Allen key. 2. Align the angle of the display according to your requirement. 3. Then evenly tighten the screw with 5 Nm.
-
Page 14: Getting To Know Your A2B
Owner´s manual 4.0 Getting to Know your A2B If after reading this section you still have questions, ask your A2B specialist dealer to explain any functions or characteristics that are unclear to you before your first ride. 4.1 An A2B overview still on its kickstand. - Page 15 1. Hold the E-Key directly over the screen of your display. 2. The display now lights up. As soon as the A2B lettering appears, pull the key away. 3. After the ride: to shut off the system hold your E-Key over the display until it blanks out.
- Page 16 Owner´s manual 4.4 Display - Functions Overview of functions and menus A. Rotary knob/Button B. Battery charge indicator C. Speed indicator D. Mode indicator - shows the respectively selected power level (1 -3) E. Unit indicator (km/h or mph) It is recommended to regard the E-Key like a car or house key. It is best to attach it to your private key ring.
- Page 17 4.5 Adjusting the degree of assistance Your A2B allows you to choose from 3 power levels (modes). At top right of the display you can see your current mode. Choosing the assistance level: Turn the knob in order to choose between the different power levels.
- Page 18 To reset the distance counter: press the knob for 2 seconds while you are in the trip menu (11). trip The system of your A2B switches automatically to the idle mode after it has been inactive for 10 minutes (including the light system).
- Page 19 Fault messages are reset automatically when the error no longer exists. In case of a permanent error message, consult your In the event of an error, the A2B specialist dealer. corresponding warning signals (!) and one of the following codes will...
- Page 20 Owner´s manual 4.10 Gears The derailleur operates inde- pendently of the motor. Use Your A2B has a derail- the derailleur to adjust the leur that is operated by the gear setting to find a gear that right-side gear shifter at the makes pedalling comfortable handlebar.
- Page 21 5. The permitted total weight of your A2B may not be exceeded. The You can now switch in the motor permitted maximum total weight is listed in the specification.
- Page 22 2.8 bar (front and rear wheels). Factors affecting range: • Have your A2B serviced regularly to ensure that the wheel bearings turn freely and that the brake shoes do not drag against the brake • Level of assistance disks.
-
Page 23: Using, Storing And Disposing Of The Battery
Improper use and insufficient storage of this charger will result in Use only the respective battery the expiration of the warranty and can lead to serious injuries or for your A2B or a replacement even death or may cause other dangerous situations, such as fire battery provided by Hero Eco. - Page 24 A2B. Otherwise please ensure that the operating switch is switched on (ON). ORANGE you charge the battery for your A2B for at least 12 hours before The indicator LED will illuminate first use. whilst the battery is being charged.
- Page 25 A2B no later than after 3 days for recharging. Complete Do not leave the charger with connected battery switched on charging of a completely discharged battery will take 4 to 5 hours.
- Page 26 Owner´s manual 5.4 Attaching and connecting the battery to your A2B 5. Connect the battery to the A2B with the connector. Carefully align Charge the battery of your A2B before first use. the clip and pins of the connector to the socket of the battery and con- nect the connectors.
-
Page 27: Important Safety Instructions Before Your First Ride
6.0 Important Safety Instructions Make certain that you and your A2B have been prepared for a safe Special note for S-Pedelecs. Ensure that every user of the and pleasant trip. A2B complies with the statutory regulations in 2.1 (pg.2 - pg.3). - Page 28 Check your A2B before every ride. Brakes. Before each Do a ‘walk around’ of your A2B before every ride and check the ride check your brakes. brakes, tyres and the tight seat of all the important fasteners. Have The left brake lever...
- Page 29 (pedalling Each of the 4 Allen screws A for and motor power) to move your A2B the handlebar attachment must be forwards. A too low tyre pressure tightened with 5 Nm.
-
Page 30: Maintenance
The wheel rims should not have any cracks, bulges or flat areas. Take your Have your A2B checked by your A2B to your A2B specialist dealer as A2B specialist dealer at least once necessary to have the wheels repaired a year. Observe Section 13 in this and/or adjusted. - Page 31 If your brake pads look worn down or the brakes do not respond as well as customary, ask your A2B specialist dealer to check and Damaged or worn tyres should be replaced immediately. Take your replace the brake pads. Brakes are less effective when wet.
- Page 32 Your A2B has a front wheel with quick release lever to make it easy to remove and install the front wheel. Please follow the instructions on the quick release lever mechanism to guarantee proper handling. If you do not follow the correct method for fastening this front quick release lever, the front wheel can come off during the ride.
- Page 33 The lever may not stick out in property damage. DO NOT use your A2B if you have doubts con- order to avoid injuring yourself. The lever cerning the proper function of the brakes.
- Page 34 2. Remove the cable clips (at the back of the drop-out and at the underside of the left chain stay) with an appropriate Allen key. 6. Remove the torque support from the A2B by pushing it from the axle. 3. Release the cable connectors for the power and control cables to the motor.
- Page 35 E. Fasten the cable clips back to the drop-out and to the frame. If this process of setting up and adjusting the brake is not completely clear to you, ask your A2B specialist dealer to adjust the brakes of your A2B for you. Improperly adjusted brakes have, among other things, reduced braking performance, which could result in an accident with serious injuries or even death and/or property damage.
-
Page 36: Cleaning The Vehicle
– After longer rides, thoroughly clean the A2B and preserve with a commer- After cleaning and before be- cially available anti-corrosion agent. ginning your ride, always test your... -
Page 37: Troubleshooting
9.0 Troubleshooting No power? Here are a few suggested solutions. If they do not solve your problem, ask an A2B specialist dealer. Problem Possible cause(s) Solution The A2B will not switch on. 1. The battery is dead. Recharge the battery. See 5.2 and 5.3 A2B switches on but there is no motor 1. -
Page 38: Technical Data
Owner´s manual 10.0 Technical Data Battery Management System (BMS) • Controls and stops over-charging General performance specification • Controls maximum charge current • Overall dimensions 17" – 1720 mm x 650 mm x 1000 mm • Controls over-discharge amperage • Overall dimensions 20" – 1745 mm x 650 mm x 1070 mm •... -
Page 39: Warranty And Safety Notes
(motor and motor controller), two years 2.3 This warranty is not applicable in the event of defects to the goods: as of the delivery date of the A2B to you; for the lithium ion battery, 2.3.1 due to normal use and wear;... -
Page 40: Disposal
A2B.DE@heroeco.com 4.2.1 Loss of income or earnings; 3.2 Hero Eco will ask you to take the A2B together with your proof of 4.2.2 Loss of business; purchase to an authorised A2B specialist dealer. At its own discretion, after 4.2.3 Loss of expected savings;... -
Page 41: Maintenance Schedule
13.0 Maintenance Schedule To guarantee the correct function and the associated safety of your A2B you should have a service check done once a year or at least according to the times described in the table. Consult an A2B specialist dealer and have the vehicle checked routinely. This also applies even if you do not notice any problems or signs of wear when using your A2B. - Page 42 Maintenance schedule Assembly inspection at 0 km...
- Page 44 Maintenance schedule Assembly first inspection at 500 km...
- Page 46 Maintenance schedule Assembly inspection every 2,500 km...
- Page 48 Maintenance schedule Assembly inspection every 2,500 km...
- Page 49 Notes...
-
Page 50: Motor
Motor serial number: To adequately protect your A2B against theft, buy a high quality bicycle lock. Lock your A2B to a firmly anchored object each time you park it somewhere unsupervised. Also lock your front and rear wheel as well as the motor to the frame. Use your E-Key as an... -
Page 52: Product Registration
Owner´s manual weareA2B.com...
Need help?
Do you have a question about the Shima and is the answer not in the manual?
Questions and answers