
Related Manuals for Suzuki JR50


Summary of Contents for Suzuki JR50
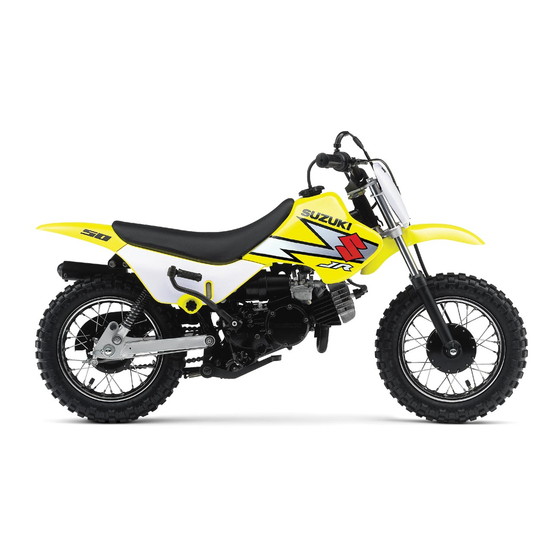
- Page 1 JR50 OWNER’S MANUAL This owner’s manual contains important safety information. Please read it carefully. Part No. 99011-04493-03A June, 2005...
- Page 3 WARNINGs and CAUTIONs are IMPORTANT arranged like this: WARNING/CAUTION/NOTE WARNING-or-CAUTION Please read this manual and fol- low its instructions carefully. To The first part will describe a emphasize special information, POTENTIAL HAZARD the symbol and the words WHAT CAN HAPPEN if you WARNING, CAUTION and NOTE ignore the WARNING or CAU- have special meanings.
- Page 4 Due to improvements or other changes, there may be some discrepancies in this man- ual. Suzuki reserves the right to make production changes at any time, without notice and without incurring any obligation to make...
- Page 5 Your Suzuki JR50 was designed IMPORTANT ADVICE TO for use by children, but this PARENTS owner’s manual is written for the adult who will be supervising the This motorcycle is designed for children. Suzuki strongly recom- use only as follows: mends, therefore, that you review •...
- Page 6 Have your child wear a hel- JR50. Remember that proper met and eye protection every time instruction before your child he or she rides.
- Page 7 To help your child develop confi- tion. dence, he or she should PRAC- TICE FIRST WITH THE ENGINE Getting to know the JR50. OFF, as follows: Your child should become com- 1. Have your child sit on the bike pletely familiar with the names while you balance and push he and functions of all controls.
- Page 8 Practice this exercise until your • Before first use of the motorcy- child can start off, accelerate, and cle, read this owner’s manual stop correctly and with confi- carefully to become familiar dence. Slowly introduce with the features, and safety maneuvers into this routine as the maintenance require-...
-
Page 9: Table Of Contents
TABLE OF CONTENTS INSTRUCTING THE YOUNG RIDER FUEL AND OIL RECOMMENDATION CONTROLS, EQUIPMENT AND ADJUSTMENTS BREAK-IN AND INSPECTION BEFORE RIDING RIDING TIPS ACCESSORY USE AND MOTORCYCLE LOADING INSPECTION AND MAINTENANCE TROUBLESHOOTING STORAGE PROCEDURE AND APPEARANCE CARE CONSUMER INFORMATION SPECIFICATIONS INDEX... -
Page 11: Instructing The Young Rider
INSTRUCTING THE YOUNG RIDER OPERATING SKILL ..................... 1-2 CLOTHING ......................1-4... - Page 12 INSTRUCTING THE OPERATING SKILL Know the mechanism. YOUNG RIDER Memorize the name of each con- trol. The name suggests its func- tion. Know the path of power from the engine to the rear wheel. Learn the sequence of checking the items listed in the INSPEC- TION BEFORE RIDING section.
- Page 13 Rehearse before riding out for WARNING the first time. Let the young rider mount the Operating this motorcycle with- machine and do a dry rehearsal out proper instruction can be with the engine off. The rider hazardous. The risk of having should be fully outfitted with hel- an accident greatly increases if met, eye protection (goggles or...
- Page 14 CLOTHING WARNING Operating this motorcycle with- wearing approved motorcycle helmet, eye protec- tion and protective clothing increases your chances of a severe injury or death in the event of an accident. As stated before, the minimum Always wear an approved acceptable riding outfit includes motorcycle helmet that fits helmet, eye protection, and pro-...
-
Page 15: Fuel And Oil Recommendation
FUEL AND OIL RECOMMENDATION FUEL ........................2-2 ENGINE OIL ......................2-3 TRANSMISSION OIL ................... 2-3... - Page 16 Oxygenated fuels which meet the such fuels are not the responsibil- minimum octane requirement and ity of Suzuki and may not be cov- the requirements described below ered under the New Vehicle may be used in your motorcycle Limited Warranty.
- Page 17 NOTE: ENGINE OIL • To help clean the air, Suzuki recommends you to use the oxygenated fuels. • Be sure that any oxygenated fuel you use has octane rat- ings of at least 87 pump octane ((R+M)/2 method). • If you are not satisfied with the...
-
Page 19: Controls, Equipment And Adjustments
CONTROLS, EQUIPMENT AND ADJUSTMENTS LOCATION OF PARTS ..................3-2 LEFT HANDLEBAR ..................... 3-5 RIGHT HANDLEBAR ..................3-5 THROTTLE LIMITER ................... 3-5 FUEL TANK CAP ....................3-6 FUEL VALVE ....................... 3-7 ENGINE OIL LEVEL .................... 3-8 CHOKE LEVER ....................3-9 KICK STARTER LEVER ..................3-9 GEARSHIFT LEVER .................. -
Page 20: Location Of Parts
CONTROLS, EQUIPMENT AND ADJUSTMENTS LOCATION OF PARTS 1 Engine stop switch 2 Front brake lever 3 Throttle grip 4 Fuel tank cap... - Page 21 5 Fuel valve 6 Spark plug 7 Gearshift lever 8 Footrest 9 Side stand 0 Drive chain...
- Page 22 A Kick starter lever B Engine oil inspection window C Transmission oil filler cap D Air cleaner E Choke lever F Carburetor G Rear brake pedal H Transmission oil level screw...
-
Page 23: Left Handlebar
LEFT HANDLEBAR THROTTLE LIMITER Engine Stop Switch 1 Use the throttle limiter to restrict To stop the engine, push the maximum engine power by limit- engine stop switch. ing throttle opening. Adjust this limiter according to the rider’s skill and experience. RIGHT HANDLEBAR To adjust the throttle limiter: 1. -
Page 24: Fuel Tank Cap
FUEL TANK CAP WARNING Fuel and fuel vapor are highly flammable and toxic. You can be burned or poisoned when refueling. • Stop the engine and keep flames, sparks and heat sources away. • Refuel only outdoors or in a To open the fuel tank cap, remove well ventilated area. -
Page 25: Fuel Valve
FUEL VALVE WARNING This motorcycle has a manually operated fuel valve. There are two Leaving the fuel valve in “ON” positions: “ON” and “OFF.” position when the engine is off can be hazardous. The carbu- retor may overflow and fuel may run into the engine. -
Page 26: Engine Oil Level
ENGINE OIL LEVEL This motorcycle is equipped with a two-stroke engine. Two stroke engines consume oil along with gasoline in the combustion pro- cess. Therefore, it is important to check the engine oil level before each ride. CAUTION Running the engine without an adequate amount of engine oil can cause severe engine dam- age such as overheating and... -
Page 27: Choke Lever
CHOKE LEVER KICK STARTER LEVER This motorcycle has a choke sys- Depressing the kick starter lever tem to provide easy starting when with the transmission in neutral the engine is cold. The choke will start the engine. works by pushing the choke lever WARNING down. -
Page 28: Gearshift Lever
GEARSHIFT LEVER SIDE STAND The motorcycle has a side stand. This motorcycle has a single- To place the motorcycle on the speed transmission which oper- side stand, place your right foot ates as shown. To shift properly, on the end of the side stand and close the throttle before you oper- push down firmly until the stand ate the gearshift lever. -
Page 29: Power Reduction Plate
Do not remove the power reduction plate until the rider develops sufficient skills to 2. Remove the two bolts securing operate JR50 safely at the max- the exhaust pipe with 5-mm imum speed with the power hexagon L type wrench. - Page 30 4. Remove the bolt securing the 6. Remove the muffler. Remove muffler at the center of the the power reduction plate from machine. This bolt needs a 12- exhaust pipe flange. This plate mm T type wrench. is positioned inside the flanged end.
-
Page 31: Seat Height Adjustment
SEAT HEIGHT ADJUSTMENT The seat height of this motorcycle is adjustable for the rider’s physi- cal size. 25 mm (1.0 in) higher STANDARD SETTING 0 mm 2. Loosen the front fork lower If higher seat height is required, clamp bolts. carry out the following proce- dures. - Page 32 NOTE: The spacers and longer Rubber cap and mounting boss bolts are provided in the tool bag. 8. Remove the lower rear shock absorber bolt. After taking off 5. Tighten the upper and lower the rubber cap from the higher bolts securely in that order.
- Page 33 • Bolts and nuts must be torqued to the proper specifi- cations. We strongly recom- mend that this be done by your authorized Suzuki dealer or qualified mechanic. Tightening torque: Front fork upper 25 N·m bolts (2.5 kgf-m, 18.0 lb-ft) Front fork lower 15 N·m...
-
Page 35: Break-In And Inspection Before Riding
BREAK-IN AND INSPECTION BEFORE RIDING BREAK-IN ......................4-2 INSPECTION BEFORE RIDING ................4-3... - Page 36 BREAK-IN AND Allow the Engine Oil to Circulate before Riding INSPECTION BEFORE Allow enough idling time after RIDING warm or cold engine start up before revving the engine or plac- BREAK-IN ing the transmission in gear. This The first 20 hours is the most allows time for the lubricating oil important in the life of your motor- to reach all critical engine compo-...
- Page 37 INSPECTION BEFORE RIDING Check the condition of the motor- cycle to help make sure that you WARNING do not have mechanical problems when your youngster rides. Failure to inspect and maintain Before your youngster rides the your motorcycle properly motorcycle, be sure to check the increases the chance of an following items.
- Page 38 WHAT TO CHECK FOR CHECK Steering • Smoothness • No restriction of movement • No play or looseness Brakes • Proper pedal and lever play • No dragging • Brake shoe wear Tires • Proper pressure • Enough tread depth •...
-
Page 39: Riding Tips
RIDING TIPS STARTING THE ENGINE ..................5-2 STARTING A COLD ENGINE ................5-2 STARTING A WARM ENGINE ................5-3 STARTING OFF AND SHIFTING ................ 5-5 STOPPING AND PARKING ................5-6... -
Page 40: Starting The Engine
RIDING TIPS STARTING A COLD ENGINE STARTING THE ENGINE Before attempting to start the engine, make sure: 3. Push the choke lever down as far as it will go. 1. Turn the fuel valve lever from OFF to ON. 4. Close the throttle grip com- pletely. -
Page 41: Starting A Warm Engine
STARTING A WARM ENGINE 5. Kick the kick starter lever to start the engine and, if this 1. Do not use the choke lever on fails to fire up, kick again. If 3rd a warm engine. or 4th kick fails, then pull back choke lever to original position, open throttle wide (by turning the grip all the way), and kick... - Page 42 WARNING CAUTION An improperly retracted kick Running the engine too long starter lever can interfere with without riding may cause the rider control. engine to overheat. Overheat- ing can result in damage to Be sure the kick starter lever is internal engine components.
-
Page 43: Starting Off And Shifting
STARTING OFF AND SHIFTING WARNING WARNING Riding this motorcycle excessive speed increases Carrying a passenger can your chances of losing control greatly reduce your ability to of the motorcycle. This may balance and steer this motor- result in an accident. cycle. -
Page 44: Stopping And Parking
WARNING Riding the motorcycle with the side stand in the down position can be hazardous. The side stand in the down position may interfere with rider control dur- ing a left turn. 4. Release the front brake and Check that the side stand is open throttle gently. - Page 45 WARNING Hard braking while turning may cause wheel skid and loss of control. Brake before you begin to turn. WARNING Hard braking on wet, loose, rough, or other slippery sur- faces can cause wheel skid and loss of control. Brake lightly and with care on slippery or irregular surfaces.
- Page 46 WARNING A hot muffler can burn you. The muffler will be hot enough to burn you for some time after stopping the engine. Park the motorcycle where pedestrians or children are not 5. Park the motorcycle on a firm, likely to touch the muffler. flat surface where it will not fall over by using the side stand.
-
Page 47: Accessory Use And Motorcycle Loading
ACCESSORY USE AND MOTORCYCLE LOADING MODIFICATION ....................6-3... - Page 48 It manual regarding accessories is not possible for Suzuki to test and modifications. Use genu- each accessory on the market or ine SUZUKI accessories or combinations of all the available equivalent designed and tested accessories;...
- Page 49 • Inspect proper ground If any load is to be carried on the clearance and bank angle. motorcycle, mount it as low as Improperly mounted load possible and as close as possible could critically reduce these to the machine. An improperly two safety factors.
-
Page 51: Inspection And Maintenance
INSPECTION AND MAINTENANCE MAINTENANCE SCHEDULE ................7-2 GENERAL LUBRICATION .................. 7-4 AIR CLEANER ..................... 7-5 SPARK PLUG ...................... 7-8 CARBURETOR ....................7-10 FUEL HOSE ....................... 7-11 TRANSMISSION OIL ..................7-12 DRIVE CHAIN ....................7-13 BRAKES ......................7-16 TIRES ......................... 7-18 SPARK ARRESTER .................. -
Page 52: Maintenance Schedule
If you have any ques- motorcycle damage. tions regarding maintenance intervals, consult your SUZUKI Always follow the inspection dealer or qualified mechanic. and maintenance recommen- dations and schedules in this CAUTION owner’s manual. Ask your... - Page 53 MAINTENANCE CHART Interval Initial 1 month Every 3 months Every 6 months Item * Cylinder head and cylinder – – * Cylinder head nuts – Spark plug – Air cleaner element Carburetor – Fuel line *Replace every 4 years Transmission oil –...
-
Page 54: General Lubrication
1 Throttle grip GENERAL LUBRICATION 2 Front brake lever holder Proper lubrication is important for 3 Front brake cable safe, smooth operation and a long 4 Side stand pivot and spring life for your motorcycle. Be sure hook that all lubrication is performed 5 Brake pedal arm pivot during periodic maintenance on motorcycle. -
Page 55: Air Cleaner
AIR CLEANER CAUTION The air cleaner element must be kept clean to provide good engine Clean or replace the air cleaner power and gas mileage. If your element frequently if the motor- youngster uses the motorcycle cycle is used in dusty, wet or under normal low-stress condi- muddy conditions. - Page 56 Air Cleaner Element Removal Washing the Element Wash the element as follows: 1. Remove the cleaner cap. 2. Take out the element. 1. Fill a wash pan larger than the element with a non-flammable cleaning solvent A. Dip the element in the solvent and wash it.
- Page 57 6. Clean any dirt or debris from CAUTION inside the air cleaner case. Be sure no dirt enters the carbure- Failure to position the air tor. cleaner element properly can 7. Reinstall the cleaner element allow dirt to bypass the air in reverse order of removal.
-
Page 58: Spark Plug
SPARK PLUG To maintain a hot, strong spark, keep the plug free from carbon. 1. Extract the spark plug cap. Remove carbon deposits from the 2. Remove the spark plug with plug, and adjust the gap to 0.6 – the spark plug wrench pro- 0.7 mm (0.024 –... - Page 59 Use one of the spark plugs Follow the procedure below to listed below or equivalent. avoid damage. Consult your Suzuki dealer or qualified mechanic if you are Carefully turn the spark plug by not sure which spark plug is hand into the threads until it is fin- correct for type of usage.
-
Page 60: Carburetor
1 and the authorized SUZUKI dealer. pilot air adjusting screw 2 in the Mechanical malfunctions resulting following procedures. from the owner tampering with carburetion adjustment will not be covered by the warranty. -
Page 61: Fuel Hose
Throttle Cable Adjustment WARNING Measure the throttle cable play by turning the throttle grip. The throt- Inadequate throttle cable play tle grip should have 2.0 4.0 mm – can cause engine speed to rise (0.08 0.16 in) play. – suddenly when you turn the handlebars. -
Page 62: Transmission Oil
TRANSMISSION OIL 6. Pour fresh oil of the specified type through the oil filler hole transmission should until the oil reaches the oil always be changed when the level hole. Be sure to check engine is warm so the oil will drain the oil level with the motorcy- easily. -
Page 63: Drive Chain
• Loose sprocket mounting nuts ment, correct the problem if you know how. If necessary, consult If you find any of these problems your authorized Suzuki dealer. with your sprocket, consult your Suzuki dealer. 7-13... - Page 64 2. Allow the chain to dry, then lubricate the links with Suzuki Inspect and adjust the drive chain lube or an equivalent. chain slack before each use. 7-14...
- Page 65 To adjust the drive chain, follow 6. Tighten adjusting nuts. the procedure below: 7. Check and, as necessary, readjust the brake pedal play as outlined in page 50. This is because adjusting the drive chain as above could alter the pedal play.
-
Page 66: Brakes
BRAKES WARNING This motorcycle is equipped with front and rear drum brakes. Failure to adjust the front brake lever and rear brake pedal play WARNING properly can lead to an acci- dent or damage your motorcy- Failure to inspect and properly cle. - Page 67 Rear Brake Pedal Adjustment Inspect brake shoe wear before each use. Ask your SUZUKI dealer or qualified mechanic to replace brake shoes if the shoes are worn to the limit.
-
Page 68: Tires
TIRES Tire Pressure and Loading Tire pressure and tire loading are WARNING important factors. Overloading your tires can lead to tire failure Failure to follow these warn- and loss of motorcycle control. ings may result in an accident due to tire failure. The tires on Check tire pressure each time your motorcycle form the cru- before you ride, according to the... - Page 69 Ask your SUZUKI dealer or qualified mechanic to perform Check tire condition each time tire repair, replacement, and before you ride. Replace tires if balancing...
-
Page 70: Spark Arrester
SPARK ARRESTER The muffler has a spark arrester which must periodically cleaned to maintain good effi- ciency. At the intervals shown in the maintenance chart, clean the spark arrester as follows. WARNING A hot muffler can burn you. The 2. Remove the spark arrester. muffler will be hot enough to burn you for some time after stopping the engine. -
Page 71: Troubleshooting
TROUBLESHOOTING FUEL SYSTEM CHECK ..................8-2 IGNITION SYSTEM CHECK ................8-3... - Page 72 If you are not sure about the • Keep children and pets away. proper action, consult your • Dispose of drained fuel prop- Suzuki dealer about the prob- erly. lem. c. Tighten the drain screw. d. Turn the fuel valve to the COMPLAINT: Engine is hard to “ON”...
- Page 73 If there is no spark, take your machine to your authorized Suzuki dealer. WARNING Performing the spark test improperly can cause a high voltage electrical shock or an explosion.
-
Page 75: Storage Procedure And Appearance Care
STORAGE PROCEDURE AND APPEARANCE CARE PROCEDURE FOR RETURNING TO SERVICE ..........9-3 CORROSION PREVENTION ................9-3 MOTORCYCLE CLEANING ................9-4 INSPECTION AFTER CLEANING ............... 9-5... -
Page 76: Storage Procedure
Suzuki recommends that you flammable and toxic. You can trust this maintenance work to be burned or poisoned when your Suzuki dealer. If you wish to handling fuel. service the machine for storage yourself, follow the general guide- When draining the fuel: lines below: •... -
Page 77: Procedure For Returning To Service
EXTERNAL CORROSION PREVENTION 1. Spray all vinyl and rubber It is important to take good care of parts with rubber protectant. your motorcycle to protect it from 2. Spray unpainted surface with corrosion and keep it looking new rust preventative. for years to come. -
Page 78: Motorcycle Cleaning
2. Wash the entire motorcycle have a Suzuki dealer make the with a mild detergent or car repair. wash soap using a sponge or 4. Store your motorcycle in a dry, soft cloth. The sponge or cloth... -
Page 79: Inspection After Cleaning
Waxing the Motorcycle After washing the motorcycle, waxing is recommended to further protect and beautify the paint. Observe the precautions speci- fied by the wax manufacturer. INSPECTION AFTER CLEANING For extended life of your motorcy- cle, lubricate according to “GEN- ERAL LUBRICATION”... -
Page 81: Consumer Information
CONSUMER INFORMATION TAMPERING WITH NOISE CONTROL SYSTEM PROHIBITED ...... 10-2 SERIAL NUMBER LOCATION ................10-3 LOCATION OF LABELS ................... 10-3 10-1... - Page 82 Whenever replacing parts on your Federal law prohibits the following motorcycle, Suzuki recommends acts or the causing thereof; that you use genuine Suzuki 1. The removal or rendering in- replacement parts or their equiva- operative by any person other lent.
- Page 83 SERIAL NUMBER LOCATION LOCATION OF LABELS You need to know the frame and Read and follow all of the warn- engine serial numbers to get title ings labeled on your motorcycle. documents for your motorcycle. Make sure you and your child You also need these numbers to understand all of the labels.
- Page 84 WARNING Do not touch hot muffler. WARNING Failure to follow these safety precautions may increase your risk of injury: • Wear a helmet, eye protec- tion, and bright protective clothing. • Off-road use only – do not use on public roads or high- ways.
-
Page 86: Specifications
(3.0 cu. in) Corrected compression ratio ......5.6 : 1 Carburetor ............MIKUNI VM12, single Air cleaner ............Polyurethane foam element Starter system ..........Kick Lubrication system ..........SUZUKI CCI TRANSMISSION Clutch ..............Wet multi-plate, Automatic, Centrifugal type Gearshift pattern ..........1-down, 1-up Transmission ...........Single-speed constant mesh Primary reduction ratio ........2.650 (53/20) - Page 88 INDEX AIR CLEANER ....... 7-5 IGNITION SYSTEM CHECK ........8-3 INSPECTION AFTER CLEANING ......9-5 BRAKES....... 7-16 INSPECTION BEFORE BREAK-IN ......4-2 RIDING ........4-3 CARBURETOR ....7-10 KICK STARTER LEVER..3-9 CHOKE LEVER...... 3-9 CLOTHING......1-4 CORROSION PREVENTION ......9-3 LEFT HANDLEBAR ....3-5 LOCATION OF LABELS..10-3 LOCATION OF PARTS ..3-2 DRIVE CHAIN ......
- Page 89 REAR BRAKE PEDAL ..3-10 RIGHT HANDLEBAR ..... 3-5 SEAT HEIGHT ADJUSTMENT ..... 3-13 SERIAL NUMBER LOCATION ......10-3 SIDE STAND......3-10 SPARK ARRESTER..... 7-20 SPARK PLUG ......7-8 STARTING A COLD ENGINE........5-2 STARTING A WARM ENGINE........5-3 STARTING OFF AND SHIFTING.......
- Page 91 California Proposition 65 Warning WARNING Engine exhaust, some of its constituents, and certain product com- ponents contain or emit chemicals known to the State of California to cause cancer and birth defects or other reproductive harm. This manual should be considered a permanent part of the motorcycle and should remain with the motorcycle when resold or otherwise transferred to a new owner or operator.
- Page 92 WARNING Failure to follow these safety precautions may increase your risk of injury: • Wear a helmet, eye protec- tion, and bright protective clothing. • Off-road use only – do not use on public roads or high- ways. • Slow down on slippery sur- faces, unfamiliar terrain, or when visibility is reduced.
Need help?
Do you have a question about the JR50 and is the answer not in the manual?
Questions and answers