
Related Manuals for Viking R-6S


Summary of Contents for Viking R-6S
- Page 1 INSTALLATION INSTRUCTIONS AND SAFETY INFORMATION F O R T H E V I K I N G R - 6 S G AT E O P E R ATO R C L A S S I C L A S S I Residential Vehicular Swing Gate Operator...
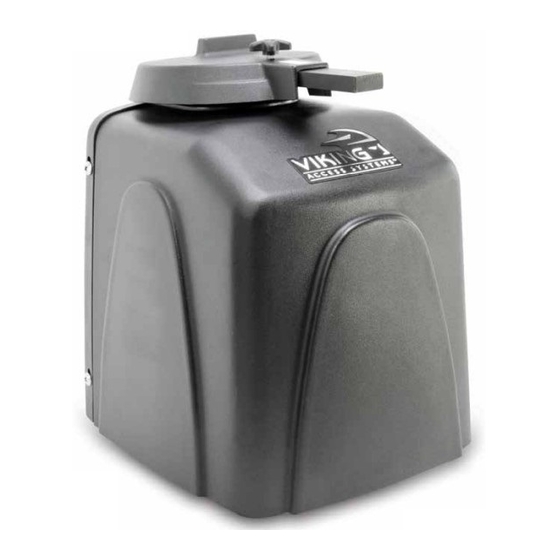
- Page 2 The R-6S™ Viking Solar Swing Gate Operator is capable of handling gates up to 700 lbs. and 14 ft. long. With its effi cient drivetrain, built in solar regulator, VFlex control board and Viking Solar Power Management Systems; the R-6S™ Gate Operator is the ideal choice for any solar residential applications.
- Page 3 R-6s Solar Vehicular Gate Operator • Revision SR6MN10.B • May 2015 VIKING TECHNICAL SUPPORT 1.800.908.0884...
-
Page 4: Parts Diagram/Parts List
Solar Charger VSCHARGSW Motor Switch DUMRS10 Power Switch DUMRS10 Chassis VSR6CH Sprocket (Gearbox) VASP1034 Chain #40x38 Pitches R6CHN40 Sprocket (Motor) VASP1058 24V DC Gearhead Motor VSR6MO Brush Kit VAMBK Multi-Part Arm Assembly VA-F1ARM20 Limit Switch Harness VNXR6LSH VIKING TECHNICAL SUPPORT 1.800.908.0884... -
Page 5: Operator References
6. CLUTCH KEY install if application does not require clutch to slip; 12. SOLAR CHARGER remove to manually operate the gate regulates and distributes solar power 7. OUTPUT ARM connects the Arm Assembly to Clutch & Handle Assembly VIKING TECHNICAL SUPPORT 1.800.908.0884... -
Page 6: Control Board References
24. EXPANSION PRODUCT CONNECTIONS communication for Viking Solar connections for additional products 16. CONTROL BOARD MOUNTING HOLES Charger. from Viking Access Systems. pg 46 secures and grounds the control board. 6. “EPS2” CONNECTOR 25. “FAIL SAFE/SECURE” Jumper 17. “Siren” TERMINAL BLOCK available for future developments. -
Page 7: Table Of Contents
Guidelines for Loop Installations Blank Page Barrier Arm (B-12) Synchronization Option TROUBLESHOOTING TROUBLESHOOTING 36-41 36-41 LED References 36-37 LCD Display References 38-40 Solutions APPENDIX A & B APPENDIX A & B 42-44 42-44 VIKING EXPANSION PRODUCTS VIKING EXPANSION PRODUCTS VIKING TECHNICAL SUPPORT 1.800.908.0884... -
Page 8: Important Safety Information
5. The gate operator controls must be placed so that the user has full view of the gate area when the gate is moving AND AWAY FROM THE GATE PATH PERIMETER. VIKING TECHNICAL SUPPORT 1.800.908.0884... -
Page 9: Important Installation Instructions
(refer to page 11). g. One or more contact sensors shall be located at the bottom edge of a vertical barrier (arm). h. Only Use Miller Edge Model MGR20 or MGS20 edge sensor to comply with UL325. VIKING TECHNICAL SUPPORT 1.800.908.0884... -
Page 10: Maintenance
• In particular, regular checks are recommended in order to verify that the safety devices are operating correctly. All installation, maintenance and repair work must be documented and made available to the user. VIKING TECHNICAL SUPPORT 1.800.908.0884... -
Page 11: Operator Classification
Install the gate operator only when: The operator is appropriate for the construction of the gate and the Usage Class of the gate. VIKING TECHNICAL SUPPORT 1.800.908.0884... -
Page 12: Photo Beam (Non-Contact Sensor) Installation
• One or more non-contact sensors shall be located where the risk of entrapment or obstruction exists, such as the perimeter reachable by a moving gate or barrier. Consult the installation manual for the UL325 device (photo beam or like) for detail information about the usage, installation and maintenance. VIKING TECHNICAL SUPPORT 1.800.908.0884... -
Page 13: Edge Sensor (Contact Sensor) Installation
To resume normal operation: 1. Align the notches on the Output Shaft to the clutch and reinstall the Clutch Key. 2. Push the Manual Release Handle down, back to the locked position. Refer to page 17 for more details VIKING TECHNICAL SUPPORT 1.800.908.0884... -
Page 14: Audible Alarm Reset Installation
• All Warning Placards must be installed where visible in the area of the gate. • A minimum of two placards shall be in- stalled. • A placard is to be installed in the area of each side of the gate and be visible. VIKING TECHNICAL SUPPORT 1.800.908.0884... -
Page 15: Important Installation Information
3. At least 6 feet away from all moving parts of the gate. 14 ft. 700 lb. R-6S Specifications: UL Application Class: Class I Maximum Gate Length: 14 ft. Maximum Gate Weight: 700 lb. Operating Temperature: -4°F (-20°C) to 160°F (71°C) VIKING TECHNICAL SUPPORT 1.800.908.0884... -
Page 16: Gate Operator Installation
Follow the local building code to determine the required depth of the concrete pad. 2. Pad measurements recommended by Viking Access Systems are at least 23” long, 20” wide and 30” deep to ensure the stable operation of the operator, and a minimum of 6” above level grade to avoid any flooding of the machinery. -
Page 17: Post Mounting Option
Provide at least 12 ” separation between low and high voltage conduits. REQUIRED ADD-ON: PART# VA-F1PS • Main pieces made of 1/4” thick material • All mounting hardware is included • Posts and U-Bolts are not supplied VIKING TECHNICAL SUPPORT 1.800.908.0884... -
Page 18: Operator Positioning
• Increasing “C” dimension provides better gate control and stability by reducing the affects of inertia and deceasing the gate leverage against the operator. • Following to the geometrical formulas and relationships provided is recommended. Arm Assembly: VA-F1ARM20 VIKING TECHNICAL SUPPORT 1.800.908.0884... - Page 19 With the Clutch Key removed, the Rotate the Clutch until it lines up with the Clutch should not slip with moderate notches on top of the Output Shaft and force applied to the gate. insert the Clutch Key. VIKING TECHNICAL SUPPORT 1.800.908.0884...
-
Page 20: Electrical Installation
Observe proper precautions. • Observe proper polarity orientation between the battery and charging circuit. Solar Panel Selection • Solar panel(s) are sold separately. • Use only UL Listed 12V solar panel(s), such as Viking part #s: Open-Circuit Short-Circuit Wattage Viking Part#... -
Page 21: Solar Panel Care & Installation Tips
• Always use a single bonding point for grounding. • All ground wires must be as short and as thick as possible. • Prevent unnecessary turns or loops in all ground Earth Ground wires. Ground Rod VIKING TECHNICAL SUPPORT 1.800.908.0884... -
Page 22: Solar Connection & Power Saving Tips
Indicates that there is no voltage being provided from the solar panel NO PANEL ERR NO Indicates that there is no voltage being provided from the solar panel. Sol UNIT ERR CHRG Potential problem with the Solar Charger. HIGH ERR BAT The battery is low VIKING TECHNICAL SUPPORT 1.800.908.0884... -
Page 23: Limits Setup
Gate OPENS to the LEFT Gate OPENS to the RIGHT Left Limit Switch Closed Limit Left Limit Switch Open Limit Right Limit Switch Open Limit Right Limit Switch Closed Limit VIKING TECHNICAL SUPPORT 1.800.908.0884... - Page 24 This display may indicate a problem with the limit switches or wires. “Close Limit” LED “Open Limit” LED indicates the gate is indicates the gate is at the close limit. at the open limit. VIKING TECHNICAL SUPPORT 1.800.908.0884...
-
Page 25: Master/Slave Setup
• 2 Conductor (wire) • 18 AWG or better • Shielded (overall foil) • Drain Wire (non-insulated or bare wire) Condui Drain Wire Shielded Cable Master Board Slave Board “MS1” “MS1” “MS2” “MS2” Conduit between Master and Slave VIKING TECHNICAL SUPPORT 1.800.908.0884... -
Page 26: Control Board Setup
“ODS” Obstruction Detection Sensor Sets the amount of force required to trip “Speed” the inherent obstruction sensor. Motor Speed See page 26 for more details about this Increases or decreases the speed of gate feature. travel. VIKING TECHNICAL SUPPORT 1.800.908.0884... -
Page 27: Initial Settings
“COM” and “N.O”. 2. While gate is moving: “AUX. PWR” terminals provide 24VDC. “Sync” Used only in conjunction with the Viking Barrier gate operator model B-12. Activating this feature allows for synchronized operation with the B-12 operator. See page 35. “EXT”... -
Page 28: Obstruction Detection Sensor (Primary Entrapment Protection)
The Status LED for the “ODS” will indicate the following when it has been triggered. A. Solid: Obstruction. Detected a sudden or abrupt increase in gate resistance. B. Flashing: Overload. Detected a more subtle, but sustained increase in gate resistance. VIKING TECHNICAL SUPPORT 1.800.908.0884... - Page 29 (THIS PAGE LEFT BLANK INTENTIONALLY) VIKING TECHNICAL SUPPORT 1.800.908.0884...
- Page 30 (THIS PAGE LEFT BLANK INTENTIONALLY) VIKING TECHNICAL SUPPORT 1.800.908.0884...
-
Page 31: Accessory Connections
“Re-Open” terminal on the control board. to the control board and individual Typically, these are the transmitter/ input terminal functions, refer to receiver type photo beams. “Appendix (A)”, pages 42-43. VIKING TECHNICAL SUPPORT 1.800.908.0884... -
Page 32: Radio Receiver (Typical)
TECHNICAL TIP: For more information regarding accessory connections and terminal functions, refer to “Appendix (A)” on pages 42-43. See “Appendix (B)” on page 44 for connecting common radio receiver models. VIKING TECHNICAL SUPPORT 1.800.908.0884... -
Page 33: Anti-Tail Gate, Open Commands, Guard Station
“C” connection to “GND”. “ATG” Anti-Tailgate This input will stop the gate when the vehicle triggers the sensor, then closes the gate when the vehicle leaves the sensor, preventing unauthorized vehicles from entry. N.O. VIKING TECHNICAL SUPPORT 1.800.908.0884... -
Page 34: Viking Loop Rack
This operator may be equipped with a pre-wired Loop Rack that plug-in type loop detectors can be connected to. This provides a convenient alternative to the box type loop detectors that would need to be wired to the control board. Viking does not provide either type of loop detectors. -
Page 35: Guidelines For Loop Installations
Perimeter (ft.) Number of Turns 30-40 50-100 Dimension “A” - 5’ for Single Gate 6’ for Dual Gate Outside Inside Center Exit Reopen Reopen Loop Loop Loop Loop Make Even with Open Gate Gate in Open Position VIKING TECHNICAL SUPPORT 1.800.908.0884... -
Page 36: Blank
(THIS PAGE LEFT BLANK INTENTIONALLY) VIKING TECHNICAL SUPPORT 1.800.908.0884... -
Page 37: Barrier Arm (B-12) Synchronization Option
This type of application opens and closes in the following pattern: 1. Open Command is provided only to the Viking B-12 Barrier Arm Operator. 2. The Barrier Arm will delay to open until this Gate Operator reaches its Open Limit. -
Page 38: Troubleshooting
Control Board is receiving an input from a device connected to the Re- 9, 10 Open terminal (pg 29, 32, 42). “ATG” Normal Condition. SOLID Control Board is receiving an input from a device connected to the ATG 9, 10 terminal (pg 31, 42). VIKING TECHNICAL SUPPORT 1.800.908.0884... - Page 39 Gate is at Open Limit, Timer is turned ON and counting down to close. (pg 24). FLASHING Gate is at Open Limit, Timer is turned ON but is not timing out due to a 9, 10 conflicting command. (pg 24). VIKING TECHNICAL SUPPORT 1.800.908.0884...
-
Page 40: Lcd Display References
Gate is at the limit open position and timing to close - The display shows the actual time left before closing __ SEC EPS2 While the gate is running, indicates the percentage of accuracy of the EPS. “OK” indicates 100% accurate communication VIKING TECHNICAL SUPPORT 1.800.908.0884... - Page 41 SOL VOLT This is the actual voltage from the solar panel. __._ VAC CHARGEr Indicates the voltage being supplied to the Control Board from the Viking Solar Charger. __._ VDC BAT VOLT This is the actual voltage from the Battery __._ VDC...
- Page 42 Indicates that there is no voltage being provided from the solar panel NO PANEL ERR NO Indicates that there is no voltage being provided from the solar panel. Sol UNIT ERR CHRG Potential problem with the Solar Charger. HIGH ERR BAT The battery is low VIKING TECHNICAL SUPPORT 1.800.908.0884...
-
Page 43: Solutions
Not applicable to this model Manually adjust any setting on the Control Board to clear all wireless override settings Not applicable to this model Not applicable to this model Call Viking Technical Support for further assistance VIKING TECHNICAL SUPPORT 1.800.908.0884... - Page 44 Each input Terminal (i.e. Radio, Exit, Re-Open, UL) has a corresponding Status LED that when illuminated indicates an input is currently being provided to the terminal and the gate is responding accordingly. (See pages 36-37 LED References) VIKING TECHNICAL SUPPORT 1.800.908.0884...
- Page 45 APPENDIX (A) Relays In General NOTE: Viking Access Systems does not provide the external safety devices and access controls. These items can be purchases from your dealer or distributor. In General Glossary of Terms 1. Terminal: Wire Connections. In regards to the Viking control board, 2.
- Page 46 Appendix (B) Appendix (B) Common Radio Receivers - Connections Common Radio Receivers - Connections VIKING TECHNICAL SUPPORT 1.800.908.0884...
-
Page 47: Viking Expansion Products
Off-site access to operator diagnostics and perform firmware updates from just about anywhere with cellular service. With the Viking App, this tool allows you to monitor and label multiple operators by site and location for quick reference. Provides error notifications, operator status, settings and diagnostic information. - Page 48 OUR CONTINUOUS COMMITMENT TO EXCELLENCE Viking Access Systems is continuously working hard to identify and design products that will appeal to the industry and its needs. As technology continues to advance, we have developed a completely efficient and intelligent line of gate operators to meet the changing demands.
- Page 49 Zinc Plated and Powder Coated steel chassis. draw. • Easy access to manual operation, allowing • Viking Solar Power Management System the gate to be move by hand, independently maximizes the number of cycles per day of the operator. •...
Need help?
Do you have a question about the R-6S and is the answer not in the manual?
Questions and answers