
Related Manuals for Toshiba MMD-AP0186HP-E


Summary of Contents for Toshiba MMD-AP0186HP-E
-
Page 1: Installation Manual
AIR CONDITIONER (MULTI TYPE) Installation Manual Indoor Unit For commercial use Model name: Concealed Duct High Static Pressure Type MMD-AP0186HP-E MMD-AP0246HP-E MMD-AP0276HP-E MMD-AP0366HP-E MMD-AP0486HP-E MMD-AP0566HP-E English... -
Page 2: Table Of Contents
Toshiba Carrier Corporation or, alternatively, he or she has been instructed in such matters by an individual or individuals who have been trained and is thus thoroughly 13 Specifications . -
Page 3: Warning Indications On The Air Conditioner Unit
Warning indications on the air conditioner unit Definition of Protective Gear When the air conditioner is to be transported, installed, maintained, repaired or removed, wear protective gloves and ‘safety’ work clothing. In addition to such normal protective gear, wear the protective gear described below when undertaking the special work detailed in the following table. -
Page 4: Precautions For Safety
– 3 – Precautions for safety Installation Suction duct length must be longer than 850 mm. When the indoor unit is to be suspended, the designated hanging bolts (M10 or W3/8) and nuts (M10 or W3/8) must The manufacturer shall not assume any liability for the damage caused by not observing the description of this be used. -
Page 5: Accessory Parts
Accessory parts Test run Before operating the air conditioner after having completed the work, check that the electrical control box cover of the indoor unit and service panel of the outdoor unit are closed, and set the circuit breaker to the ON position. You may receive an electric shock if the power is turned on without first conducting these checks. -
Page 6: Selection Of Installation Place
– 5 – Selection of installation place Installation under high-humidity atmosphere In some cases including the rainy season, especially inside of the ceiling may become high-humidity atmosphere Avoid installing in the following places (dew-point temperature: 23 °C or higher). Select a location for the indoor unit where the cool or warm air will circulate evenly. 1. -
Page 7: Installation
Installation Installation space (Unit: mm) Reserve sufficient space required for installation or service work. CAUTION Strictly comply with the following rules to prevent damage of the indoor units and human injury. Do not put a heavy article on the indoor unit or let a person get on it. (Even units are packaged) Carry in the indoor unit as it is packaged if possible. -
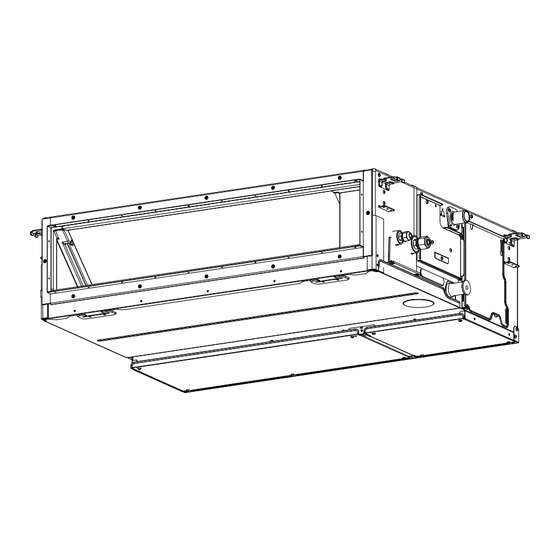
Page 8: Installation Of Indoor Unit
– 7 – Installation of hanging bolt Installation of indoor unit Removing the foamed polystyrene and three plates for transportation Consider the piping / wiring after the unit is hung to Treatment of ceiling determine the location of the indoor unit installation The ceiling differs according to structure of building. -
Page 9: Drain Piping
Drain piping Gravitational drainage Reattach the drain cap. CAUTION * For gravitational drainage, remove the white connector (CN504) on the upper left of the circuit board in the Following the Installation Manual, perform the drain piping work so that water is properly drained. Apply a heat electrical control box. - Page 10 – 9 – Check the draining Heat insulating process In the test run, check that water drain is properly performed and water does not leak from the connecting part of As shown in the figure, cover the flexible hose and hose band with the attached heat insulator up to the bottom the pipes.
-
Page 11: Fan Characteristics
Fan characteristics AP0186 type AP0246, 0276 type AP0366 type Standard Air Flow 800m Standard Air Flow 1,200m Standard Air Flow 1,920m 200Pa- High 200Pa- High 200Pa-Mid. 200Pa- High 200Pa-Mid. 200Pa-Mid. 150Pa- High 150Pa- High 150Pa- High 200Pa-Low 200Pa-Low 200Pa-Low 100Pa- High 150Pa-Low 100Pa-... -
Page 12: Duct Design
– 11 – Duct design Duct design Arrangement (Unit: mm) Referring to the following dimensions, manufacture duct at the local site. In order to prevent short circuits, design the duct work so that the intake and discharge openings are not adjacent to each other. The indoor unit does not have a built-in air filter. -
Page 13: Refrigerant Piping
Refrigerant piping Evacuation The sealed gas was sealed at the atmospheric pressure so when the flare nut is removed, there will no “whooshing” sound: This is normal and is not Perform vacuuming from the charge port of valve of the Connecting refrigerant piping indicative of trouble. -
Page 14: Electrical Connection
– 13 – Electrical connection Heat insulation process Apply heat insulation for the pipes separately at liquid side and gas side. For the heat insulation to the pipes at gas side, be sure to use the material with heat-resisting temperature Power supply wire and 120 °C or higher. - Page 15 Wiring between indoor unit and outdoor unit Power supply 220 V – 240 V ~, 50 Hz Power supply 220 V ~, 60 Hz NOTE Power supply switch/circuit breaker or power supply wiring/fuse rating for indoor units should be selected by the accumulated An outdoor unit connected with control wiring between indoor and outdoor units wire becomes automatically the total current values of the indoor units.
-
Page 16: Applicable Controls
– 15 – Applicable controls Wire connection Basic procedure for changing REQUIREMENT REQUIREMENT settings Connect the wires matching the terminal numbers. Incorrect connection causes a trouble. When the air conditioner is used for the first time, it will Pass the wires through the bushing of wire connection holes of the indoor unit. take some moments after the power has been turned on Keep a margin (Approx. -
Page 17: External Static Pressure
External static pressure Each time button is pushed, indoor <Setting up on the circuit board of the indoor unit> unit numbers in the control group change To set up the external static pressure, use the DIP switch on the circuit board of the wireless reception part. settings cyclically. -
Page 18: Test Run
– 17 – Test run Filter sign setting Remote controller sensor According to the installation condition, the filter sign The temperature sensor of the indoor unit senses room term (Notification of filter cleaning) can be changed. temperature usually. Set the remote controller sensor Before test run Wired remote controller Follow to the basic operation procedure... -
Page 19: Maintenance
Maintenance When a test run is not Wireless remote controller performed properly When TEMPORARY button is pushed for 10 seconds or more, “Pi!” sound is heard and <Daily maintenance> (Once every 3 months) the operation changes to test run. After When a test run is not performed properly, refer to the error code and the part to be checked on Cleaning of the air filter (sold separately :... -
Page 20: Troubleshooting
– 19 – Troubleshooting Periodic Maintenance For environmental conservation, it is strongly recommended that the indoor and outdoor units of the air conditioner in use be cleaned and maintained regularly to ensure efficient operation of the air conditioner. When the air conditioner is operated for a long time, periodic maintenance (once a year) is recommended. Confirmation and check Confirmation of error log Furthermore, regularly check the outdoor unit for rust and scratches, and remove them or apply rustproof... - Page 21 Check method On the wired remote controller, central control remote controller and the interface P.C. board of the outdoor unit (I/F), a check display LCD (Remote controller) or 7-segment display (on the outdoor interface P.C. board) to display the operation is provided.
- Page 22 – 21 – Outdoor unit 7-segment display Sensor block display of receiving unit Wired remote controller display — — — — — — — — 01:TE1 sensor TE1 sensor error 02:TE2 sensor TE2 sensor error — — — — — 01:Comp.
- Page 23 Outdoor unit 7-segment display Sensor block display of receiving unit Wired remote controller display — — c i l s t i y t i (Displayed in indoor unit with priority) Duplicated indoor units with priority (Displayed in unit other than indoor unit s t i y t i with priority)
- Page 24 — General-purpose equipment, — — — Differs according to error contents of unit with occurrence of alarm o l l TCC-LINK — — Duplication addresses of indoor units in TCC-LINK central control device TCC-LINK: TOSHIBA Carrier Communication Link. 45-EN 46-EN...
-
Page 25: Specifications
Specifications Declaration of Conformity Sound pressure level (dBA) Manufacturer: TOSHIBA CARRIER (THAILAND) CO., LTD. Model Weight (kg) 144/9 Moo 5, Bangkadi Industrial Park, Tivanon road, Tambol Bangkadi, Cooling Heating Amphur Muang, Pathumthani 12000, Thailand MMD-AP0186HP-E MMD-AP0246HP-E Authorized Nick Ball MMD-AP0276HP-E... - Page 26 – 25 – Warnings on Refrigerant Leakage Important Check of concentration limit The room in which the air conditioner is to be installed requires a design that in the event of refrigerant 2) When there is an effective opening with the adjacent room for ventilation of leaking refrigerant gas (opening gas leaking out, its concentration will not exceed a set limit.
- Page 27 51-EN 52-EN – 26 –...
- Page 28 TOSHIBA CARRIER (THAILAND) CO.,LTD. 144/9 MOO 5, BANGKADI INDUSTRIAL PARK, TIVANON ROAD, TAMBOL BANGKADI, AMPHUR MUANG, PATHUMTHANI 12000, THAILAND. 1117065599...
Need help?
Do you have a question about the MMD-AP0186HP-E and is the answer not in the manual?
Questions and answers