Table of Contents
Advertisement
Advertisement
Table of Contents

Related Manuals for Delphi SA10276


Summary of Contents for Delphi SA10276
- Page 1 SA10276 Important: This manual contains important safety and operating information. Please read, understand, and follow the instructions in this manual. Failure to do so could result in personal injury, death, and/or damage to your RoadyXT, accessories, and/or to your vehicle or property...
-
Page 2: Fcc Information
Warning: The FCC and FAA have not certified the Delphi XM RoadyXT Satellite Radio Receiver for use in any aircraft (neither portable nor permanent installation). Therefore, Delphi cannot support this type of application or installation. -
Page 3: Table Of Contents
....... . Personalizing Your RoadyXT ..Delphi limited consumer Making your vehicle’s FM warranty . -
Page 4: A Brief History
A Brief History The new Delphi RoadyXT Satellite Radio Receiver—smaller, lighter, and more versatile than the best-selling Roady2 ® • Dock your RoadyXT into cradles that are easily installed in your vehicles or your home. One simple motion connects your RoadyXT’s power, audio,and antenna. -
Page 5: About Delphi
About Delphi Delphi is a worldwide leader in mobile electronics, vehicle components, and audio technology. Delphi created the first in-dash car radio in 1936 and continues its strong tradition of innovation in the audio industry. Now Delphi technology has helped make satellite radio a reality, and Delphi continues to expand its in-vehicle and consumer electronics technologies. -
Page 6: Let's Get Started
Let’s Get Started First, some important reminders We know you’re eager to turn on your new RoadyXT and listen to XM Please take a moment to remember the following: Warning: This manual contains important safety Caution: Use your RoadyXT only with the enclosed and operating information. -
Page 7: Controls
Controls power menu – access advanced features up and down arrows, and configuration select – change chan- options nels, choose menu options, TuneSelect disp – change search – look up channels what you see on by category or scan all the display channels pre/dir –... -
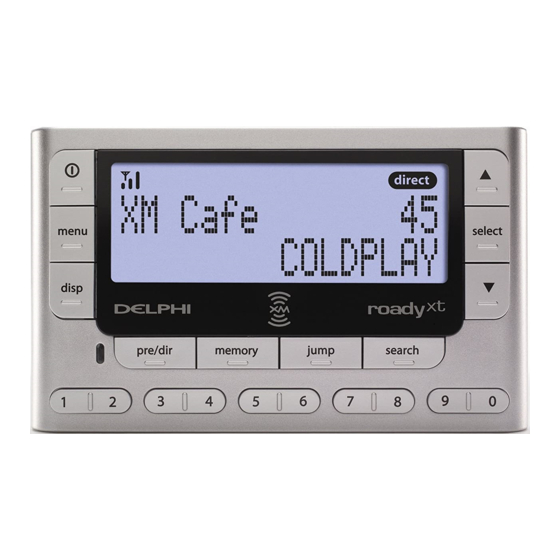
Page 8: Display
Display signal strength – search by scanning display search channels channel selection 1 to 3 bars all channels modes 5 by category mode – direct entry or preset banks A, B, or C additional info – channel name, channel number, artist, song title, Stock Ticker, and Info Extras... -
Page 9: Remote Control
Remote control* power menu – access advanced up and down arrows, features and configuration select – change channels, options choose menu options, TuneSelect + and – change channels, or control volume if RoadyXT is search – look up channels placed in an audio system by category or scan all channels jump –... -
Page 10: Activating Your Roadyxt
Activating Your RoadyXT Use the arrow buttons to find channel 0, then push the “select” button to choose it. You should see an 8-character XM Radio ID in the display. (The XM Radio ID should also be on the bottom of your RoadyXT, and on the package.) Write the ID here: Note: Carefully check your XM Radio ID. -
Page 11: Listening To Xm
Listening to XM Selecting channels Select a channel directly by entering its channel number. Press the“pre/dir” button (step 1) until appears on the screen. Then press the number buttons (step 2) corresponding to the channel. Channel 12 can be entered as “1,” then by “2,” or as “0,” “1,” and “2.” Or press the up and down arrows to quickly step through each channel. -
Page 12: Searching For Channels By Category
Searching for channels by category XM channels are arranged by categories, or neighborhoods. This allows you to see all channels in the “Rock” category, for example. Press the “menu” button (step 1), go to “Search Mode,” and select “By Category. ” Each press of the “search”... -
Page 13: Searching For Channels By Scanning
Searching for channels by scanning Your RoadyXT can also scan through each channel, pausing long enough to hear the programming before moving on to the next one. Press the “menu” button (step 1), go to “Search Mode,” and select “By Scanning”... -
Page 14: Using Presets
Using presets Your RoadyXT can store up to 30 of your favorite channels as presets. The presets are organized into three banks (A, B, or C) that each contain 10 presets. Press the “pre/dir” button one or more times to select bank A, B, or C (step 1). -
Page 15: Memory And Jump
Memory and jump Press the “memory” button to remember a song’s artist or title. Your RoadyXT can remember up to 20 entries. (After 20, any new entry replaces the oldest entry in memory.) To recall the list of songs, press and hold the “memory” button, then use the up and down arrow buttons to step through the list. -
Page 16: Personalizing Your Roadyxt
Personalizing Your RoadyXT You can easily adapt your RoadyXT to suit your listening habits. Simply press the “menu” button to see the options you can customize. If you ever get lost or decide not to change anything, press the “menu” button several times to return to normal operation. - Page 17 5. You should now hear XM programming on your vehicle’s FM radio. If the sound isn’t clear or you hear noise or static, try another FM frequency. If you’re traveling, you may need to retune periodically; this is due to the differences in signal strength of local FM stations and is not a problem with your RoadyXT.
-
Page 18: Screen Colour
Screen colour To change the colour of the display, press the “menu” button and select “Screen Color. ” Use the arrow and the “select” buttons to choose a colour; to cancel, press the “menu” button. Contrast To vary the contrast of the display, press the “menu” button and select“Contrast.”... -
Page 19: Aiming The Antenna
Aiming the antenna Note: For use with the Home Kit, sold separately. Your RoadyXT can help you choose the best antenna position and orientation. 1. Press the “menu” button. Use the arrow and “select” buttons to choose“Antenna Aiming.” 2. Slowly turn and tilt the antenna. The signal bars on the display will change. -
Page 20: Stock Ticker
5. To edit the list, press the “menu” button and choose the “TuneSelect”option, then the “Erase” option. You can either erase specific songs orartists on the list, or erase all songs and artists. Stock Ticker You can track up to 20 stock symbols and see their prices and movements right on the RoadyXT’s display.* TO ADD A STOCK SYMBOL: 1. -
Page 21: Info Extras
Info Extras XM Satellite Radio will broadcast information such as sports scores and other features at various times.* Press the “menu” button and select “Info Extras” (step 1). Use the arrow buttons to see what’s available (step 2). Press the “select” button to add or remove the Info Extras item (step 3). “”... -
Page 22: Changing Display Information
Changing display information The Stock Ticker and Info Extras can either be scrolled (moving from right to left in the display) or paged (one symbol at a time). To switch from one option to the other: 1. Press the “menu” button and select “Display Mode.” 2. -
Page 23: Resetting To Factory Default
Auto-Off and “sleep” timer You can set your RoadyXT to shut off the radio 1 to 3 hours after being turned on. Set this option if you have connected your RoadyXT to a power source in your vehicle that is always live. Your RoadyXT will then automatically shut off and prevent you from draining your vehicle’s battery. -
Page 24: Vehicle Installation
Vehicle Installation Introduction This XM receiver offers a variety of options for connecting XM Satellite Radio to your vehicle’s FM radio. XM research and lab test results show that using a vehicle cassette adapter can maximize the relationship between the best sound quality and ease of installation. If your vehicle kit does not include a cassette adapter, one should be available at your local retailer. -
Page 25: Installation Instructions
Installation Instructions Step First, determine the proper location for your satellite radio antenna based on the following criteria for your specific vehicle: • You must locate the satellite radio antenna on the top of the roof either in front of the rear window (option 1) or behind the windshield (option 2).The satellite radio antenna will perform best if magnetically attached to a steel surface with an unobstructed view of the open sky and minimum of 3 to 6 inches of metal surrounding the antenna. - Page 26 Step 3: • Once you have plugged the power and antenna jacks into the car cradle, use the included cable organizer as shown in figure 2 to improve the overall appear- ance of the installation. • Reuse the cable twist ties that were provided with the power adapter and car antenna cables and always be sure to gather, bundle, twist tie, and secure any...
- Page 27 Keep excess cable behind or under the dashboard. • For option 1 and rear mounting locations, route the cable into the trunk as shown. Always cross the weather seal at the lowest part of the trunk to reduce water leaks. From the trunk, route the cable into the passenger compartment through available wire channels and then along the floor under the door jamb trim or under the carpet to the front of the passenger compartment.
-
Page 28: Other Things You Should Know
Other Things You Should Know Care You should be able to use your RoadyXT during most of your daily activities. However, you should remember: • If your RoadyXT does get dirty, wipe the case with a soft cloth (lightly moistened with water if necessary), then wipe dry with another cloth. Avoid chemicals such as paint thinner, alcohol, or abrasive cleansers. -
Page 29: Troubleshooting
Troubleshooting Your RoadyXT should provide you with trouble-free performance without- needing any servicing. If it does not appear to be working properly, first try to remedy the problem by following these steps: 1. Attach all connections firmly and securely. 2. Ensure the cigarette lighter adapter or auxiliary power socket is clean and free of corrosion. - Page 30 If you see this on the display: You should: UPDATING Simply wait a few seconds until the update Cause: Your RoadyXT is being updated is done. with the latest encryption code. Cause: You may have tried to tune to a To receive that channel, contact channel that you have blocked or that you XM Satellite Radio at 1.877.GET.XMSR...
- Page 31 If this happens: You should: The display is blank; nothing happens Check the power connections to your when you push the power button. RoadyXT. You do not receive all XM channels you Your RoadyXT may not be activated. have subscribed to. Contact XM Satellite Radio (see page 10).
- Page 32 FM radio. pages 16 and 17). If the problem persists and you are using the FM modulator in a vehicle, use the Delphi FM Direct Adapter (model SA10112, sold separately). Audio on XM instant traffic and weather Nothing is wrong with your RoadyXT.
-
Page 33: Contacting Technical Support
Contacting Technical Support For additional information in solving problems with your RoadyXT, contact Delphi Technical Support at 1.877.GO DELPHI (1.877.463.3574), 8:00 a.m.— 8:00 p.m. Eastern Time, Monday — Friday. Technical Support is also available at www.delphi.com. Technical Information DIMENSIONS receiver, without cradle: 2.25 in (H) x 3.7 in (W) x 0.7 in (D) -
Page 34: Warranty
Delphi limited consumer warranty Delphi Product and Service Solutions (“Delphi”) warrants all XM Satellite Radio Products sold by Delphi (each “Product”) to be free of defects in material and workmanship, subject to the following conditions: The duration of Delphi’s warranty with respect to each Product is limited to one(1) year from the date of sale to the original consumer purchaser. - Page 35 (xii) service by anyone other than a Delphi authorized repair facility, (xiii) other improper application, installation or operation of this Product, or (xiv) defects or malfunctions of which Delphi is not advised within ten (10) days of the expiration of the limited warranty period.
-
Page 36: How You (The Customer) Can Get Service
Product with the original receipt to the original place of purchase. To obtain warranty service for all Products for the remainder of the limited warranty period, you must contact Delphi by phone at 1.877.GO.DELPHI (1.877.463.3574). If further clarification or additional information is required from Delphi, you may call Delphi at 1.877.GO.DELPHI... - Page 38 Delphi Corporation 1441 West Long Lake Road Troy, Michigan 48098-5090 U.S.A.Customer Service: [1] 877 GO DELPHI www.delphi.com RoadyXT, the XM name, Roady2, and related logos are trademarks of XM Satellite Radio Inc. Printed on Recycled Paper ©2006 Delphi Corporation. All rights reserved.
Need help?
Do you have a question about the SA10276 and is the answer not in the manual?
Questions and answers