Table of Contents
Advertisement
Advertisement
Table of Contents

Related Manuals for Delphi SA10085


Summary of Contents for Delphi SA10085
- Page 1 SA10085 User Guide Satellite Radio Receiver Important: This manual contains important safety and operating information. Please read and follow the instructions in this manual. Failure to do so could result in personal injury, death, and/or damage to your Roady2 and/or to your vehicle.
- Page 2 IMPORTANT: The FCC and FAA have not certified the Delphi XM Roady2 Satellite Radio Receiver for use in any aircraft (neither portable nor permanent installation). Therefore, Delphi cannot support this type of application...
- Page 3 Welcome Thank you for purchasing a Delphi XM Your Roady2 gives you access to over 120 XM Satellite Radio channels of music, news, and information from coast-to-coast.* Your Roady2 must be used with the enclosed connecting devices (or other approved accessories) to ensure maximum performance and safety.
-
Page 4: About Delphi
About Roady Roady2 is the latest in the acclaimed line of portable devices from Delphi and XM Satellite Radio and represents the best in audio technology. The smallest and lightest satellite radio receiver currently available, Roady2 is always ready to go with you. Just plug it in and go! Roady2 now contains an integrated... -
Page 5: Table Of Contents
Contents Section 1 Getting Started: Activating Roady2 ........... .6 Section 2 Roady2 Receiver Roady2 Display Screen . -
Page 6: Getting Started: Activating Roady2
Getting Started: Activating Roady2 To quickly begin enjoying Delphi XM Satellite Radio, follow these simple steps: 1. Set up your Roady2 using the installation instructions in Section 5 of this guide (see page 17) or with the help of a professional installer. -
Page 7: Roady2 Receiver Roady2 Display Screen
Roady2 Receiver Roady2 Display Screen While tuned to an XM channel, the Roady2 default display contains information about that channel and the Roady2 settings. See figure 1. Signal-strength indicator (zero to three bars) Channel name and number Artist name Roady2 Controls Power button Number keys Display mode... - Page 8 The Roady2 unit has seven function buttons, a Tuning Wheel, and 10 number keys. Turns the Roady2 on or off. The display button toggles between four display options: display 1. Channel name, channel number, artist name 2. Channel name, channel number, song title 3.
-
Page 9: Basic Operations
Basic Operations Turning Roady2 On and Off Press on the Roady2. When first turned on, the receiver will automatically tune in to the last channel listened to and recall the previous settings. Basic Channel Selection Select a channel by number 1. - Page 10 3. Press and hold the number key corresponding to the preset you would like to set. The receiver will beep to indicate that the preset is registered. 4. When you first get Roady2, all presets go to Channel 1. Preview and select channels using the Tuning Wheel You can use your Roady2 to preview the XM channel lineup, see what is currently playing, and then decide if you want to leave your current channel.
-
Page 11: Changing The Display
Display Option 1 Display Option 2 Changing the Display display Pressing lets you change what is shown on your two-line Roady2 display during normal listening from among four options: • Display mode 1 (factory default): Shows the channel name and channel number on the first line and the artist name on the second line. -
Page 12: Menu
Menu menu Press to enter the menu section of Roady2. Here, you can change each of the following options using the Tuning Wheel pressing the Tuning Wheel button, allowing you to back out of existing sections. Following are the settings that can be changed: FM Frequency (only available when FM modulator is turned on) Roady2’s internal FM modulator can be used to send the audio to a nearby... -
Page 13: Audio Level
each available frequency until you have found an optimal frequency. In the rare circumstance that you cannot find an acceptable open frequency, change to a hard-wired FM modulator configuration using the separately available FM Modulator Direct Wiring Adaptor described in the Available Accessories section on page 29. -
Page 14: Antenna Aiming
Antenna Aiming When using the optional home kit, you can optimize the position of your home antenna using this screen. For optimal performance, your home anten- na should be positioned to maximize the satellite signal received by your Roady2. TuneSelect™ Using this function, you can program your Roady2 to alert you with a tone when a favorite song is playing on a channel other than the one you are listening to. -
Page 15: Stock Ticker
Stock Ticker This feature lets you track the Dow Jones Industrial Average (“DOW”), NASDAQ, and S&P500 indices. In addition, you can enter and track the price and daily movement of up to 20 different stock symbols. You can track the performance of any listed stock on the NYSE, NASDAQ, or AMEX. This feature is first set up by selecting “Stock Ticker”... -
Page 16: Factory Default
Auto-On Once you have installed your Roady2 and the power has been turned on using the power button set to be turned off and back on again using the ignition key in your vehicle. To change this factory-set condition and always power your Roady2 on and off with the power button then select “Off.”... -
Page 17: Installation Roady2 Kit Set-Up
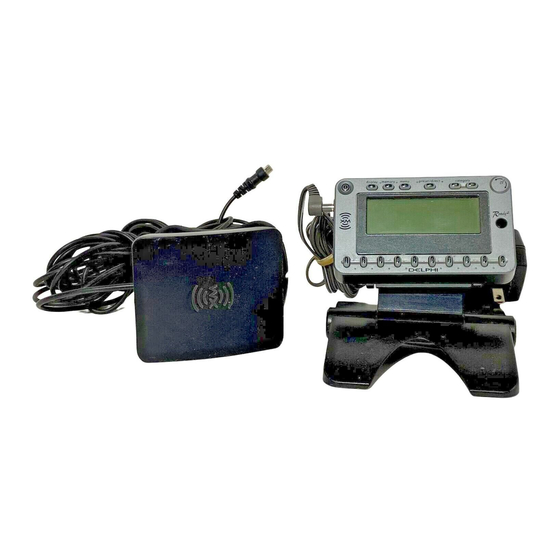
Installation Roady2 Kit Set-up Your Roady2 Kit contains the following components: Car mount XM antenna Cell phone mount adaptor Figure 4. Roady2 Kit components. Hooking up your Roady2 Receiver (Optional) Figure 5. Connect accessories to your Roady2 as shown. 12V power adaptor Cassette audio Your kit also includes: •... -
Page 18: Direct Connect
Roady2 and internal FM modulator directly to your vehicle radio’s antenna jack can be purchased. See www.delphi.com or your retailer for details. Wireless FM Modulator Many late model cars do not come with built-in cassette players. -
Page 19: Roady2 Installation
the XM audio signal wirelessly to the vehicle’s FM radio. This FM modulator is automatically turned on whenever the cassette adaptor (or other audio jack) is unplugged from the side of the Roady2. One of 12 different frequencies can be selected, as described on page 12. In order to ensure optimum perform- ance, the signal is broadcast to your car’s FM radio from both inside the Roady2, and from the included XM antenna. - Page 20 (a) Flat mount: Use the included Velcro back of Roady2 and the identified flat surface in your vehicle. (b) Vent mount: Your Roady2 kit includes an optional vent mount that can be used in place of the more permanent Velcro easily move your Roady2 and mount from car to car.
- Page 21 adhere to the vehicle’s surface. Make sure you accurately place the pad on the first try since in many cases it will bond almost immediately. 3M recommends a 72-hour curing time for maximum adhesion. 3. Clip the Roady2 onto the swivel or vent mount (figure 7).
-
Page 22: Xm Antenna Set-Up
XM Antenna Set-up Antenna Installation • Best reception is achieved with the antenna mounted on the metal surface of the vehicle roof in the center of an area with at least 12" x 12" of surface area and a minimum of 6" from a window or sunroof. Figure 8 shows three typical mounting locations. -
Page 23: Cable Routing
Cable Routing • Once you have mounted the antenna in the correct location, plan how to route the cable from this location to the receiver, avoiding blocked passages and any obstructions that could kink, crimp, twist, or chafe the cable. Figure 9 shows typical routing configurations. If the cable will come into contact with a rough metal opening, use a rubber grommet to prevent damage. - Page 24 • For antenna mounting locations at the rear of the roof, the antenna cable can be routed into the vehicle through the trunk, as shown in figure 10. Always route the cable under the weather seal near the lowest part of the trunk to help reduce possible water leaks. •...
-
Page 25: Reference
Reference Taking Care of Your Roady2 (Failure to follow these instructions may result in personal injury or damage to your Roady2 or to your vehicle.) Important: • Use only a soft, dry cloth to clean the outside of your Roady2 and any peripherals. -
Page 26: Troubleshooting
Troubleshooting Your Roady2 is designed and built to provide you with trouble-free performance without the need for service. If it does not appear to be functioning correctly, please follow these troubleshooting steps: 1. Make sure all connectors are properly attached. 2. -
Page 27: You Should
If you see this on the display: NO SIGNAL Cause: The XM signal is being blocked. ANTENNA Cause: The antenna jack that plugs into your Roady2 has probably come loose. OFF AIR Cause: The channel selected is not currently broadcasting. You should: The message should disappear as soon as you move out of an... - Page 28 If this happens: You do not receive all XM channels you have subscribed to. Cause: Your Roady2 is not activated. The audio sounds distorted The audio level is too low You cannot tune to a channel No song title or artist name displays The audio has static The audio on the XM instant...
-
Page 29: Contacting Customer Service
Contacting Product Technical Support and Customer Service For additional information in solving problems with your Roady2, contact Delphi at 1.877.GO DELPHI (1.877.463.3574) Monday—Friday. • Customer Service: 8:00 am—4:30 pm Eastern Standard Time • Technical Support: 8:00 am—8:00 pm Eastern Standard Time Customer Service and Technical Support is also available at www.delphi.com. -
Page 30: Warranty
This warranty is not transferable and applies only to the original consumer purchaser of the Product. Delphi will, as its sole obligation under this warranty, replace or repair, at its option, any Product that does not conform to this warranty. Under no circum- stances will Delphi be liable for any incidental or consequential damages under this warranty or any implied warranties. -
Page 31: How State Law Relates To The Warranty
Product with the original receipt to the original place of purchase. To obtain warranty service during the remainder of the warranty period, you must contact Delphi by phone at 1.877.GO DELPHI (1.877.463.3574). If warranty service is needed at any time during the warranty period, the purchaser will be required to furnish a sales receipt/proof of purchase indicating the date of purchase, amount paid and place of purchase. - Page 32 1441 West Long Lake Road Troy, Michigan 48098-5090 U.S.A. Customer Service: [1] 877.GO DELPHI www.delphi.com The Roady2 name, XM name, and related logos are trademarks of XM Satellite Radio Inc. Printed on Recycled Paper ©2004 Delphi Corporation. All rights reserved. DPSS-04-E-030...
Need help?
Do you have a question about the SA10085 and is the answer not in the manual?
Questions and answers