Table of Contents
Advertisement
Installation and Servicing
60F
G.C. No. 41 319 63
Fanned Flue Boilers
This is a Cat I
Reference in these instructions to British Standards and Statutory
Regulations/Requirements apply only to the United Kingdom.
For Ireland the rules in force must be used.
The instructions consist of three parts, User, Installation and Servicing Instructions, which includes the Guarantee Registration
Card. The instructions are an integral part of the appliance and must, to comply with the current issue of the Gas Safety
(Installation and Use) Regulations, be handed to the user on completion of the installation.
Thank you for installing a new Glow-worm appliance in your home.
Glow-worm appliances' are manufactured to the very highest standard so we are pleased
to offer our customers' a Comprehensive First Year Guarantee.
In the center pages are to be found your Guarantee Registration Card, which we recommend you complete and
If this card is missing you can obtain a copy or record your registration by telephoning the Heatcall Customer
Our Guarantee gives you peace of mind plus valuable protection against breakdown by covering the cost of:
All replacement parts
All labour charges
All call-out charges
One Contact Local Service
Supplied By www.heating spares.co Tel. 0161 620 6677
Instructions for Use
T o b e l e f t w i t h t h e u s e r
BS 6332
BS 5258
Appliance
2H
Guarantee Registration
return as soon as possible.
Service number 01773 828100.
REGISTER YOUR GLOW-WORM APPLIANCE
FOR 1ST YEAR GUARANTEE PROTECTION
CALL 0181 380 2555
Customer Services:
Tel: (01773) 828100
Fax: (01773) 828070
Hepworth Heating Ltd.,
Nottingham Road, Belper, Derbyshire. DE56 1JT
General/Sales enquiries:
Tel: (01773) 824141 Fax: (01773) 820569
221504A.11.98
Advertisement
Table of Contents

Related Manuals for Glow-worm Economy Plus 60F


Summary of Contents for Glow-worm Economy Plus 60F
-
Page 1: Instructions For Use
Guarantee Registration Thank you for installing a new Glow-worm appliance in your home. Glow-worm appliances' are manufactured to the very highest standard so we are pleased to offer our customers' a Comprehensive First Year Guarantee. In the center pages are to be found your Guarantee Registration Card, which we recommend you complete and return as soon as possible. -
Page 2: Table Of Contents
Important Information Testing and Certification This boiler is tested and certificated for safety and performance. It is therefore important that no alteration is made to the boiler, without permission, in writing, from Hepworth Heating Ltd. Any alteration not approved by Hepworth Heating Ltd., could invalidate the certification, boiler warranty and may also infringe the current issue of the Statutory Requirements, see Section 1.4. - Page 3 Instructions for Use Introduction Please read these instructions and follow them carefully for the safe and economical use of your boiler. The Economy Plus “F” Range are boilers designed to provide central heating and indirect domestic hot water from a fully pumped system with a fully indirect cylinder.
- Page 4 Instructions for Use Data/Serial Number Label VIEWING The GC number of the appliance can be found on the Data label, WINDOW positioned at the top right of the inner cover. The model name and serial number are located on the control box cover, visible when the controls tray is removed.
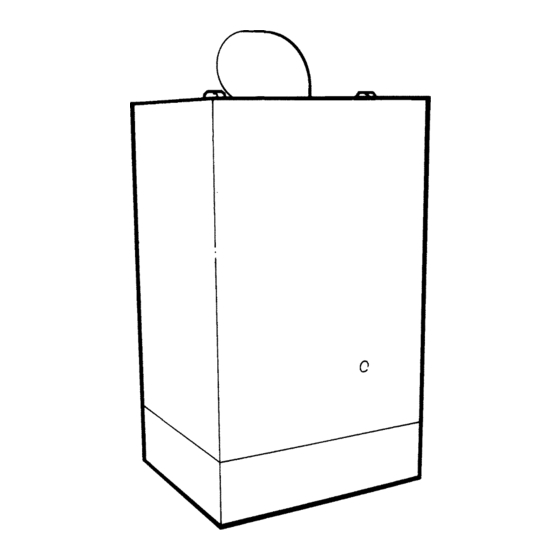
- Page 5 1 General WATER CONNECTIONS FLUE TERMINAL DETAIL GAS CONNECTIONS from boiler top. 58mm from inner case top. GENERAL ARRANGEMENT Diagram 1.1 1.1 Important Notice TABLE 1. ECONOMY PLUS DATA This boiler is for use only on G20 gas. MODEL The boiler is delivered in one pack. 26.5Kg LIFTING Wherever possible, all materials, appliances and components...
-
Page 6: General Data
1 General Detailed recommendations are contained in the current issue of 1.9 Heating System Controls the following British Standards and Codes of Practice, BS4814, The heating system should have installed: a programmer and BS5440 Part 1 and 2, BS5449, BS5546, BS6700, BS6798, room thermostat controlling the boiler. -
Page 7: Water System
2 Water System 2.6 Open (Vented) Water System Notes: Open Vented and Sealed Systems For an open (vented) system the boiler must be supplied from See chart for pressure drop of the boiler diagram 2.1. an unrestricted water supply taken from a feed and expansion cistern situated at a maximum height of 27.5metres (90ft) 2.1 Draining Tap above the boiler. - Page 8 2 Water System 2.7 Domestic Hot Water Cylinder The expansion vessel volume depends on the total water system volume and the initial system design pressure. For any The hot water cylinder must be of the double feed fully indirect system an accurate calculation of vessel size is given in the type.
- Page 9 2 Water System 2.11 Pressure Gauge METHOD 1 Mains topping up method A pressure gauge with a set pointer and covering at least 0 to 0051M METHOD 1 COMBINED 4bar (0 to 60lb in ) shall be fitted permanently to the system in CHECK VALVE HEATING a position where it can be seen when filling the system.
-
Page 10: Boiler Location
3 Boiler Location 3.1 Boiler Location The boiler may be installed in any room although particular attention is drawn to the requirements of the current issue of BS7671 with respect to the installation of a boiler in a room containing a bath or shower. Any electrical switch or boiler control using mains electricity should be so situated that it cannot be touched by a person using the bath or shower. -
Page 11: Flue
4 Flue 4.1 Flue The flue must be installed in accordance with the current issue of BS5440 Part 1. The air and flue duct connect to the top of the boiler using an elbow which can be positioned to the sides or rear. The standard flue is able to provide the duct lengths ranges shown in diagram 4.2 rear flue and 4.3 side flue. - Page 12 4 Flue 4.4 Flue Collar Kit A flue collar kit, part No.443286 (with instructions) is available. This can be used to cover the flue, as shown in diagram 4.4 Please note, the use of this collar will mean that the flue lengths will need to be altered, full instructions are given in the kit.
-
Page 13: Preparation
5 Preparation 5.1 Unpacking 5.2 Flue Preparation Open the carton and check the items supplied against the list on All flue assemblies are designed for internal installation, given the flap, see diagram 5.1. that there is sufficient clearances opposite to the flue exit for installation of the flue and the fixing of side panels. - Page 14 5 Preparation No. 10x ø ø PLUG TOP BOILER MOUNTING TEMPLATE HOLES MOUNTING PLATE FIXING POINT SECURING ø SCREW (2) MOUNTING ø PLUG PLATE BOILER MOUNTING and PLATE FIXING POINTS Diagram 5.4 5.4 Flue Hole Cutting Having marked out the flue centre cut a hole for the flue using, preferably, a 115mm minimum core drill.
- Page 15 5 Preparation 5.7 Air Duct/Terminal (Standard or Long) Mark the duct length, see diagram 5.7 for Rear flue and diagram 5.8 for Side flue, then cut square and remove any burrs. LONG FLUE TERMINAL 5.8 Air Duct/Terminal and Flue Duct Assembly Locate the flue duct into the air duct/terminal, see diagram 5.9.
- Page 16 5 Preparation 5.10 Internal Flue Installation If access to the outside wall is not practical, the flue system can be installed from inside. Use of the optional wall liner kit DRILL SIZE recommended. Secure the flue elbow to the air duct/terminal with the two self SEAL WITH AIR DUCT/TERMINAL &...
- Page 17 5 Preparation 5.12 Boiler Preparation Remove the controls tray and outer case and place on one side until required, see diagram 5.13. Discard packing piece from between front cover and inner case Note: If convenient, a connection can be made to the gas service cock at this time.
-
Page 18: Water Connection
6 Water Connections Make the water connection to the heating system, see diagram 6.1. UNION NUT The boiler has compression connections, with nuts and olives supplied loose in the fittings pack, to accept 28mm outside diameter copper tubing to BS2871. The right hand connection is the flow from the boiler. - Page 19 7 Flue Assembly Installation 7.3 Internal Flue Installation Push the flue assembly into and through the wall, see diagram 7.3. 7.4 Flue/Boiler Connection Secure the flue elbow and gasket to the boiler with the three screws and washers, previously removed, see diagram 7.4. Replace the fan and mounting plate assembly ensuring engagement of the fan into the flue elbow and the fan retaining bracket, see diagram 7.5 and secure with the two screws...
-
Page 20: Gas Connection
8 Gas Connection Make the gas connection, refer to diagram 8.1. GAS SERVICE COCK (shown on ) GAS VALVE (cover removed for clarity) Diagram 8.1 9 Electrical Connection 9.1 Electrical Connection 9.3 Testing - Electrical WARNING. This boiler must be earthed. Checks to ensure electrical safety should be carried out by a competent person. -
Page 21: Commissioning
9 Electrical Connection FIXING SCREWS PUMP CABLE LIP BRACKET CABLE CLAMPS MAINS CABLE CONTROL BOX Diagram 9.2 Remove red ink between 9 & SL When fitting a time control etc (if no switch is fitted, link will make the circulation pump run constantly) CONTROL BOX TERMINAL Diagram 9.3 10 Commissioning... - Page 22 10 Commissioning Temporarily disconnect the black cable from the main solenoid and insulate the connector with tape. FLUE HOOD Remove the combustion chamber front panel, securing screws, WING NUTS see diagram 10.2. Switch on the electrical supply to the boiler and heating system. Make sure that any remote controls are calling for heat.
- Page 23 10 Commissioning 10.4 Testing - Gas With the boiler on proceed as follows: Test for gas soundness around the boiler gas components using a suitable leak detection fluid, in accordance with the current issue of BS6891. Check the main burner gas pressure at least 10 minutes after the boiler has lit, refer to Data label.
-
Page 24: Completion
10 Commissioning SECURING SCREW (2) DATA LABEL SECURING SCREW SECURING SCREW (4) WING PILOT FRONT INNER VIEWING COVER CASE WINDOW CONTROLS TRAY VIEWING WINDOW Diagram 10.6 Diagram 10.7 OUTER CASE 11 Completion 11.1 User Information Hand the Instructions for Use to the user for their retention. Instruct and demonstrate the efficient and safe operation of the boiler, heating system and if fitted, the domestic hot water system. -
Page 25: Servicing
12 Servicing Notes: To ensure the continued efficient and safe operation of Place a sheet of paper in the base of the combustion chamber the boiler it is recommended that it is checked and serviced at and clean the heat exchanger thoroughly with a suitable stiff regular intervals. -
Page 26: Fault Finding
12 Servicing 12.2 Burner and Injector Cleaning ELECTRODE With the main burner removed, brush off any deposits from the burner, ensuring that the flame ports are unobstructed. Do not use a brush with metallic bristles. Check the main burner injector, see diagram 12.2, for blockage PILOT BURNER or damage and remove if necessary. - Page 27 13 Fault Finding 13.1 Electrical Important. On completion of the Service/Fault Finding task which has required the breaking and remaking of the electrical bk BLACK w WHITE connections the earth continuity, polarity, short circuit and br BROWN r RED resistance to earth checks must be repeated using a suitable br BLUE y YELLOW multimeter.
- Page 28 13 Fault Finding Before detailed checking of electrical components ensure that remote controls are calling for heat. Check the gas supply is free of obstructions and purged of air. Check the overheat cutoff has not operated. Isolate the electrical supply and physically check ALL cables, connections and the printed circuit board fuse.
- Page 29 13 Fault Finding Pump overrun Operation The Control Thermostat has a pump overrun facility built into it, when the Control Thermostat is set at maximum only, the pump overrun will keep the pump running to allow the boiler to cool down after which it will stop, providing the remote controls are NOT calling for heat.
- Page 30 13 Fault Finding BLUE DOUBLE SOLENOID GAS VALVE BLACK FLAME SENSE/ YELLOW SPARK ELECTRODE BLACK PRESSURE BLUE SWITCH GRN/ YEL. BROWN CHASSIS GREEN/YELLOW CHASSIS EARTH EARTH Remove red link between 9 & SL when fitting GRN/YEL a time control etc (if no switch is fitted, link GRN/YEL will make the circulation pump run constantly) SEQUENCE...
-
Page 31: Replacement Of Parts
14 Replacement of Parts 14.4 Control Board (PCB): Diagram 14.2. Notes Remove the control box, refer to Section 9. Replacement of parts must be carried out by a competent person. Disconnect the three electrical plugs and ignition lead. Before replacing any parts isolate the boiler from the electrical Release the cables from the plastic retaining clip and disconnect supply and turn the gas supply off at the gas service cock, see the cables, including the earth connection, from the PCB to the... - Page 32 14 Replacement of Parts 14.6 Control Thermostat - diagram 14.3 14.8 Control Thermostat and Overheat Cutoff Capillaries and Phials - diagram 14.4 Pull off the control thermostat knob. Remove the cable ties retaining the capillary(s), see diagram Remove the electrical connections from the thermostat body. 14.1.
- Page 33 14 Replacement of Parts 14.10 Gas Valve: Diagram 14.6 Remove the gas valve cover, retaining screw, see diagram 10.1. Disconnect the electrical connections at the gas valve. Disconnect the pilot tube nut at the gas valve. Support the gas valve, remove the four extended screws from the flanged connections at each end of the valve and remove the valve by easing the flanges apart.
-
Page 34: Combustion Chamber
14 Replacement of Parts 14.12 Fan: Diagram 7.2 COMBUSTION Gain access as described in the servicing section for “Heat CHAMBER Exchanger Cleaning”. FRONT COVER Fit new fan. INSULATION 14.13 Main Burner SECURING Gain access as described in Servicing to remove and replace SCREW the burner. -
Page 35: Spare Parts
14 Replacement of Parts 14.17 Pilot Viewing Window: Diagram 14.10 Remove the two screws and then the viewing window. INNER Replace the damaged component(s). CASE When replacing take care not to damage the gasket. SEAL INNER 14.18 Inner Case Seal: Diagram 14.10 CASE Remove the inner case. -
Page 36: Diagram
15 Spare Parts Diagram 15.1 Because of our constant endeavour for improvement details may vary slightly from those in the instructions. 221504A Supplied By www.heating spares.co Tel. 0161 620 6677...
Need help?
Do you have a question about the Economy Plus 60F and is the answer not in the manual?
Questions and answers