Table of Contents

Summary of Contents for Boyertown Furnace RSM 500
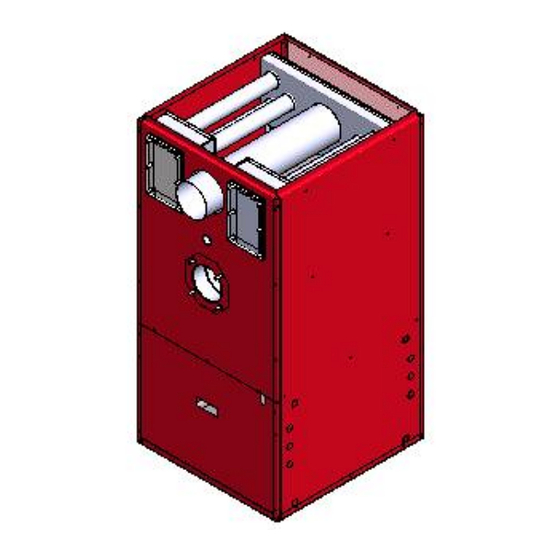
- Page 1 Regal Star Series RSM 500/600/750 Installation, Operation and Maintenance Manual Keep these instructions with the furnace at all times for future reference Boyertown Furnace Co. PO Box 100 Boyertown, PA 19512 610-369-1450 www.boyertownfurnace.com 9-1-15...
- Page 2 Be Aware of Hazard Definitions Denotes presence of a hazard which, if ignored, will result in severe personal injury, Danger death or property damage Denotes presence of a hazard which, if ignored could result in severe personal injury, Warning death or substantial property damage. Denotes the presence of a hazard, which if ignored, could result in minor personal injury Caution or property damage...
-
Page 3: Table Of Contents
TABLE OF CONTENTS PAGE NO. FURNACE SPECIFICATIONS INSTALLATION CLEARANCES Standard Clearances Reduced Clearances DUCT WORK Sizing Blower Specifications Filter Racks Multiple Furnace Installation VENTING Direct Venting Chimney Venting Chimney Relining Chimney Connector Power Venting Vent Dampers VENTILATION AND COMBUSTION AIR BURNER INSTALLATION WIRING Power... -
Page 4: Furnace Specifications
Specifications RSM 500 RSM 600 RSM 750 Firing Rate GPH 0.50 0.60 0.75 Input Btu/Hr 70,000 84,000 105,000 Heating Capacity Btu/Hr 60,000 72,000 89,000 Temperature Rise 60°F 60°F 60°F Flue Size 5”Frt/Rear 5”Frt/Rear 5”Frt/Rear Filter Size 16 x 20 16 x 20... -
Page 5: Installation Clearances
Table 1 Standard Installation Clearances High Boy Configuration Sides Front Rear Flooring Chimney Plenum MODEL “A” “B” “C” “D” Connector Top & “E” Sides RSM 500 2” 2” Closet-18” 6” Combustible 6” 2” RSM 600 2” 2” Closet-18” 6” Combustible 6” 2”... - Page 6 handling capacity of a duct system. By utilizing the Tables 3 through 5, one can obtain the necessary duct system size. Use a supplier's catalog for proper sizing of outlet and return air registers to insure that the register will meet the CFM requirements of the run to which it is connected. Do not exceed the recommended flow rate.
-
Page 7: Filter Racks
Table 3 Recommended Maximum Duct Velocities, Feet Per Minute (FPM) Main Ducts* Branch Ducts Application Supply Return Supply Return Apartments Auditoriums 1200 1000 1000 Banks 2000 1500 1600 1200 Hotel Rooms 1500 1300 1200 1000 Libraries 2000 1500 1600 1200 Meeting Rooms 2000 1500... - Page 8 AIR FILTERS To maintain furnace performance and safety, inspect filters monthly during the heating or cooling season and replace if dirty. Use new approved disposable filters of the same size and type, or clean permanent filters according the the manufacturer’s instructions. Replace or clean the filter more often if dusty conditions exist.
- Page 9 ECM Motor Air Flow Selection Air flow settings for both heating and cooling are made by setting the heat and the cool airflow DIP switches to the proper location. Ensure the furnace power supply is off before adjusting blower speeds. Do not adjust the heating air flow below the firing rate of the furnace. The air flows for heating are designed to give a 60 F temperature rise.
- Page 10 16 x 4 Wire Box Connections The remote mounted 16 x 4 wire box translates the thermostat and control signals from the NrgMax board into the appropriate air flow signal for the motor. In standby and all operating modes the “RX” and “TX”...
- Page 11 Volts Full Capacitor Rotation Blower Blower Blower Load 370 volt Model Speed Speed Amp. Heat RSM 500 1075 10.2 100-10T RSM 600 1075 10.2 100-10T RSM 750 1075 10.2 100-10T Table 8 PSC Motor Air Flow vs. Static Pressure Motor 0.2”...
-
Page 12: Venting
NFPA 211 and NFPA 31 Direct Vent The furnace can be direct vented when used in conjunction with the Boyertown Furnace Direct Vent Kit. For complete direct vent application and installation instructions consult the Furnace Direct Vent Kit Z- Flex DVO manual. -
Page 13: Chimney Relining
Four plates, flaring down, can be added to help insure that the wind will pass straight over the chimney outlet. Chimney Relining A tile lined masonry chimney serving an oil fired furnace should comply with applicable building codes such as NFPA-211. An additional listed lining may be required to reduce transient low draft during startup and acid water condensation during cyclic operation. -
Page 14: Power Venting
the chimney. A thimble should be used to connect the vent connector pipe to the chimney so that the vent connector pipe may be readily removed in case of inspection or replacement. Connection to the chimney must be made above the bottom of the chimney to avoid blockage. Vent piping should extend just into the chimney far enough to expel flue gasses. -
Page 15: Burner Installation
Table 9 Beckett Burner Specifications Furnace Model Burner Delavan Pump Head Tube Insertion Static Model Nozzle Press. Band Shutter Length Plate RSM 500 0.40X60 º 9” 4-1/4” 3-3/8 RSM 600 3-3/8 0.50X60 º 9” 4-1/4” RSM 750 º 3-3/8 0.60X60 9”... -
Page 16: Wiring
Table 10 Riello Burner Specifications Furnace Model Burner Delavan Pump Turbulator Tube Insertion Model Nozzle Press. Setting Setting Length RSM 500 º 40F3 0.40X80 1.50 8” 4-1/4” º RSM 600 0.50X80 40F3 2.75 8” 4-1/4” RSM 750 º 0.60X80 40F3 3.25... - Page 17 Conventional System (1) Stage Heat (1) Cool PSC Motor Conventional System (1) Stage Heat (1) Cool ECM Motor “O” Terminal to be energized for Cooling Only Humidistat breaks on high humidity. Jumper “R”-“DH” if not used.
- Page 18 Conventional System (1) Stage Heat (2) Cool ECM Motor “O” Terminal to be energized for Cooling Only Humidistat breaks on high humidity. Jumper “R”-“DH” if not used. Heat Pump (1) Stage Heat (1) Stage Cool PSC Motor - Furnace Auxiliary Heat...
- Page 19 Heat Pump (1) Stage Heat (1) Stage Cool ECM Motor - Furnace Auxiliary Heat O” Terminal on NRG Max terminal is to be energized on cooling. If thermostat “O/B” terminal energizes for heating do not connect to NRG Max “O” terminal. Humidistat breaks on high humidity.
- Page 20 Furnace Wiring PSC Motors...
- Page 21 Furnace Wiring Nidec ECM Motors...
-
Page 22: Oil Tank And Piping
Oil Tank and Piping WARNING Installation of oil tanks must meet all local codes and ordinances. Refer to NFPA-31 for complete guidelines on oil tank installations internal to the building, outside above and below ground tanks. Oil tanks located inside the building shall not be in excess of 275 gallons individual capacity and shall not be located within 5 feet horizontally from any source of heat, either internal or external to the º... - Page 23 REQUIRED TO MAKE IT. This problem becomes proportionately larger with underground tanks. Connect vacuum gauge to oil pump. Suction vacuum must not exceed 10 inches of mercury for single stage pumps and 15 inches for two stage pumps. It is preferable to stay below these limitations. When the suction line is tight and properly installed the pump will hold its vacuum for a minimum of 60 minutes after shutdown.
-
Page 24: Start Up
Start-Up Use number No. 1 or No. 2 fuel oil only. WARNING Do not attempt to start the burner if excess oil has accumulated. Do not use gasoline, crankcase draining or any oil containing gasoline. This equipment must be adjusted and started only by a qualified service agency – an individual or agency, licensed and experienced with all codes and ordinances, and who is responsible for the installation and adjustment of the equipment. -
Page 25: Burner Adjustments
8. Volt meter 9. Amp meter Burner Adjustments Allow the burner to operate for at least 10 minutes before making the following adjustments. The factory burner settings may not be suitable for specific job conditions. Do not attempt to make any adjustments or start the furnace without the proper equipment. 1. -
Page 26: Operating And Maintenance
Operating and Maintenance Instructions WARNING The furnace must be installed, adjusted and maintained only by a qualified service agency annually. Have your unit inspected, cleaned and adjusted at least once a year to assure proper operation. In the event of extended shut down of the furnace have a qualified service person inspect before restarting the furnace. -
Page 27: Vent System
Nozzles: ANY NOZZLE REPLACEMENT SHOULD BE OF THE EXACT TYPE AS THE ORIGINAL SUPPLIED BY THE MANUFACTURER. Use extreme care in handling nozzles to avoid scratches or dirt that could cause leaks or affect the oil spray pattern. Perform the combustion checks as per the burner manual and the furnace manual. Blower Removal 1. -
Page 28: Parts Breakdown Lists
Item Description Part No. BURNER - BECKETT 540609B BURNER - RIELLO 540820 BURNER - CARLIN 540820 CLEAN OUT COVER COMPLETE 17150 CLEANOUT COVER GASKET 489017 BRASS PLUG 1/4" NPT 712350 3/4” X 1/4" BUSHING 310410 1” WASHER 310094 FLUE COLLAR 17340 JACKET FRONT PANEL 17005... -
Page 29: Troubleshooting Guide
Troubleshooting Guide WARNING This equipment must be serviced, adjusted and started only by a qualified service agency – an individual or agency, licensed and experienced with all codes and ordinances, and is responsible for the installation and adjustment of the equipment. Burner Goes Off on Safety Oil T ank Full Fill T ank... - Page 30 Burner Will Not Start T hermostat Set Adjust Above Room T hermostat T emperature Check Supply 120 Volts at Fuses and Furnace Disconnects 120 Volts at Fan and Limit Replace Burner Control Operational Fan and Limit Check all Wiring Burner Off on Refer to Burner Safety Manual...
- Page 31 Nidec ECM Troubleshooting General Troubleshooting 1. Check unit for power. 2. Disconnect or turn off power to the furnace, air handler, or system being serviced and wait 2 minutes. This allows the capacitors in the control unit to fully discharge. 3.
- Page 32 Control Unit Verification 1. Disconnect or turn off power to the furnace, air handler, or system being serviced and wait 2 minutes. This allows the capacitors in the control unit to fully discharge. 2. Remove 3 screws securing the motor and control unit together. Grasp the Control Unit and pull away from motor until both units are separated.
- Page 33 levels are greater than 100K, the control unit is functioning properly. If the multimeter resistance levels are less than 100K replace the control unit. Motor Verification 1. Disconnect or turn off power to the furnace, air handler, or system being serviced and wait 2 minutes.
-
Page 34: Warranty
Boyertown’s nameplate to be free from defects in workmanship or material for a period of years as indicated below under normal use and service at a firing rate of number (2) oil not exceeding that shown on its rating plate on all models of Boyertown Furnace. If... -
Page 35: Installation And Service Checklist
Reviewed owners’ information in this manual with owner or maintenance personnel and instructed to keep for future reference? □ Properly filled in and returned warranty registration card to Boyertown Furnace Co. Inserted burner manual instructions with furnace manual for future use? -
Page 36: Warranty Registration
__________________________________________ __________________________________________ __________________________________________ __________________________________________ __________________________________________ __________________________________________ --------------Cut and Return This Form or Register Online at www.boyertownfurnace.com---------------------- Boyertown Furnace Co. P.O. Box 100 Boyertown, PA 19512 Date Installed: ___________________________ Furnace Model: __________________________ Serial Number: ________________________ Name of Purchaser: _________________________________________________________________________ Purchaser’s Address: ________________________________________________________________________ ________________________________________________________________________ Dealer’s Name: _____________________________________________________________________________...
Need help?
Do you have a question about the RSM 500 and is the answer not in the manual?
Questions and answers