Table of Contents
Advertisement
Quick Links
Contact Details for Oricom Support and
Express Warranty Claims in Australia
Oricom International Pty Ltd
Locked Bag 658
South Windsor, NSW 2756
Australia
Email: support@oricom.com.au
Phone: 1300 889 785 or (02) 4574 8888
(Monday to Friday 8am to 6pm AEST)
Web: www.oricom.com.au
Fax: (02) 4574 8898
Contact Details for Oricom Support and
Express Warranty Claims in New Zealand
Email: support@oricom.co.nz
Phone: 0800 674 266
(Monday to Friday 10am to 8pm NZST)
Web: www.oricom.co.nz
Ref: 13052014
Advertisement
Table of Contents

Related Manuals for Oricom UHF2180


Summary of Contents for Oricom UHF2180
- Page 1 Contact Details for Oricom Support and Express Warranty Claims in Australia Oricom International Pty Ltd Locked Bag 658 South Windsor, NSW 2756 Australia Email: support@oricom.com.au Phone: 1300 889 785 or (02) 4574 8888 (Monday to Friday 8am to 6pm AEST) Web: www.oricom.com.au...
-
Page 2: Operating Instructions
Operating Instructions UHF2180 80 Channel UHF 2-way 8 Citizen Band Radio Keep this user guide for future reference. Always retain your proof of purchase in case of warranty service and register your product on line at: AUSTRALIA: www.oricom.com.au... - Page 3 Need Help? If you need assistance setting up or using your Oricom product now or in the future, call Oricom Support. Australia 1300 889 785 or (02) 4574 8888 www.oricom.com.au Mon-Fri 8am – 6pm AEST New Zealand 0800 674 266 www.oricom.co.nz...
-
Page 4: Table Of Contents
During this time wideband channel use will be gradually phased out as users upgrade their existing radio’s. This means that the new Oricom narrowband radio you have purchased will have more channels than older wideband radios. Some of these channels are locked and cannot be used, (see the attached channel chart for more information). -
Page 5: Safety Information And Warnings
Safety Information and Warnings Safety Information and Warnings Information on Safe Operation Read This Information Before Using Your Oricom Radio. WARNING The operation of your UHF radio in Australia and New Zealand is subject to conditions in the following licenses:... - Page 6 • Do not immerse or expose the batteries to water or other liquids. • If you believe the batteries are damaged, remove product from the charger and stop using the product. Contact Oricom for assistance. • Never use damaged batteries as they may explode. • Remove batteries when they are no longer able to hold a charge and when the equipment will not be used for an extended period of time. Dispose of the batteries according to local regulations, never in your household rubbish.
- Page 7 “blasting area” or in areas posted: “Turn off the two way radio.” Obey all signs and instructions. Exposure to Radio Frequency Energy Your Oricom two-way radio complies with Australian Communications Authority Radio communications (Electromagnetic Radiation-Human Exposure) Standard, 2003. To assure optimal radio performance and make sure...
- Page 8 Safety Information and Warnings Radio Operation and EME Exposure Unauthorized antennas, modifications, or attachments WARNING could damage the radio and violate compliance. Do NOT hold the antenna when the radio is “IN USE.” Holding the antenna reduces the effective range. Do not use the radio if the antenna is damaged.
- Page 9 Safety Information and Warnings Medical Devices - Pacemakers The Advanced Medical Technology Association WARNING recommends that a minimum separation of 6 inches (15cm) be maintained between a handheld wireless radio and a pacemaker. These recommendations are consistent with the independent research by and recommendations of the U.S.
-
Page 10: Getting Started
Getting Started Installation Removing the Belt Clip Pull the Belt Clip latch forward (away from the unit) Belt Clip latch While pulling the Belt Clip latch, push up the Belt Clip as shown in Figure1. Installing the Belt Clip Slide the Belt clip into the slot as shown in Figure2. -
Page 11: Charging The Batteries
When the battery level reaches it minimum level, the unit will emit two beep tones and automatically it will power off. Your UHF2180 can detect the battery charge in 4 levels; Battery charge at high level. Battery charge at medium level. -
Page 12: Battery Life
For in vehicle charging, the SM5100 accessory kit is available which contains 2 car chargers and 2 shoulder speaker mics. These can be purchased from your re seller or online at www.oricom.com.au Transmitting range The talk range depends on the environment and terrain. The radio can reach (up to about 10km) in wide open spaces, without obstructions such as hills or buildings. -
Page 13: Oricom Uhf2180 Instructions
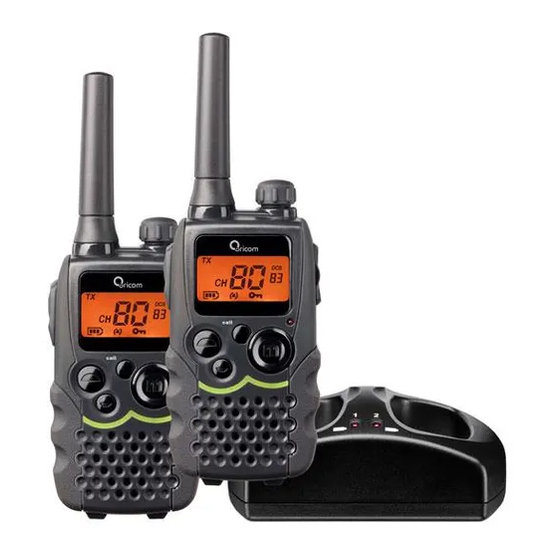
Oricom UHF2180 instructions Oricom UHF2180 instructions Antenna PWR/VOL Switch - Rotate clockwise/ counter clockwise to LCD Screen turn the unit ON or OFF. - Displays the current channel s e l e c t i o n a n d o t h e r r a d i o symbols. -
Page 14: Operation
The volume level will increase or decrease by rotating the Power/Vol button. Changing Channels The UHF2180 has 80 available channels, to communicate with other radio’s, it must have your radio tuned to the same channel. a. Press the MENU button once, the current channel number flashes on the LCD Screen. -
Page 15: Transmitting And Receiving
The UHF2180 transmission is SIMPLEX “one way-at- a-time.” While you are speaking, you can not receive a transmission. The UHF2180 is an open-license band. Always identify yourself when transmitting on the same channel. IMPORTANT: Before transmitting on a UHF channel listen to ensure... - Page 16 Operation Transmitting (sending a speech) The unit is continuously in the Receive mode when the unit is turned ON and not transmitting. When a signal is received on the current channel, “RX” icon will be displayed on the LCD screen and the receiver LED will light up.
- Page 17 VOX operation is not recommended if the radio will be used in a noisy or windy environment. A PTT headset is also available under part number KESP-300-0 from your re-seller or at www.oricom.com.au Activating the Auto Channel Scan Channel scan perform searches for active signals in an endless loop for all 80 channels, 38 CTCSS codes and all 83 DCS codes.
- Page 18 (if applicable) will hear the Call-ring tone. Selecting a Call- Ring tone Your UHF2180 is equipped with 15 different types of Call-Ring tones. a. Press the MENU button 8 times, the “C 1” icon will display and flash on the LCD Screen.
- Page 19 Operation Setting the Roger Beep The Roger beep is a tone which is automatically transmitted whenever the PTT button is released. This alerts the receiving party to inform you that you have intentionally ended the transmission, and you are now in receive mode. a.
- Page 20 Operation e. Continue pressing the MENU button to change the DCS code. f. Press the UP or DOWN button to select the desired DCS code (1-83) g. P ress the PTT button to confirm your setting. Duplex operation via Repeaters This feature allows to use local repeater stations that are designed to automatically re-transmit your broadcast over a large area thus giving you increased range.
- Page 21 Operation Receive Channel Transmit channel 34 35* 36 37 38 Receive Channel 44 45 46 47 48 Transmit channel 74 75 76 77 78 * Channel 5 is emergency channel only Repeater Station Setting the Repeater function a. Select your repeater channel to suit the repeater station you wish to access (Channels 1 –...
-
Page 22: Key Lock
Auxiliary Features Key Lock The Key Lock feature allows the user to disable the UP, DOWN and MENU buttons so that the UHF2180 settings could not be changed accidentally. a. To activate the key Lock feature, press and hold the MENU button until key lock “... -
Page 23: Uhf Channels And Frequencies
UHF channels and frequencies Channel Frequency Table Radiocommunications (Citizen Band Radio Stations) Class Licence 2002 No licence is required to own or operate this radio in Australia and New Zealand. The Radiocommunications (Citizen Band Radio Stations) Class Licence 2002 contains the technical parameters, operating requirements, conditions of licence and relevant standards for Citizen Band (CB) radios. - Page 24 UHF channels and frequencies 476.6500 476.6500 477.1500 477.1500 476.6625 476.6625 477.1625 477.1625 476.6750 476.6750 477.1750 477.1750 476.6875 476.6875 477.1875 476.7000 476.7000 477.2000 477.2000 476.7125 476.7125 477.2125 476.7250 476.7250 477.2250 477.2250 476.7375 476.7375 477.2375 476.7500 476.7500 477.2500 477.2500 476.7625 476.7625 477.2625 476.7750 476.7750 477.2750...
- Page 25 UHF channels and frequencies Channels 22 and 23 are for Telemetry and Telecommand use, voice communications are not allowed on these channels by law. Channel 9 and above are the best choices for general use in Simplex mode. 38 CTCSS CODE LIST CODE Frequency(Hz) CODE...
-
Page 26: Customer Support
Important Please retain your purchase receipt and attach to the back page of this user guide as you will need to produce this if warranty service is required. Take a few moments to register your product online: www.oricom.com.au... -
Page 27: Express Warranty
You are also entitled to have the goods repaired or replaced if the goods fail to be of acceptable quality and the failure does not amount to a major failure. Oricom warrants that the product is free from defects in materials or workmanship during the Express Warranty Period. - Page 28 No change to the conditions of this Express Warranty is valid unless it is made in writing and signed by an authorised representative of Oricom. Oricom will not be liable under this Express Warranty, and to the extent permitted by law will not be liable for any defect, loss, damage or injury arising out of or in connection with a: 1.
- Page 29 Please note that if a Customer Support Team member advises that your product does not qualify for return, this warranty does not apply to your product. Products that are authorised to be returned to Oricom in Australia must include all of the following: • A completed Return Authorisation form...
-
Page 30: Information
Express Warranty Important Information Repair Notice Please be aware that the repair of your goods may result in the loss of any usergenerated data (such as stored telephone numbers, text messages and contact information). Please ensure that you have made a copy of any data saved on your goods before sending for repair.
Need help?
Do you have a question about the UHF2180 and is the answer not in the manual?
Questions and answers