Advertisement
Quick Links
ORICOM CUSTOMER SUPPORT
Oricom have a trained and dedicated team of Customer Support
Representatives, each with the knowledge and resources to assist in
answering your questions quickly and efficiently.
Oricom Support - Australia
For all product enquiries, troubleshooting or to discuss the range of
Oricom products, feel free to contact Oricom or visit our website for
answers to frequently asked questions.
02 4574 8888
Monday - Friday 8am – 6pm AEST
Email: support@oricom.com.au
www.oricom.com.au
Oricom Support - New Zealand
0800 674 266
Monday - Friday 10am – 8pm NZST
Email: support@oricom.co.nz
Ref: 31082021
Advertisement

Related Manuals for Oricom UHF2200


Summary of Contents for Oricom UHF2200
- Page 1 Oricom Support - Australia For all product enquiries, troubleshooting or to discuss the range of Oricom products, feel free to contact Oricom or visit our website for answers to frequently asked questions. 02 4574 8888 Monday - Friday 8am –...
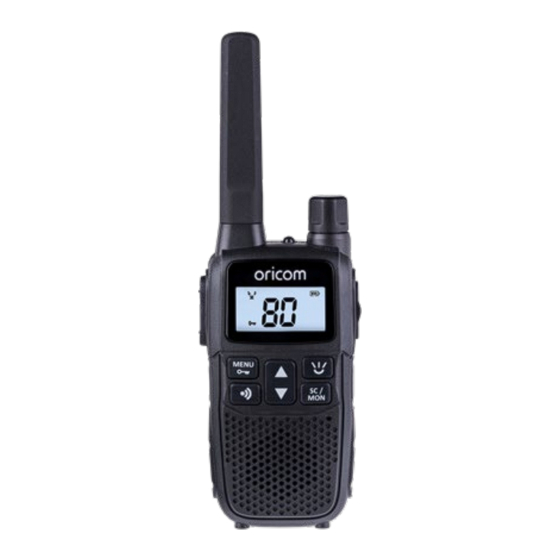
- Page 2 Operating Instructions UHF2200 80 Channel UHF 2 Way Citizen Band Radio Keep this user guide for future reference. Always retain your proof of purchase in case of warranty service. www.oricom.com.au...
- Page 3 Need Help? If you need assistance setting up or using your Oricom product now or in the future, call Oricom Support. Australia 02 4574 8888 www.oricom.com.au Mon-Fri 8am – 6pm AEST New Zealand 0800 67 42 66 www.oricom.co.nz Mon-Fri 10am – 8pm NZST...
-
Page 4: Table Of Contents
Table of contents Safety Information and Warnings ......4 Getting Started ............10 Oricom UHF2200 instructions ......... 15 Operation ..............17 Channel Frequency Table ........26 Troubleshooting guide ..........29 Customer Support ........... 30 Express Warranty (Australia) ........31 When a narrowband radio receives a transmission from an older wideband radio the speech may sound loud and distorted –... -
Page 5: Safety Information And Warnings
Safety Information and Warnings Safety Information and Warnings Information on Safe Operation Read This Information Before Using Your Oricom Radio. WARNING The operation of your UHF radio in Australia and New Zealand is subject to conditions in the following licenses:... - Page 6 Safety Information and Warnings Read all these Safety Warnings before you install batteries. WARNING • Do not dispose of the batteries in a fire as they may explode. • Exercise extreme care when handling batteries in order not to short the battery with conducting materials such as rings, bracelets and keys.
- Page 7 Safety Information and Warnings WARNING: Risk of explosion if battery is replaced by an incorrect WARNING type. Potentially Explosive Atmospheres Turn your radio OFF when in any area with a potentially explosive atmosphere. Sparks in such areas could cause an explosion or fire resulting in injury or even death.
- Page 8 Safety Information and Warnings Exposure to Radio Frequency Energy Your Oricom two-way radio complies with Australian WARNING Communications Authority Radio communications (Electromagnetic Radiation-Human Exposure) Standard, 2003. To assure optimal radio performance and make sure human exposure to radio frequency electromagnetic energy is within the guidelines set out in the above standards always adhere to the following procedures.
- Page 9 Safety Information and Warnings Radio Operation and EME Exposure Unauthorized antennas, modifications, or WARNING attachments could damage the radio and violate compliance. Do NOT hold the antenna when the radio is “IN USE.” Holding the antenna reduces the effective range. Do not use the radio if the antenna is damaged.
- Page 10 Safety Information and Warnings Medical Devices - Pacemakers The Advanced Medical Technology Association WARNING recommends that a minimum separation of 6 inches (15cm) be maintained between a handheld wireless radio and a pacemaker. These recommendations are consistent with the independent research by and recommendations of the U.S.
- Page 11 Safety Information and Warnings Other Medical Devices If you use any other personal medical device, WARNING consult the manufacturer of your device to determine if it is adequately shielded from RF energy. Your physician may be able to assist you in obtaining this information.
-
Page 12: Getting Started
Getting Started Installing the Batteries Lift the battery cover lock to open then remove the battery cover. Install the rechargeable batteries by following the orientation as shown in Figure 1. Replace the Battery compartment cover and lock. WARNING Figure 1 •... - Page 13 Getting Started CHARGING WITH AC Adaptor To charge directly with AC adaptor instead of the cradle, please make sure the radio is off before charging. Plug the adaptor into the wall socket and the other end into the radio earphone jack. The LCD Icon will flash.
- Page 14 Flat, open areas Buildings or trees Dense foliage or Also near residential mountains. Also inside buildings some buildings UHF2200 Pack Contents: 1 x UHF2200 UHF CB Radio 1 x AC Adaptor 4 x AAA 600mA Ni-MH Rechargeable Batteries 1 x Belt Clip...
- Page 15 Getting Started Oricom UHF2200 Accessories The following Oricom UHF2200 accessories can be purchased directly from Oricom. Visit www.oricom.com.au or call (02) 4574 8888. Model No. Description 2U0175 Heavy duty speaker microphone 2U0176 Twin charging cradle 2U0177 AC adaptor 2U0178 Car charger...
-
Page 16: Oricom Uhf2200 Instructions
Oricom UHF2200 instructions Oricom UHF2200 2-Way CB Radio 1. Antenna 2. Torch LED 3. PTT key 4. Menu / Key lock key 5. Call Tone key 6. Down key 7. Power On/Off/Volume Knob 8. LCD display 9. Earphone & Charger Jack 10. - Page 17 Oricom UHF2200 instructions LCD DISPLAY ICONS 1. TX 8. CTCSS 2. RX 9. Code for CTCSS/DCS 3. Dual Watch 10. APO (Auto Power Off) 4. VOX 11. Main Channel Digits 5. Repeater 12. Key Lock 6. Battery Level 13. Vibrator 7.
-
Page 18: Operation
You have 10 seconds to decide before auto-reverting back to the main screen. Your UHF2200 is simplex “one way at a time”. While you are speaking, you can not receive a transmission. Your UHF2200 is an open- ‐license band. Always identify yourself when transmitting on the same channel. - Page 19 Operation Key Lock Press and hold key for 3 seconds, LCD displays icon. All keys are locked except PTT , torch and key. To unlock, press and hold key for 3 seconds again. Torch Press key to turn on the LED torch. Press the again to turn the torch off.
- Page 20 Operation Transmitting and Receiving The radio has 75 main frequencies and 38 CTCSS codes or 83 DCS codes. You can communicate with any other user who is using the same combinations, providing they are within range. To transmit, press & hold the PTT key, LCD displays TX icon indicating the radio is transmitting.
- Page 21 Operation Press the PTT key to confirm and quit or press MENU to continue to the next menu setting. Each channel also has 83 digital codes to let you set up a group of users for more private communication. Press Menu key MENU 3 times, the DCS code is blinking on the LCD Screen.
- Page 22 Operation Voice operated transmitter, allows you to transmit with your voice without pressing the PTT button. Your UHF2200 is equipped with an adjustable Voice Operated Transmitter (VOX) that can be used for automatic voice transmission. You can enjoy talking and listening without pressing PTT key.
- Page 23 VIBRATE MODE The unit will vibrate to alert you when it receives a Call or radio voice signal from other UHF2200 radios. Press MENU key 7 times, the LCD will display “ ”. Press ▲ or ▼ key to turn the vibrator on or off.
- Page 24 Operation Roger Beep The Roger Beep is a tone which is automatically transmitted whenever the PTT button is released. Press MENU key 9 times, LCD display “r o”. Press ▲ or ▼ key to select the Roger beep On/Off. Press PTT to confirm and quit or press MENU to continue next menu setting.
- Page 25 Operation Duplex operation via Repeaters This feature allows you to use local repeater stations that are designed to automatically re-transmit your broadcast over a large area thus giving you increased range. Repeater stations are privately operated radio systems installed throughout Australia. For example, if you wish to access a repeater station in your area which operates on channel 2, you need to set the Duplex access on this Channel.
- Page 26 Operation Receive Channel Transmit channel 34 35* 36 37 38 Receive Channel 44 45 46 47 48 Transmit channel 74 75 76 77 78 * Channel 5 is emergency channel only Repeater Station...
-
Page 27: Channel Frequency Table
Channel Frequency Table Channel Frequency Table Radiocommunications (Citizen Band Radio Stations) Class Licence 2002 No licence is required to own or operate this radio in Australia and New Zealand. The Radiocommunications (Citizen Band Radio Stations) Class Licence 2002 contains the technical parameters, operating requirements, conditions of licence and relevant standards for Citizen Band (CB) radios. - Page 28 Test Report No 101127.1 Test Report No 101127.1 Report date: 25 November 2010 Report date: 25 November 2010 Nominal Carrier Channel Frequency Table Nominal Carrier Table 1 Nominal Carrier Frequency Table 1 Nominal Carrier Frequency Freq Freq Freq Freq Channel Channel Freq Freq...
- Page 29 Channel Frequency Table * The primary use for these channels is repeater operation using 750 kHz offset. Channels 1-8 and 41-48 inclusive are used for mobile reception and channels 31-38 and 71-78 for mobile transmission. In addition, any designated repeater channel may be used for simplex operation in areas where it is not used for repeater operation.
-
Page 30: Troubleshooting Guide
Audio cutting in and 1: Too weak signal-too far away. out at receivers end. 2: External mic defective? Please contact Oricom Support. Too many 1: Another group is using the same transmissions heard channel number -change channel... -
Page 31: Customer Support
Troubleshooting section of this user guide as well as “Frequently Asked Questions” on our website www.oricom.com.au. If you have further questions about using the product after reviewing the resources above or would like to purchase replacement parts or accessories, please call our Customer Support Team. -
Page 32: Express Warranty (Australia)
In the event of a minor failure, Oricom reserves the right to choose to repair or replace the product. - Page 33 Oricom. Oricom will not be liable under this Express Warranty, and to the extent permitted by law will not be liable for any defect, loss, damage or injury arising out of or in connection with a:...
- Page 34 Oricom or Oricom’s authorised service provider. How to make a claim under your Express Warranty in Australia Oricom has a simple warranty process for you to follow: • Please call or email our Customer Support Team, 02 4574 8888 or support@oricom.com.au.
- Page 35 • The faulty product, including all accessories. Send the approved returns to: Oricom International Pty Ltd Locked Bag 658 South Windsor NSW 2756 Australia Please note that this Express Warranty excludes expenses incurred by you in returning any faulty product to us. You must arrange and...
Need help?
Do you have a question about the UHF2200 and is the answer not in the manual?
Questions and answers