Table of Contents
Advertisement
Quick Links
Advertisement
Table of Contents

Related Manuals for Atag KD8088AD


Summary of Contents for Atag KD8088AD
- Page 1 ATAG KD8088AD KD8102AD KD8102BD KD8140BD...
-
Page 2: Table Of Contents
Service Information No. 05/2006 IKP ..5. from -20 Contents Operating and control elements Functions at a glance Description of the appliance 3.1 Schematic diagram IKP ..50, without 4-star freezer compartment 3.2 Schematic diagram IKP ..54, with 4-star freezer compartment Control and functional components 4.1 Refrigerator compartment 4.2 Freezer compartment Refrigeration circuit... -
Page 3: Operating And Control Elements
Service Information No. 05/2006 IKP ..5. from -20 1.0 Operating and control elements IKP 2850 with fan Refrigerator compartment 1 : Setting button temperature higher 2 : Setting button temperature lower 3 : Temperature display, refrigerator compartment 4 : On/Off button 5 : SuperCool function, button lit = function switched on. -
Page 4: Description Of The Appliance
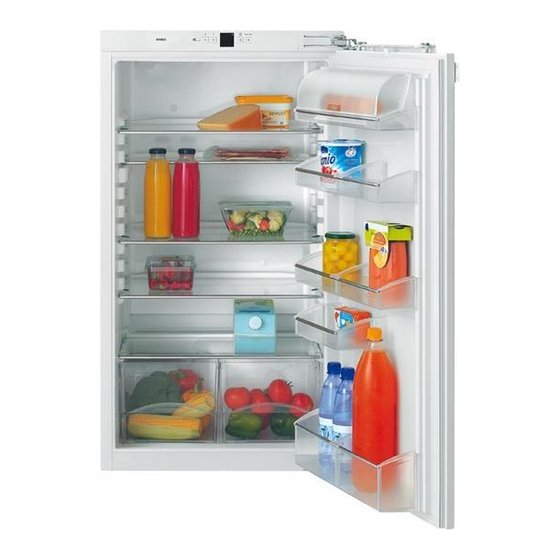
Service Information No. 05/2006 IKP ..5. from -20 3.0 Description of the appliance The IKP ..50 are refrigerators for integrated use with a freely suspended rear wall evaporator. The IKP ..54 are refrigerators for integrated use with a foamed-in rear wall evaporator and a 4-star freezer compartment. -
Page 5: Control And Functional Components
Service Information No. 05/2006 IKP ..5. from -20 4.0 Control and functional components Refrigerator compartment Electr. control system: Series 6 electronic control system: integral PCB. +2°C to +9°C Setting range: Display range: 2°C to 50°C Door alarm: Interior light: Position: Inside right. -
Page 6: Freezer Compartment
Service Information No. 05/2006 IKP ..5. from -20 Freezer compartment Electronic control See 4.1 Refrigerator compartment. system: Setting range: Dependent on refrigerator compartment setting Display range: No display Compressor: See 4.1 Refrigerator compartment -compressor- 5.0 Refrigeration circuit IKP ..50: Freely suspended evaporator. Evaporator: IKP ..54: Foamed-in rear wall evaporator + foamed-in... -
Page 7: Special Features
Service Information No. 05/2006 IKP ..5. from -20 6.0 Special features Soft stop Integrated on the door, the SoftSystem cushions movement when the door is closed. The door is closed automatically from an opening angle of approx. 30°. Fig. 6.1/ 1 Soft stop mechanism Cover: Disengage and detach cover. -
Page 8: Assembly Instructions
Service Information No. 05/2006 IKP ..5. from -20 7.0 Assembly instructions Evaporator sensor 7.1.1 Appliances without 4-star freezer compartment Evaporator sensor: Remove glass shelves and glass shelf supports. Undo screws of the evaporator suspension (see Fig.7.1.1/ 1) Swing evaporator to the left. Pull off the strip about 20 cm, starting from the bottom (see Fig. -
Page 9: Air Sensor
Service Information No. 05/2006 IKP ..5. from -20 Air sensor In appliances with 4-star compartment, first remove the evaporator sensor cover. Unlock the locating lugs of the light cover in arrow direction, using a short screwdriver (see Fig. 7.2/ 1). Unlock light housing at rear locating lug in arrow direction (see Fig. -
Page 10: Only Ikp 2850- Fan
Service Information No. 05/2006 IKP ..5. from -20 -Only IKP 2850- fan Undo fastening screws of the fan (see Fig. 7.4/ 2). Pull off connecting cable (see Fig. 7.4/ 3). Unlock locating lugs of the fan cover (see Fig. 7.4/ 4) and remove fan cover in a forward direction. -
Page 11: Integral Pcb
Service Information No. 05/2006 IKP ..5. from -20 Integral PCB Covers: Disengage covers at the marked points. Fig. 7.5/ 1 Front panel: Unlock locating lugs at the left and right of the front casing. Fig. 7.5/ 2 PCB carrier: Draw out front casing in a forward direction and uncover the cables. Fig. - Page 12 Service Information No. 05/2006 IKP ..5. from -20 Front panel: Release marked locks and remove front panel. Fig. 7.5/ 5 PCB: Release reed PCB and marked locks using a screwdriver and pull PCB sideways out of the PCB carrier. Fig. 7.5/ 6 Fig.
-
Page 13: Door Magnet
Service Information No. 05/2006 IKP ..5. from -20 Door magnet Magnet holder: Press marked locating lugs together and detach magnet holder upwardly. Magnet Fig. 7.6/ 1 Fig. 7.6/ 2 Support rails for sectioned glass shelves Rails: These plastic rails support the sectioned glass shelves. The marking R for right and L for left is impressed inside. -
Page 14: Technical Data
Service Information No. 05/2006 IKP ..5. from -20 8.0 Technical data Interior light: Wattage: 3 watts Voltage: 230 volts Wattage: 8.5 watts Fan: (Only IKP 2850) Voltage: 230 volts Speed: 1700 rpm. Air and evaporator sensor Sensor values: Temperature °C Resistance value kOhm 11.9 15.3... -
Page 15: Service Menu
Service Information No. 05/2006 IKP ..5. from -20 9.0 Service menu The service menu may be used only by customer service technicians. IKP 2850 with fan Demo mode "d0" • Press SuperCool and On/Off simultaneously for 3 seconds. • "d1" or "d0", the SuperCool LED flash. •... -
Page 16: Sensor Test (Temperature Display) And Door Contact Test "E
Service Information No. 05/2006 IKP ..5. from -20 Sensor test (temperature display) and door contact test "E" • Press SuperCool and On/Off simultaneously for 3 seconds. • "d1" or "d0", the SuperCool LED flash. • Press "Up" twice. "E" flashes. •... - Page 17 AEP Home Products Impact 54 – 6921 RZ Postbus 249 – 6920 AE Duiven – Nederland...
Need help?
Do you have a question about the KD8088AD and is the answer not in the manual?
Questions and answers