Ariston EuroCombi A/23 MFFI Servicing Instructions
Hide thumbs
Also See for EuroCombi A/23 MFFI:
- Servicing instructions (32 pages) ,
- Installation instructions manual (28 pages) ,
- Installation instructions manual (24 pages)

Related Manuals for Ariston EuroCombi A/23 MFFI


Summary of Contents for Ariston EuroCombi A/23 MFFI
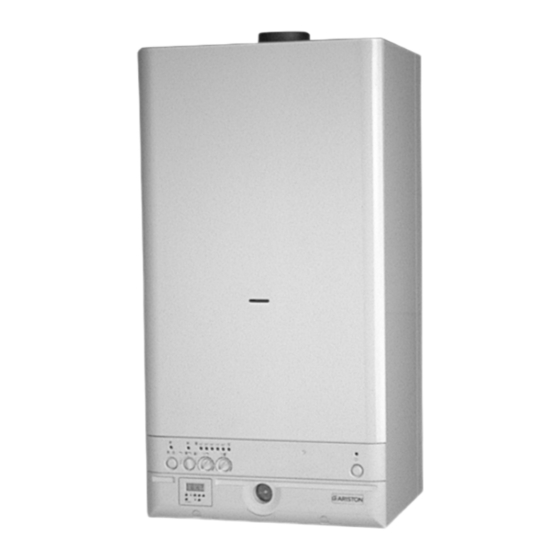
- Page 1 A/23 MFFI - A/27 MFFI G.C.N. 47-116-18 / 47-116-19 Servicing Instructions Type C Boilers LEAVE THESE INSTRUCTIONS ADJACENT TO THE GAS METER...
-
Page 2: Table Of Contents
TABLE OF CONTENTS Page No. 1. SERVICING INSTRUCTIONS 1.1 Replacement of Parts 1.2 To Gain General Access - Removing the Front Panel - Removing the Side Panels - To Lower the Control Panel 1.3 Access to the Combustion Chamber - Removing the Sealed Combustion Chamber - Removing the Burner and Injectors - Removing the Electrodes - Removing the Main Heat Exchanger... -
Page 3: Servicing Instructions
To ensure efficient safe operation, it is recommended that the boiler is servi- SERVICING ced annually by a competent person. INSTRUCTIONS Before starting any servicing work, ensure both the gas and electrical supplies to the boiler are isolated and the boiler is cool. Before and after servicing, a combustion analysis should be made via the flue sampling point (please refer to the Installation Manual for further details). -
Page 4: Removing The Side Panels
Removing the side panels 1. Remove the screws “B”; 2. Pull the panel away from the boiler, then lift the panel up and away from the boiler (see fig. 1.2). To lower control panel 1. Remove the screws “B” 2. Push the two side panels outward slightly (fig. 1.5); 3. -
Page 5: Access To The Combustion Chamber
Access to the Combustion Chamber A/23 MFFI Removing the sealed chamber Removing the combustion cover frontal cover Remove the screws “D” Remove the screws “E” Fig. 1.9 Fig. 1.8 A/27 MFFI Removing the sealed chamber Removing the combustion cover frontal cover Remove the screws “D”... -
Page 6: Removing The Burner And Injectors
Removing the burner and the 1. Remove the side panels of sealed chamber (fig. 1.10); injectors 2. Remove the screws “H” of the burner (see fig. 1.11); 3. Remove the burner (see fig. 1.12); 4. Remove the injectors using a No. 7 socket spanner; 5. -
Page 7: Removing The Electrodes
Removing the electrodes 1. Remove rubber gasket “I” (see fig. 1.13); 2. Disconnect ignition leads by pulling downward (see fig. 1.14); 3. To remove the flame sensor, disconnect the cable at its only connection point close to the P.C.B. (see fig. 1.15); Fig. -
Page 8: Removing The Main Heat Exchanger
Removing the main heat 1. Drain the boiler of water; exchanger 2. Release the two connection nuts “K” connecting the exchanger to the flow and return pipes (see fig. 1.18; 3. Pull it straight out (see fig. 1.19). Fig. 1.18 Fig. -
Page 9: Removing The Venturi Device
Removing the venturi device 1. Disconnect the silicone pipes “O” and remove the screw “P” (see fig. 1.22); 2. Extract the venturi (see fig. 1.23). Fig. 1.22 Fig. 1.23 Removing the fan (A/23 MFFI) A/23 MFFI 1. Disconnect electrical connections “Q” (see fig.1.24); 2. - Page 10 Removing the fan (A/27 MFFI) A/27 MFFI 1. Disconnect electrical connections and remove screws “S” using a No. 2 star tipped screwdriver (see fig.1.27); 2. Pull fan to the right, forward and remove (see fig.1.28); 3. Remove fan from mounting plate; 4.
-
Page 11: Servicing And Removal Of The Gas Valve
Servicing and Removal of the Gas Valve Setting gas pressures Setting the minimum and the maximum power of the boiler 1. Check that the supply pressure to the gas valve is a minimum of 20 mbar for natural gas. 2. To do this, remove the screw “A”. Fit the pipe of the pressure gauge to the pressure connection of the gas valve “B”. - Page 12 Regulating the heating power for natural gas (G20) Regulating the heating power for butane gas (G30) Regulating the heating power for propane gas (G31) TABLE “A” B029...
- Page 13 10. Remove the pipe from the pressure gauge and connect screw “C” to the pressure outlet in order to seal off the gas. 11. Carefully check the pressure outlets for gas leaks (valve inlet and outlet). IMPORTANT! Whenever you disassemble and reassemble the gas connections, always check for leaks using a soap and water solution.
-
Page 14: Removing The Gas Valve
Removing the gas valve 1. Disconnect all the cables from the solenoid and modureg; 2. Remove the spark generator; 3. Release the top nut “W” using a 30 mm open ended spanner (see fig. 1.33); 4. Remove the screws “X” from the bottom of the gas valve pipe (see fig. 1.34). -
Page 15: Removing The Safety Valve
Removing the safety valve 1. Loosen nut “Z” (see fig. 1.38); 2. Unscrew and remove the valve (see fig. 139) Fig. 1.38 Fig. 1.39 Removing the automatic air vent 1. Unscrew valve “A1” (see fig. 1.39). Fig. 1.40 Removing the main circuit flow switch 1. -
Page 16: Removing The Pump
Removing the pump 1. Remove the electrical connection “A5” (see fig. 1.43); 2. Release the nuts “A6” and remove the pump (see fig. 1.44). Fig. 1.44 Fig. 1.43 Removing the pressure gauge 1. Remove the inspection panel (see fig. 1.6 - 1.7); 2. -
Page 17: Removing The Expansion Vessel
Removing the expansion vessel 1. Remove nut “A8” away from the expansion vessel (see fig. 1.47); 2. Remove nut “A9” (see fig. 1.48); 3. Remove expansion vessel (see fig. 1.49). Fig. 1.47 Fig. 1.48 Fig. 1.49 Removing the overheat thermostat 1. -
Page 18: Access To The Control System
Access to the Control Checking fuse 1. Remove the inspection panel System (see fig. 1.6 - 1.7); 2. Remove fuse (see fig. 1.52). Fig. 1.52 Removing the time clock 1. Remove the inspection panel (see fig. 1.6 - 1.7); 2. Remove electrical connection of the clock “B1” (see fig. -
Page 19: Removing The P.c.b.s
N.B. It is possible to by-pass the time clock in the event of failure by simply unplug- ging the electrical connection from the P.C.B. (see fig. 1.48). This will revert control of the central heating to the room stat connection on the reverse of the control panel. -
Page 20: Fault Finding
FAULT FINDING Fault Finding Guide It is possible to detect and correct any defect by using the standard fault fin- ding diagrams described in this chapter. (Flow-chart) B029... - Page 21 B029...
- Page 22 B029...
- Page 23 B029...
- Page 24 B029...
-
Page 25: Electrical Diagrams
Legend: 3. ELECTRICAL AT = High Voltage P.C.B. DIAGRAMS BT = Low Voltage P.C.B. = Flame Failure L.E.D. = Insufficient Water Pressure L.E.D. = Water Temperature Indicator L.E.D.s = Overheat Thermostat Warning L.E.D. = System Reset Button = Selector Knob for Operating Mode = Domestic Hot Water Temp. - Page 26 A/23 MFFI - A/27 MFFI B029...
-
Page 27: Short Spare Parts List
4. SHORT SPARE PARTS LIST A/23 MFFI B029... - Page 28 A/23 MFFI B029...
- Page 29 A/27 MFFI B029...
- Page 30 A/27 MFFI B029...
- Page 31 B029...
- Page 32 Manufacturer: Merloni TermoSanitari SpA - Italy Commercial subsidiary: MTS (GB) LIMITED MTS Building Hughenden Avenue High Wycombe Bucks HP13 5FT Telephone: (01494) 755600 Fax: (01494) 459775 internet: http://www.mtsgb.ltd.uk E-mail: info@mtsgb.ltd.uk Technical Service Hot Line: (01494) 539579...
Need help?
Do you have a question about the EuroCombi A/23 MFFI and is the answer not in the manual?
Questions and answers