Table of Contents
Advertisement
Available languages
Available languages
Quick Links
Download this manual
See also:
Quick Manual
Advertisement
Table of Contents

Related Manuals for Steren CCTV-970


Summary of Contents for Steren CCTV-970
- Page 2 DVR con pantalla de LCD de 7” y 4 cámaras. Por favor, revísela completamente para estar seguro de cómo utilizar apropiadamente el producto. Para apoyo, compras y todo lo nuevo que tiene Steren, visite nuestro sitio web: www.steren.com La información que se muestra en esta guia sirve únicamente como referencia sobre el producto.
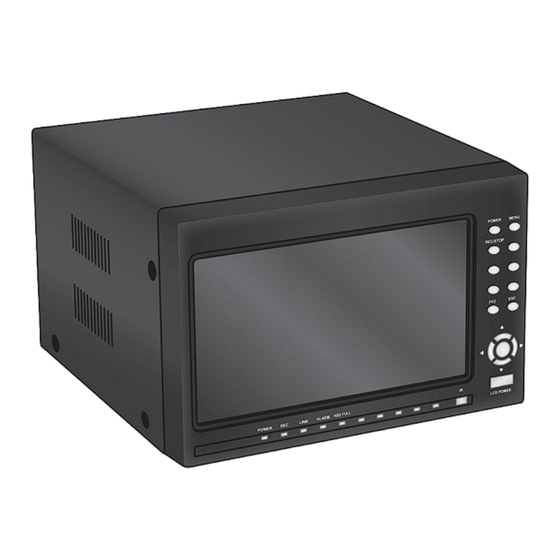
- Page 4 1. CONTROLES...
- Page 5 1. POWER: Permite apagar el dispositivo. Presiónelo (si le pide una contraseña, seleccione la cuenta admin e ingrese la contraseña 123456), y seleccione OK con el ratón o el botón de selección. 2. MENU: Presione para ingresar al menú principal. 3.
-
Page 6: Operación
2. OPERACIÓN CONTROL REMOTO En la operación del dispositivo, la tecla [Enter] en el control remoto tiene la misma función que el clic izquierdo del ratón. 1. STANDBY: Pulse para activar/desactivar modo de espera. 2. LOGIN/LOCK: puede controlar el DVR usando el control remoto mediante el acople de introducir los números del dispositivo. - Page 7 12. EXTRA: para el uso futuro. 13. Controles de reproducción: •: Aumentar la velocidad de reproducción hacia atrás 2X, 4X, 8X, 16X, 32X. •: Pulse este botón para iniciar la reproducción. •: Presione para aumentar la velocidad de reproducción hacia adelante 2X, 4X, 8X, 16X, 32X.
- Page 8 OPERACIÓN CON RATÓN El ratón es el dispositivo de entrada principal para navegar por los menús del sistema. Nota: A menos que se indique lo contrario, todas las funciones del sistema se describe en este manual se logran a través de la entrada del mouse. Para usar un ratón con el sistema: 1) Conecte un ratón USB al puerto del ratón en el panel posterior del dispositivo.
-
Page 9: Operación Del Sistema
2. Haga clic en 0 ~ 9 para entrar el dígito deseado. 3. Haga clic para cambiar entre números, letras mayúsculas y minúsculas y otros caracteres (sólo para ciertas opciones) 4. Haga clic en la tecla retroceso/eliminar. Nota: Los botones cambia de naranja a blanco cuando se selecciona el botón con el cursor del ratón. - Page 10 ACCESO AL SISTEMA Acceso al menú principal: haga clic con botón derecho del ratón en cualquier lugar de la pantalla, aparecerá un menú en forma lista, seleccione [menú principal]; si usa el control remoto o el panel frontal, sólo pulse [MENU]. Nombre de usuario: Haga clic en el cuadro de lista desplegable de nombre de usuario y seleccione su nombre de usuario.
-
Page 11: Configuración De Red
Registro: ON: signifi ca que el canal está habilitado para la grabación. Calidad: Hay tres opciones, correspondientes al estándar de grabación según la calidad. Resolución: hay tres resoluciones: D1, HD1, CIF. Audio: ON: signifi ca que la grabación de audio está habilitada para todos los canales. OFF: la grabación de audio está... - Page 12 ● IP Estático Puerto Media: para la transmisión de video por internet. Puerto WEB: para confi gurar el puerto de comunicación HTTP. Dirección IP: confi gurar la dirección IP, presione [Enter] o las teclas numéricas para cambiar el valor. Máscara: Presione [Enter] o las teclas numéricas para cambiar el valor. Gateway: Presione [Enter] o las teclas numéricas para cambiar el valor.
-
Page 13: Búsqueda
DDNS: Hay dos opciones [ON/OFF], si tiene un servicio DDNS, confi gúrelo como abierto. Servidor: puede seleccionar el servidor DDNS necesario, hay 4 opciones: 3322, dyndns, nightowldvr y no-ip. Dominio: ingrese el nombre del servidor. Usuario: nombre de usuario DDNS. Contraseña: introduzca la contraseña DDNS. -
Page 14: Copia De Seguridad
Instrucciones: 1. Mes: Se mostrará el estado de la grabación en este mes. Verde signifi ca grabación normal, rojo signifi ca grabación por alarma. Haga clic en cualquier fecha en este cuadro para buscar la grabación de ese día, los resultados serán mostrados... -
Page 15: Especificaciones
IDIOMA Entre al menú [Sistema] y luego a [Idioma] (el icono con el cuadro naranja signifi ca que está seleccionado). El iidioma del sistema puede ser Chino, Inglés, Ruso, Portugués, Español, Turco, Italiano, Persa, Francés y Polaco. 4. ESPECIFICACIONES Monitor DVR Alimentación: 12 V- - - 5 A Cámara Alimentación: 12 V- - - 500 mA... - Page 16 1.- Para hacer efectiva la garantía, presente esta póliza y el producto, en donde fue adquirido o en Electrónica Steren S.A. de C.V. 2.- Electrónica Steren S.A de C.V. se compromete a reparar el producto en caso de estar defectuoso sin ningún cargo al consumidor. Los gastos de transportación serán cubiertos por el proveedor.
- Page 18 Steren, visit our website: www.steren.com The instructions of this guide are for reference about the product. There may be differences due to updates. Please check our web site (www.steren.com) to obtain the latest version of the instruction manual.
- Page 20 1. CONTROLS...
- Page 21 Front panel 1. POWER: allows you to turn off the device. Press it (if it asks for a password, select the admin account and enter the password 123456), and use the mouse or the selection button to select OK. 2. MENU: press to enter the main menu. 3 REC/STOP: press to start / stop recording.
-
Page 22: Device Operation
2. DEVICE OPERATION REMOTE CONTROL In device operation, the enter key on remote control has the same function as left click of the mouse. 1. STANDBY: Press to turn on/off standby mode. 2. LOGIN/LOCK: You can control the DVR using the remote control by pairing it entering the device number. - Page 23 12. EXTRA: For the future use. 13. Playback controls: • : Increase reverse playback speed 2X, 4X, 8X,16X,32X. • : Press to start playback. • : Press to increase forward playback speed 2X,4X, 8X,16X,32X. • : Press to slow playback speed by 1/2, 1/4, 1/8, 1/16,1/32. •...
-
Page 24: Mouse Operation
MOUSE OPERATION The mouse is the primary input device for navigating system menus. NOTE: Unless otherwise noted, all system functions described in this manual are achieved through mouse input. To use a mouse with the system: 1) Connect a USB mouse to the USB MOUSE port on rear panel of the system. -
Page 25: System Operation
2. Click 0~9 to enter the desired digit. 3. Click to switch between numerals, upper and lowercase letters, and other characters (only for certain options) 4. Click to Backspace/Delete. NOTE: The buttons will turn from orange to white when you select the button with the mouse cursor. -
Page 26: System Login
SYSTEM LOGIN Login the main menu: Right-click anywhere on the screen, a menu list will pop-up, then select [main menu]; If use remote controller or front panel, just press [MENU] button. Username: Click on the User Name drop-down box and select your user name. -
Page 27: Network Setup
RECORD: Open: Means the channel is enabled for recording. QUALITY: There are three options, corresponding different data stream standard. RESOLUTION: there are three corresponding resolutions: D1, HD1, CIF. AUDIO: Open: Means enable the audio recording for all channels, Close: Means disable audio recording REC.MODE: Always: Means the device will start recording at startup. - Page 28 ● STATIC PORT: For video transmission via internet. WEB PORT: setup the HTTP communication port. IP ADDRESS: setup the IP address, press [Enter] or number keys to change the value. NETMASK: press [Enter] or number keys to change the value. GATEWAY: press [Enter] or number keys to change the value.
- Page 29 DDNS: There are two options [Open/Close], if you have a DDNS service, please setup it as Open. SERVICE: you can select required DDNS server, there are 6 options: 3322, dyndns, nightowldvr and no-ip HOST NAME: Input the name of the host server. USERNAME: Input in the DDNS user name.
- Page 30 Instruction: 1. MONTH: It will show all the recording status in this month. Green means normal recording, Red means alarm recording. Click any date in this box to search the recording of that day, the search results will be showed in the window below. 2.
-
Page 31: Specifications
LANGUAGE Move cursor to select [LANGUAGE] (Icon with the orange box means that selected) and press [ENTER] to enter into the system language setup interface. System language may be Chinese, English, Russian, Portuguese, Spanish, Turkish, Italian, Persian, French and Polish. 4. -
Page 32: Warranty
Part number: CCTV-970 Brand: Steren WARRANTY This Steren product is warranted under normal usage against defects in workmanship and materials to the original purchaser for one year from the date of purchase. CONDITIONS 1. This warranty card with all the required information, invoice, product box or package, and product, must be presented when warranty service is required.
Need help?
Do you have a question about the CCTV-970 and is the answer not in the manual?
Questions and answers