
Related Manuals for AEG 88131 K-MN


Summary of Contents for AEG 88131 K-MN
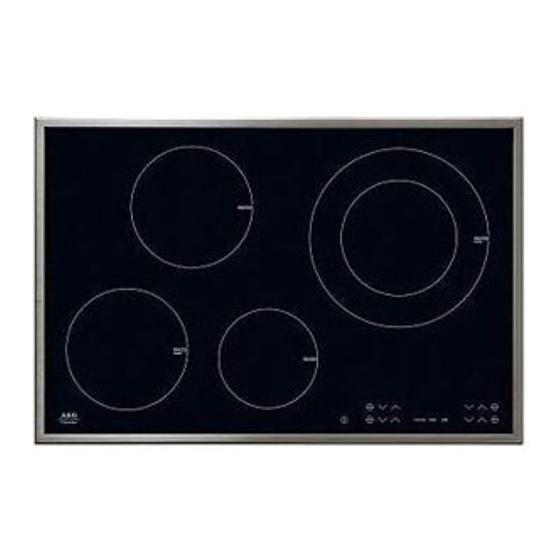
- Page 1 88131 K-MN Benutzerinformation Induktions- User Manual Glaskeramik-Kochfeld Ceramic glass induction...
-
Page 2: Table Of Contents
Thank you for choosing one of our high-quality products. To ensure optimal and regular performance of your appliance please read this instruc- tion manual carefully. It will enable you to navigate all processes perfectly and most ef- ficiently. To refer to this manual any time you need to, we recommend you to keep it in a safe place. -
Page 3: Operating Instructions
Operating Instructions Operating Instructions Safety instructions Please comply with these instructions. If you do not, any damage resulting is not cov- ered by the warranty. Correct use • This appliance is not intended for use by children or other persons whose physical, sensory or mental capabilities or lack of experience and knowledge prevents them from using the appliance safely without supervision or instruction by a responsible person to ensure that they can use the appliance safely. -
Page 4: Safety When Cleaning
Description of the Appliance • Risk of burns! Do not place objects made of metal, such as knives, forks, spoons and saucepan lids on the cooking surface, as they can get hot. Safety when cleaning • For cleaning, the appliance must be switched off and cooled down. •... -
Page 5: Control Panel Layout
Description of the Appliance Control panel layout Cooking zone indicators Child lock Power function with display Timer function Timer display STOP+GO with indicator Heat setting selection On/Off Timer Heat setting indicator with indicator Touch Control sensor fields The appliance is operated using Touch Control sensor fields. Functions are controlled by touching sensor fields and confirmed by displays and acoustic signals. -
Page 6: Residual Heat Indicator
Description of the Appliance Displays Display Description Keep Warm setting STOP+GO function is set Heat settings To set heat settings Power Power function is switched on Fault Malfunction has occurred Residual heat Cooking zone is still hot Child safety device Lock/child safety device is engaged Automatic switch off Switch off is active. -
Page 7: Operating The Appliance
Operating the appliance Operating the appliance Use the induction cooking zones with suitable cookware. Switching the appliance on and off Control panel Display Pilot light Switch on Touch for 2 seconds lights up Switch off Touch for 1 second / none goes out After switching on, within approx. -
Page 8: Using The Automatic Warm-Up Function
Operating the appliance Using the automatic warm-up function All cooking zones are equipped with an automatic warm-up function. When setting a heat setting using the automatic warm-up function, the cooking zone switches to full power for a certain amount of time and then automatically switches back to the heat setting set. -
Page 9: Using The Child Safety Device
Operating the appliance Using the child safety device The child safety device prevents unintentional use of the appliance. Switching on the child safety device Step Control panel Display/Signal Switch on appliance. (Do not set a heat setting.) Touch for 4 seconds The child safety device is switched on. -
Page 10: Switching The Power Function On And Off
Operating the appliance Switching the power function on and off The power function makes more power available to the induction cooking zones, e.g. to bring a large quantity of water to the boil quickly. The power function is activated for 10 minutes at most. After that the induction cooking zone automatically switches back to heat setting 14. -
Page 11: Using The Timer
Operating the appliance Using the timer Function Condition Outcome after the time has elapsed Automatic cut-out a heat setting is set acoustic signal flashes Cooking zone switches Countdown timer cooking zones not in use acoustic signal flashes If just one countdown value is set you can change it only when the appliance is switched on. - Page 12 Operating the appliance Setting the time Step Control panel Indicator Select cooking zone Pilot light for the cooking zone selected flash- Touch minutes After a few seconds the pilot light flashes more slowly. The time is set. The time counts down. Switching off the timer function Step Control panel...
-
Page 13: Automatic Switch Off
Operating the appliance Automatic switch off Cooking surface • If after switching on the cooking surface, a heat setting is not set for a cooking zone within approx. 10 seconds, the cooking surface automatically switches itself off. • If one or more sensor fields are covered by objects (a pan, etc.) for longer than approx. 10 seconds, a signal sounds and the cooking surface switches off automatically. -
Page 14: Tips On Cooking And Frying
Tips on Cooking and Frying Tips on Cooking and Frying Information on acrylamides According to the latest scientific knowledge, intensive browning of food, especially in products containing starch, can constitute a health risk due to acrylamides. Therefore we recommend cooking at the lowest possible temperatures and not browning foods too much. -
Page 15: Tips On Energy Saving
Tips on Cooking and Frying Tips on energy saving Place cookware on the cooking zone before it is switched on. If possible, always place a lid on the cookware. Examples of cooking applications The information given in the following table is for guidance only. Heat Cooking- Cooking... -
Page 16: Cleaning And Care
Cleaning and Care Cleaning and Care Take care! Risk of burns from residual heat. Warning! Sharp objects and abrasive cleaning materials will damage the appliance. Clean with water and washing up liquid. Warning! Residues from cleaning agents will damage the appliance. Remove residues with water and washing up liquid. -
Page 17: What To Do If
What to do if … What to do if … Problem Possible cause Remedy The cooking zones cannot be More than 10 seconds have Switch the appliance on again. switched on or are not operat- passed since the appliance was switched on The lock is switched on Switch off the lock (See the... -
Page 18: Operating Noises
What to do if … Problem Possible cause Remedy lights up Unsuitable cookware Use suitable cookware No cookware on the cooking Place cookware on the cooking zone zone The diameter of the bottom of Move onto a smaller cooking the cookware is too small for zone the cooking zone Use suitable cookware... -
Page 19: Disposal
Disposal Disposal Packaging material The packaging materials are environmentally friendly and can be recycled. The plastic components are identified by markings, e.g. >PE<, >PS<, etc. Please dispose of the pack- aging materials in the appropriate container at the community waste disposal facilities. Old appliance The symbol on the product or on its packaging indicates that this product may not... -
Page 20: Installation Instructions
Installation Instructions Installation Instructions Safety instructions Warning! This must be read! The laws, ordinances, directives and standards in force in the country of use are to be followed (safety regulations, proper recycling in accordance with the regulations, etc.) Installation may only be carried out by a qualified electrician. The minimum distances to other appliances and units are to be observed. -
Page 21: Service
Service Service In the event of technical faults, please first check whether you can remedy the problem yourself with the help of the operating instructions (section “What to do if…”). If you were not able to remedy the problem yourself, please contact the Customer Care Department or one of our service partners. -
Page 22: Assembly
Montage Montage Assembly... - Page 23 Assembly...
- Page 24 Assembly...
-
Page 25: Rating Plate
Typenschild Rating Plate 88131K-MN 949 593 095 55GBDC2AU 230 V 50 Hz Induction 7,4 kW 7,4 kW AEG-ELECTROLUX... - Page 26 Guarantee/Customer Service Centres EURO-LINE APPLIANCES LENGTH OF WARRANTY EURO-LINE WILL PAY FOR: TWO YEAR FULL WARRANTY Replacement parts and/or labour to repair defects in materials or workmanship. Service from original date of purchase, including parts must be provided by an authorized Euro-Line and labour, to the first purchaser of this company (unless advised otherwise).
- Page 27 EURO-PARTS, USA EURO-PARTS, CANADA EURO-LINE APPLIANCES Tel: 1-800-561-4614 Tel: 1-800-678-8352 1-800-421-6332 Fax: 1-519-528-5001 Fax: 1-519-528 5001 Tel. Direct: 1-905-829-3980 Fax: 1-905-829-3985 User Instructions & Installation Manual Service & Repair To save you time and money please have the following information ready in case you have to call for service: •...
Need help?
Do you have a question about the 88131 K-MN and is the answer not in the manual?
Questions and answers