Table of Contents
Advertisement
INSTALLATION AND OPERATION MANUAL
MODEL FBD56X SERIES
FROZEN BEVERAGE DISPENSERS
THIS MANUAL APPLIES TO FROZEN BEVERAGE DISPENSERS
THIS DOCUMENT CONTAINS IMPORTANT INFORMATION.
This manual must be read and understood
BEFORE the installation and operation of the dispenser.
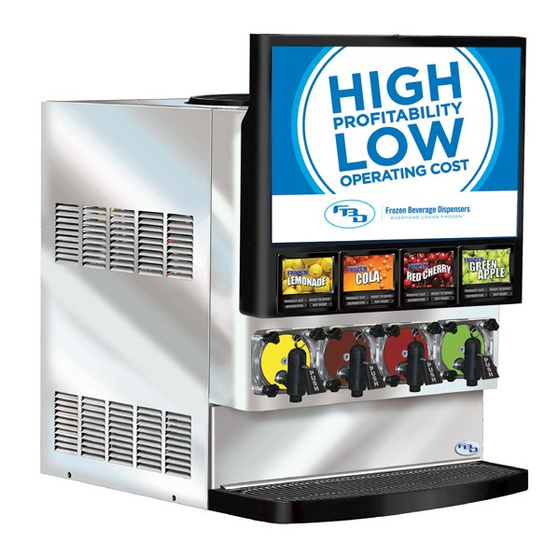
FBD562
The information contained in this document is subject to change without notice.
FBD MAKES NO WARRANTY OF ANY KIND WITH REGARD TO THIS MATERIAL, INCLUDING, BUT NOT
LIMITED TO, THE IMPLIED WARRANTIES OF MERCHANTABILITY AND FITNESS FOR A PARTICULAR
PURPOSE. FBD shall not be liable for errors contained herein or for incidental consequential damages in connection
with the furnishings, performance, or use of this material.
This document contains proprietary information which is protected by copyright. All rights reserved.
This manual supersedes and replaces 24-2280-0001/Rev 03, dated 03/27/12,
Please refer to the FBD web site (www.fbdfrozen.com) for information
relating to FBD Installation, Operation and Service Manuals, Instruction
Sheets, Technical Bulletins, Service Bulletins, etc.
FOR THE
IN THE 562, 563 AND 564 SERIES.
FBD563
NOTICE:
©2014 FBD Partnership, LP. All Rights Reserved.
and is designated as Revision 04.
FBD Partnership, LP
• P.O. BOX 18597 • SAN ANTONIO, TX 78218 USA •
• 210-637-2800 • FAX 210-637-2844 • www.fbdfrozen.com •
• FBD TECHNICAL SUPPORT • 1-866-323-2777 •
• TECHNICAL SUPPORT FAX 1-210-637-2832 •
FBD564
REV LEVEL 04:
FBD Part Number: 24-2280-0001
02/25/14
Advertisement
Table of Contents

Related Manuals for FBD FBD562


Summary of Contents for FBD FBD562
- Page 1 FBD MAKES NO WARRANTY OF ANY KIND WITH REGARD TO THIS MATERIAL, INCLUDING, BUT NOT LIMITED TO, THE IMPLIED WARRANTIES OF MERCHANTABILITY AND FITNESS FOR A PARTICULAR PURPOSE. FBD shall not be liable for errors contained herein or for incidental consequential damages in connection with the furnishings, performance, or use of this material.
-
Page 2: Specifications
SPECIFICATIONS FOR THE FBD562 DISPENSER DIMENSIONS Width 17.0 inches (432 mm) Depth 32.3 inches (820 mm) Height (Standard Countertop Unit) 41.4 inches (1054 mm) Height (Optional Roll Around Unit/Stand) 75.4 inches (1918 mm) WEIGHT Shipping 395 pounds (179.2 kg) Empty 318 pounds (144.2 kg) -
Page 3: Safety Precautions
Maximum pressure 72 psig (496.4 kPag) SAFETY PRECAUTIONS We at FBD are concerned about your safety. Please carefully read the following precautions before working with the FBD56x units. This will familiarize you with proper equipment handling techniques. LIFTING • To avoid personal injury or damage, do not attempt to lift the unit without help. The use of a mechanical lift is recommended ••... -
Page 4: Quick Reference Sheet For Installing Fbd Units
See Sections 4 through 6 of this manual for further details on each of these checkpoints and dispenser installation. NOTE: If the unit has been in storage for longer than 90 days, FBD recommends that the rear seals be replaced. - Page 5 OPERATING REQUIREMENTS 550: 345 LB (156 Kg) 562: 345 LB (156 Kg) 553: 370 LB (168 Kg) 563: 390 LB (177 Kg) 564: 460 LB (209 Kg) 554: 634 LB (288 Kg) 550: 215-245 VAC, 30 A, 1 PH 562: 215-245 VAC, 20 A, 1 PH 553: 215-245 VAC, 30 A, 1 PH 563: 215-245 VAC, 20 A, 1 PH 564: 215-245 VAC, 30 A, 1 PH...
-
Page 6: Table Of Contents
TABLE OF CONTENTS SPECIFICATIONS ............................2-3 SAFETY PRECAUTIONS ..........................3 QUICK REFERENCE SHEET FOR INSTALLING FBD UNITS ..............4-5 TABLE OF CONTENTS ..........................6-7 1. PREPARING THE LOCATION ........................7 LOCATION REQUIREMENTS ......................7 ADDITIONAL REQUIREMENTS ......................7 2. RECEIVING AND UNPACKING UNIT ......................7 RECEIVING ............................7 UNPACKING ............................7 3. -
Page 7: Table Of Contents
14.4 FLOW DIAGRAM/SCHEMATIC - FBD562 ..................45 14.5 FLOW DIAGRAM/SCHEMATIC - FBD563 ..................46 14.6 FLOW DIAGRAM/SCHEMATIC - FBD564 ..................47 14.7 UPPER BOARD SCHEMATIC - FBD562 ..................48 14.8 LOWER BOARD SCHEMATIC - FBD562 ..................49 14.9 UPPER BOARD SCHEMATIC - FBD563 ..................50 14.10 LOWER BOARD SCHEMATIC - FBD563 ..................51 14.11 UPPER BOARD SCHEMATIC - FBD564 ..................52... -
Page 8: Installing The Unit
A. Be sure the counter will support the weight of the specific FBD unit being installed and the full length of the unit (including the drip tray). If permanently mounting the unit to a countertop, use the information in Section 15.1 or 15.2 to mark and drill the four (4) mounting holes in the countertop. -
Page 9: Connecting Water, Co
(120VAC) to ensure proper wiring and voltage (see Figure 4.1). 2. The FBD562 and FBD563 Units must be protected by 20 Amp service and a 20 Amp fuse (or circuit breaker). It is recommended that a 3 conductor, 20 Amp receptacle (NEMA #L620-R) be used. -
Page 10: Co 2 Supply
A. Connect a backflow prevention assembly to the water inlet of the unit (see Figure 5.2). A backflow prevention assembly is available from FBD under PN 12-2272-0001. B. Fabricate a 3/8 inch supply line for connecting the unit to a potable water supply (a 3/8” barb by 1/4”... -
Page 11: Starting The Unit
B. Connect the syrup lines to the bulkhead fittings as follows: 1. For the FBD562 Unit - to the appropriate bulkhead syrup fittings located at the rear of the unit (see Figure 5.2). 2. For the FBD563 Unit - to the appropriate bulkhead syrup fittings located at the rear of the unit (see Figure 5.3). -
Page 12: Brixing
Electrical Box Cover Typical Electrical Box Cover Figure 6.2 Figure 6.3 BRIXING A. With the unit powered up, press both of the “OFF” buttons on the display to ensure the unit is in the OFF state. CAUTION CHECK ALL SUPPLY LINES TO ENSURE THAT THEY ARE CONNECTED TO THE CORRECT FITTINGS. -
Page 13: Filling The Chamber
K. Measure the brix with a refractometer. Set brix to between 13.5 and 15.0 by adjusting the syrup brix flow controller clockwise to increase brix level or counter-clockwise to decrease brix level. If the brix requires adjustment, discard a sample before checking the brix again. NOTE Do not adjust the brix with the water flow control setting unless you are unable to obtain the desired brix with adjustments to the syrup flow control. -
Page 14: Critical Regulator And Flow Control Settings
A sample may be taken by fully opening the sample valve, by turning it clockwise until it stops. LEFT SIDE RIGHT SIDE FILL BEATER FILL BEATER DEF. DEF. CANCEL BACK SELECT FBD562 Contols Figure 7.1a LEFT SIDE CENTER RIGHT SIDE FILL BEATER FILL BEATER FILL BEATER DEF. DEF. -
Page 15: Operation Of The Dispenser
CANCEL BACK SELECT SAN ANTONIO, TEXAS SIDE ONE SIDE TWO SIDE THREE SIDE FOUR FILL FILL FILL FILL BEATER BEATER BEATER BEATER DEF. DEF. DEF. DEF. FBD564 Contols Figure 7.1c 7. OPERATION OF THE DISPENSER OPERATING ELECTRONIC CONTROLS A. The electronic machine controls are designed to provide a logical sequence of operation with a minimum of written instruction. - Page 16 C. Common Controls and Displays 1. The four (4) control buttons, located below the LCD display, allow access to the various menu levels for the machine (see Figures 7.1a, 7.1b and 7.1c) The CANCEL button cancels any current operation and steps the operator back CANCEL one (1) level in the menu.
- Page 17 MODE DISPLAY LEFT SIDE RIGHT SIDE FILL BEATER FILL BEATER DEF. DEF. CANCEL BACK SELECT FBD562, Access and Change Figure 7.2a SIDE 1 STATUS CENTER STATUS SIDE 2 STATUS MODE DISPLAY LEFT SIDE CENTER RIGHT SIDE FILL BEATER FILL BEATER...
- Page 18 FORWARD FBD56X Series, Menu Structure Figure 7.3...
-
Page 19: Machine Access
MACHINE ACCESS (SEE FIGURES 7.2.A, 7.2.B AND 7.2.C) A. Machine Operator Display Mode Display Description Preset Value 1. VERSION Shows current version of the software installed. 2. TIME Used to set the time of day. The machine uses a 24 hour format (military time) clock. The clock has a battery backup which maintains correct time even if not plugged into electrical power. -
Page 20: Machine Settings
4. Once this is set, the machine is ready to run. NOTE: In the FBD562 unit, the 1 Side and 2 Side equate respectively to the Left Side and Right Side; and in the FBD563 unit, the 1 Side, 2 Side, and 3 Side equate respectively to the Left Side, Center, and Right Side. -
Page 21: Readouts
NOTE: In the FBD562 unit, the 1 Side and 2 Side equate respectively to the Left Side and Right Side; and in the FBD563 unit, the 1 Side, 2 Side, and 3 Side equate respectively to the Left Side, Center, and Right Side. -
Page 22: Required Cleaning Equipment
110 to 115°F (44 to 46°C). Stir the solution until sanitizing agent has completely dissolved. F. Disconnect all BIB connectors from syrup boxes, then install BIB Adapters (FBD PN 05-0249) onto BIB connectors. G. Turn off the water at source. -
Page 23: Preventive Maintenance
S. When there is no more off taste, fill the unit following the procedure outlined in Section 6.3. PREVENTIVE MAINTENANCE An annual Preventive Maintenance schedule is recommended by FBD and should include the following steps. A. Clean Air Filter – refer to Section 8.6. - Page 24 C. In Sections 4 through 7 of this manual are instructions on machine installation and initial operation. These instructions should be followed for initial setup of the machine. If the product quality is not as desired after allowing time for stabilization, the critical settings should be checked and adjusted as necessary.
-
Page 25: Changing Factory Set "Level Control
10. CHANGING FACTORY SET “LEVEL CONTROL” NOTE Always check brix and water flow rates before adjusting “Level Control.” The factory setting of the liquid “Level Control” may be changed to alter the consistency of the product. Adjusting the liquid “Level Control” will change a drink that is too liquid or one that is frozen too hard. A product that is frozen too hard will not allow the chamber to stay full and the drink will dispense with sudden releases of CO (“spitting”). -
Page 26: Changing The Default Level Control Setting
B. It will be necessary to drain off several drinks to allow the chamber to fill and rebalance. It is then necessary to defrost the chamber and allow the product to refreeze. If the drink is still too liquid, repeat the process taking the level control to the next lower setting. C. -
Page 27: Changing Thaw And Freeze Settings
12.2 LINE VOLTAGE DROP The FBD562 and FBD563 units require a separate electrical circuit complete with a 20 Amp breaker or fuse on a 20 Amp service. The FBD564 unit requires a separate electrical circuit complete with a 30 Amp breaker or fuse on a 30 Amp service. -
Page 28: Troubleshooting Guide
2. Install booster pumps in the supply lines. Use a vacuum regulating valve with syrup booster pumps. 3. Increase primary CO regulator pressure from bulk or tank CO to 105 - 120 psig (723.9 to 827.4 kPag). A secondary regulator will be necessary for pumps (syrup, water) to avoid exceeding manufacturer’s recommended operating pressures. - Page 29 TROUBLE CAUSE REMEDY (Item 13.3 continued from previous page.) D. Syrup or Water Pump failure. D. Check all pumps and replace, if necessary. E. CO or water can’t keep up E. Reroute water or CO lines to with unit demand. maximize supply pressure.
-
Page 30: Electrical
TROUBLE CAUSE REMEDY 13.6 Brix sample valve leaks. A. Damaged or failed seal or A. Turn off CO , water and disconnect o-ring on valve. syrup. Depressurize by opening sample valve. Remove clamp from sample valve. Remove sample valve, change o-ring and washer and reinstall. -
Page 31: Electronic Controls
TROUBLE CAUSE REMEDY 13.12 Low beater counts. A. Chamber is frozen too hard A. Verify correct brix, Level Control or solid. and Thaw/Freeze settings. Defrost chamber, refill to 90% and refreeze (see Sections 9.1, 10 and 11). B. Lower motor control board B. -
Page 32: Refrigeration
Check amperage draw on compressor. Check compressor wiring and terminals. Replace compressor, Contact FBD Warranty Dept. at 866-323-2777 before tapping system if unit is under warranty! 13.22 Compressor runs long A. Return temperature not A. Verify that Return Temperature time but won’t freeze dropping. - Page 33 90°F. D. Water is not turned on for D. Ensure water is turned on for the water condenser inlet. water condenser inlet. Contact FBD Warranty Dept. at 866-323-2777 before tapping system if unit is under warranty!
-
Page 34: Drink Quality
13.24 Low head/suction A. Low refrigerant level. A. See item 13.22.H above. pressure. Contact FBD Warranty Dept. at 866-323-2777 before tapping system if unit is under warranty! DRINK QUALITY 13.25 Drink too “Wet” or A. Chamber not filled properly. A. Defrost, then assure chamber is “Liquid”. -
Page 35: Lcd Display Error Messages
TROUBLE CAUSE REMEDY (Item 13.26 continued from previous page.) F. Solution Solenoid F. Activate “Solution Sol” in Manual malfunctioning and not On/Off. Check for 24VAC at coil. allowing the chamber to fill. Clean solenoid or replace, if necessary. G. Relay board not sending G. - Page 36 TROUBLE CAUSE REMEDY (Item 13.29 continued from previous page.) E. Level Control too low. E. Level Control settings may need to be raised due to excessive CO the chamber. Raise the Level Control settings using the instructions in Section 10.2 of this manual.
- Page 37 TROUBLE CAUSE REMEDY (Item 13.34 continued from previous page.) F. Syrup Transducer problem. F. Check syrup pressure readouts for 70-72 psig. If not within 2 psi, adjust regulator and/or check transducer. Replace transducer, if necessary. G. Lower Board problem. G Check lower power board for +5, +15, and –15 indicator lights.
- Page 38 TROUBLE CAUSE REMEDY (Item 13.36 continued from previous page.) G. Upper Board Problem. G. Circuits within Main Control (Upper) Board electronics read transducer pressures. Replace Main Control (Upper) Board, if necessary. 13.37 RTempE, Return A. Temperature Sensor error A. 1. Check for short in sensor and Temperature Error or failure.
-
Page 39: Lcd Display Messages
LCD DISPLAY MESSAGES (# stands for the barrel number which is L, C, R, or 1, 2, 3, 4) FBD56X SERIES FROZEN BEVERAGE DISPENSERS MESSAGE DESCRIPTION Sleep Unit in “Sleep” mode. Unit is shut down. CmpSDl This delay is before compressor starts. The time period varies from 1 to 20 seconds. CmpStr This is displayed when compressor starts freezing or defrosting. -
Page 40: Lcd Display Error Messages
LCD DISPLAY ERROR MESSAGES (# stands for the barrel number which is L, C, R, or 1, 2, 3, 4) FBD56X SERIES FROZEN BEVERAGE DISPENSERS MESSAGE DESCRIPTION WILL CAUSE DefPMx Chamber pressure is above 55 psig during defrost only. DefPrO Product is out during defrost only. -
Page 42: Illustrations, Parts Listings, And Diagrams
14. DIAGRAMS AND SCHEMATICS 14.1 MOUNTING DIAGRAM - FBD 562 This Figure illustrates the locations of threaded mounting holes in the base of the FBD562 units. 17.0” 14.875 CENTER 4 x 1/2” LINE CLEARANCE HOLE 20.0” 32.4” 1.75” 8.500” 10.3”... -
Page 43: Mounting Diagram - Fbd563
14.2 MOUNTING DIAGRAM - FBD 563 This Figure illustrates the locations of threaded mounting holes in the base of the FBD563 unit. 20.250” 18.125” CENTER 4 x 1/2” LINE CLEARANCE HOLE 20.0” 32.4” 1.75” 8.500” 10.3” DRIPTRAY 7.125” DRAIN FRONT... -
Page 44: Mounting Diagram - Fbd564
14.3 MOUNTING DIAGRAM - FBD 564 This Figure illustrates the locations of threaded mounting holes in the base of the FBD564 unit. 26.0” 23.875 CENTER 4 x 1/2” LINE CLEARANCE HOLE 20.0” 32.4” 1.75” 8.500” 10.3” DRIPTRAY 7.125” DRAIN FRONT... -
Page 45: Flow Diagram/Schematic - Fbd562
14.4 FLOW DIAGRAM/SCHEMATIC - FBD 562 SYRUP SYRUP BRIX VALVE BRIX VALVE CO2 INJECT CO2 INJECT EXPANSION EXPANSION CHAMBER CHAMBER (PRESET, RELIEVING) FREEZE FREEZE CHAMBER CHAMBER R SIDE L SIDE PRODUCT PRODUCT PRODUCT PRODUCT DISPENSING DISPENSING DISPENSING DISPENSING VALVE VALVE... -
Page 46: Flow Diagram/Schematic - Fbd563
14.5 FLOW DIAGRAM/SCHEMATIC - FBD 563... -
Page 47: Flow Diagram/Schematic - Fbd564
14.6 FLOW DIAGRAM/SCHEMATIC - FBD 564... -
Page 48: Upper Board Schematic - Fbd562
14.7 UPPER BOARD SCHEMATIC - FBD 562... -
Page 49: Lower Board Schematic - Fbd562
14.8 LOWER BOARD SCHEMATIC - FBD 562... -
Page 50: Upper Board Schematic - Fbd563
14.9 UPPER BOARD SCHEMATIC - FBD 563... -
Page 51: Lower Board Schematic - Fbd563
14.10 LOWER BOARD SCHEMATIC - FBD 563... -
Page 52: Upper Board Schematic - Fbd564
14.11 UPPER BOARD SCHEMATIC - FBD 564... -
Page 53: Lower Board Schematic - Fbd564
14.12 LOWER BOARD SCHEMATIC - FBD 564... -
Page 54: Lower Board Schematic - Fbd564
14.13 LOWER BOARD SCHEMATIC (INCLUDES AUXILIARY BOARD AND DIO BOARD) - FBD 564... - Page 55 THIS PAGE INTENTIONALLY LEFT BLANK...
- Page 56 • TECHNICAL SUPPORT FAX 1-210-637-2832 • Please contact FBD Technical Support at 1-866-323-2777 for assistance. Please refer to the FBD web site (www.fbdfrozen.com) for information relating to FBD Installation, Operation and Service Manuals, Instruction Sheets, Technical Bulletins, Service Bulletins, etc.
Need help?
Do you have a question about the FBD562 and is the answer not in the manual?
Questions and answers