Table of Contents
Advertisement
Quick Links
Advertisement
Table of Contents

Related Manuals for Crumar MOJO


Summary of Contents for Crumar MOJO
- Page 1 User Manual Firmware revision 6.1 Software revision 2.3 MADE IN ITALY...
- Page 2 INDEX 1) GENERAL WARNINGS. 2) PACKAGE AND HANDLING. 3) INCLUDED ACCESSORIES. 4) CONNECTIONS AND CONTROLS. 5) START-UP AND SHUT-DOWN PROCEDURES. 6) CRUMAR MOJO OVERVIEW. 7) EDIT AND PROGRAMMING MODE. BONUS SOUNDS. 9) UPDATES. 10) MAINTENANCE AND WARRANTY. 11) ADDENDUM.
-
Page 3: General Warnings
• Do not touch the AC plug with wet hands. FACTORY DEFAULTS • The CRUMAR Mojo accepts voltages from 100V to 240V AC 50-60Hz through the original power supply. Be sure that local electrical standards are compliant with the instrument. -
Page 4: Package And Handling
Carefully remove the instrument from its packaging. The CRUMAR Mojo weighs just over 37 lbs (17 kg). Please set the CRUMAR Mojo on a stand rated at 44 lbs (20 kg). Please keep the original packaging material for future use. -
Page 5: Included Accessories
CRUMAR service center. Important notes on Power supply. Depending on your country, Mojo power supply can be of class 1 or class 2 type. If your instrument doesn’t work properly (power off after a while, no sound after a while ecc) or you notice noise on your instrument (power supply, ground loop noise), please check connections and avoid ground loops;... - Page 6 Back Panel Connections and Controls (Fig.1): Fig.1 1. Power: This plug is used to connect the CRUMAR Mojo power supply (12 Volt CC). Do not use any power supply other than the original unit that shipped with the instrument. 2. Motherboard Connections Access Slot: Connections to the motherboard can be accessed in this panel.
- Page 7 5. MIDI IN: This five-pole DIN connection is used to connect the CRUMAR Mojo to a device capable of sending MIDI data, such as a master keyboard or a pedal board. This connection is also used when updating the instrument’s firmware with MIDI Firmware Upload (MFU) technology.
- Page 8 9. Sustain: This 6.3 mm stereo output jack connection is used to connect an optional momentary “on/off” type of sustain pedal to the CRUMAR Mojo. The instrument accepts both pedals configured as normally closed and pedals configured as normally open.
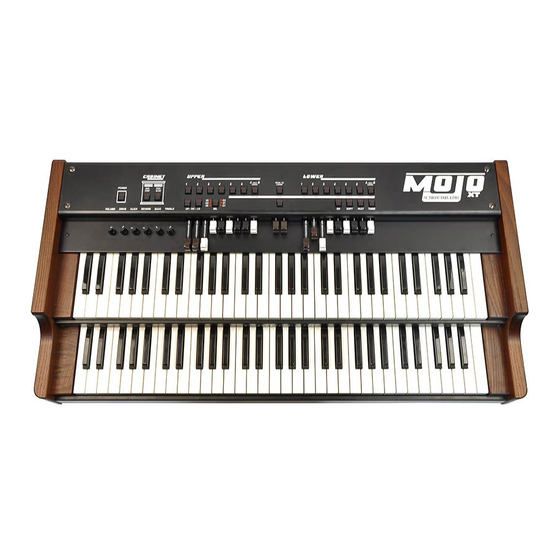
- Page 9 • Upper Section: This section consists of a button called “Manual” and six buttons called “Presets.” These buttons control the sound settings related to the upper manual drawbars found directly under the upper manual preset buttons. “Manual” – When the “Manual” button is selected, all nine drawbars can be used in real time to adjust the sound.
- Page 10 ON/OFF can be changed with this. For more information, see Section 7: Edit and Programming Mode and section 8. • Drawbars Section: The CRUMAR Mojo has 20 drawbars arranged into two sections of nine for the upper and lower manuals and a central section of two for the pedal tones.
-
Page 11: Start-Up And Shut-Down Procedures
When the knob is set in the middle position (12:00), the equalization is at zero. 5) START-UP AND SHUT-DOWN PROCEDURES To start up the CRUMAR Mojo, the instrument needs to be powered on . START-UP PROCEDURE: 1. Connect the audio cables, expression pedal, sustain pedal and rotary speaker control cables. - Page 12 Many of these parameters can be edited from the control panel of the CRUMAR Mojo, which can be helpful to adjust the sound during live performances. Additional parameters can be edited via the Graphical User Interface (GUI), which can be accessed when a monitor and mouse are connected to the instrument or using our “mojoeditor”...
- Page 13 Fig.3bis displays the “settings screen” accessible if you click in the “note” icon. Fig 3 bis The settings of all other parameters can be saved and made the default settings by pressing the red “Store” button. Generator Model – The VB3 CE 2 software is able to model 22 different tonewheel organs.
- Page 14 Obtaining Tonewheel Organ Measurements. NOTE: THIS IS A COMPLICATED PROCESS. USERS WITH NO EXPERIENCE WITH ELECTRONICS OR ELECTRONIC MEASUREMENT EQUIPMENT SHOULD NOT ATTEMPT THIS! Required tools: Calibrated Digital Oscilloscope (Experienced users may use an analog oscilloscope). 1. Locate the terminal strip on the backside of the tonewheel organ generator. 2.
- Page 15 “Reverb”: Two selections possible, digital and spring. “R.Wires”: resistors wires type, two selections possible With “Circuit” section, you can change the “leakeage” effect (ambient simulation created by magnetic interaction of tonewheels inside the organ), “Xtalk” (amount of overtones, often referred to as “Cross Talk,” created by the interaction of the different drawbar settings) and the “Brilliance”...
- Page 16 On the lower right corner, there’s the function called “settings” that allows to recall early settings or default ones. “Reset to factory” – factory reset of all controls and settings of the software. “Revert to saved” – restore all previous saved controls and settings of the software.
- Page 17 This button is used to send an “all notes off” MIDI “panic” message to all 16 MIDI channels. This function also resets the CRUMAR Mojo MIDI interface. If this button is held for three seconds, the CRUMAR Mojo sends an “all notes off” message to all 16 MIDI channels and...
- Page 18 8) BONUS SOUNDS. Crumar Mojo organ offers some additional and useful “bonus sounds” together with the tonewheel sound in the form of fixed combinations. They are accessible with the “shift” button + one of the 4 percussion buttons. Combination 1: Tonewheel organ only.
- Page 19 COMBINATION n. 1 – TONEWHEEL ORGAN Combination n. 1 is just the tonewheel organ, what the MOJO was built for and the sole reason why you have choose to play a MOJO! COMBINATION n. 2 – TONEWHEEL + TINES E.PIANO + SYNTH BASS Combination n.
- Page 20 COMMON ELEMENTS OF COMBINATIONS 2, 3 and 4 Organs: combo organs respond on MIDI channel 1; are 49 keys, from the second C to the last C, on the first octave you have a bass registration; Combo organs don't use the Rotary simulation;...
- Page 21 ACCESSING THE ADDITIONAL BONUS SOUNDS VIA MIDI CONTROL You can connect an external keyboard to the MIDI INPUT of your Mojo, have it send notes on channel 6 and play the electric piano sounds along with the tonewheel organ.
-
Page 22: Maintenance And Warranty
Software updates can be used to update or replace the VB3 CE 2 sound software installed in the instrument. Updates could include new features, updated parameters or bug fixes. Updates of the VB3 CE 2 are free for CRUMAR Mojo owners up to version 2. Visit www.crumar.it... - Page 23 11) ADDENDUM CRUMAR MOJO MIDI IMPLEMENTATION CHART FUNCTION TRASMITTED RECOGNIZED REMARKS Basic Channel Default: :1-2 Changed: :1-2 4-5 Mode Messages Default: Altered: Note Number 24-108 True Voice _______________ Velocity Note On Note Off Aftertouch Keys: Channel : Pitch Bend Control Change...
- Page 24 MIDI FUNCTIONS TABLE STANDARD FUNCTIONS Controls Midi messages Type Upper Drawbar 16 Control Change Channel 1 n 12 Continuous Upper Drawbar 5-1/3 Control Change Channel 1 n 13 Continuous Upper Drawbar 8 Control Change Channel 1 n 14 Continuous Upper Drawbar 4 Control Change Channel 1 n 15 Continuous Upper Drawbar 2-2/3...
-
Page 25: Special Functions
L&R out Selection Control Change Channel 1 n 54 Continuous / Fixed Values Crosstalk Control Change Channel 1 n 91 Continuous Keyclick Length Control Change Channel 1 n 92 Continuous Reverb Length Control Change Channel 1 n 93 Continuous Rotary Balance Control Change Channel 1 n 94 Continuous Percussion Volume... - Page 26 E-mail: info@crumar.it Manual Rev.11 – July 2015 CRUMAR and VB3 brand name and logo are trademarks of the respective owners. ASIO is a trademark of Steiberg Media Technologies GmbH VST is a trademark of Steinberg Soft-und Hardware GmbH All rights reserved.
Need help?
Do you have a question about the MOJO and is the answer not in the manual?
Questions and answers