Genie 1035 Operation & Maintenance Manual
Belt/chain drive
Hide thumbs
Also See for 1035:
- Operation & maintenance manual (32 pages) ,
- Programming, operation & maintenance manual (35 pages) ,
- User manual
Table of Contents
Advertisement
Serial Number Decal
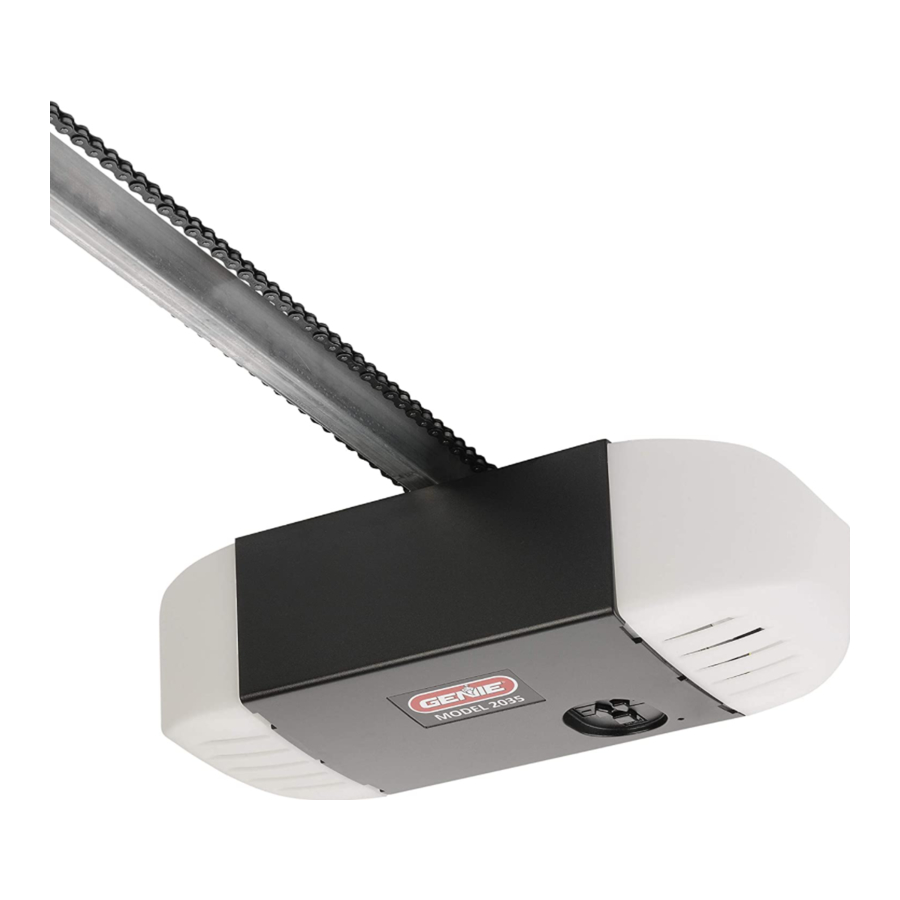
BELT/CHAIN DRIVE
GARAGE DOOR OPENER MODELS
1035, 2035, 2036,
2055, 3035, 3055,
7035, 7055
OPERATION &
MAINTENANCE
MANUAL
Includes INTELLICODE® Remote Control. Safe-T-Beam® system must be installed to close the door. For use only with
residential sectional overhead garage doors. Homelink® and Car2U® compatible
STOP
INSTALLER: LEAVE THIS MANUAL WITH HOMEOWNER
HOMEOWNER: SAVE THIS MANUAL FOR FUTURE REFERENCE
To reduce the risk of injury to persons or damage to property, use this opener only with a sectional residential door.
Por réduire le risque de blessures ou de dommages materials, utilisez cet ouvre-porte uniquement pour une porte à section ré sidentielle.
©2015 GMI Holdings, Inc d/b/a The Genie Company, the Genie logo, Intellicode, Safe-T-Reverse, SmartSet, Sure-Lock, Door Detect, and Safe-T-Beam, are trademarks of The Genie Company.
All other trademarks are property of their rightful owners. Consistent with our policy of continuing product improvements, we reserve the right to change product speci cations without
prior notice or obligations. HomeLink is a registered trademark of Gentex Corporation. Car2U is a registered trademark of Lear Corporation.
Need help or have questions?
For answers and assistance,
visit www.GenieCompany.com
or call Customer Service at: 1-800-35-GENIE
WARNING
AVERTISSEMENT
PRE-PROGRAMMED
REMOTE
INCLUDED
FOR QUICK
& EASY
INSTALL
38967503005
Advertisement
Table of Contents
Troubleshooting

Related Manuals for Genie 1035


Summary of Contents for Genie 1035
- Page 1 Por réduire le risque de blessures ou de dommages materials, utilisez cet ouvre-porte uniquement pour une porte à section ré sidentielle. ©2015 GMI Holdings, Inc d/b/a The Genie Company, the Genie logo, Intellicode, Safe-T-Reverse, SmartSet, Sure-Lock, Door Detect, and Safe-T-Beam, are trademarks of The Genie Company.
-
Page 2: Table Of Contents
Carriage Adjustment for Release ....17 Adjustment Guides ..........17 Alternate language manuals available at: www.GenieCompany.com Locating Safe-T-Beam® Pairs ......18 Idioma alternativo manuales disponibles en: www.GenieCompany.com Autre langue manuels disponibles à: www.GenieCompany.com Wiring Diagram ...........18 Troubleshooting .......... 19-20 Genie Battery Backup Installation .....21 Warranty ..............22... -
Page 3: Safety Information
Safety Information OVERVIEW OF POTENTIAL HAZARDS READ THIS SAFETY INFORMATION Garage doors are large, heavy objects that move with the help of springs under high tension and electric motors. Since moving objects, springs under tension, and electric motors can cause injuries, your safety and the safety of others depend on you reading the information in this manual. If you have questions or do not understand the information presented, call your nearest trained door system technician or visit our website at www.GenieCompany.com. -
Page 4: Important Installation Instructions
POUR RÉDUIRE LES RISQUES DE BLESSURES GRAVES VOIRE MORTELLES LIRE ET SUIVRE ATTENTIVEMENT TOUTES LES INSTRUCTIONS D’INSTALLATION ET DE FONCTIONNEMENT AINSI QUE TOUTES LES CONSIGNES DE SÉCURITÉ. Si vous avez des questions ou si vous ne comprenez pas une instruction, veuillez contacter directement The Genie Company. •... -
Page 5: Features
Turn ON when door is activated and automatically turns OFF 4 NOTE: Genie Battery Backup will only operate minutes later. after operator installation is completed and Travel Limits have been set. -
Page 6: Wall Console Features
Wall Control Features One of the following wall controls will be included. NOTE: Wall consoles from other manufactures may not work with this new opener. Use only the wall control provided with this unit. See warning. SERIES II WALL CONSOLE Open/Close Button Opens and closes door from inside garage. -
Page 7: Introduction
INTRODUCTION Now that the Genie® garage door opener is installed, follow the steps in this manual to program the opener so that the door opens and closes properly and all remote devices operate correctly. -
Page 8: Travel Limits
DO NOT set limits with Battery Backup attached. AC power régler les limites. Voir le poster d’installation (si fourni) ou MUST be connected to the opener while setting limits for appelez le service clientèle au 1-800-35-GENIE ou visitez le proper operation. site www.GenieCompany.com. -
Page 9: Opening Garage Door (Up Limit)
Programming Information Opening Garage Door (Up Limit) NOTE: Beginning with garage door closed is recommended but not necessary. READ AND UNDERSTAND STEPS 6-9 BEFORE PROCEEDING 9. Press and release the program/set button—both LEDs 6. Press and hold the UP arrow button (+) for two seconds ash blue and then go o . or until the long LED comes on blue. -
Page 10: Force Control
Wall Control Operation Force Control Contact Reverse Test NOTE: The limit and Force settings MUST BE COMPLETED before The force controls are automatically set when the wall control is used performing the Contact Reverse Test. for the rst time with garage door opener. The door MUST complete one full cycle, from full open to full close and then, full close to full 12. -
Page 11: Remote Control Programming
Remote Control Programming REMOTES Slowly press and release the remote button two times. The opener LEDs will ash and go o , indicating it has been NOTE: THE REMOTE CONTROLS INCLUDED WITH THIS OPENER, HAVE successfully programmed to the remote. BEEN PRE-PROGRAMMED AT THE FACTORY FOR YOUR CONVENIENCE. -
Page 12: Keypad Overview
Programming Wireless Keypad (Optional on some models) Tip: Program Keypad before mounting. Keypad Overview: Synchronizing Keypad to Door: 1. Press PROGRAM SET button two seconds until the round LED turns blue, then release. The long purple LED will blink. BLINKING PURPLE 2. - Page 13 Programming Wireless Keypad (Continued) Door Operation with Wireless Keypad: Mounting Keypad The keypad MUST be mounted within sight of the garage door(s) at To open and close a single door with the Keyless Entry Pad, enter least ve feet above the oor and clear of any moving door part. the PIN number and press Up/Down Key (enter).
-
Page 14: Programming Vehicle Remotes
1. Press and release button 1 again. C. Release the button being held in step B and wait for the LED to stop ashing. This button is now set for Genie. Repeat Step 2 for second Genie Opener. -
Page 15: Clearing Memory For Remotes
Clearing Remotes CLEARING MEMORY OF REMOTES Press and hold the UP (+) and DOWN (–) button at the same NOTE: Clearing memory of remotes from the powerhead will clear ALL time, until both LEDs ash blue and go o . programmed remotes and wireless keypads. -
Page 16: Maintenance And Adjustments
Maintenance and Adjustments For help, call customer service at: 1-800-35-GENIE or visit www.GenieCompany.com IMPORTANT SAFETY INSTRUCTIONS IMPORTANTES CONSIGNES DE SÉCURITÉ WARNING AVERTISSEMENT POUR RÉDUIRE LE RISQUE DE BLESSURES GRAVES VOIRE MORTELLES, TO REDUCE THE RISK OF SEVERE INJURY OR LIRE ET COMPRENDRE TOUTES LES INSTRUCTIONS. -
Page 17: Regular Maintenance
Maintenance and Adjustments (continued) Regular Maintenance C. Safe-T-Beam (STB) System Check ® Basic monthly maintenance tasks include: Check that both the RED and GREEN LEDs are ON steady. This indicates • Contact Reverse Test the system is working properly. If both LEDs are not ON steady, check •... -
Page 18: Light Bulb Replacement
Maintenance and Adjustments (continued) F. Light Bulb Replacement AVERTISSEMENT WARNING • Faire particulièrement attention lors de travaux e ectués • Use extreme caution when working from a ladder or step depuis une échelle ou en escabeau. • En referment le couvercle de l’éclairage, s’assurer que les ls stool or serious injury can occur. -
Page 19: Carriage Adjustment For Release
Rail, Chain, & Door The carriage on this opener can be adjusted to work with the Emergency Arms not shown for Release Cable Lock System (available at your local Genie® Retailer). clarity Operate door to mid position. Pull emergency release cord and manually close door. -
Page 20: Locating Safe-T-Beam® Pairs
Maintenance and Adjustments Multiple Garage Doors LOCATING SAFE-T-BEAM® PAIRS • NEVER position Safe-T-Beam® modules where signals will cross. Transmitter (RED LED) and Receiver (GREEN LED) • Place the Transmitter (Red LED) Safe-T-Beams on adjacent doors facing in opposite directions. NOTE: Direct sunlight creates interference with Safe-T-Beam ® Receiver (Green LED). STB modules CAN be positioned further away from the door opening if necessary to avoid sunlight but no further o the wall to maintain alignment with the Transmitter (Red LED) module. -
Page 21: Troubleshooting
Troubleshooting Need help or have questions? DO NOT RETURN to the store. Visit www.genicompany.com or call Customer Service at 1-800-35-GENIE. PROBLEM: WHAT TO DO: Opener does NOT • Turn Sure-Lock™ OFF See page 4. • Check power source. operator when wall –... -
Page 22: Troubleshooting
Troubleshooting Troubleshooting OPERATION (continued) PROBLEM WHAT TO DO • Be sure all door fasteners are tight. Noisy operation. • Be sure garage door is in good repair, properly lubricated and balanced. • Be sure opener is in good repair. Door opener runs • Check operating condition of door. Door may need professional repair/adjustment. slow. • Is this opener installed on a one-piece door? This opener is not designed to operate a one-piece door. POWERHEAD LEDS Powerhead LED Solution Possible Problem Round LED Long LED Normal operation. None required. Check power supply. No response from unit. -
Page 23: Genie Battery Backup Installation
Genie Battery Backup (BBU) Battery backup devices from other manufacturers will not operate with this opener. Use only Genie Battery Backup type battery that was provided. Genie P/N 111658-0002 TO PREVENT POSSIBLE CAUTION Installing Genie Battery Backup SERIOUS INJURY or DEATH... -
Page 24: Warranty
Limited Warranty GMI Holdings, Inc. d/b/a The Genie Company (“Seller”) warrants to the original purchaser of the Models 1035, 2035, 2036, 2055, 3035, 3055, 7035 or 7055 garage door opener (“Product”), subject to all of the terms and conditions hereof, that the Product and all components thereof will be free from defects in materials and workmanship for the following period(s) of time, measured from the date of purchase: MOTOR/GEARBOX –...
Need help?
Do you have a question about the 1035 and is the answer not in the manual?
Questions and answers
Lost power to the house, how do I re-engage the garage door because I had to pull the rope to disengage it.
To re-engage the Genie garage door model 1035 after pulling the rope to disengage it:
1. Close the garage door.
2. Place the carriage in the "engage" position by pulling the handle forward and up.
3. Operate the door using the remote or wall control. The carriage will automatically reattach to the drive chain or belt.
This answer is automatically generated