Table of Contents
Advertisement
Quick Links
Advertisement
Table of Contents

Related Manuals for Philips Desa DR16124


Summary of Contents for Philips Desa DR16124
-
Page 1: Digital Video Recorders
Digital Video Recorders Philips Communication, Security & Imaging... -
Page 3: Important Safeguards
IMPORTANT SAFEGUARDS 17. Servicing - Do not attempt to service this unit yourself as opening or removing covers may expose you to dangerous voltage or other hazards. 1. Read Instructions - All the safety and operating instructions should be read Refer all servicing to qualified service personnel. -
Page 4: Safety Precautions
SAFETY PRECAUTIONS SECURITE ATTENTION RISQUE D’ÉLECTROCUTION. NE PAS OUVRIR ! CAUTION:TO REDUCE THE RISK OF DANGER : POUR ÉVITER TOUT RISQUE ELECTRICAL SHOCK, DO NOT OPEN D’ÉLECTROCUTION,VEUILLEZ NE PAS COVERS. NO USER SERVICEABLE PARTS OUVRIR LE BOÎTIER. IL N’Y A PAS DE PIÈCES INSIDE. - Page 5 SICHERHEITSHINWEISE SEGURIDAD VORSICHT PRECAUCIÓN ELEKTRISCHE SPANNUNG. RIESGO DE DESCARGA ELÉCTRICA NICHT ÖFFNEN! ¡NO ABRIR! VORSICHT: DAS GEHÄUSE ZUR VERMEIDUNG PRECAUCIÓN: PARA REDUCIR EL RIESGO DE DESCARGA ELÉCTRICA, NO ABRA LAS VON ELEKTRISCHEN SCHLÄGEN NICHT TAPAS. EN EL INTERIOR NO HAY NINGÚN ÖFFNEN.
- Page 6 VEILIGHEIDSMAATREGELEN SICUREZZA VOORZICHTIG ATTENZIONE GEVAAR VOOR ELEKTRISCHE SCHOK. PERICOLO DI SCOSSA ELETTRICA. NIET OPENEN! NON APRIRE. ATTENZIONE: PER RIDURRE IL PERICOLO DI VOORZICHTIG: MAAK HET APPARAAT NIET SCOSSA ELETTRICA, NON APRIRE LE OPEN OM DE KANS OP ELEKTRISCHE COPERTURE. L’INTERNO NON CONTIENE SCHOKKEN TE VERMIJDEN.
-
Page 7: Table Of Contents
2.1 Package Contents ............................12 DÉSA FUNCTIONAL OVERVIEW AND INSTALLATION DIAGRAMS ..........13 3.1 Front Panel ..............................13 3.2 Rear Panel................................13 3.3 Connecting Philips PAN/TILT Cameras ......................14 3.4 Connecting Other Manufacturers’ Cameras ....................14 3.5 Connecting Alarm Inputs ..........................15 3.6 Connecting Auxiliary Outputs ........................15 3.7 Connecting the Watchdog Cable ........................15... - Page 8 11.1 Split Screen Display ............................41 11.2 Full Screen ..............................41 11.3 Maximizing 1 Channel ............................41 12 PAN/TILT ..............................42 12.1 Switching PAN/TILT & Display Mode ......................42 12.2 PAN/TILT Controls ............................43 13 SEARCH SETUP ............................44 13.1 Start Search..............................44 13.2 Search by Date and Time ..........................44 13.3 Play Back Searched Video ..........................45 13.4 Intelli Search ..............................47 13.5 Image Control..............................49...
- Page 9 15.1 Printer Troubleshooting ..........................85 15.2 Audio Troubleshooting ............................85 For additional information or to speak to a representative, please contact the Philips Communication, Security & Imaging location nearest you: The Americas: 1 800 326 3270 Europe & Middle East: +31 40 278 1222 Asia Pacific Region: +65 350 1859 or visit our Web site at www.philipscsi.com.
-
Page 11: Part A Désa Local Host Product Description
PART A DÉSA LOCAL HOST PRODUCT DESCRIPTION The Philips DÉSA is a Windows ® 2000-based digital recorder that produces an amazing 120–240 images per second, with average file sizes of 3–6 KB per image. This unit has sixteen (16) video inputs with independently configurable frame rate. -
Page 12: Unpacking
Verify that the items below are present (note that the Monitor is optional). If any items have been damaged in shipment, replace the item(s) properly in the shipping carton and notify the shipping company. If any items are missing, notify your Philips CSI Sales or Customer Service Representative. K M C... -
Page 13: Désa Functional Overview And Installation Diagrams
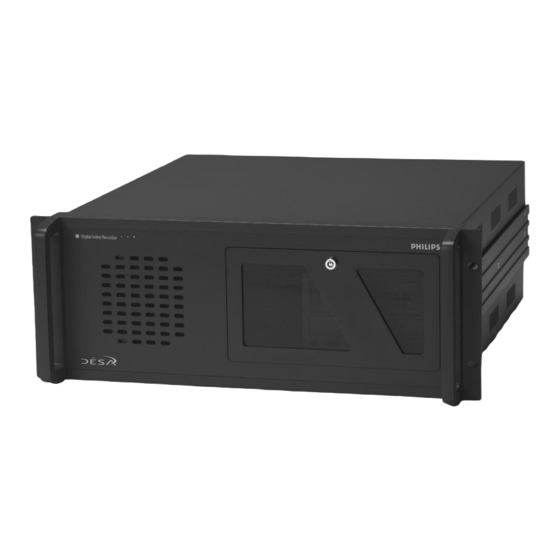
FUNCTIONAL OVERVIEW Front Panel HDD LED Run LED Power Reset Power LED Switch Floppy Drive Removable CDR-W Figure A3 DÉSA Series Video Recorder - Front Panel View Analog BNC Ports External Composite Rear Panel Monitor Port Alarm & Auxiliary Cable Connection Power Com Port 2 Switch... -
Page 14: Connecting Philips Pan/Tilt Cameras
Up to 5 for Up to 5 for Up to 5 PTZ Cameras PTZ Cameras PTZ Cameras Figure A5 DÉSA & Philips Pan/Tilt Camera Connection Connecting Other Manufacturers’ Cameras RUN LED TXD LED RXD LED External Monitor (Not Used) -
Page 15: Connecting Alarm Inputs
Connecting Alarm Inputs Connect one end of the Alarm Connection to the COM (common) point. Connect the other end of the Alarm Cable to any alarm input point (1–16). AUXILIARY-OUT ALARM-IN Figure A7 DÉSA Alarm Input Connection Connecting Auxiliary Outputs Connect one end of the Auxiliary Connection to the COM (common) point. -
Page 16: Programming The Désa
PROGRAMMING THE DÉSA Default Screen Display Name Description Split screen display Camera inputs can be viewed in 4, 6, 9, 10, 13, 16, or Full Screen Display selection modes by selecting the appropriate display layout. Sequences through the quad display modes. Displays camera video in Full Screen mode without GUI. -
Page 17: Entering A Password
Entering a Password Default screen display mode 1. Left click . The Password Input window appears. 2. To access the DÉSA menu and options, enter the 4-digit User Level password, or click the numbered buttons located at the right on the pop-up screen, then click OK. Each user level password can be changed. -
Page 18: Désa System Setup Options
Pan/Tilt, PAN/TILT is displayed at the top of the camera’s video in green text. Type Other manufacturers’ Receiver/Driver and Dome-type cameras are supported by the DÉSA system. From the drop down box, select the model identical to the one connected to the DÉSA system. PHILIPS TC8540 is the default. -
Page 19: Alarm Input Setup
5.1.2 Alarm Input Setup Name Description Enable Enable Alarm Inputs via the check box next to the alarm input numbers. No check box indicates the alarm input contact is disabled. N/C (normally closed) / By default the alarm input contact is N/O (Normally Open) N/O (normally open) Clicking N/C changes the state of the alarm input to N/C. -
Page 20: Auxiliary Setup
5.1.3 Auxiliary Setup Name Description Enable Enable Auxiliary outputs via the check box next to the auxiliary output number. An unchecked box indicates that the auxiliary output contact is disabled. Name Field for naming the auxiliary output contact, up to 16 characters in length. Automatic ON/OFF time A schedule can be entered to automatically turn ON or OFF an enabled auxiliary output contact.This eliminates manually enabling and disabling the... -
Page 21: External Monitor
5.1.4 External Monitor The DÉSA provides an analog monitor output for displaying a video sequence. The sequence dwell time and camera list are configurable. Name Description Dwell time Sets the dwell time in seconds, associated with the External Spot (select from 1–10 second capability) Monitor sequencing. -
Page 22: Motion Setup
Motion Setup Motion detection allows the DÉSA recorder to record any activity within the video, without using external alarm inputs. Name Description Camera (1–16) Click the corresponding camera number button to set up its’ motion zone(s). Detection area To create the detection area(s), place the mouse pointer over the desired area, left click, and drag until the desired area is fully covered. - Page 23 . . . Continued from previous page Name Description Setup for all cameras - Area draw Creates full screen detection area for all cameras. Setup for all cameras - Screen size Configures the recording screen resolution.The recommended screen size is 320 x 240. NOTE: Setting a screen resolution of 160 x 120 results in an approximate doubling of display update and recording speed, but video quality is low.
-
Page 24: Schedule Setup
Schedule Setup Name Description Camera Click the Camera number button to set up the schedule for its individual corresponding camera. Camera buttons with a camera connected are active (camera buttons without a camera connected are grayed out). Setting recording Use this function to set the type of recording for the selected camera, by day and type and time time. -
Page 25: Record Modes
5.3.1 Record Modes C: Continuous Record • Used when continuous recording is preferred, without motion or alarm detection. M: Motion Record • Recording is done using motion detection. A: Alarm Record • Records when an alarm condition is detected via an external alarm input. •... -
Page 26: Screen Division
Screen Division Use this function to configure the multiscreens according to the number of attached cameras. Name Description Screen division Determines the number of split screens (4, 6, 9, 10, 13, 16). 4 ch 6 ch 9 ch 10 ch 13 ch 16 ch Camera selection... -
Page 27: Communications Setup
Communication Setup Name Description Type of connection LAN, PSTN, ISDN, or Leased line can be used for remote connection. ISDN or Leased line is possible with router connection. ISDN or PSTN connections can be used to communicate directly with DÉSA, without a router. If not using remote connection, check No connection. -
Page 28: Site Information Setup
Site Information Setup Name Description Site information Enter Site code (required), Location, Model, Distributor, Sale Date, or other notes (warranty service date, other). When connecting via the Remote Client, DÉSA verifies the site code and password. If incorrect, disconnection occurs. Display Site information Check to enable DÉSA location name and site code on GUI display. -
Page 29: Password Setup
Password Setup Name Description Password change Passwords can be assigned for one (1) Administrator and five (5) users. Administrator: Full Access; User 1–User 5 are definable by the Administrator. NOTE: • No Password is set for the DÉSA. • Passwords must be 4–18 digits in length. •... -
Page 30: Audio Setup
AUDIO SETUP Name Description Camera Select the single camera whose audio is to be recorded (currently available for one (1) camera only). Audio save Enabled indicates that Audio save is enabled for the selected camera. Audio data is only captured by microphone if video is being recorded. Audio playback Enabled indicates video and audio will play back simultaneously from the search screen. -
Page 31: System Setup For Audio
System Setup for Audio 6.1.1 Volume Control Prior to recording audio, the audio level for the microphone must be set via the Start menu on the PC. Start -> Programs -> Accessories -> Entertainment -> Volume Control Select Options -> Properties. Volume control sliders appear. SoundMAX Digital Audio is installed in the DÉSA To use the audio recording function, Microphone should be set from the Properties tab. -
Page 32: Pc Setup For Microphone From Advanced Mode
6.1.2 PC Setup for Microphone from Advanced Mode If audio input through the microphone is weak, even if the volume is maximized, amplify the audio input via these Windows 2000 menu options: ® Volume Control -> Options -> Advanced Controls Select Advanced, beneath the Microphone column. -
Page 33: System Setup
SYSTEM SETUP Name Description Use Watermark Activates Watermark encoding to ensure that original video images have not been modified. Any change to the original video image causes a user message informing of video image modification. Display Watermark protect image Activates Watermark authentication display image (text) on the camera(s). -
Page 34: Backups
BACKUPS Setting Backup Schedule Name Description Title, Data time, Rotate, Media Listing of currently scheduled backups for selected date. Calendar Select a date to display scheduled backups. Click to add a backup schedule. Delete Click to delete currently scheduled backup(s). Setup Click Setup to save this backup schedule, or press Cancel to exit without saving. -
Page 35: Add Backup Schedule
Add Backup Schedule Name Description Title Enter a name for the backup schedule (for display in the backup list, shown in previous section). Date/Time Enter the Start and End date/time for the backup.The time entered must be past the current recording time in order to be valid. Rotate option Configure recurring backups via the rotation option for week, month, or year. -
Page 36: Select Backup Media
Select Backup Media Name Description Local drive Choose HDD, CD-RW, or Network Drive. Remote drive Specify an IP address and registered Password for execution of the Remote Backup Server program. NOTE: Remote location must have DÉSA Remote Client Software running. Select drive Select the Remote drive (as shown above). -
Page 37: Backup Progress Indication
Backup Progress Indication While backup is in progress, an animated icon appears at the top of the screen. Double click the icon to check backup progress and any remaining scheduled backups. -
Page 38: Storage Structure
STORAGE STRUCTURE Name Description Drive allocation Displays allocation and storage space status for each HDD. Modify storage Allows reallocation of storage structure for each drive.This structure process is initiated after DÉSA is rebooted. -
Page 39: Map Setup
E-MAP SETUP Name Description Use E-Map Activates Use E-Map, an actual graphical representation of the security site, for control of the site map, including cameras, auxiliaries, and alarms. Position No. Allows selection of the split screen location for display of the E-Map image. The E-Map can be located in any cameo of the 4, 6, 9, 10, 13, and 16 split screen displays. -
Page 40: E-Map Usage
10.1 E-Map Usage Name Description E-Map E-Map functionality may be used for each split screen of the corresponding camera number.The E-Map image is indicated from the surveillance screen. Alarm and auxiliary When an alarm input is detected, it is indicated from the corresponding in/output number icons.When an auxiliary output (automatic, timed, or manual) occurs, the corresponding auxiliary icon number on the E-Map indicates... -
Page 41: Screen Display
SCREEN DISPLAY 11.1 Split Screen Display Up to 16-camera inputs can be displayed simultaneously by selecting from the screen displays at the lower left of the main screen, as shown above. 4 ch 6 ch 9 ch 10 ch 13 ch 16 ch Full Screen Live video can be displayed in 4, 6, 9, 10, 13, and 16 split screens, or Full Screen display. -
Page 42: Pan/Tilt
PAN/TILT 12.1 Switching PAN/TILT & Display Mode When a Pan/Tilt camera is used, left click on the camera video to display in full screen. Right click on the camera video to display the Pan/Tilt mode To switch back to display mode, click DIS. -
Page 43: Pan/Tilt Controls
Aux/Set Click to display the Philips command pop-up window. Command selection From the Philips command pop-up window, select Aux ON, Aux OFF, Set, or Shot. Select one of these four options with the left mouse button to create a dialog window with entry field. -
Page 44: Search Setup
SEARCH SETUP 13.1 Start Search In display mode, press Search: 13.2 Search by Date and Time Year/ Month Hour, Minute Select the Date and Time to be searched: Click to display the date, month, year, hour, and minute as shown above. -
Page 45: Play Back Searched Video
13.3 Play Back Searched Video Name Description Camera Select the desired Camera by clicking on the corresponding numbered button. Button is depressed when selected. Audio enable Select to enable audio during video playback. Screen split display setup 4, 6, 9, 10, 13, and 16 split screen displays appear automatically according to the number of cameras present on the DÉSA system. - Page 46 . . . Continued from previous page Name Description Delay Adjust the search speed using Delay by designating the time interval (0/fastest–50/slowest) at which the search image will be displayed on the screen during playback. Example: 13 Delay Backup/Print Select to back up or print an image from the local search display. Zoom control The default video image size is 0 (Zoomed Out).To zoom in, move the slider control toward 100, one zoom interval at a time.
-
Page 47: Intelli Search
13.4 Intelli Search Name Description Scroll Use to view and select cameras for playback. Cameras Select a Camera number to search.The camera number’s graph color highlights upon selection. Time and graph These show the stored video time for the selected camera. Click on the time column indicators to change the graph’s represented units of time. - Page 48 . . . Continued from previous page Name Description Expand Click to Expand the displayed image in or out x5. Digital zoom in/ Click with the right mouse button to magnify 13 times. zoom out/move Click with the right mouse button to reduce the video image after magnification. After zooming in on the video image, click and drag with the right mouse button to move within the video image.
-
Page 49: Image Control
13.5 Image Control Name Description Brightness Adjusts the brightness for stored images. Contrast Adjusts the darkness of black and white shadings. Smoothness/ Smooths out the roughness/blurriness in the stored video image. Sharpness Noise Reduction Eliminates noise stored in the video image. De-skew Corrects twisted or skewed video images by flattening or rotating the images for better viewing. - Page 50 . . . Continued from previous page Name Description Print Print from one magnified search result screen after adjusting size and brightness. Data backup Backup of searched video via user defined media. Bookmark References the location of video image(s), allowing for a logged note and quick review at a later date.
-
Page 51: Bookmark
BOOKMARK Name Description Time information and While searching, this function shows the date and time of the video image location Description on a bookmark. The Description of the bookmark is either user-definable, or it mirrors the Time information. While searching, select to add the current video image location to the bookmark list. Delete Select the desired delete time from the bookmark list, then press Delete to remove the selected video image location from the bookmark. -
Page 52: Video Backup From Search Screen
VIDEO BACKUP FROM SEARCH SCREEN Select the video image to back up, then click The Backup window appears. Select either Floppy backup (Section 15.1), or Time backup (Section 15.3). 52 52... -
Page 53: Floppy Backup
15.1 Floppy Backup Video images may be stored via the Floppy backup option from Search -> Backup. • Click Select media as in the above data backup window, then A:\ and OK. The zoomed video image is stored in BMP or JPEG format. •... -
Page 54: Using Watermark Check Program
15.2 Using Watermark Check Program Run WMChecker.exe on the floppy disk used for backup. The following Watermark Check Program window appears: Click File Open, then select the backed up video image to be authenticated and click Open. When the Watermark Check Program window reappears, click Water Mark Check to verify authentication of the selected video image. -
Page 55: Time Backup
15.3 Time Backup Name Description Floppy Backup (See Section 15.1) Time backup Use for backing up large amounts of video to HDD, CD-RW, or Network Drive.This backup format is specific to the DÉSA, thus can only be used with DÉSA software. Date/Time Select start and end time of backup video (must be prior to the current time). -
Page 56: Formatting & Backup To Cdr/Cdrw
FORMATTING & BACKUP TO CDR/CDRW If the CD was already formatted, select the desired CDR/CDRW drive and follow the on-screen instructions. 16.1 Formatting the CD Using Direct CD Software Follow these instructions prior to backup to an unformatted CD or in case of failure during backup to CD. •... -
Page 57: Audio Function
AUDIO FUNCTION Audio Play Icon 17.1 Audio Play Configuration Click , the Audio Play icon, to display the above audio play configuration window for setting audio playback. Check Enable Audio Play. Volume Control is adjustable via the slide bar. 17.2 Audio Play Capability in Search Mode Audio can be recorded on only one channel and can be played back while watching up to 2 channels, one of which can be in full screen mode (no Audio playback is present when searching multiple camera inputs). -
Page 58: Printing Searched Video
PRINTING SEARCHED VIDEO Select to Print the selected image (one magnified screen). Adjust image size and brightness. If the system is not set up properly for printing, the following error may occur: Ensure that the printer is properly set up per the following Windows installation instructions: ®... -
Page 59: Reports
REPORTS 1. To view a database of events associated with the DÉSA, click 2. To access events associated with a DÉSA camera, select the appropriate camera(s) from the Camera No./Name drop down window. Then, select the start date From: and the stop date To: and click Query to display a list of events associated with the camera selection. -
Page 60: Introduction
PART B REMOTE CLIENT PROGRAM INTRODUCTION Description The Remote Client program enables remote access, multiserver access, remote administration, and management of video and audio on the DÉSA. Therefore, there is no need to have the DÉSA actually at your remote location! Recommended System Requirements •... -
Page 61: Remote Client Connection
REMOTE CLIENT CONNECTION ISDN, DSU, Leased Circuit Connect to USB ISDN Leased ISDN Circuit Remote PC Connect to COM2 (9 PIN) MODEM, LAN connection Modem PSTN Internet & LAN Modem Remote PC... -
Page 62: Remote Client Software Installation
REMOTE CLIENT SOFTWARE INSTALLATION To install the DÉSA Remote Software on your (Remote) PC, place the CD labeled DÉSA Remote Software into your CD drive. This will automatically initiate the auto-install for the DÉSA software. Follow the screen prompts to complete the installation of your software. - Page 63 3. File Copy Status Screen: 4. Setup Finish Screen: When the install process is complete, click Finish.
-
Page 64: Remote Client Program Execution
REMOTE CLIENT PROGRAM EXECUTION 1. Double-click the DÉSA Remote Client software icon to run the Remote Client program. 2. DÉSA Remote Client software verifies the password upon startup. By default, there is no password. CAUTION: If the password has been lost or forgotten, it is not possible to gain access to the DÉSA. (For protection, write the password down and keep it in a safe place.) It is recommended that the administrator be in charge of changing the password. -
Page 65: Main Screen Setup
MAIN SCREEN SETUP Name Description Date/Time Displays current date and time. Stop/Live Displays/stops the selected image(s), live. Search Changes to search mode. Setup Activates the Setup screen. Connect Connects to the Local DÉSA site. Disconnect Disconnects from the Local DÉSA site. Reports Displays a database log of all alarm, motion, and video loss events. -
Page 66: Remote Client Communication Setup
REMOTE CLIENT COMMUNICATION SETUP Click to begin setup of the Remote Client. The Remote Client setup screen will be displayed, as below. Press OK to display the initial Setup Screen (see the following section). -
Page 67: Setup Configuration
Setup Configuration Name Description Preservable Designates the modem connection time. Display control Displays the Manual Control button on the screen. status bar Watermark indicates Watermark authentication is enabled. Live screen data save When transmitting current images once connected to a Local DÉSA site, this function simultaneously stores the images to a designated HDD. -
Page 68: Modem Setup
Modem Setup Name Description Type of connection Select communication line type to be used. Select PSTN/ISDN - No router when using a regular phone line or ISDN (without router). Select LAN/ISDN - Router/Leased circuit - Router when using a LAN or ISDN/ISDN only line (with router). -
Page 69: Other
Other Name Description Change password For password change (factory default is no password). Enter password and click OK. Confirmation; enter new password and click OK. Health Check Rate at which the remote software polls the Local DÉSA Clock display format Format for displaying current date and time. -
Page 70: Connecting To The Local Désa
CONNECTING TO THE LOCAL DÉSA Click on the initial screen. LAN Connection The above screen displays when is selected. Enter the appropriate Site code (A), IP address or DNS/Host (B), Location (C), Password (D) and Confirmation (E), then click Add. (F) Lists the available sites for connection (as added previously). -
Page 71: Connection Via Pstn, Isdn
Once connected, the below screen is displayed. Connection via PSTN, ISDN Assumption: Modem hardware is available in the machine. 1. Click and enter the Site code, Phone No, Location, and Password. 2. Click Add to store the new configuration. 3. In the Site Connection pop up window, click Connect to establish a remote connection to the specified DÉSA. - Page 72 4. The Connecting Site dialog box (shown above) will be present while attempting remote connection. 5. If the Remote PC is running Windows 98 or Windows ME, the above dialog window appears for entry of the ® ® User name, Password, and Logon domain. If the Remote PC is set to any domain, that domain name appears by default.
- Page 73 6. The Connecting Site dialog box will appear, and after connection is established, you then have access to view video from the DÉSA site.
-
Page 74: Playing Current Image
PLAYING CURRENT IMAGE NOTE: For the purposes of this section, items covered in Part A of this manual will not be discussed in Part B. 1. Select the camera to view (uninstalled cameras won’t be displayed on screen). 2. Click to play the current image. -
Page 75: Search From The Remote Client
SEARCH FROM THE REMOTE CLIENT Name Description Search mode The user must first stop image transmission before a search can be executed. Press Search Once image transmission has stopped, press to search video. End Search End the Search by clicking to revert to the Search screen. -
Page 76: Backup From The Remote Client
Backup from the Remote Client NOTE: The Remote Client has the same backup and print capabilities as the Local DÉSA Site. Please consult Part A of this manual for further details. The following backup functions are available: • Floppy backup •... -
Page 77: Local Site Désa Setup
LOCAL SITE DÉSA SETUP 10.1 How to Set Up 1. Left click . The Password Input window appears. 2. To access the DÉSA menu and options, enter the 4-digit User Level password, or click the numbered buttons located at the right on the pop-up screen, then click OK. Each user level password can be changed. - Page 78 The below window appears, with several tabs for the selection of the following: • Hardware setup • Motion setup • Site information • Setup system • Other For further details, see Part A of this manual. In SITE Setup, the Other tab, shown above, allows the setup of Screen Divide Mode (Ref #1) and Restart Local DÉSA system (Ref #2).
-
Page 79: Remote Drive Backup
REMOTE DRIVE BACKUP When accessed from the DÉSA Local site, the Remote Drive Backup function receives data during backup. Upon Remote Client startup, this function executes automatically. Name Description Menu - > Change When executing a remote drive backup from the Local site, the password Password change option is available. - Page 80 Name Description View log Click View log (or double-click on the Backup log list, Ref #2 on the previous page) to display more detailed transmission information. Delete log Press Delete log after selecting the desired entries for deletion from the list. Press OK to exit the Backup log window.
-
Page 81: Searching Backup Data
SEARCHING BACKUP DATA Name Description Search Press to search data that resides on backup media. Ensure that the backup media being searched has been loaded. The following devices are supported: HDD, CDRW, and any Network drive recognized by Windows ® Search Mode Select Select the backup media type. -
Page 82: Audio Replay
AUDIO REPLAY The Audio Play Configuration and functionality are the same as on the Local site. Further details can be found in Part A of this manual under Section 17, Audio Function. When properly configured, this function adds audio to searched or current video data. Click the Audio Play icon to display the configuration window for setup. -
Page 83: 14 2-Way Audio
2-WAY AUDIO Name Description Connecting 2-way Audio Both sending and receiving voice transmission is possible between the Remote Client and the Local Site. Select to connect 2-way Audio once site connection has been established. If initiating 2-way Audio during image transmission, a temporary image delay may occur while the sound card initializes.This is normal. - Page 84 For details on Audio Setup, see Part A of this manual, Section 6. TIP: Check Mute to record, but not hear Audio:...
-
Page 85: Troubleshooting
TROUBLESHOOTING: 15.1 Printer Troubleshooting Verify that the printer is configured properly: Installing printer 1. In Windows 2000 click Start -> Settings -> Printers. ® 2. In Printer window, select and click Add Printer. 3. In Add Printer window, click Next. 4. - Page 86 • Go to Options > Properties. The window shown below right appears. To use 2-way Audio, the microphone must be set from the Properties tab, as shown at right. A Soundcard mixer must be installed in each system. TIP: To record but not hear audio, check Mute: The Advanced Controls for Microphone can be adjusted by clicking Advanced under Microphone in...
- Page 88 Intel Corporation. 3935 890 41611 02-20 © 2003 Bosch Security Systems, Inc. Printed In U.S.A. All Rights Reserved. Philips ® is a registered trademark of Philips Electronics N.V. Updated January 20, 2003. Data subject to change without...
Need help?
Do you have a question about the Desa DR16124 and is the answer not in the manual?
Questions and answers