Saeco Aulika SUP040R Operating Instructions Manual
Hide thumbs
Also See for Aulika SUP040R:
- Service manual (56 pages) ,
- Installation and operating instructions manual (85 pages)
Table of Contents
Advertisement
Quick Links
Description
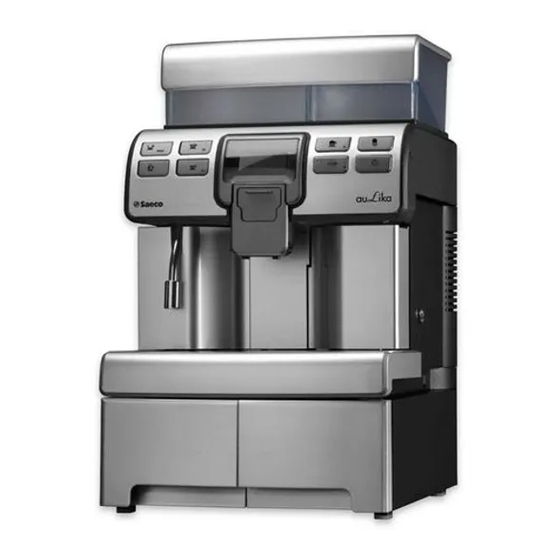
Aulika is the new line of coffee machines for the OCS and
HORECA markets, fully expressing the excellent quality of
Saeco technology.
All models include the best professional solutions, such as the
double hydraulic circuit, the high capacity of the water and coffee
tanks and the professional certification; all this guarantees the
best performance and highest reliability, extremely important in
location with high daily consumption.
The wide graphic display, designed to manage both icons and
text in different languages, and the interface (equipped with
large, easy to understand direct selection buttons) make it
possible to use and program the machine easily; maintenance
and cleaning operations, too, are made easy by the fact that all
the parts that require regular care are removable.
All Aulika models can dispense coffee and milk-based drinks, as
well as hot water and steam for more expert users.
The TOP versions are also equipped with "ONE TOUCH"
function, and automatically provide cappuccino and latte
macchiato, thanks to a special next generation cappuccinatore,
integrated in the nose of the machine. The quality of milk foam
and the temperature in the cup, two fundamental characteristics
of a good milk-based product, are really top of the line. The
TOP version, in its standard configuration, includes also the base
with extra capacity for grounds collection, and can be connected
directly to the water supply (standard equipment in the RI model).
Aulika is the Saeco range addressed at the most demanding out
of home professionals.
Main features
• New "Pinless wonder" cappuccinatore and "ONE TOUCH"
function for milk-based specialities in the TOP models
• High capacity containers for professional use (4 l water, 1 kg
coffee beans)
• Double circuit, with double pump and double boiler
• User interface with graphic display and 8 direct selection
buttons
• Wide programming menu in the local language, with credit
management capability
• Water supply connection capability
• Professional certification pursuant to the 60335-2-75 standard
Saeco is a trademark of the Philips Group
Advertisement
Table of Contents

Related Manuals for Saeco Aulika SUP040R


Summary of Contents for Saeco Aulika SUP040R
- Page 1 (standard equipment in the RI model). double hydraulic circuit, the high capacity of the water and coffee Aulika is the Saeco range addressed at the most demanding out tanks and the professional certification; all this guarantees the of home professionals.
-
Page 2: Technical Data
*Supplied separately; installed by the operator Saeco Vending S.p.A. - Località Casona, 1066 - 40041 Gaggio Montano, Bologna - Italy - Tel.: +39 0534 7741 - Fax: +39 0534 774808 info.saecovending.saecoitaly@philips.com - www.vending.saeco.com As our Company is constantly involved in the continuous improvement of its production, aesthetic characteristics and dimensions, technical data, equipment and accessories can be... - Page 3 Designed & Made in Italy...
- Page 4 As for practicality, the machine feature a one-touch function where both coffee and milk are integrated into the same pouring group. The new Cappuccinatore (frother) system, baptized by Saeco as the “Pinless Wonder”, not only delivers the perfectly steamed milk that is hot and consistent in temperature, but is also very easy to clean –...
- Page 5 The Aulika is operated trough The Aulika doesn’t just make a user-friendly keypad with an great tasting coffees; it also fea- easy to read and clear LCD dis- tures a stunning modern design play. Effortless menu navigation with its stainless steel finish. All coupled with exclusive options these features are packed in a in the “star menu”...
- Page 6 milk fridge perfect late & large coffee waste large bean & easy self easy one option cappuccino drawer water container cleaning touch operation Technical data Aulika Electrical characteristics Water connections Water tank capacity 4 l Coffee dose adjustment • Structural characteristics Power supply 230-240/50 Hz - (120-220V/60 Hz) Water supply connection 3/4’’...
- Page 7 Type SUP040R OPERATING INSTRUCTIONS Read these instructions carefully before using the machine.
- Page 8 • 2 •...
- Page 9 • 3 •...
- Page 10 SAFETY REGULATIONS or feet. Do not let the power cord hang freely from tables or shelves. Never allow water to come into contact For the Safety of Others with any of the electrical parts of the ma- Ensure that children cannot play with the ma- chine: Danger of short circuit! Hot water chine and/or the packaging materials.
- Page 11 such conditions alert the service provider, who Storing the Machine will carry out a safety check. If the machine is to remain inactive for a long time, turn it off and unplug it. Store the ma- Cleaning chine in a dry place, out of the reach of chil- Before cleaning the machine, the power button dren.
-
Page 12: Table Of Contents
Machine Use - User Manual CONTENTS 1 GENERAL INFORMATION ........7 8.7 Opening the Upper Lid ..........23 1.1 Intended Use of the Machine ........7 8.8 Filling the Water Tank..........24 1.2 To Simplify Manual Reading.........7 8.9 Filling the Coff ee Bean Hopper ........24 1.3 How to Use these Operating Instructions .....7 8.10 Closing the Upper Lid ..........25 8.11 Electrical Connection..........25... -
Page 13: General Information
Machine Use - User Manual Service Provider/Supply Operator: GENERAL INFORMATION Company or person responsible for normal ma- chine installation, start-up and suspension of Intended Use of the Machine service. On detecting machine malfunctions, the This machine automatically brews: service provider should request the assistance of - Coff ee and espresso coff ee using coff ee beans;... -
Page 14: Technical Specifi Cations
Machine Use - User Manual Residual Risks Note: When contacting the Service Provider, al- ways refer to this plate, and to the machine's spe- The dispensing outlet has no guards to prevent accidental hand cifi c data shown on it. contact with coff ee, hot beverages and/or steam. -
Page 15: Control Panel Description
Machine Use - User Manual Control Panel Description USING THE MACHINE Note: All possible controls are described here. Before start using the machine check that the water tank and the Refer to the following sections for the operating coff ee bean hopper are fi lled and that the machine is properly modes. -
Page 16: Warm-Up And Rinsing
Machine Use - User Manual Warm-up and Rinsing button (25) (if at least one coff ee-based product has been brewed). Upon start-up, the machine activates the warm-up phase. Wait until it is completed. A small amount of water will be dispensed to rinse and heat all HEATING UP…... -
Page 17: Coff Ee Brewing
Machine Use - User Manual The recommended positions are: Once the prebrewing cycle is complete, coff ee begins to come - When using small cups (Fig.03, page 3); out of the dispensing spout. - When using large cups (Fig.05, page 3). Coff ee brewing stops automatically when the set level is Two cups can be placed under the dispensing spout to brew two reached. -
Page 18: Brewing A Cappuccino
Machine Use - User Manual Remove the drawer and empty out the coff ee grounds in a suit- Place the cup under the dispensing spout (Fig.12, page 3). able container. Only when the display shows: Press the " " button (20). INSERT COFFEE The machine needs a preheating time. -
Page 19: Dispensing Hot Water
Machine Use - User Manual Note: The "STEAM" function is displayed and can be When the machine is ready, press the " " button (21) to selected only if it has been previously activated by start dispensing the latte macchiato. the service provider;... - Page 20 Machine Use - User Manual Hot Milk American Coff ee This programme allows you to prepare a hot milk. This programme allows you to prepare an American coff ee. Danger of burns! Dispensing may be preceded by Press the " "...
-
Page 21: Using The Machine With Credits
Machine Use - User Manual • Cleaning can only be carried out when the machine is cold Press the " " button (18) to confi rm. and disconnected from the electric network. • Use a soft, dampened cloth to clean the machine. The machine heats up the system. -
Page 22: Cleaning The Coff Ee Grounds Drawer
Machine Use - User Manual Cleaning the Coff ee Grounds Drawer Ensure that the Cappuccinatore, complete with all its parts, is The coff ee grounds drawer must be emptied and cleaned when- correctly inserted (Fig.10, page 3). ever indicated by the machine. To carry out this operation, refer to section 3.7. - Page 23 Machine Use - User Manual Place the cover back on the machine (Fig.08, page 3). Remove the valve from the Cappuccinatore. Important Note: It is advisable to remove the Cap- puccinatore from the machine when not being used, in order to keep it clean. Remove the suction tube from the Cappuccinatore.
-
Page 24: Machine Warnings
Machine Use - User Manual MACHINE WARNINGS This chapter describes all the warning messages that the machine provides to the user, and the actions that can and/or must be performed by the user. Help Message Displayed How to Reset the Message To restore the machine operation, close the service door. - Page 25 Machine Use - User Manual Help Message Displayed How to Reset the Message Fill the coff ee bean hopper with coff ee beans. ADD COFFEE The machine requests a descaling cycle. When this message is displayed, it is still possible to use the machine, but its correct operation might be aff ected.
-
Page 26: Handling And Storage
Machine Installation - Service Provider Manual Safety Regulations HANDLING AND • Read the entire instruction manual carefully. STORAGE • The machine must be connected to the mains according to All the operations described in chapter 7 must the safety regulations in force in the country where the ma- be performed exclusively by the service provid- chine is used. -
Page 27: Stop Functions
Machine Installation - Service Provider Manual - Use the machine in an environment in which a risk of fi re Power cord to connect the machine to the mains. exists. - Use the machine to dispense products other than those it is designed for. -
Page 28: Assembly-Siting
Machine Installation - Service Provider Manual Assembly-Siting After placing the packing container near the installation site, pro- ceed as follows: The machine must not be installed outdoors or in • Ensure that the container has not been tampered with during environments in which jets of water or steam are transport and that the original packaging is intact and closed;... -
Page 29: Opening The Upper Lid
Machine Installation - Service Provider Manual Remember that the components must be cor- Open the service door with the supplied key. rectly aligned: Check them. After installing the containers, refi t the components and close the door. Install the group compartment drawer and the drip tray. Opening the Upper Lid The upper lid should be removed in order to fi ll the containers. -
Page 30: Filling The Water Tank
Machine Installation - Service Provider Manual Filling the Water Tank Before switching on the machine, the water tank should be fi lled with fresh drinking water. Warning! Before using the machine for the fi rst time, wash the water tank carefully. The tank should be fi lled only with fresh drinking water, as hot water, carbonated water or other liquids will dam- age the machine. -
Page 31: Closing The Upper Lid
Machine Installation - Service Provider Manual 8.11 Electrical Connection Slowly pour the coff ee beans into the hopper. This operation must only be performed by special- ist technical personnel or by the service provider. The machine is designed to work with single-phase voltage matching the rating indicated on the identifi cation plate (section 1.4 "Machine Identifi cation"). -
Page 32: First Use - Use After A Long Period Of Inactivity
Machine Installation - Service Provider Manual Note: Upon fi rst use, once the warm-up is com- 8.14 Measuring and Adjusting Water Hardness plete the machine primes the circuit and performs Measuring water hardness is very important in order to correctly a rinse cycle of the internal circuits. -
Page 33: Intenza+" Water Filter
That is why all MACHINE MENU Saeco machines are equipped with the INTENZA+ fi lter. This fi lter is easy to use and its sophisticated technology is eff ective in pre- Press the "... - Page 34 Machine Installation - Service Provider Manual Immerse the "INTENZA+" water fi lter vertically in cold water Press the " " button (18) for access. (with its opening positioned upwards) and delicately press its sides so as to let the air bubbles out. ACTIVATE FILTER ACTIVATE FILTER? Note: To exit the procedure, press the "...
-
Page 35: Adjusting The Coff Ee Grinder
Machine Installation - Service Provider Manual The machine allows the coff ee grinder to be slightly adjusted in Press the " " button (18) to confi rm the introduction of order to adapt it to the kind of coff ee used. For any adjustments, the new fi lter. -
Page 36: Adjusting The "Aroma" - Amount Of Ground Coff Ee
Machine Installation - Service Provider Manual 8.17 Adjusting the "Aroma" - 8.18 Adjusting Brewed Products Amount of Ground Coff ee The machine allows you to adjust the product length according to your needs and to the cup features. The machine allows you to program the amount of coff ee to be ground for preparing each cup of coff ee. - Page 37 Machine Installation - Service Provider Manual To select the "CAPPUCCINO" option, press the " " but- Press the " " button (24) to select the "COFFEE LENGTH" ton (24). menu. BEVERAGE MENU CAPPUCCINO ESPRESSO PREBREWING COFFEE COFFEE TEMPERATURE CAPPUCCINO COFFEE LENGTH LATTE MACCHIATO MILK QUANTITY Press the "...
- Page 38 Machine Installation - Service Provider Manual Note: The factory settings can be restored for MENU each single beverage and the restored settings CREDITS MENU will be applied only to that specifi c beverage. To restore BEVERAGE MENU MACHINE MENU the other beverages' settings, enter the menu and restore the settings.
-
Page 39: Machine Programming
Machine Installation - Service Provider Manual The machine starts the milk dispensing phase. The "STOP MACHINE PROGRAMMING MILK" message is displayed. All the operations described in chapter 9 must MEMO be performed exclusively by the service provid- er or a specialised technician, who shall organ- ise all operating sequences and employ suitable means STOP MILK to ensure strict compliance with the safety regulations... -
Page 40: Programming Controls
Machine Installation - Service Provider Manual Programming Controls When the machine menus are accessed, the buttons on the key- pad take on new functions. " " "page up/change" button (20) This button allows you to: 1 Browse the pages within a menu; 2 Change the parameters when they are made editable using the "OK"... -
Page 41: Credits Menu
Machine Installation - Service Provider Manual Credits Menu This menu allows you to manage the machine credits to avoid undesired product brewing. Credit management is not active for hot water, hot milk and steam dispensing. To manage machine operation with credits. CREDITS MENU ADD CREDITS This function allows you to add credits to the machine. -
Page 42: Beverage Menu
Machine Installation - Service Provider Manual Beverage Menu BEVERAGE MENU To manage beverage dispensing. ESPRESSO To manage espresso coff ee brewing parameters. COFFEE To manage coff ee brewing parameters. CAPPUCCINO To manage cappuccino brewing parameters. LATTE MACCHIATO To manage latte macchiato dispensing parameters. HOT WATER To manage hot water dispensing parameters. - Page 43 Machine Installation - Service Provider Manual COUNTERS HOT WATER No. of hot water cups dispensed from the last RESET. CAPPUCCINO No. of cappuccino cups brewed from the last RESET. LATTE MACCHIATO No. of latte macchiato cups dispensed from the last RESET. HOT MILK No.
-
Page 44: Machine Menu
Machine Installation - Service Provider Manual Machine Menu This menu allows the general operation and maintenance parameters of the machine to be managed. To change the machine operating settings. GENERAL MENU This function activates/deactivates the acoustic alarms. TONE To deactivate the acoustic alarms. To activate the acoustic alarms This function allows the machine boilers to be activated in order to save ECOMODE... - Page 45 Machine Installation - Service Provider Manual GENERAL MENU To activate the beverage length self learning function. SELF LEARNING When set this way, self learning is not active. When set this way, self learning is active. Hold a button pressed for 3 seconds to start the automatic cup length learning cycle. To set the access PASSWORD for machine programming.
- Page 46 Machine Installation - Service Provider Manual WATER MENU This menu allows the correct water parameters for coff ee brewing to be set. To change the machine water hardness setting. HARDNESS With the "Hardness" function you can adjust your machine to the level of hardness of the water you use, so that the machine will request descaling at the right moment.
- Page 47 Machine Installation - Service Provider Manual MAINTENANCE This menu allows all the functions for correct machine maintenance to be set. This function allows you to perform the Brew Group wash cycle (see sec- BREW GROUP CLEAN tion 10.5). DESCALING This function activates and starts the descaling cycle (see section 10.7). This function starts the descaling cycle as described in the rel- START DESCALE evant section.
-
Page 48: Setting The Password
Machine Installation - Service Provider Manual Setting the PASSWORD Carry out the procedures described in steps (7) and (8) to set the chosen numbers. The PASSWORD must be set by the service provider in order to prevent access by unauthorised personnel who could change the Here an example that explains the procedure. -
Page 49: Cleaning And Maintenance
Saeco detergent. be performed exclusively by the service provider or a specialised technician, who shall organise The Saeco detergent may be purchased at your local dealer or at all operating sequences and employ suitable means to en- authorised service centres. - Page 50 Machine Installation - Service Provider Manual Drinking the solution dispensed during this pro- CAPPUCCINATORE CLEANING cedure is strictly prohibited. The solution must be WASH THE disposed of. CAPPUCCINATORE? CAPPUCCINATORE CLEANING PLACE A CONTAINER Note: If this option is confi rmed, the cycle must be UNDER THE DISPENSING SPOUT completed.
-
Page 51: Brew Group - Weekly Cleaning
Machine Installation - Service Provider Manual Place an empty container under the dispensing spout and Open the service door with the supplied key. press the " " button (18) to confi rm. CAPPUCCINATORE RINSING The machine performs a Cappuccinatore rinse cycle. The bar shows the rinsing progress. -
Page 52: Cleaning The Brew Group With "Coff Ee Clean Tablets
Machine Installation - Service Provider Manual Lift the rear side of the inner drawer and unlock the drawer. Ensure that the lever is in contact with the brew group base. Remove the inner drawer, wash it and put it back into its seat. Ensure that the hook to lock the Brew Group is in the correct position;... - Page 53 Machine Installation - Service Provider Manual Warning: The "Coff ee Clean Tablets" has no descal- BREW GROUP CLEAN ing property. For descaling use the Saeco descal- EXTRACT BREW GROUP ing solution and follow the procedure described in the "Descaling" chapter.
-
Page 54: Brew Group Lubrication
Before lubricating the brew group clean it under running water as described in the "Brew Group - Weekly Cleaning" section. Lubricate the brew group guides using the Saeco grease only. After placing the tablet in the brew group press the "... -
Page 55: Descaling
Use the Saeco descaling product only. Its formula has been de- signed to ensure better machine performance and operation for its whole operating life. If correctly used, it also avoids alterations in the brewed product. - Page 56 ALL THE COMPONENTS DESCALING SOLUTION Insert the complete Cappuccinatore into the machine and Pour the entire content of the Saeco concentrated descal- remove the dispensing spout. ing solution into the water tank and then fi ll the tank with fresh drinking water up to the level indicated by the icon.
- Page 57 Machine Installation - Service Provider Manual Insert the tank into the machine. Press the " " button (18). DESCALING PLACE A CONTAINER UNDER MILK AND HOT Empty the containers used to collect the liquid dispensed by WATER SPOUTS the machine. DESCALING Place a container under the hot water wand and a large EMPTY DRIP TRAY...
-
Page 58: Machine Disposal
Machine Installation - Service Provider Manual Once the rinse cycle is complete, the machine carries out the 11 MACHINE DISPOSAL warm-up and rinse cycle to be ready for product brewing. The packing materials can be recycled. Appliance: Unplug the appliance and cut the power cord. Empty the containers used to collect the liquid dispensed by Deliver the appliance and power cord to a service center or the machine and reassemble the dispensing spout. -
Page 59: Troubleshooting
12 TROUBLESHOOTING Machine actions Causes Solutions The machine does not switch on. The machine is not plugged and/or the power but- Plug the machine and/or switch the power but- ton is positioned on "0". ton to "I". Coff ee is not hot enough. The cups are cold. - Page 60 • 54 •...
- Page 61 • 55 •...
- Page 62 The manufacturer reserves the right to make changes without prior notice.
Need help?
Do you have a question about the Aulika SUP040R and is the answer not in the manual?
Questions and answers
insert coffee grounds drawer, what to do ?
Place the coffee grounds drawer in its seat as referenced in the manual (Ref.14 - Page 2).
This answer is automatically generated