
Related Manuals for Scott ISO 4210:2014


Summary of Contents for Scott ISO 4210:2014
- Page 1 SCOTT-SPORTS.COM SCOTT GENERAL INFO ISO 4210:2014 / ISO 8098:2014 / EN 15194 TRANSLATION OF THE ORIGINAL SCOTT OPERATING INSTRUCTIONS TREKKING-PEDELEC...
- Page 2 INSTRUCTIONS Read the translation of these original SCOTT operating instructions and the manuals of the component manufacturers on this SCOTT info CD! Together with the manuals of the component manufacturers and the system instructions of Read at least pages 13-28 before your first ride! the drive manufacturer and the translation of these original SCOTT operating instructions is part of a system.
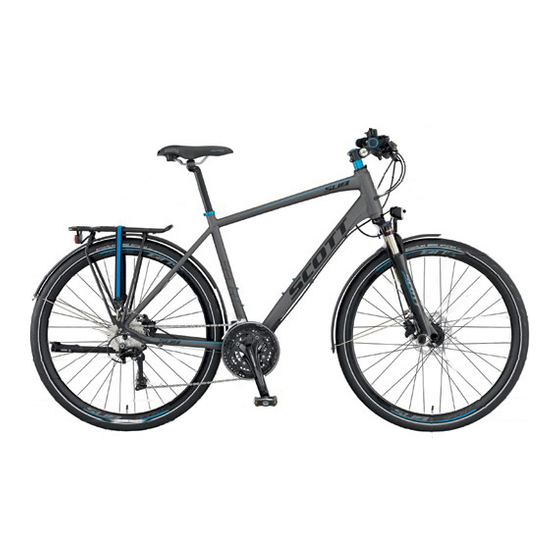
- Page 3 SCOTT CITY/TREKKING BIKE SCOTT PEDELEC SCOTT PEDELEC Frame: Top tube 1 Saddle 18 Handlebars Down tube 2 Seat post 19 Brake lever Central tube 20 Shifter 3 Seat post clamp Seat tube 4 Pannier rack 21 Headset Chainstay 5 Rear light...
-
Page 4: Table Of Contents
Mechanical disc brakes with your SCOTT pedelec ....... . . 25 Roller, drum and back-pedal brakes . - Page 5 Recommended torque settings for disc brakes and hydraulic rim brakes on your SCOTT bike ..... . 143 Special case – pedelecs........116 LEGAL REQUIREMENTS FOR RIDING ON PUBLIC ROADS .
-
Page 6: Some Notes On The Translation Of These Original Scott Operating Instructions
City bikes (a) This symbol provides you with information about how to handle the prod- Trekking bikes (b) uct or refers to a passage in the translation of these original SCOTT operat- Urban bikes ing instructions that deserves your special attention. -
Page 7: Safety And Behaviour
Our SCOTT frames and components are customized and adjusted to The described possible consequences will not be repeated in this translation suit the needs of the users to enhance your joy when riding on your new SCOTT of the original SCOTT operating instructions every time one of the symbols bike –... - Page 8 SCOTT bike. bike at all times. When setting off on a SCOTT pedelec, keep in mind that the drive boosts your cycling speed. If necessary, attend a beginners course for When doing any adjusting and servicing (a), be aware that the detailed instruc- cyclists or pedelec riders, as already offered here and there.
-
Page 9: Intended Use Of Your Scott Bike
There is no bicycle type which is suitable for all purposes. Your SCOTT dealer bike unless you feel absolutely sure about it. If you are in doubt or if you will be pleased to help you finding the right SCOTT bike for your needs. He will have any questions, contact your SCOTT dealer. - Page 10 When you stop pedalling, the motor switches off. Contact your SCOTT dealer before mounting. A driving licence is not required for riding a SCOTT pedelec (d), if the motor assistance switches off automatically at a speed of 25 kmh. You do not need an DANGER! operating licence and need not insure the pedelec either.
- Page 11 SCOTT pedelec must no longer be used on public roads. DANGER! Be sure to use your SCOTT bike only for its intended purpose, as it may Check in the country where you use your SCOTT speed pedelec whether you otherwise not withstand the stress and fail. Risk of falling! require a moped licence or a driving licence for motor vehicles.
-
Page 12: Tests Before Your First Ride
It is essential to also observe the system instructions of your drive manu- are used to (right or left). If it is not, ask your SCOTT dealer to switch the facturer as well as the manuals of the component manufacturers on this brake levers before you set off for the first time. -
Page 13: Additional Information "Tests Before Your First Ride" With Your Scott Pedelec
DANGER! SCOTT dealer to adjust the suspension settings to your needs. Improperly In case you had a crash with your SCOTT bike, perform at least the check adjusted suspension elements are liable to malfunction or damage. In any described in the chapters “Tests before every ride“ and “Tests after an case they will impair the performance of your bike as well as your safety and accident“. - Page 14 DANGER! weight distribution on bikes without drive assistance. A SCOTT pedelec is Be sure to use your SCOTT pedelec only for its intended purpose, as it may markedly heavier than a SCOTT bike without drive assistance. For this reason otherwise not withstand the stress and fail. Risk of falling! parking, pushing, lifting and carrying the SCOTT pedelec is more difficult.
-
Page 15: Tests Before Every Ride
If your SCOTT pedelec topples over, it can suffer from damage. You should not be able to pull the lever all the way to the handlebars. If your bike has hydraulic brakes, check the hydraulic brake cables for oil or brake fluid leaks! Check the thickness of the brake pads, as well. -
Page 16: Additional Information "Tests Before Every Ride" With Your Scott Pedelec
These have no memory effect. It does not matter, if your Improperly closed fastenings, e.g. quick-releases, can cause parts of your SCOTT pedelec is left as it is for a short time (e.g. during a break) when less SCOTT bike to come loose and result in serious accidents! than 50% charged (e). -
Page 17: Using Quick-Releases
Move the lever back, as if to close it. Now you should be able to read ”Close“ on Do not use your SCOTT pedelec, if it fails at one of these points! A defective the outside of the lever. When you start closing the lever you should feel virtu-... -
Page 18: Adjusting The Scott Bike To The Rider
If you have a very small frame, there may be the danger of your foot col- key. If you are in doubt or if you have any questions, contact your SCOTT dealer. liding with the front wheel. Therefore, make sure your cleats are properly DANGER! adjusted. -
Page 19: Adjustment Of The Saddle To The Correct Height
If sitting on the saddle causes you trouble, e.g. because it numbs your crotch, this may be due to the saddle. Your SCOTT dealer has a very wide Verify in between that the seat post is sufficiently tight by taking hold of the range of saddles available and will be pleased to advise you. -
Page 20: Adjustment Of The Height Of The Handlebars
DANGER! the deeper insertion depth. The stem is one of the load bearing parts of your SCOTT bike. Changes to it can impair your safety. If you are in doubt or if you have any questions, CAUTION! -
Page 21: Stems - Conventional
DANGER! Stems - conventional Never ride a SCOTT bike with a stem that has been drawn out beyond the mark for the maximum permissible height (a)! Check all bolted connections Handlebars with conventional stems allow limited vertical adjustment. This is and test your brakes before you set off! done by moving the stem up or down inside the fork steerer tube (a). -
Page 22: Stems For Threadless Systems - Aheadset
(f). Stems for threadless systems – Aheadset® In the case of SCOTT bikes with Aheadset® headsets the stem also serves to Tighten carefully by approaching the prescribed maximum torque value in small adjust the bearing preload. -
Page 23: Saddle Adjustment - Fore-To-Aft Position And Horizontal Tilt
The manufacturers of saddles deliver their products with detailed manuals. The inclination of your upper body (a), and hence your riding comfort and You find these manuals on this SCOTT info CD. Read them carefully before pedalling power, are also influenced by the distance between the grips of the adjusting the position of your saddle. - Page 24 Use a different saddle model (f) or contact your SCOTT dealer. Having found your preferred position, make sure both clamp halves fit snugly around the saddle rails before tightening the bolt(s) to the correct torque value DANGER! as prescribed by the seat post manufacturer.
-
Page 25: Cockpit Adjustment
In the case of hydraulic brakes and disc brakes follow the manual of the brake manufacturer, which you can find on this SCOTT info CD. If you are in doubt or if you have any questions, contact your SCOTT dealer. -
Page 26: Glossary
CAUTION! If you want to mount multi-position handlebars or bar ends to the alumin- ium or carbon handlebars of your SCOTT bike, inform yourself in advance whether these components are permitted on your SCOTT bike. If necessary, contact your SCOTT dealer before mounting. -
Page 27: Front Suspension
Damping is usually done by oil. Get off your SCOTT bike so that the fork does not compress any more. The dis- tance between the rubber ring/cable tie and the wiper is the negative suspen- NOTE! sion travel, or sag (e). -
Page 28: Adjusting The Damping Control
When replacing any parts, be sure to only use parts that bear the appropriate If you have found the desired setting, write down the ideal inflation pressure mark and, to be on the safe side, original spare parts. Your SCOTT dealer will be for later checks. -
Page 29: Lockout
SCOTT dealer or follow the corresponding instructions in the manual CAUTION! of the suspension fork manufacturer, which you can find on this SCOTT info CD. Do not actuate the lockout function when riding over field tracks, but only when riding over smooth terrain (such as roads or field tracks) (d). -
Page 30: Suspension Seat Posts
The adjustment is made by a bolt which is screwed into the seat pension fork service centre. post at its lower end. Ask your SCOTT dealer to explain you the basic setting. 6. Suspension forks with pneumatic springs must be checked regularly for air pressure (c), since the air escapes over time. -
Page 31: Brakes
SCOTT dealer to switch the brake levers before you set off for the (b), resulting in an overturning of the SCOTT bike and, secondly, by the grip of first time. -
Page 32: Rim Brakes
The position of the brake lever where the brake starts to act, also referred to as See your SCOTT dealer and ask them to examine the remaining thickness of the pressure point, can be adjusted to the size of the hand as well as to individual rims when you have worn through your second set of brake pads at the latest. -
Page 33: Hydraulic Rim Brakes
See your SCOTT dealer and ask him to examine the remaining thickness of the rims when you are through your second set of brake pads at the latest. Your Hydraulic rim brakes SCOTT dealer has special measuring devices for determining the remaining thickness of the rims (d). -
Page 34: Disc Brakes
(b) to compensate the wear. Observe the operating instructions of the DANGER! brake manufacturer on this SCOTT info CD. If you are in doubt or if you have any Disc brakes get hot in use. For this reason do not touch the brakes directly questions, contact your SCOTT dealer. -
Page 35: Hydraulic Disc Brakes
Only transport your SCOTT bike with wheels mounted or if dismounted with the brake. If you are in doubt or if you have any questions, contact your SCOTT safety locks. Pull the brake lever and secure it with a strong elastic strap, dealer. -
Page 36: Roller, Drum And Back-Pedal Brakes
NOTE! DANGER! Read in any case the manual of the brake manufacturer on this SCOTT info If during braking the travel of the brake lever increases, unusual noises oc- CD carefully before removing the wheel or doing any maintenance work. -
Page 37: Gears
– higher gear ratio Small front chainring – low/easy gear – lower gear ratio The gears of your SCOTT bike (a+b) serve to adjust the gear ratio to the terrain Large rear sprocket – low/easy gear – lower gear ratio you are riding on and the desired speed. -
Page 38: Checking And Readjusting
Find below the principles of the shift lever types and their operation. It is, how- DANGER! ever, also possible that your new SCOTT bike has a gear system that is not listed below. Shifting gears under load, i.e. while pedalling hard, can make the chain slip. -
Page 39: Adjusting The Rear Derailleur
Do a test ride in a place free of traffic, after adjusting the gears of your NOTE! bicycle. Ask a helper to lift the rear wheel or hang the SCOTT bike into a work stand. CAUTION! By turning the cranks and shifting through you can easily check the func- tion. -
Page 40: Adjusting The Front Derailleur
“H“ and “L“ (a). The adjustment is guaranteed via one or several planetary gears, depending on the limit screws are adjusted by your SCOTT dealer. They do not alter their position number of gears. To change gears the pedal force should be reduced shortly. -
Page 41: Check, Readjustment And Maintenance
SCOTT info CD. by offering smoother running and comfort than a chain. In addition, the belt is more resistant to corrosion and the influence of direct sunlight. -
Page 42: Bicycle Chain
Once this is done, When replacing your chain, only use appropriate and suitable original spare turn the cranks a few more times; then let your SCOTT bike rest for a few min- parts (f). Your SCOTT dealer will be pleased to help you. -
Page 43: Wheels And Tyres
first kilometres. Ask a rough surface. Rolling resistance on level ground decreases with growing your SCOTT dealer to check and true up the wheels after you have bedded pressure, but so does comfort. Highly inflated tyres are therefore most suitable them in over about 100 to 300 kilometres or 5 to 15 hours of use. -
Page 44: Valves
The functioning of the SCOTT bike may even be impaired before you no- tice the wobbling appearance of a wheel that has gone out of true. -
Page 45: Repairing Tyre Punctures
You will find it easier to remove the rear wheel, when you pull the rear derailleur slightly backwards. Lift your SCOTT bike a little off the ground and give the REPAIRING TYRE PUNCTURES wheel a light blow with your hand so that it drops out. -
Page 46: Clincher And Folding Tyres
Rim tapes for this type of rim should only be made of fabric or durable plastic. If you are in doubt or if you have any questions, contact your SCOTT dealer. To finish mounting the tyre, start at the opposite side of the valve. Using your thumbs, press as much of the second bead of the tyre over the edge of the rim as you can. -
Page 47: Remounting The Wheel
(several times, if you have disc brakes). Lift your SCOTT bike off the ground and spin the wheel with your hand. With Check whether the tyre is properly seated by inspecting the fine witness line the wheel spinning the rotor should not drag along the brake calliper or the just above the rim edge. -
Page 48: Tests After An Accident
(b). Briefly lean 5. Let your SCOTT bike bounce on the ground from a small height. If there is on the brake levers to make sure the handlebars are firmly fixed in the stem. -
Page 49: Additional Information "Tests After An Accident" With Your Scott Pedelec
SCOTT dealer after an accident or similar 3. Let your SCOTT pedelec bounce on the ground from a small height. If there is incident. Carbon is extremely strong and durable with very low weight, making any rattling, check where it comes from. -
Page 50: Conventional Headsets
Bring your weight to bear on the saddle, pull the front brakes with your other hand and push the SCOTT bike firmly back and forth with the wheel manufacturer on this SCOTT info CD. -
Page 51: Riding A Scott Pedelec
If you face any problems with your drive (e.g. because CAUTION! it pushes you forward in front of a bend), slow down your SCOTT pedelec Do not overtighten the upper bolt, it only serves to adjust the headset play carefully. -
Page 52: Useful Information For A Long Ride
Shift gears frequently (a) in the same way that you are used to doing Keep in mind that pedestrians do not hear you when you approach at high with a conventional SCOTT bike so as to make your own contribution to your speed. Therefore, ride particularly defensive and anticipating when using forward progress as efficient as possible. -
Page 53: Riding Without Motor Assistance
USEFUL FACTS FOR RIDING A SCOTT SPEED PEDELEC the decisive advantage of the hybrid concept of your SCOTT pedelec: Without drive assistance you can ride your SCOTT pedelec like a usual bike with an un- limited range and nearly without compromising on riding characteristics. -
Page 54: Information For Proper Handling Of The Rechargeable Battery
- using lanes that are marked with a road sign allowing access for mopeds, tyres that are not of identical size, may cause harm to the safety of your SCOTT - using your SCOTT speed pedelec on cycle lanes which are allowed for mo- pedelec or SCOTT speed pedelec. - Page 55 SCOTT pedelec! Do not deposit any objects in the storage area (e.g. clothes). DANGER! Make sure to use the battery only for the SCOTT pedelec (f) for which it is designed. TREKKING-PEDELEC | ORIGINAL OPERATING INSTRUCTIONS 2016 ORIGINAL OPERATING INSTRUCTIONS 2016 | TREKKING-PEDELEC...
-
Page 56: Scott Kids' Bikes
CAUTION! If you want your child to use his/her SCOTT kids’ bike (e) on the road, you Do not dispose of your rechargeable battery in the normal household rub- should be willing to invest time in road safety instruction and help him/her im- bish (c)! It must be disposed of according to battery disposal regulations. -
Page 57: Adjustment
Make sure the child always wears a properly fitting cycling helmet and well give your child a scooter or a SCOTT walker (a), so that he/she can train his/her visible, i.e. bright, clothing. It is also advisable to wear reflector stripes to sense of balance. -
Page 58: Lighting Of Your Scott Bike
”Adjusting the SCOTT bike to the rider”. If you are in doubt or if you have any questions, You should be familiar with the assembly of the lighting set so that you can contact your SCOTT dealer. -
Page 59: Hub Dynamo
SPECIAL CASE – PEDELECS HELMETS AND GLASSES In some countries it is allowed for SCOTT pedelecs to feed the lighting from the battery (c). Even if the motor no longer works, because the battery is empty, the Cycling helmets (f) are absolutely recommendable. Your SCOTT dealer has a residual current will do for the lighting. -
Page 60: Clothing
Only use clipless pedals allowing you to engage and disengage smoothly. cause knee pain in the long run. Your SCOTT dealer has a wide range of shoes A defective pedal or a badly worn cleat can make the shoe disengage from available and will be pleased to advise you. -
Page 61: Accessories
Do not forget to take a high quality D- (e) or chain lock with you on your ride. be sure to have proper equipment and to keep a few tips in mind. Your SCOTT The only way to effectively protect your SCOTT bike against theft is to lock it to dealer has a variety of useful accessories on offer enhancing both your safety an immovable object. -
Page 62: Cycle Computers
Using a rucksack is a convenient way of transporting Kickstand luggage on a bike. However, your SCOTT bike is fitted with a pannier rack (d) for Bike kickstands (b) are intended to prevent your bike from falling over when it is longer cycling tours or if you intend to take heavy and bulky items with you. -
Page 63: Transporting Children On Your Scott Bike
Some of the towing devices are attached to the seat post of the SCOTT bike that is towing. Suspension from one point of the seat post is somewhat unstable. USING A CHILD CARRIER Systems in which the kids’... -
Page 64: Transport Of The Scott Bike Or Scott Pedelec
If you want to use your SCOTT bike for towing a trailer system, check with the required supporting load on the trailer hitch. whether it is approved for towing. Have a look at the SCOTT bike card or ask your SCOTT dealer for advice. -
Page 65: By Public Transport
DANGER! CAUTION! Do not buy a carrier on which the SCOTT bike has to be mounted upside Be sure to transport your SCOTT bike only with the wheels mounted. If down, i.e. with the handlebars and saddle fixed face down to the carrier. -
Page 66: What To Bear In Mind When Transporting Your Scott Pedelec
By car the car. If you transport your SCOTT pedelec without its battery on a bike carrier SCOTT pedelecs can be transported like conventional SCOTT bikes outside or system, protect the connections against water, moisture and dirt, for example, inside the car (a). -
Page 67: By Plane
SCOTT service and mainte- If you intend to take your SCOTT pedelec by plane or to dispatch it by a for- nance schedule. If you ride a great deal on poor road surfaces or on uneven... -
Page 68: Cleaning And Caring For Your Scott Bike Or Scott Pedelec
A rechargeable battery that has reached the end of its service life must not drying to give them a nice shine. be disposed of with normal household rubbish (f). Bring the rechargeable battery to the dealer, where you buy your new one. If in doubt, ask your SCOTT DANGER! dealer. -
Page 69: Sheltering And Storing Your Scott Bike Or Scott Pedelec
To be on the safe side, be sure to only use original spare parts. gradually lose air when the bike is not used for a long time. If your SCOTT bike is left standing on flat tyres for an extended period, this can cause damage to Components which must not be replaced or only after a type test, e.g. -
Page 70: Maintenance And Care Of Your Scott Pedelec Motor
Once this is done, turn the cranks a few more times; then let the SCOTT pedelec rest for a few minutes so that the lubricant can disperse. Finally wipe off excess lubricant with a rag so that it does not spatter around during riding or can collect road dirt. -
Page 71: Scott Service And Maintenance Schedule
If you come across any defects, take appropriate measures without delay. If Replace liquid (DOT-liquids) you are in doubt or if you have any questions, contact your SCOTT dealer. Suspension forks Check and retighten bolts, if necessary All-inclusive service (change oil) Jobs marked o are best left to your SCOTT dealer. -
Page 72: Recommended Torque Settings For Your Scott Bike
These values are reference values of the above-mentioned component manu- facturers. Observe the values in the manuals of the component manufacturers on this SCOTT info CD. These values do not apply to the components of other All bolted connections of the bike components have to be tightened carefully manufacturers. -
Page 73: Recommended Torque Settings For Disc Brakes And Hydraulic Rim Brakes On Your Scott Bike
Discrete Clamp Bolt/ 5 - 7 Hinge Clamp Bolt/ If you want to use your SCOTT bike for riding on public roads (d), it has to be XLoc Hinge Clamp Bolt: 5 - 6 equipped according to the regulations of the respective country. -
Page 74: Warranty And Guarantee
Therefore, be sure to keep these documents in a safe place. Brake pads Brake fluid (DOT) Handlebar tape To ensure a long service life and good durability of your SCOTT bike, use it Brake discs/rotors (e) Lamps only for its intended purpose (see the chapter “Intended use of your SCOTT... -
Page 75: Guarantee On Scott Bikes
On Gambler, Voltage Fr and Volt-X the warranty period is limited to two years. of the manual) will remain in copy at the SCOTT dealer after acceptance and signature of the consumer. It is obligatory to show this protocol of handing over... -
Page 76: Service Plan
Carried out on: Stamp and signature Carried out on: Stamp and signature of the SCOTT dealer: of the SCOTT dealer: 4th service – After 6,000 kilometres or 2nd service – After 2,000 kilometres or 300 hours of use or after three years 100 hours of use or after one year Order no.: . - Page 77 Carried out on: Stamp and signature Carried out on: Stamp and signature of the SCOTT dealer: of the SCOTT dealer: 6th service – After 10,000 kilometres or 8th service – After 14,000 kilometres or 500 hours of use or after five years 700 hours of use or after seven years Order no.: .
- Page 78 Carried out on: Stamp and signature Carried out on: Stamp and signature of the SCOTT dealer: of the SCOTT dealer: 10th service – After 18,000 kilometres or 12th service – After 22,000 kilometres or 900 hours of use or after nine years 1,100 hours of use or after eleven years Order no.: .
-
Page 79: Bike Card
Handover date, stamp, Permissible overall load Signature of the SCOTT dealer SCOTT bike, rider and luggage The customer confirms with his signature that he received the SCOTT bike in Pannier rack/permissible load £ no £ yes proper condition along with the accompanying documents specified below and Child seat permitted £... - Page 80 All rights reserved © 2015 SCOTT Sports SA SCOTT Sports SA | 17 Route du Crochet | 1762 Givisiez | Switzerland Distribution: SSG (Europe) Distribution Center SA P.E.D Zone C1, Rue Du Kiell 60 | 6790 Aubange | Belgium...
Need help?
Do you have a question about the ISO 4210:2014 and is the answer not in the manual?
Questions and answers