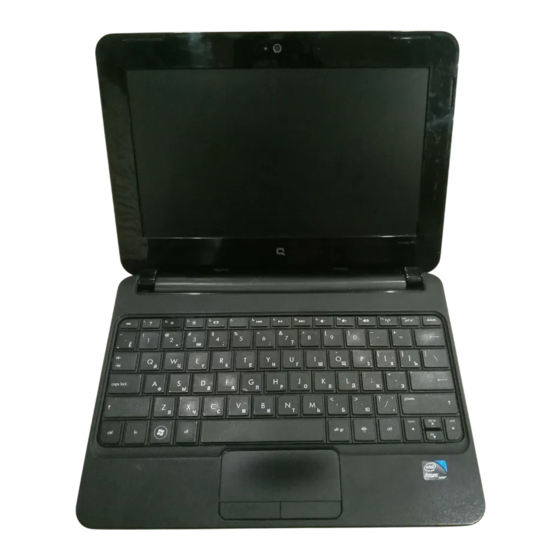
HP compaq mini cq10 Manual
Hide thumbs
Also See for compaq mini cq10:
- Maintenance and service manual (108 pages) ,
- Reference manual (103 pages) ,
- User manual (89 pages)
Table of Contents
Advertisement
Quick Links
Top . . . . . . . . . . . . . . . . . . . . . . . . . . . . . . . . . . . . . . . . . . . . . . . . . . . . . . . . . . . . . . . . . . . 1
TouchPad . . . . . . . . . . . . . . . . . . . . . . . . . . . . . . . . . . . . . . . . . . . . . . . . . . . . . . . . . . 1
Lights . . . . . . . . . . . . . . . . . . . . . . . . . . . . . . . . . . . . . . . . . . . . . . . . . . . . . . . . . . . . . 2
Keys . . . . . . . . . . . . . . . . . . . . . . . . . . . . . . . . . . . . . . . . . . . . . . . . . . . . . . . . . . . . . . 3
Front . . . . . . . . . . . . . . . . . . . . . . . . . . . . . . . . . . . . . . . . . . . . . . . . . . . . . . . . . . . . . . . . . . 4
Right side . . . . . . . . . . . . . . . . . . . . . . . . . . . . . . . . . . . . . . . . . . . . . . . . . . . . . . . . . . . . . . 4
Left side . . . . . . . . . . . . . . . . . . . . . . . . . . . . . . . . . . . . . . . . . . . . . . . . . . . . . . . . . . . . . . . 6
Display . . . . . . . . . . . . . . . . . . . . . . . . . . . . . . . . . . . . . . . . . . . . . . . . . . . . . . . . . . . . . . . . 8
Bottom . . . . . . . . . . . . . . . . . . . . . . . . . . . . . . . . . . . . . . . . . . . . . . . . . . . . . . . . . . . . . . . . 9
Keyboard and pointing devices . . . . . . . . . . . . . . . . . . . . . . . . . . . . . . . . . . . . . . . . . . . . 10
Using the keyboard . . . . . . . . . . . . . . . . . . . . . . . . . . . . . . . . . . . . . . . . . . . . . . . . . . 10
Setting pointing device preferences . . . . . . . . . . . . . . . . . . . . . . . . . . . . . . . . . . . . . 12
Using pointing devices . . . . . . . . . . . . . . . . . . . . . . . . . . . . . . . . . . . . . . . . . . . . . . . 12
Thank you for choosing Verizon Wireless . . . . . . . . . . . . . . . . . . . . . . . . . . . . . . . . . . . . 17
Mobile Broadband setup. . . . . . . . . . . . . . . . . . . . . . . . . . . . . . . . . . . . . . . . . . . . . . . . . . 17
Verizon Wi-Fi . . . . . . . . . . . . . . . . . . . . . . . . . . . . . . . . . . . . . . . . . . . . . . . . . . . . . . . . . . 20
Setting up Internet Connection Sharing (ICS) . . . . . . . . . . . . . . . . . . . . . . . . . . . . . . . . . 21
Upgrade VZAccess Manager software . . . . . . . . . . . . . . . . . . . . . . . . . . . . . . . . . . . . . . . 21
Finding Verizon Wireless help in the U.S. . . . . . . . . . . . . . . . . . . . . . . . . . . . . . . . . . . . . 22
Global access outside of the U.S. and Canada . . . . . . . . . . . . . . . . . . . . . . . . . . . . . . . . . 22
Removing or inserting a SIM Card. . . . . . . . . . . . . . . . . . . . . . . . . . . . . . . . . . . . . . . . . . 23
Using VZAccess Manager outside of the U.S. and Canada . . . . . . . . . . . . . . . . . . . . . . . 25
GPS functionality . . . . . . . . . . . . . . . . . . . . . . . . . . . . . . . . . . . . . . . . . . . . . . . . . . . . . . . 26
Verizon Wireless network technology . . . . . . . . . . . . . . . . . . . . . . . . . . . . . . . . . . . . . . . 26
VZAccess Manager user tips . . . . . . . . . . . . . . . . . . . . . . . . . . . . . . . . . . . . . . . . . . . . . . 26
Windows automatic updates . . . . . . . . . . . . . . . . . . . . . . . . . . . . . . . . . . . . . . . . . . . 27
Loss or theft . . . . . . . . . . . . . . . . . . . . . . . . . . . . . . . . . . . . . . . . . . . . . . . . . . . . . . . 27
Fraud prevention. . . . . . . . . . . . . . . . . . . . . . . . . . . . . . . . . . . . . . . . . . . . . . . . . . . . 28
My Verizon. . . . . . . . . . . . . . . . . . . . . . . . . . . . . . . . . . . . . . . . . . . . . . . . . . . . . . . . . . . . 28
Inserting or removing the battery . . . . . . . . . . . . . . . . . . . . . . . . . . . . . . . . . . . . . . . . . . . 29
Replacing or upgrading the hard drive . . . . . . . . . . . . . . . . . . . . . . . . . . . . . . . . . . . . . . . 31
Removing the hard drive . . . . . . . . . . . . . . . . . . . . . . . . . . . . . . . . . . . . . . . . . . . . . 31
Installing a hard drive . . . . . . . . . . . . . . . . . . . . . . . . . . . . . . . . . . . . . . . . . . . . . . . . 32
Adding or replacing memory modules . . . . . . . . . . . . . . . . . . . . . . . . . . . . . . . . . . . . . . . 34
Updating programs and drivers . . . . . . . . . . . . . . . . . . . . . . . . . . . . . . . . . . . . . . . . . . . . 38
Cleaning the display . . . . . . . . . . . . . . . . . . . . . . . . . . . . . . . . . . . . . . . . . . . . . . . . . . . . . 39
Contents
iii
Advertisement
Table of Contents
Troubleshooting

Subscribe to Our Youtube Channel
Related Manuals for HP compaq mini cq10


Summary of Contents for HP compaq mini cq10
-
Page 1: Table Of Contents
Contents Chapter 1: Getting to know your computer Top ..............1 TouchPad . - Page 2 Contents Cleaning the TouchPad and keyboard ........39 Traveling and shipping .
-
Page 3: Chapter 1: Getting To Know Your Computer
Chapter 1: Getting to know your computer After you set up and register the computer, it is important to learn about your computer features. TouchPad Component Description TouchPad Moves the pointer and selects or activates items on the screen. Left TouchPad button Functions like the left button on an external mouse. -
Page 4: Lights
Chapter 1: Getting to know your computer Lights Component Description Caps lock light White: Caps lock is on. On: Caps lock is off. ■ Mute light Amber: Computer sound is off. ■ Off: Computer sound is on. ■ Wireless light White: An integrated wireless device, such as a wireless local area network ®... -
Page 5: Keys
Chapter 1: Getting to know your computer Keys Component Description Displays system information when pressed in combination with the key. Executes frequently used system functions when pressed in combination num lk with a function key, the key, or key. ® Windows logo key Displays the Windows Start menu. -
Page 6: Front
Chapter 1: Getting to know your computer Front Component Description Speakers Produce sound. Right side Component Description Digital Media Slot Supports the following digital card formats: ■ Memory Stick ■ Memory Stick Pro ■ MultiMediaCard (MMC) ■ Secure Digital (SD) Memory Card ■... - Page 7 Chapter 1: Getting to know your computer Component Description ■ Power switch When the computer is off, slide the switch to turn on the computer. ■ When the computer is on, slide the switch briefly to initiate Sleep. ■ When the computer is in the Sleep state, slide the switch briefly to exit Sleep.
-
Page 8: Left Side
Chapter 1: Getting to know your computer Left side Component Description Power connector Connects an AC adapter. ■ AC adapter light White: The computer is connected to external power and the battery is fully charged. ■ Amber: The computer is connected to external power and the battery is charging. - Page 9 Chapter 1: Getting to know your computer Component Description Drive light Blinking white: The hard drive or flash drive is being accessed. USB port Connects an optional USB device. Audio-out (headphone) Connects optional powered stereo jack/Audio-in (microphone) speakers, headphones, earbuds, a jack headset, or television audio.
-
Page 10: Display
Webcam Records video and captures still photographs. To use the webcam, select Start > All Programs > HP > HP Media Suite > HP Camera. Webcam light On: The webcam is in use. *The antennas are not visible from the outside of the computer. For optimal transmission, keep the area immediately around the antennas free from obstructions. -
Page 11: Bottom
Chapter 1: Getting to know your computer Bottom Component Description Battery locking latch Locks the battery into the battery bay. Battery bay Holds the battery. ✎ The SIM slot is located under the battery. Battery release latch Releases the battery from the battery bay. -
Page 12: Keyboard And Pointing Devices
Chapter 1: Getting to know your computer Keyboard and pointing devices Using the keyboard Identifying the hotkey A hotkey is a combination of the fn key 1 and the esc key 2. Description Hotkey fn+esc Displays information about system hardware components and the system BIOS version number. - Page 13 Chapter 1: Getting to know your computer ✎ The action key feature is enabled at the factory. You can disable this feature in Setup Utility. If this feature is disabled in Setup Utility, you must press fn and an action key to activate the assigned function.
-
Page 14: Setting Pointing Device Preferences
Chapter 1: Getting to know your computer Description Decreases speaker volume incrementally. Increases speaker volume incrementally. Mutes or restores speaker sound. Turns the wireless feature on or off. ✎ This key does not establish a wireless connection. To establish a wireless connection, a wireless network must be set up. - Page 15 Chapter 1: Getting to know your computer Navigating To move the pointer, slide one finger across the TouchPad in the direction you want the pointer to go. Selecting Use the left and right TouchPad buttons like the corresponding buttons on an external mouse. Using TouchPad gestures The TouchPad supports a variety of gestures.
- Page 16 Chapter 1: Getting to know your computer ✎ The computer also support additional TouchPad features. To view and turn on these features, click the Synaptics icon in the notification area, at the far right of the taskbar. Click Pointer Device Properties, and then click the Device Settings tab. Select the device, and then click Settings.
- Page 17 Chapter 1: Getting to know your computer Rotating Rotating allows you to rotate items such as photos. To rotate, anchor your left forefinger in the TouchPad zone. Move the right forefinger around the anchored finger in a sweeping motion, moving from 12 o’clock to 3 o’clock. To reverse the rotation, move your right forefinger from 3 o’clock to 12 o’clock.
-
Page 19: Chapter 2: Welcome To Verizon Wireless
Mobile Broadband setup ✎ If Windows Update or HP Update prompts you to update your system, click Ignore or Cancel, so that the setup process will not be interrupted. 1. Make sure wireless is turned on. The wireless light should be white. (If the light is amber, press the wireless key to turn it on.) - Page 20 Chapter 2: Welcome to Verizon Wireless 5. When you see the Set Network Location screen, choose Home, Work, or (for more security) Public, and then follow the on-screen instructions to add your preferences. ✎ To change this setting after initial setup, select Start > Control Panel > Network and Internet >...
- Page 21 Chapter 2: Welcome to Verizon Wireless 7. Select your service plan. If the service plans are grayed out, click Finish to complete the self-activation process. 8. Click the Connect WWAN button in the lower-right corner of the VZAccess Manager window. 9.
-
Page 22: Verizon Wi-Fi
Chapter 2: Welcome to Verizon Wireless 10. When Mobile Broadband is connected, you will see the word “Connected” next to Verizon Wireless - VZAccess and the red Disconnect WWAN button in the lower-right corner of the window. 11. Launch your Web browser, e-mail, or other Internet application to get started! If you are prompted to update Verizon information, such as hotspots, click Yes. -
Page 23: Setting Up Internet Connection Sharing (Ics)
Chapter 2: Welcome to Verizon Wireless 4. When in range of a Verizon Wi-Fi hotspot, select Verizon Wi-Fi under Available Network, and then click ConnectWi-Fi. 5. Launch your Web browser, e-mail, or other Internet application. ✎ Verizon Wi-Fi hotspots are not owned or operated by Verizon Wireless. Verizon Wireless is not able to estimate upload or download speeds at these locations. -
Page 24: Finding Verizon Wireless Help In The U.s
1-800-922-0204 for technical support or go to http://www.verizonwireless.com/netbooks. ■ For hardware, software, or computer repair, refer to Chapter 4, “Troubleshooting.” ■ For Limited Warranty information, select Start > Help and Support > HP Warranty, or go to http://www.hp.com/go/orderdocuments. http://www.verizonwireless.com/welcome The Welcome page includes: ■... -
Page 25: Removing Or Inserting A Sim Card
Chapter 2: Welcome to Verizon Wireless Removing or inserting a SIM Card CAUTION: Do not bend or scratch your SIM Card. Avoid exposing your SIM Card to static Ä electricity, water, or dirt. ✎ A Subscriber Identity Module (SIM) Card is a “smartcard” that houses personal information such as your mobile phone number, calling plan, and account information as well as other content such as contacts, text messages, and call history. - Page 26 Chapter 2: Welcome to Verizon Wireless 9. Turn the computer right-side up, and then reconnect external power and external devices. 10. Turn on the computer. ✎ Should your 4G SIM Card be lost or damaged, call 1-800-922-0204 to speak with a Customer Service Representative.
-
Page 27: Using Vzaccess Manager Outside Of The U.s. And Canada
Chapter 2: Welcome to Verizon Wireless 7. Insert the SIM Card into the SIM Card slot with the gold contacts facing up, and gently push the SIM Card into the slot until it clicks into place. 8. Replace the battery. ✎... -
Page 28: Gps Functionality
Chapter 2: Welcome to Verizon Wireless 6. Click Connect WWAN. “Connected” appears at the bottom left of the VZAccess Manager window when a connection is established. If you are not within a coverage area, a “No Service” message is displayed. Be sure that you are in a suitable coverage area. -
Page 29: Windows Automatic Updates
1-800-922-0204 to suspend your service. From outside the U.S., call + 1-908-559-4899. If your wireless device is malfunctioning, refer to your warranty guide. For Limited Warranty information, select Start > Help and Support > HP Warranty, or go to http://www.hp.com/go/orderdocuments. -
Page 30: Fraud Prevention
Fraud prevention Verizon Wireless wants to protect your privacy and works hard to prevent unauthorized phone usage or fraud. Wireless device numbers and calls are capable of being intercepted by someone with specialized equipment. We use anti-fraud technology to make fraudulent calling very difficult, particularly on digital calls. -
Page 31: Chapter 3: Upgrading And Routine Care
Chapter 3: Upgrading and routine care Inserting or removing the battery ✎ For additional information on using the battery, refer to the HP Notebook Reference Guide. To insert the battery: 1. Save your work and shut down the computer. 2. Disconnect all external devices connected to the computer. - Page 32 Chapter 3: Upgrading and routine care To remove the battery: CAUTION: Removing a battery that is the sole power source may cause loss of information. Ä To prevent loss of information, save your work and initiate Hibernation or shut down the computer through Windows before removing the battery.
-
Page 33: Replacing Or Upgrading The Hard Drive
Chapter 3: Upgrading and routine care Replacing or upgrading the hard drive CAUTION: To prevent information loss or an unresponsive system: Ä Shut down the computer before removing the hard drive from the hard drive bay. Do not ■ remove the hard drive while the computer is on, in the Sleep state, or in Hibernation. If you are not sure whether the computer is off or in Hibernation, turn the computer on by ■... -
Page 34: Installing A Hard Drive
Chapter 3: Upgrading and routine care 7. Carefully remove the hard drive cable from the cable routing channel. 8. Remove the 3 hard drive screws 2. 9. Grasp the tab on the hard drive, and lift the hard drive 3 out of the hard drive bay. Installing a hard drive 1. - Page 35 Chapter 3: Upgrading and routine care 4. Grasp the tab on the hard drive cable connector 3, and then carefully press the hard drive cable connector onto the system board until it snaps into place. 5. Replace the vanity cover: a.
-
Page 36: Adding Or Replacing Memory Modules
Chapter 3: Upgrading and routine care 6. Replace the battery 3. 7. Reconnect external power and external devices. 8. Turn on the computer. Adding or replacing memory modules The computer has one memory module compartment, which is located on the bottom of the computer, beneath the removable vanity cover. - Page 37 Chapter 3: Upgrading and routine care 1. Save your work and shut down the computer. 2. Disconnect all external devices connected to the computer. 3. Unplug the power cord from the AC outlet. 4. Remove the battery 1 from the computer. 5.
- Page 38 Chapter 3: Upgrading and routine care b. Grasp the edge of the memory module 2, and gently pull the module out of the memory module slot. ✎ To protect a memory module after removal, place it in an electrostatic-safe container. 7.
- Page 39 Chapter 3: Upgrading and routine care c. Gently press the memory module 3 down, applying pressure to both the left and right edges of the memory module, until the retention clips snap into place. 8. Replace the vanity cover: a. With the battery bay toward you, insert the 4 tabs on the front edge of the vanity cover into the 4 slots in the base 1.
-
Page 40: Updating Programs And Drivers
To download and install software other than a BIOS update, follow these steps: 1. Access the page on the HP Web site that provides software for your computer: Select Start > Help and Support, and then select the software and drivers update. -
Page 41: Cleaning The Display
Chapter 3: Upgrading and routine care 8. Complete the installation by following the instructions on the screen. ✎ After a message on the screen reports a successful installation, you can delete the downloaded file from your hard drive. Cleaning the display CAUTION: To prevent permanent damage to the computer, never spray water, cleaning Ä... - Page 42 ■ When traveling by air, carry the computer as hand luggage, and do not check it in with the rest of your bags. CAUTION: Avoid exposing a drive to magnetic fields. Security devices with Ä magnetic fields include airport walk-through devices and security wands. The airport security devices that check carry-on luggage, such as conveyor belts, use X-rays instead of magnetism and do not damage a drive.
-
Page 43: Chapter 4: Troubleshooting
For questions about Mobile Broadband service or VZAccess Manager software, access support online 24 hours a day, seven days a week at http://verizonwireless.com/support. For computer hardware, other software, or computer repair inquiries, contact HP Support at 1-800-474-6836 or visit them online at http://hp.com/support. -
Page 44: Troubleshooting Resources
Chapter 4: Troubleshooting ® ■ Microsoft Certificate of Authenticity—Contains the Windows Product Key. You may need the Product Key to update or troubleshoot the operating system. This certificate is affixed to the bottom of the computer. ■ Regulatory label—Provides regulatory information about the computer. The regulatory label is affixed inside the battery bay. -
Page 45: Quick Troubleshooting
If the computer is plugged into an AC outlet, plug another electrical device into the outlet to be sure that the outlet is providing adequate power. ✎ Use only the AC adapter provided with the computer or one approved by HP for this computer. ■... -
Page 46: The Computer Is Unusually Warm
Chapter 4: Troubleshooting The computer is unusually warm It is normal for the computer to feel warm to the touch while it is in use. But if the computer feels unusually warm, it may be overheating because a vent is blocked. If you suspect that the computer is overheating, allow the computer to cool to room temperature. -
Page 47: Chapter 5: Backup And Recovery
If for some other reason you need to restore your system, this can be achieved using the HP recovery partition (select models only), without the need for recovery discs or a recovery flash drive. -
Page 48: Creating Restore Media
Chapter 5: Backup and recovery Creating restore media HP recommends that you create either a set of recovery discs or a recovery flash drive to ensure that you can restore your computer to its original factory state if the hard drive fails, or if for any reason you cannot restore using the recovery partition tools. -
Page 49: Restoring Using The Dedicated Partition (Select Models Only)
Note the following when performing a system recovery: ■ You can restore only a system that you have previously backed up. HP recommends that you use Recovery Manager to create either a set of recovery discs or recovery flash drive as soon as you set up your computer. -
Page 50: Changing The Computer Boot Order
Chapter 5: Backup and recovery Changing the computer boot order To change the boot order for recovery discs: 1. Restart the computer. 2. Press esc while the computer is restarting, and then press f9 for boot options. 3. Select Internal CD/DVD ROM Drive from the boot options window. To change the boot order for a recovery flash drive: 1. -
Page 51: Using Windows Backup And Restore
Chapter 5: Backup and recovery 2. Copy the screen image: To copy only the active windows, press alt+fn+prt sc. To copy the entire screen, press fn+prt sc. 3. Open a word-processing document, and then select Edit > Paste. The screen image is added to the document. 4. - Page 52 Chapter 5: Backup and recovery Create a system restore point 1. Select Start > Control Panel > System and Security > System. 2. In the left pane, click System protection. 3. Click the System Protection tab. 4. Follow the on-screen instructions. Restore to a previous date and time To revert to a restore point (created at a previous date and time), when the computer was functioning optimally, follow these steps:...
-
Page 53: Chapter 6: Important Consumer Information
Chapter 6: Important consumer information Security deposit You may have been asked to leave a security deposit at the time you activated your wireless service. You are eligible to receive your security deposit back at the end of 1 year of uninterrupted service, or upon termination of your contract. -
Page 54: Radio Emission Safety
Chapter 6: Important consumer information Radio emission safety Your wireless device, which contains a radio transmitter and receiver, emits radio frequency energy during use. The following consumer information addresses commonly asked questions about the health effects of wireless devices. Are wireless phones and devices safe? Scientific research on the subject of wireless devices and radio frequency (RF) energy has been conducted worldwide for many years, and continues. -
Page 55: What Does Specific Absorption Rate (Sar) Mean
Chapter 6: Important consumer information What does specific absorption rate (SAR) mean? In 1996, the FCC, working with the FDA, the U.S. Environmental Protection Agency (EPA) and other agencies, established RF exposure safety guidelines for wireless devices in the United States. Before a wireless device model is available for sale to the public, it must be tested by the manufacturer and certified to the FCC that it does not exceed limits established by the FCC. -
Page 56: Where Can I Get Further Information About Rf Emissions
Chapter 6: Important consumer information the United Kingdom [UK] made such a recommendation in December 2000. In this report a group of independent experts noted that no evidence exists that using a cell phone causes brain tumors or other ill effects. [The UK’s] recommendation to limit cell phone use by children was strictly precautionary;... -
Page 57: Drive Responsibly
Chapter 6: Important consumer information Drive responsibly When behind the wheel, safe driving is your responsibility and it should always be your first priority. Scientific research on the subject of wireless phone use and driving has been conducted worldwide for several years. According to the National Highway Traffic Safety Administration (NHTSA), the available research indicates that using a wireless phone while driving degrades a driver’s performance, whether it is a hands-free or hand-held wireless phone. - Page 58 Chapter 6: Important consumer information Getting Started Guide...
-
Page 59: Chapter 7: Specifications
DC power source, it should be powered only with an AC adapter or a DC power source supplied and approved by HP for use with this computer. The computer can operate on DC power within the following specifications. - Page 61 Index AC adapter light, identifying 6 decrease brightness, key 11 action keys Digital Media Slot, identifying 4 decrease brightness 11 display, cleaning 39 Help and Support 11 drive light, identifying 7 identifying 3 drivers, upgrading 38 increase brightness 11 mute 12 environmental specifications 57 next track 11 esc key, identifying 3...
- Page 62 Index action 3 using 12 esc 3 ports fn 3 external monitor 6 Windows applications 3 USB 5, 7 Windows logo 3 power connector, identifying 6 power light, identifying 4 power specifications 57 labels, identifying 41 power switch, identifying 5 latches, battery release 9 power, turning on computer 43 lights...
- Page 63 Index altitude 57 Verizon Wireless network technology 26 humidity 57 VGA port, identifying 6 input power 57 volume keys 12 operating environment 57 VZAccess Manager software, upgrade 21 temperature 57 VZAccess Manager user tips 26 startup problems, troubleshooting 43 fraud prevention 28 stop playback key 11 loss or theft 27 switch screen image 11...
Need help?
Do you have a question about the compaq mini cq10 and is the answer not in the manual?
Questions and answers