Table of Contents
Advertisement
Handbuch
User Manual
IN-6014
HD
/ Integrated Passive Infrared Motion Detector
/ Wide Dynamic Range 720p CMOS Sensor for adverse lighting conditions
/ Automatic alarm by email and FTP video upload
/ Video recording on SDHC card (up to 32 GB)
/ Easy camera configuration via the integrated WebUI
/ Multi-level user managment and access control
/ Accessible over the internet via preinstalled DDNS address
/ Smartphone App InstarVision (iOS, Android, WinPhone, Blackberry, Kindle)
/ Scheduled motion detection via image analysis
/ 4mm wide-angle lens with 90
º
diagonal view
6014
Advertisement
Table of Contents

Related Manuals for Instar IN-6014 HD


Summary of Contents for Instar IN-6014 HD
- Page 1 Handbuch User Manual IN-6014 / Integrated Passive Infrared Motion Detector / Wide Dynamic Range 720p CMOS Sensor for adverse lighting conditions / Automatic alarm by email and FTP video upload / Video recording on SDHC card (up to 32 GB) / Easy camera configuration via the integrated WebUI / Multi-level user managment and access control / Accessible over the internet via preinstalled DDNS address...
- Page 2 Wide-Dynamic Range CMOS Sensor The OmniVision® WDR Sensor raises the bar in security imaging with a single-chip SOC sensor that combines 720p high-definition video with WDR in a 1/3-inch optical format. The sensor is build on a 4.3 micron OmniPixel3-HS™ pixel enabling 720p HD at unparalleled low-light sensitivity and a dynamic range in colour of 115dB - compared to the 60 dB of a regular VGA IP camera.
-
Page 3: Table Of Contents
INSTAR INSTAR HD IP Camera – Usermanual IN-6014 HD SAFETY WARNINGS................3-EN PRODUCT FEATURES...............4-EN INSTALLATION ...................5-EN START UP.....................8-EN THE WEB USER INTERFACE ............11-EN SOFTWARE..................12-EN 5.1.1 LANGUAGE..................12-EN 5.1.2 REBOOT/RESET.................12-EN 5.1.3 BACKUP....................12-EN 5.1.4 UPDATE....................12-EN NETWORK....................13-EN 5.2.1 IP CONFIGURATION................13-EN 5.2.2 WiFi ....................13-EN 5.2.3 DDNS....................14-EN... - Page 4 ANDROID AND iPHONE APP .............26-EN WINDOWS SOFTWARE .................28-EN RTSP STREAMING .................30-EN TECHNICAL DATA ..................31-EN WARRANTY & DISPOSAL ..............32-EN FAQ Questions & Answers ..............33-EN AVAILABLE ACCESSORIES ..............35-EN More user manuals can also be found download.instar.de Your Manufacturer for Network and Security Technology...
-
Page 5: Safety Warnings
» Don’t use the camera for any other purpose that it isn’t made for. INSTAR does not give any warranty if you use any third party firmware or WebUI. » Please note that this is an indoor camera which is made for indoor surveillance only. -
Page 6: Product Features
2 PRODUCT FEATURES Hardware » Integrated passive Infrared Motion Detector » Wide Dynamic Range Megapixel CMOS sensor and ARM media processor » 12 Infrared-LEDs for nightvision 8 - 12 m » Resolution: 720p (1280 x 720), 640 x 352 and 320 x 176 »... -
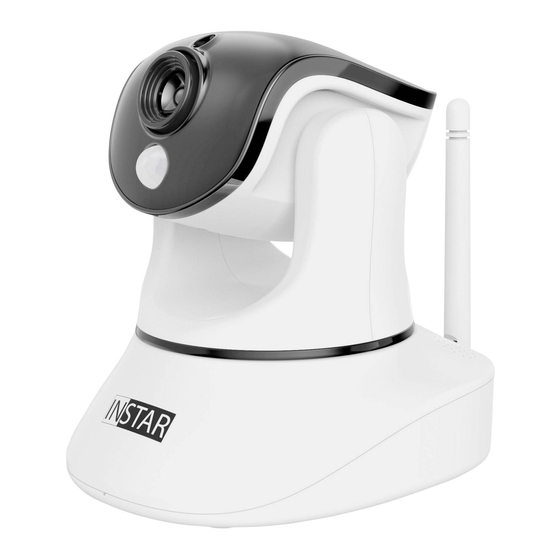
Page 7: Installation
3 INSTALLATION Fig. 1 Front Fig. 2 Rear Fig. 3 Bottom Photosensor Twilight-Switch for IR LEDs Lense Wideangle-lense (focal length: 4.3mm / field of view: 90.º hor.) Infrared-LEDs 12 IR LEDs (nightvision @ 850nm) PIR Detector Integrated passive Infrared Motion Detector Loudspeaker Integrated Loudspeaker (s. - Page 8 LAN port of your network router. For a direct connection to your Windows PC or Mac, please re- fer to our online FAQ section on faq.instar.de. But we recommend to connect the camera to your net- work router for the initial installation.
- Page 9 IN-LAN is an intelligent and secure technology that lets you set up a home network easily via your household power grid - without the need of complex and expensive dedicated cabling. Additional accessories, like the IN-LAN Adapter, can be found in the accessories of your camera model on www.instar.de.
-
Page 10: Start Up
4.1 NETWORK INSTALLATION Please start the setup wizard from the CD and install the INSTAR Camera Tool linked on the CD for Windows, LINUX or MacOS. (You can find documentations for the use of other IP scanners on http://faq.instar.de) - Page 11 Troubleshooting: In case the INSTAR Camera Tool doesn’t find your INSTAR IP camera please make sure that the status LED for the LAN connector is active. For troubleshooting please check on page 8 in this user manual. In case your camera isn’t automatically assigned an IP address, the camera will be shown inside a wrong IP address space.
- Page 12 IP camera. You can set the camera IP by using the INSTAR Camera Tool. As for Gateway and DNS server please fill in the computer IP. After submitting the settings to the camera please wait a moment until the camera has restarted.
-
Page 13: The Web User Interface
Quicktime Player. Please follow the enclosed A5 Quick Installation manual. Also check the FAQ section at the end of this user manual (chapter 13) or visit the FAQ section on http://wiki.instar.de for more detailed instructions. 5 THE WEB USER INTERFACE... -
Page 14: Software
5.1.4 SOFTWARE/UPDATE You can download regular software updates for your cam- era from http://download.instar.de. Please use the browse button to set the file path to the downloaded *.PKG file and click “Submit” to upload the file to your camera. Use... -
Page 15: Network
30-60 seconds for the camera to connect to your WiFi network. The camera will receive a new address from your router if you didn’t assign a static IP address to your camera previously (Chapter. 5.2.1), therefore you should use the INSTAR Camera Tool again to rediscover your camera (Chapter 4). -
Page 16: Ddns
5.2.3 NETWORK/DDNS Your camera comes with a personal DDNS address - e.g. http://xxxx77.ddns-instar.de. Everything you need for a remote access to your camera is a port forward- ing rule in your router. You can access your camera af- terwards through the internet using this http address. -
Page 17: P2P (Point-To-Point)
There are 3 ways to connect your camera with the INSTAR App Tap the “Search” button to find the p2p camera inside your local network Type in the “UID” from the camera´s web UI or from the label on the camera case. -
Page 18: System
5.3 SYSTEM 5.3.1 SYSTEM/INFO The Info menu gives you an overview of several im- portant camera parameters - like your software ver- sion and connection status. 5.3.2 SYSTEM/DATE & TIME You can set up the internal clock of the camera to be either synchronised with your PC clock or with one of several NTP servers. -
Page 19: Ir Led
ONVIF is a global standard for the interface of IP- based security products. The ONVIF specification will ensure interoperability between products regardless of manufacturer, allowing you to integrate your INSTAR camera as a generic ONVIF camera into existing secu- rity systems. -
Page 20: Video
5.4.2 MULTIMEDIA/VIDEO The video settings allow you to adjust the quality of all 3 videostreams of your camera. Please be adviced that high quality settings come with high requirements for your computer hardware and network bandwidth. Ad- just the video quality to obtain a fluent video accord- ingly. -
Page 21: Actions
1280x720 resolution as well as the VGA resolutions with 640x352 and 320x175 pixel. activate the external input. An alarm will be triggered The IN-6014 HD gives you advanced PIR detection technology with an integrated PIR once the circuit (pins 3&4 - see page 5) is broken by the sensor at the camera front. -
Page 22: Schedule
SMTP server data (s.5.5.4), though some email provider let you choose this field freely. If you want to send the email to more than one address, simply separate the addresses with a semicolon ‘;’ . E.g. max.mustermann@instar.de;franz.fingerhut@instar.de... -
Page 23: Ftp
You can define an upload directory for your camera under FTP Folder. The root folder of the FTP server can be reached by “./”. The separator for the folders is the forward slash. A subfolder (e.g. INSTAR) can be reached by “./INSTAR”. An ending forward slash is not obligatory, but can be used. -
Page 24: Photo Series
5.5.8 ALARM/SD CARD Please check the corresponding box and click submit to either format or unmount your SD card. A click on the link above the submit button will lead you to the SD card directory where all your snapshots and videos will be stored. -
Page 25: Menu Bar
5.7.5 MENU BAR/HELP Clicking on Help will bring you to our constantly expand- ing online FAQ section on www.instar.de. 5.7.6 MENU BAR/MJPEG (H.264) Here you can switch between the camera’s H.264 and MJPEG videostream - see also 5.4.2. If you are using the IE web browser, the function Record and Player is only supported in the H.264 mode. -
Page 26: Video Menu Bar
(only Internet Explorer) Here you can set the record path for your videos and snap- shots. The set path is used by all your INSTAR Megapixel Cameras! Your camera will automatically create subdirecto- ries with the current date and its IP address when you start recording or take a snapshot. -
Page 27: Pan&Tilt Control
Software/Firmware for your IP camera. The firmware file can be uploaded to your camera via the web user interface (s.5.1.4) or by using the INSTAR camera tool. 6 RESET YOUR CAMERA In order to reset your camera (if you have lost your password), please hold the small camera reset button for min. -
Page 28: Lense Adjustment
7 LENSE ADJUSTMENT The IN-6014 HD’s lense offers a limited field depth that was adjusted to a field between 1m to 10m. In case the object you want to observe lies outside of this area, you will have to adjust the lense accordingly. - Page 29 Password: The password with which you log in to your camera. As default the password is “instar”. Model: Please choose your INSTAR camera model. Now please choose “Save” to save the settings and to return to the home screen (Fig.1).
-
Page 30: Windows Software
InstarVision® is a 16/32 Channel Video Surveillance Software for Windows (the number of available channels depends on your license!) The Software can record the live stream of any Webcam, TV Cards, Video-Recording Cards (DVR), INSTAR IP Camera or other devices with up to 30 fps. - Page 31 IP Camera to start the Camera Tool. Click on search to discover all INSTAR cameras inside your local network and right-click the cameras to assign it to a channel. The number of available channels can be set in the channel...
-
Page 32: Rtsp Streaming
Access via internet: Please use your DDNS address to remote access your camera’s RTSP stream: rtsp://<user>:<password>@xxx.ddns-instar.de:<RTSP Port>/11 xxx = please check your personal DDNS address under network/DDNS (s. 5.2.3) Tip: Your camera offers you 3 RTSP streams with different bitrates. Please choose stream 2 or 3 if your available bandwidth is limited or you are using a computer with limited processing power (e.g. -
Page 33: Technical Data
11 TECHNICAL DATA Image Sensor Sensor ”Megapixel WDR CMOS Resolution max. 1280x720 Pixel (1.0 Megapixel) Lense f = 4.3 mm; F/1.2 (IR Lense) Angle of View 90 ° diagonal Min. Illumination 0.5 Lux @ F/1.2 Video Properties Video Encoding h.264/MPEG-4 AVC (Level3) Alternative Encoding MJPEG (no plugins needed) Video Framerate... -
Page 34: Warranty & Disposal
12 WARRANTY & DISPOSAL Warranty INSTAR offers a 2-year warranty on its products. During this period you can send in your camera for a free repair (shipping the defective hardware to INSTAR will be paid by the buyer). This excludes cameras installed with custom-made or 3rd party Firmware and WebUIs which have not been approved by INSTAR. -
Page 35: Faq Questions & Answers
13 FAQ Questions & Answers 1) The video doesn’t start in Internet Explorer? Please make sure that you installed the Active Control Element (s. page 11). You can always install the element manually from the software CD in case the automatic instal- lation doesn’t work. - Page 36 Please press the reset button at the back panel of the camera for at least 15s! The camera needs to be connected to the power. After the reset all passwords are set to their default values: Defaults User Name Password Administrator admin instar User user instar Guest guest instar 4). How does port forwarding work? As shown in below illustration map, the router’s internal IP is 192.168.0.1.
-
Page 37: Available Accessories
Usually it takes about 30 minutes but in some cases, it can take up to 12 hours before you can reach your camera via the ddns-instar address. Please note that you first have to set up a port forwarding rule in your router (s. 5.2.3 & above). If you can still not access your camera, please change the HTTP (LAN) port of your cam- era (default 80) - to e.g. - Page 38 www.instar.de...
Need help?
Do you have a question about the IN-6014 HD and is the answer not in the manual?
Questions and answers