
Related Manuals for Instar IN-3003


Summary of Contents for Instar IN-3003
- Page 1 User Manual IN-3003 - Page 1 INSTAR IN-3003 WLAN/LAN-IP-Camera with Night Vision and Motion Detection User Manual Version 1.01...
- Page 2 All company names, trademarks, product descriptions and Logos which are used in this user manual are owned by the company. INSTAR Deutschland does assume no liability for the validity and actuality of this manual. INSTAR Deutschland does assume no liability for damages which occur by misusing the product in any kind of way.
-
Page 3: Table Of Contents
User Manual IN-3003 - Page 3 Table of Contents 1. Introduction............................5 1.1. Functions............................5 1.2. Delivery Contents.......................... 6 1.3. Accessories (soon available in the Online Store)............... 6 1.4. System Requirements........................7 1.5. Safety Warnings..........................7 1.6. Control Elements and Connections..................... 8 2. - Page 4 User Manual IN-3003 - Page 4 4.1. Frequently asked Questions....................... 34 4.1.1. How can I connect to my camera over the Internet?............34 4.1.2. I have forgot my username or password. What can I do?..........34 4.1.3. I don’t see any picture in the Internet Explorer. Why?............35 4.1.4.
-
Page 5: Introduction
User Manual IN-3003 - Page 5 1. Introduction Congratulations on purchasing our products. You have bought a high quality Security Camera with wireless and wired network connectivity and a integrated web server which allows you to access your camera in your local network and also over the internet. -
Page 6: Delivery Contents
12mm-telephoto lens without IR-Filter This lens allows you to monitor objects which are more far away from the camera (sample pictures online). This lens also supports night vision. More accessories as well as spare parts you can find on the INSTAR-Website at http://www.instar.de/... -
Page 7: System Requirements
User Manual IN-3003 - Page 7 1.4. System Requirements CPU: 2.06GHz or higher Memory Size: 256MB or higher Network Connection: 10Mbit or better Display Card: 64MB or higher Recommended OS: MS Window 2000/XP/Vista/7, Mac OS X, Linux 1.5. -
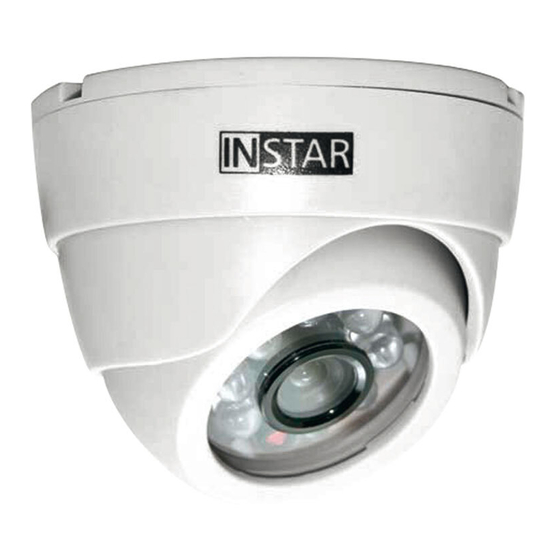
Page 8: Control Elements And Connections
User Manual IN-3003 - Page 8 1.6. Control Elements and Connections Description Function/Notes Photo element Automatic brightness adjustment Infrared-LEDs Will be automatically activated if surrounding light is too dark Microphone Audio stream only available on Internet Explorer Lens Fixed focus... -
Page 9: Installation
Please follow the steps below very carefully to assure a stable operation of your camera. 2.1. Preparation 1. You can install the IN-3003 either on the wall or the sealing. To do so please remove the mounting plate from the camera casing. You can turn the mounting plate by turning it counter clockwise. - Page 10 User Manual IN-3003 - Page 10 A start window welcomes you to the installation: It is highly recommended to close all running programs before installation. Continue by pressing the button “Next >” . Continue with “Next >”. The program starts installing all necessary files.
- Page 11 User Manual IN-3003 - Page 11 After installation you will be asked to restart your computer. Please keep the settings on “Yes, I want to restart...” and click “Close”. After your computer has restarted you will find the symbol below on your desktop: “IP Camera Tool”.
- Page 12 User Manual IN-3003 - Page 12 Now please mark your new camera with one left click and then please click with the right mouse button on the IP address. The following screen should show. By clicking “Network Configuration” you can now set up the IP address of your camera manually.
-
Page 13: Extended Settings Of The "Ip Camera Tool
User Manual IN-3003 - Page 13 With this settings the basic set-up of your camera is done. With a double click on the camera / cameras IP address the cameras web server should be automatically opened in your default web browser. After entering the username (admin) without password the graphical interface (GUI) of the camera should be opened. -
Page 14: First Setup Without "Ip Camera Tool
2. Find out the IP address of the camera. You can use a simple IP scanner for this. You may download a small IP scanner on our website: http://www.instar.de/ 3. Open the graphical interface of your camera by entering the IP address in your web browser. -
Page 15: The Graphical User Interface
User Manual IN-3003 - Page 15 3. The graphical User interface The integrate web server provides you with a graphical interface (GUI) for an easy operation and configuration of your IP camera. Requirement to enter the user interface is the correct set up of your cameras connection as described in step 2. Installation starting from page 9. - Page 16 User Manual IN-3003 - Page 16 If you select a different language (in our example “Deutsch”) it will then show the language you have chosen: If you now click on “Sign in”, the graphical web interface of the camera will appear.
- Page 17 User Manual IN-3003 - Page 17 Control Description User rights element Display of the Live-Video activation (only IE) All Groups Display of the Live-Videos deactivate (only IE) All Groups Make a Snapshot (jpg) All Groups Video recording start/stop (only IE)
-
Page 18: Menu "Live Video
User Manual IN-3003 - Page 18 3.1. Menu “Live Video” After you sign in to your camera you will automatically be redirected to the “Live Video” Menu. In this Menu you will be able to see the Live-Video of your camera. The control elements for controlling the camera are activated in this mode. -
Page 19: Menu "Multi Device
User Manual IN-3003 - Page 19 3.2. Menu “Multi Device” 3.2.1. Submenu “Multi-Cameras” (only IE) The graphical webinterface of the camera allows you to show up to 9 Cameras at the same time (see “Multi-Device-View“). This function is now only available on the Internet Explorer since it requires a ActiveX Plugin. -
Page 20: Submenu "Upgrade Device Firmware
User Manual IN-3003 - Page 20 3.2.2. Submenu “Upgrade Device Firmware” The Camera-Firmware and User Interface can be updated through this submenu. While updating the firmware, you should never disconnect the power from the camera because it will cause serious damage to the camera. In the worst case you will not be able anymore to use the camera. -
Page 21: Menu "Network
User Manual IN-3003 - Page 21 3.3. Menu “Network” In this menu you can do all settings which are necessary to enter the graphic webinterface (GUI) over the network and via internet. 3.3.1. Submenu “IP-Configuration” The option “Obtain IP from DHCP Server” will cause your camera to receive its IP address, Subnet mask, Gateway and DNS Server information from a DHCP Server in your network. -
Page 22: Submenu "Wireless Lan Settings
User Manual IN-3003 - Page 22 3.3.2. Submenu “Wireless LAN Settings” You camera is equipped with a Wifi-module which allows you to transfer the Video Data wireless. Therefor it is necessary to set the following configuration correctly. By clicking the button “Scan” the camera will automatically scan for wireless networks in the area. -
Page 23: Submenu "Adsl
User Manual IN-3003 - Page 23 3.3.3. Submenu “ADSL” Your camera can be connected directly to a DSL Modem in order to dial in the internet. Therefor you have to fill in the username and password of your internet connection. After this the camera needs to be connected with the DSL-Modem. -
Page 24: Submenu "Ddns Service Settings
User Manual IN-3003 - Page 24 3.3.5. Submenu “DDNS Service Settings” The easiest way to access your camera over the Internet is DDNS. Details about this you will find at 4.1.1. How can I connect to my camera over the Internet? on page 34. You camera is automatically set in the factory automatically sent the newest IP address to a DDNS Server provided by the manufacturer. -
Page 25: Menu "Audio / Video
User Manual IN-3003 - Page 25 3.4. Menu “Audio / Video” In this menu you can do the following setting: Parameter Description OSD (only IE) Shows the Date and Time in the right corner. You can choose (On-Screen-Display) among the colors black, yellow, red, white and blue. -
Page 26: Menu "System
User Manual IN-3003 - Page 26 3.5. Menu “System” 3.5.1. Submenu “Device Info” This option shows you status information about your camera. You can not do any settings here. Parameter Description Camera ID Every camera has its own Device ID (Mac address) -
Page 27: Submenu "Alias Settings
User Manual IN-3003 - Page 27 3.5.2. Submenu “Alias Settings” Particularly if you are using more than one camera it is highly recommended to give each camera a unique name so that you can separate them. 3.5.3. Submenu “Date&Time” Your camera can automatically receive the date and time from your PC andServers. -
Page 28: Submenu "User Settings
User Manual IN-3003 - Page 28 3.5.4. Submenu “User Settings” Here you can set up to 8 users including passwords and assign them to different user- groups such as “Administrator”, “Operator” or “Guest”. The group “Administrator” has full user rights and is allowed to change all settings in the camera interface. -
Page 29: Submenu "Backup & Restore
User Manual IN-3003 - Page 29 3.5.5. Submenu “Backup & Restore” Here you can save the settings of your camera (Backup) and restore them. If you do a backup the settings will be saved in a file called “params.bin”. Note: Please note that all data which will be saved in the file is not encrypted and it might be accessed by someone else. -
Page 30: Menu "Others
User Manual IN-3003 - Page 30 3.6. Menu “Others” 3.6.1. Submenu “Mail Service” The Email configuration is necessary if you want the camera to automatically send you an Email if an alarm occurs via motion detection. The camera will include 6 pictures in the Email. -
Page 31: Submenu "Ftp Service Settings
User Manual IN-3003 - Page 31 3.6.2. Submenu “Ftp Service Settings” Your camera can send pictures to your FTP Server with the FTP-Protocol included in the camera. You have to fill in all information about your FTP Server. Please ask your Administrator or Provider for the necessary information. -
Page 32: Submenu "Alarm
User Manual IN-3003 - Page 32 3.6.3. Submenu “Alarm” Your camera can react to alarm by motion detection and send pictures via Email (see Submenu “Mail Service”) and/or FTP-Protocol (see Submenu “Ftp Service Settings”). The camera also includes a potential free Alarm output to connect a separate motion sensor or other alarm devices. -
Page 33: Submenu "Record Path" (Only Ie)
User Manual IN-3003 - Page 33 Parameter Description Send Mail on Alarm If Alarm/Motion Detect is activated a Email will be sent with 6 pictures in the attachment of the object which caused the motion detection to trigger. Configuration of the Email settings please see 3.6.1. Submenu “Mail Service”... -
Page 34: Annex
User Manual IN-3003 - Page 34 4. Annex 4.1. Frequently asked Questions 4.1.1. How can I connect to my camera over the Internet? If you want to access your camera over the Internet it is necessary to fill in the correct settings in the camera and also in your router. -
Page 35: I Don't See Any Picture In The Internet Explorer. Why
User Manual IN-3003 - Page 35 4.1.3. I don’t see any picture in the Internet Explorer. Why? You have to adjust the security settings in the Internet Explorer. The Security settings for ActiveX “Download unsigned ActiveX controls” “Initialize and script ActiveX controls not marked as safe for scripting”... -
Page 36: Warranty And Technical Support
User Manual IN-3003 - Page 36 5. Warranty and technical Support INSTAR offers a 2-year warranty on its products. During this time you can send your camera for a free repair. This excludes cameras which have been installed custom made Firmware and WebUIs which have not been approved by INSTAR. -
Page 37: Disposal Of Old Electrical Appliances
User Manual IN-3003 - Page 37 6. Disposal of old electrical appliances The European Directive 2002/96/EC on Waste Electrical and Electronic Equipment (WEEE), requires that old household electrical appliances must not be disposed of in the normal unsorted municipal waste stream. Old appliances must be collected...
Need help?
Do you have a question about the IN-3003 and is the answer not in the manual?
Questions and answers