Table of Contents
Advertisement
Available languages
Available languages
Bedienungsanleitung
IN-9420 2K+
Außenkamera
www.instar.com
- Sony STARVIS 4MP WQHD-Bildsensor
- Benutzerfreundliche und moderne HTML5-Weboberfläche (WebUI)
- Unterstützt alle modernen Webbrowser (Edge, Firefox, Chrome, Safari, etc.)
- Unterstützt MicroSD (max 256GB) für Alarm- und manuelle Aufnahmen
- Alarmbenachrichtigung per Email, Push (Textmitteilung) und / oder Alarmserver
- Speicherung von Bildern, Videos und / oder Fotoserien per FTP(S) / SFTP
- TLS Verschlüsselung für sichere HTTPS, FTPS und MQTTS Verbindungen
- Sichere Archivierung der Alarmvideos in der INSTAR Cloud (optional)
Advertisement
Chapters
Table of Contents

Related Manuals for Instar IN-9420 2K+


Summary of Contents for Instar IN-9420 2K+
- Page 1 - Alarmbenachrichtigung per Email, Push (Textmitteilung) und / oder Alarmserver - Speicherung von Bildern, Videos und / oder Fotoserien per FTP(S) / SFTP - TLS Verschlüsselung für sichere HTTPS, FTPS und MQTTS Verbindungen - Sichere Archivierung der Alarmvideos in der INSTAR Cloud (optional)
-
Page 2: Table Of Contents
6. Smartphone Apps 10-DE 7. Fernzugriff 11-DE 8. Zurücksetzen der Kamera 12-DE 9. Autofokus-Zoom-Objektiv 13-DE 10. Online-Material 14-DE 11. INSTAR Cloud 15-DE 12. Technische Daten 16-DE 13. Garantie & Entsorgung 17-DE 14. Rechtliche Informationen 18-DE 1-DE Gehen Sie auf http://install.instar.com... -
Page 3: Vorstellung Der Kamera
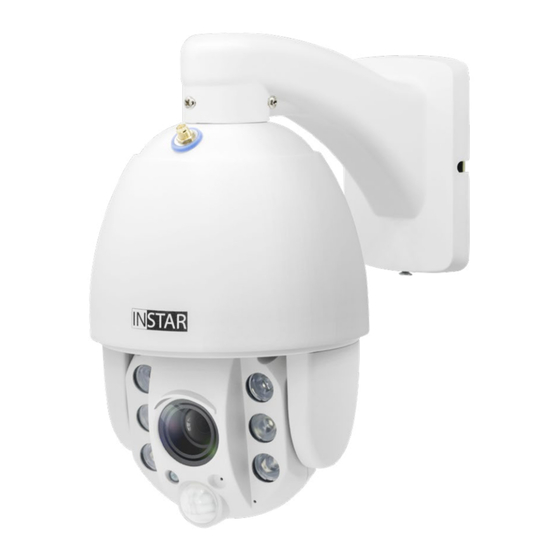
1. Vorstellung der Kamera Die IN-9420 2K+ ist die neueste wetterfeste WQHD-Außenpanorama-/Neigungs-/ Zoom-IP-Kamera von INSTAR. Mit einem eingebauten passiven Infrarot-Bewe- gungsmelder (PIR) und vier softwareseitig separat einstellbaren Alarmbereichen, die mit dem PIR verknüpft werden können, verhindert dieses Kameramodell Fe- hlalarme und benachrichtigt Sie nur, wenn ein richtiger Alarm ausgelöst wurde. -
Page 4: Sicherheitsvorschriften
Installieren Sie das Gerät bitte nicht in der Nähe von leicht entzündlichen Ge- genständen. • Der Hersteller INSTAR haftet für keinerlei Schäden, die durch Zubehör oder Firmware von Drittanbietern entstehen. • ACHTUNG: Die Anschlüsse am Anschlusskabel sind nicht wetterfest und müs- sen wettergeschützt installiert werden! -
Page 5: Produktmerkmale
Kostenfreier Point-2-Point-Zugriff mit InstarVision, unterstüzt IPv6 DDNS Kostenfreie DDNS-Adresse für die Verbindung über das Internet Cloud Opt. Speicherung / Verwaltung der Alarmvideos in der INSTAR Cloud FTP-Upload Übertragung von Alarmbildern / Videos per FTP(S) / SFTP Wi-Fi Protected Setup (WPS) zur einfachen WLAN-Einrichtung WLAN / WiFi 2,4/5Ghz WLAN, Wi-Fi 5 802.11ac und WPA2/3-Verschlüsselung... -
Page 6: Aufbau Der Kamera
4. Aufbau der Kamera 4.1. Verpackungsinhalt micro Netzteil Kamera Anschlusskabel Wandhal- 32GB MicroSD Netzwerkkabel Antenne Deckenhalterung Schrauben / Dübel terung Folgende Teile sind im Lieferumfang enthalten 4.2. Kameraaufbau 5-DE Gehen Sie auf http://install.instar.com... - Page 7 Strom vorhanden. 16 - Netzwerkanschluss RJ45-LAN-Anschluss für Cat5e-LAN-Kabel oder höher 17 - Stromanschluss Für mitgeliefertes 12V / 2A DC Netzteil 18 - Anschlusskabel Mit LAN- u. Stromanschluss sowie Alarmeingang, Alarmaus- gang, Reset 6-DE Gehen Sie auf http://install.instar.com...
-
Page 8: Installation
Ihre Kamera zugreifen, um diese einzurichten. Schritt 7 Nach Einrichtung Ihrer Kamera können Sie die Kamera gemäß Ihrer Präferenz an der Wand oder an der Decke befestigen. Informationen zur Installation mit Decken- oder Wandhalterung finden Sie im näch- sten Abschnitt. 7-DE Gehen Sie auf http://install.instar.com... - Page 9 Schritt 5: Bringen Sie jetzt die Wandhalterung an der Wand an, indem Sie diese auf die in Schritt 3 befestigte Metallplatte aufset- zen. Anschließend fixieren Sie die Halterung durch Anziehen der Schraube auf der Unterseite. 8-DE Gehen Sie auf http://install.instar.com...
- Page 10 Decke. Verwenden Sie die mitgelieferten Schrauben und Dübel, um die Halterung Abb. 3 an der Decke zu befestigen. Schritt 3: Lösen Sie die Schraube an der Halterung und fixieren Sie die Kamera an der Halterung durch Festziehen der Schrauben. 9-DE Gehen Sie auf http://install.instar.com...
-
Page 11: Smartphone Apps
Weboberfläche (WebUI): Sie können die Weboberfläche in jedem aktuellen Webbrowser öffnen, der HTML5 unterstützt. Nutzen Sie einfach das INSTAR Camera Tool, um die IP-Adresse der Kamera zu finden und diese im Webbrowser zu öffnen. Die WebUI erlaubt es Ihnen, die Kamera nach Ihren Wünschen zu konfigurieren. -
Page 12: Fernzugriff
über eine externe Internetverbindung testen. Beachten Sie bitte, dass eine Portweiterleitung nur bei einem öffentlichen IPv4 Internetanschluss funktioniert. Für Informationen zur Portweiterleitung und dem DDNS-Service im Allgemeinen schauen Sie bitte auf: http://remote.instar.de 11-DE Gehen Sie auf http://install.instar.com... -
Page 13: Zurücksetzen Der Kamera
Kamera neu einzurichten. Für mehr Informationen, wie man die Kamera neu installiert, schauen Sie bitte hier: https://install.instar.com. Na- chdem die Kamera wieder verbunden ist, verwenden Sie das INSTAR Camera Tool, um die IP-Adresse der Kamera zu finden und öffnen Sie die WebUI zur neuen Einrichtung. -
Page 14: Autofokus-Zoom-Objektiv
Nutzer sollten immer VERMEIDEN, am Objektiv zu han- tieren und DÜRFEN NIEMALS versuchen, das Objektiv Hinweis manuell zu justieren. Jede manuelle Justierung resultiert in einem permanenten Verlust des Zooms, was nicht rückgän- gig gemacht werden kann. 13-DE Gehen Sie auf http://install.instar.com... -
Page 15: Online-Material
4. Wie kann man sich die Aufnahmen auf der Speicherkarte herunterladen und vieles mehr... 10.2. Firmware-Update INSTAR Kameras erhalten kostenfreie Firmware-Updates. Öffnen Sie die WebUI und gehen Sie auf System -> Firmware-Update, um zu prüfen, ob eine neue Firmware für Ihre Kamera verfügbar ist. Sie können diese dann herunterladen und über die WebUI installieren. -
Page 16: Instar Cloud
Aufnahmen sicher aufzubewahren. Testen Sie die INSTAR Cloud jetzt kostenfrei für 30 Tage unter https://cloud.instar.de. Die INSTAR Cloud kostet in etwa 1/3 von dem, was andere Anbieter verlangen. Wenn man mit einer Speichereinheit von 10GB für eine Kamera plant (es lassen sich ca. -
Page 17: Technische Daten
Ausgang: 12V DC 2A / Eingang: 110-240V Stromverbrauch Max. 16 Watt (im Normalbetrieb 5 Watt) Betriebstemperatur - 20°C bis 55°C Anforderungen Webbrowser Webbrowser mit HTML5-Unterstützung CPU / Grafikkarte Dual Core (min. 2Ghz) / 256MB+ Grafikkarte Bandbreite min. 512kbs pro Kamera 16-DE Gehen Sie auf http://install.instar.com... -
Page 18: Garantie & Entsorgung
Produkt einsenden, dann kontaktieren Sie bitte support@instar.com, um eine RMA-Nummer zu beantragen. Mit dieser RMA können Sie dann das Gerät zur Reparatur einsenden. Das INSTAR SERVICE CENTER finden Sie aktuell an folgendem Standort: Firma: INSTAR Deutschland GmbH Hotline: +49 (6438) 9198992 Raiffeisenstraße 12... -
Page 19: Rechtliche Informationen
(2) dieses Gerät muss alle empfangenen Störung- en akzeptieren, einschließlich Störungen, die einen uner- wünschten Betrieb verursachen können. Das FCC Compliance Statement finden Sie auf folgender Internetseite: https://www.instar.com/legal/fcc © INSTAR ist eine geschützte Marke der INSTAR Deutschland GmbH. 18-DE Gehen Sie auf http://install.instar.com... - Page 20 INSTAR Deutschland GmbH Ihr Spezialist für Netzwerk- und Sicherheitstechnik...
- Page 21 - Alarm notifications by email, push and / or to an alarm server - Supports FTP(S) / SFTP upload of alarm images, videos and / or photo series - Supports TLS encryption for secure HTTPS, FTPS and MQTTS communication - Supports secure video upload to the INSTAR Cloud (optional)
- Page 22 6. Smartphone Apps 10-EN 7. Remote Access 11-EN 8. Camera Reset 12-EN 9. Auto-Focus Lens 13-EN 10. Online Material 14-EN 11. INSTAR Cloud 15-EN 12. Technical Data 16-EN 13. Warranty & Disposal 17-EN 14. Legal Information 18-EN 1-EN Go to http://install.instar.com...
-
Page 23: Camera Introduction
1. Camera Introduction The IN-9420 2K+ is the newest WQHD PIR outdoor pan/tilt/zoom IP camera from INSTAR. With a built-in state-of-the-art Panasonic passive infrared (PIR) motion sensor and four separately configurable alarm areas that can be linked together, the camera prevents false alarms and notifies you only when a real alarm has been triggered. -
Page 24: Safety Warnings
Don’t use the camera for any other purpose than it is made for. • Never install the device near explosive or flammable substances. • INSTAR does not give any warranty if you use any third party firmware. • INSTAR does not give any warranty if you open the camera without authorization. •... -
Page 25: Product Features
DDNS Free DDNS address to connect to your camera via the internet Cloud Optional upload & management of alarm videos in the INSTAR Cloud FTP Upload Upload alarm images / videos to an FTP server (FTP / FTPS / SFTP) -
Page 26: Camera Structure
4. Camera Structure 4.1. Delivery Content micro Power Camera Connection Cable Wall-mount 32GB MicroSD Network Cable Antenna Ceiling-mount Screws & Dowels Adaptor Bracket Bracket Delivery content in the camera package 4.2. Camera Structure 5-EN Go to http://install.instar.com... - Page 27 RJ45 LAN port / connector for Cat5e LAN cable or higher 17 - Power Connector For included 12V / 2A power supply 18 - Connection Cable With LAN- and power connector as well as alarm input, as alarm output, reset 6-EN Go to http://install.instar.com...
-
Page 28: Installation
Web User Interface (WebUI). Step 7 After you set up your camera, you can now mount it according to your mounting preference. You can refer to the following for wall mounting and ceiling mount. 7-EN Go to http://install.instar.com... - Page 29 Fig.4. Fig. 5 Step 5: Attach the wall-mount to the metal plate on the wall. Once attached, please tighten the screw at the bottom of the wall-mount. 8-EN Go to http://install.instar.com...
- Page 30 Fig. 3 Step 3: Loosen the screws on the neck of the bracket, put the cam- era in position and fix it on to the bracket by tightening the screws again. 9-EN Go to http://install.instar.com...
-
Page 31: Smartphone Apps
You can open the WebUI using a modern HTML5 based web browser on your computer. You only need to use the INSTAR Camera Tool to search for your cam- era’s IP address and then open it inside your default web browser. -
Page 32: Remote Access
LTE / data connection. Please consider that port forwarding only works if your router has a public IPv4 address. For detailed description to port forwarding on your router model and DDNS service in general, please refer to: https://remote.instar.com 11-EN Go to http://install.instar.com... -
Page 33: Camera Reset
For more information on how to install your camera again, please visit: https://install.instar.com. Once you connect the camera to the network, use the INSTAR Camera Tool to find out the camera’s IP address and open the camera’s WebUI to start configurating your camera again. -
Page 34: Auto-Focus Lens
Users should always AVOID tampering with the lens unit and MUST NEVER try to adjust the lens manually. Any man- Notice ual adjustment on the lenses mechanical parts will result in a permenant loss of focus and cannot be undone. 13-EN Go to http://install.instar.com... -
Page 35: Online Material
10.2. Firmware Update INSTAR cameras will be provided with free firmware updates. Open the WebUI and navigate to System -> Firmware Update to check if there is a new update available for your camera model. You can then download and install the latest firmware directly through the WebUI. -
Page 36: Instar Cloud
What’s the INSTAR Cloud? The INSTAR Cloud is a purely optional and paid service to backup your record- ings. Try the INSTAR Cloud free of charge for 30 days at https://cloud.instar.de. The INSTAR Cloud costs only about 1/3 of what other cloud platforms demand. -
Page 37: Technical Data
Max. 16 Watt (in normal operation 5 Watt) Operating Temperature - 20°C to 55°C Requirements Web Browser Web browser supporting HTML5 CPU / Graphic Card Dual core (min. 2Ghz) / 256MB+ graphic card Bandwidth Min. 512kbs per camera 16-EN Go to http://install.instar.com... -
Page 38: Warranty & Disposal
13. Warranty & Disposal 13.1. Warranty INSTAR offers a 2-year warranty on its products. During this period you can send in your camera for free repair (the shipping cost to our service center will have to be paid by the customer). This excludes cameras installed with custom-made or third party firmware and WebUIs which have not been approved by INSTAR. -
Page 39: Legal Information
The complete FCC Compliance Statement can be found on the https://www.instar.com/legal/fcc following website: © INSTAR is a registered trademark of the INSTAR Deutschland GmbH. 18-EN Go to http://install.instar.com... - Page 40 INSTAR Deutschland GmbH Your Specialist for Network and Security Equipments...
Need help?
Do you have a question about the IN-9420 2K+ and is the answer not in the manual?
Questions and answers