TP-Link TD-8840T Quick Installation Manual
Hide thumbs
Also See for TD-8840T:
- User manual (56 pages) ,
- User manual (77 pages) ,
- Installation manual (18 pages)
Advertisement
Quick Links
Installation
Note
Please use only wired network connections to configure the Modem Router.
If you currently use a modem, disconnect it now - the Modem Router will
replace your current modem.
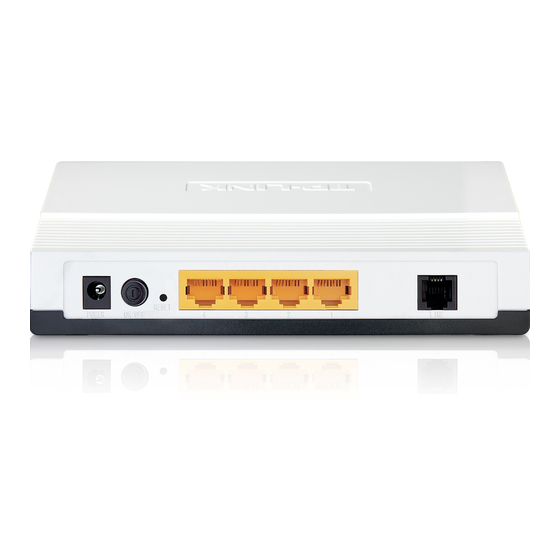
Connect your computer to the Port
labeled "1~4" on the Modem Router
with an Ethernet cable.
Connect the splitter to the wall
j ack using a telephone line,
then use the other telephone
line to directly connect it to the
A DSL port on the Modem
Router and the MODEM port
of the splitter, also have the
PHONE port of the splitter
connected to a telephone.
If no telephone is needed, please connect the ADSL port of the Modem
Note
Router to the wall jack using the telephone line directly.
1
Advertisement

Related Manuals for TP-Link TD-8840T


Summary of Contents for TP-Link TD-8840T
- Page 1 Installation Note Please use only wired network connections to configure the Modem Router. If you currently use a modem, disconnect it now - the Modem Router will replace your current modem. Connect your computer to the Port labeled “1~4” on the Modem Router with an Ethernet cable.
- Page 2 ISP to ensure that your internet connection is active. To configure the device, you can either run the Resource CD (method one), Note or run the Web based Quick Setup Wizard (method two). TP-LINK strongly recommends that you run the Resource CD.
- Page 3 Insert the provided Resource CD into your CD-ROM drive. The Setup Wizard will automatically pop up on your computer’s screen. Please select your product model and click Start Setup Then a flash video will pop up and show you how to connect your devices.
- Page 4 Login Open your web browser and type in 0H192.168.1.1 in the address bar and press Enter A dialog box will prompt you for the User name and Password. Enter the default values and click User name: admin Password: admin Click OK If the dialog box does not pop up, please refer to T3 in the Troubleshooting Note guide on page 9.
- Page 5 Internet Parameters Configuration This page will then display. Click Next Enter the VPI and VCI values given by your ISP Click Next Choose the WAN Type given by your ISP. If PPPoE or PPPoA is selected, please proceed to A; If Dynamic IP is selected, please skip to B;...
- Page 6 A. Configuration for PPPoE or PPPoA This page will then display. Enter the Username, Password Confirm Password provided by your ISP Click Next If you are using the modem on a new DSL line and have not completed Note your DSL provider’s online registration, you may be using a generic username and password.
- Page 7 Quick Setup Complete Save page will be displayed. Please confirm all parameters. Click Previous to modify or click the Save button to make the configuration take effect. To continue, the following page will be displayed. Click Finish Now, your Modem Router has been configured.
- Page 8 The basic settings for your Modem Router are completed. Please open the web browser and log on to the following websites: http://www.tp-link.com http://www.google.com If the above websites can be accessed, it indicates that your Modem Router has been configured successfully and you can start to enjoy the Internet. If the websites cannot be accessed, please refer to “T4.
-
Page 9: Troubleshooting
Troubleshooting How do I restore my Modem Router’s configuration to its factory default settings? With the Router powered on, press and hold the RESET button on the rear panel for 8 to 10 seconds before releasing it. Hold it for 8 to 10 seconds Once the Router is reset, the current configuration settings will be lost and Note you will need to re-enter all the parameters. - Page 10 Click Network Connections Right-click Local Area Connection Click Properties Double-click Internet Protocol (TCP/IP)
- Page 11 Select Obtain an IP address automatically Select Obtain DNS server address automatically Click OK Click OK...
- Page 12 For Windows Vista OS Go to Start > Settings > Control Panel, and then you will see the following page. Click View network status and tasks Click V iew status Click Properties...
- Page 13 Double-click Internet Protocol Version 4 (TCP/IPv4) Select Obtain an IP address automatically Select Obtain DNS server address automatically Click OK...
- Page 14 For Windows 7 OS Go to Start > Settings > Control Panel, and then you will see the following page. Click View network status and tasks Click Change adapter settings Right-click Local Area Connection Click Properties...
- Page 15 Double-click Internet Protocol Version 4 (TCP/IPv4) Select Obtain an IP address automatically Select Obtain DNS server address automatically Click OK...
- Page 16 2) Configure your IE browser Open your IE browser, click Tools tab and you will see the following screen. Click Internet Options Select Never dial a connection Click OK Now, try to log on to the Web-based configuration page again after the above settings have been configured.
- Page 17 Modem Router by following the instructions of this QIG. Please feel free to contact our Technical Support if the problem still persists. For more details about Troubleshooting and Technical Support contact Note information, please log on to our Technical Support Website: http://www.tp-link.com/en/support...
-
Page 18: Technical Support
9:00 AM to1:00 PM, 2:00 PM to 6:00 PM Brazil Indonesia Toll Free: 0800-770-4337 (Portuguese Tel: (+62) 021 6259 135 Service) E-mail : support.id@tp-link.com E-mail: suporte.br@tp-link.com Service time : Monday to Friday Service time: Monday to Saturday 9:00 -12:00; 13:00 -18:00 08:00 AM to 08:00 PM...
Need help?
Do you have a question about the TD-8840T and is the answer not in the manual?
Questions and answers