Table of Contents
Advertisement
Quick Links
Download this manual
See also:
Owner's Manual
Advertisement
Table of Contents

Related Manuals for Viper 4708V


Summary of Contents for Viper 4708V
-
Page 3: Table Of Contents
Contents Getting Started ....................4 Charging the Remote Control ..............4 Responder LC3 2-Way..................5 Advanced Remote Control Commands ........... 6 Fault Condition Alerts ................6 Status Screen Icons ....................6 Basic Commands ....................8 Remote Start ..................8 Lock ....................8 Unlock .................... -
Page 4: Getting Started
Getting Started Your Responder LC3 remote is powered by an internal rechargeable battery that can only be serviced by an authorized Directed dealer. Due to transit and storage time prior to your purchase, the battery charge may have depleted. To ensure proper operation, check the battery level and connect the battery charger if not fully charged. -
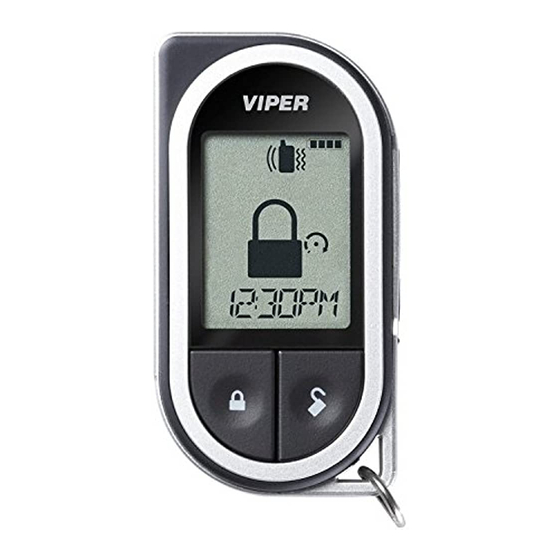
Page 5: Responder Lc3 2-Way
Responder LC3 2-Way Internal Antenna Display 1-800-274-0200 RPN 7752V IC: 1513A-7752 FCC ID:EZSDEI7752 Mini-USB Port Feature Description Internal Antenna Used for transmitting and receiving information Display Status screen - the upper portion of the display contains status Internal icons for the System, Remote Start and Remote Control. Antenna Text field - the lower portion of display - shows the Clock, Display... -
Page 6: Advanced Remote Control Commands
Advanced Remote Control Commands Refer to the Quick Reference Guide for more information on advanced remote start commands that are specific to each vehicle. Fault Condition Alerts If, when performing a command, a condition exists that does not allow activation of a Remote Start feature*, the not available text and a fault tone will play. - Page 7 Icon Description Locked: The system is Locked. Unlocked: The system is Unlocked. Remote start is active, the engine is running. On during Aux/Trunk channel activation. On during Fault Report to indicate the Hood is open. Bars indicate battery level is Full, ¾,½,¼ or Empty. On while the remote control is transmitting a command.
-
Page 8: Basic Commands
Basic Commands Remote Start Press and release Activates (or if On, deactivates) the remote starter. The engine and parking lights turn On and the level 1 level 3 level 4 level 2 6:30 text and tones play, or the engine remote start on and parking lights turn Off and the text and tones... -
Page 9: Unlock
Unlock Press and release The doors unlock and parking lights flash twice. The text and disarm beeps play to confirm and the system status icons update. Note If the remote is set to Remote Keyless Entry (RKE), it will dis- play LOCK/UNLOCK;... -
Page 10: Responder Lc3 Configuration
Responder LC3 Configuration Operations of the Responder LC3 and how it communicates messages are set in the configuration Main Menu. The following instructions will direct you through the available programming options. Navigating Menus and Options Navigating menus and features, changing options, and exiting are performed using the remote control buttons. -
Page 11: Remote Features (Main Menu)
Remote Features (Main Menu) The following Main Menu list of features is available for configuration of the remote control. Setup Remote menu Keypad Lock Options: auto When , the buttons do not lock and always perform a com- mand when pressed. When set to , the remote buttons auto lock after a 20 second lapse between buttons presses to prevent... - Page 12 There are several ways for the Responder LC3 to alert you when it has received a message from the system. will alert by both emitting tones and vibrating the re- tone vibe mote. Select to be alerted by tones that are unique for tone each message.
- Page 13 Temp Unit (Not available on this system) Options: Button Beep Options: When set to , the remote will emit a beep as confirmation of a button press. When set to , beeps are not emitted for button presses. System Type Options: Note If the remote is set to Remote Keyless Entry (RKE), it will...
-
Page 14: Demo Mode
Demo Mode Demo Mode plays a pre-selected group of animations as a demon- stration tool to show friends or family. Running Demo mode shortens the battery life over time if used excessively • : The remote will display a selection of icons on single silent the status screen without beeps and tones then stop. -
Page 15: Exit
Exit To return to normal operation, press the button while EXIT is dis- played. Additional Remotes This device does not support end user programming. To add a new remote, please consult your local 12-volt retailer to have one pro- grammed for you. Remote Start Features Refer to the Quick Reference Guide for more information on remote start features that are specific to each vehicle. -
Page 16: Remote And System Operations
Remote and System Operations Out of Range Each time a command is performed the remote will expect a com- mand confirmation from the system. If a command confirmation is not received the out-of-range icon ( ) and a fault tone will play as an alert. -
Page 17: 1-Way Companion Remote Control
1-Way Companion Remote Control Internal Antenna Transmit Internal Antenna Feature Description Transmit Internal Antenna Used for transmitting information 1-800-274-0200 RPN 7152X Transmit LED Transmit LED flashes when transmitting information. IC: 1513A-7152 FCC ID:EZSDEI7152 BATTERY: CR2032 Press for one second to lock. Press for one second to unlock. -
Page 18: Using The 1-Way Companion Remote
Using the 1-Way Companion Remote The companion 1 way remote commands the system features as shown in the previous table, but without the message display of the Responder LC3 remote. Parking light flashes is used to indicate that a command has been received and activated as described in the Basic and Advanced command sections. - Page 19 To exit; press and release the button to go back and repeat to exit. 1 short and 1 long beep is emitted for each step back, the LED turns off when programming is exited. Remote Features Menu Press and release the button, 2 LED flashes and beeps indi- cate the remote features menu is accessed and can be set.
-
Page 20: Battery Information (1-Way)
Cover Battery Information (1-Way) The 1-way companion remote is powered by one 3V coin cell lithium battery (PN CR-2032) that will last approximately one year under normal use. Battery Replacement 1. Using a small flat narrow object, Rear View push latch down towards battery tray while gently prying the tray outwards Battery from both ends until released. -
Page 21: Low Battery
Warnings! NEVER connect the supplied AC adapter to products other than the Responder LC3 remote con- trol. It is a high current device designed specifically for rapid charging of the Responder LC3 battery and may cause severe damage or explosion when connected to any other products. -
Page 22: Battery Life
Important To preserve power at critically low battery levels the Responder LC3 turns the pager off and stops receiving messages from the system. It will continue to command the system until the battery can be charged. Battery Life The Responder LC3 remote control has many features that make it one of the most unique remote controls on the market today, including su- perior long range communication with the system. -
Page 23: Government Regulations
Government Regulations This device complies with Part 15 of FCC rules. Operation is subject to the following two conditions: (1) This device may not cause harmful interference, and (2) This device must accept any interference received, including interference that may cause undesirable operation. - Page 24 This device complies with the Industry Canada Radio Standards Specification RSS 210. Its use is authorized only on a no-interference, no-protection basis; in other words, this device must not be used if it is determined that it causes harmful interference to services authorized by IC.
-
Page 25: Warning! Safety First
Warning! Safety First Please read the safety warnings below before proceeding. Improper use of the product may be dangerous or illegal. Installation Due to the complexity of this system, installation of this product must only be performed by an authorized Directed dealer. If you have any questions, ask your retailer or contact Directed directly at 1-800-753-0600. -
Page 26: Limited Lifetime Consumer Warranty
Limited Lifetime Consumer Warranty Directed Electronics. (“Directed”) promises to the original purchaser to repair or replace (at Directed’s election) with a comparable reconditioned model any Directed unit (hereaf- ter the “unit”), excluding without limitation the siren, the remote transmitters, the associated sensors and accessories, which proves to be defective in workmanship or material under reasonable use during the lifetime of the vehicle provided the following conditions are met: the unit was purchased from an authorized Directed dealer, the unit was profession-... - Page 27 COSTS FOR MAINTENANCE, REMOVAL OR REINSTALLATION OF THE UNIT OR ANY CONSEQUENTIAL DAMAGES OF ANY KIND. IN THE EVENT OF A CLAIM OR A DISPUTE INVOLVING DIRECTED OR ITS SUBSIDIARY, THE VENUE SHALL BE SAN DIEGO COUNTY IN THE STATE OF CALIFORNIA. CALIFORNIA STATE LAWS AND APPLICABLE FEDERAL LAWS SHALL APPLY AND GOVERN THE DISPUTE.
Need help?
Do you have a question about the 4708V and is the answer not in the manual?
Questions and answers