TRENDnet TE100-P1U User Manual
Hide thumbs
Also See for TE100-P1U:
- User manual (113 pages) ,
- Quick installation manual (14 pages) ,
- Datasheet (2 pages)
Table of Contents
Advertisement
Quick Links
Download this manual
See also:
User Manual
T
ABLE OF
ABOUT THIS GUIDE .................................................................................. 4
INTRODUCTION ......................................................................................... 5
.................................................................................... 6
............................................................................... 6
..................................................................................... 7
V
............................................................................................. 8
HARDWARE INSTALLATION ............................................................... 10
....................................................................... 10
.................................................................. 11
USING THE UTILITIES ........................................................................... 12
......................................................................... 13
................................................................................................. 14
Installing PS-Utility ................................................................................ 14
Using PS-Utility ...................................................................................... 15
................................................................................................. 18
WEB CONFIGURATION .......................................................................... 24
.................................................................. 24
.......................................................................................................... 25
........................................................................................... 26
Second HTTP Port .................................................................................. 28
Save to Print Server ................................................................................ 28
.................................................................................. 30
............................................................................... 31
......................................................................................... 32
.................................................................................. 33
........................................................................................................ 34
PRINTING IN WINDOWS 95/98/ME ...................................................... 35
- 2 -
C
ONTENTS
................................. 36
Advertisement
Table of Contents

Related Manuals for TRENDnet TE100-P1U


Summary of Contents for TRENDnet TE100-P1U
-
Page 1: Table Of Contents
ABLE OF ONTENTS ABOUT THIS GUIDE .................. 4 INTRODUCTION ..................5 ..................6 ACKAGE ONTENTS ................6 YSTEM EQUIREMENTS ..................7 ENERAL EATURES ..................... 8 RODUCT HARDWARE INSTALLATION ............... 10 ............... 10 ETWORKING PPLICATION ..............11 NSTALLING THE RINT ERVER USING THE UTILITIES ................ -
Page 2: About This Guide
This manual provides instructions and illustrations on how to use your TCP/IP P ........62 ETTING INDOWS ISTA RINTING TE100-P1U USB 2.0 Print Server, including: PRINTING IN MAC OS ................68 Chapter 1, Introduction, provides the general information on MAC OS 10.2 ............68 ENDEZVOUS SES IN the product. -
Page 3: Introduction
♦ One TE100-P1U ♦ One AC Power Adapter suitable for your country’s electric power service. Congratulations on purchasing your TE100-P1U USB 2.0 Print ♦ One Quick Installation Guide. Server, the easiest and fastest way to deploy printers on your network. -
Page 4: General Features
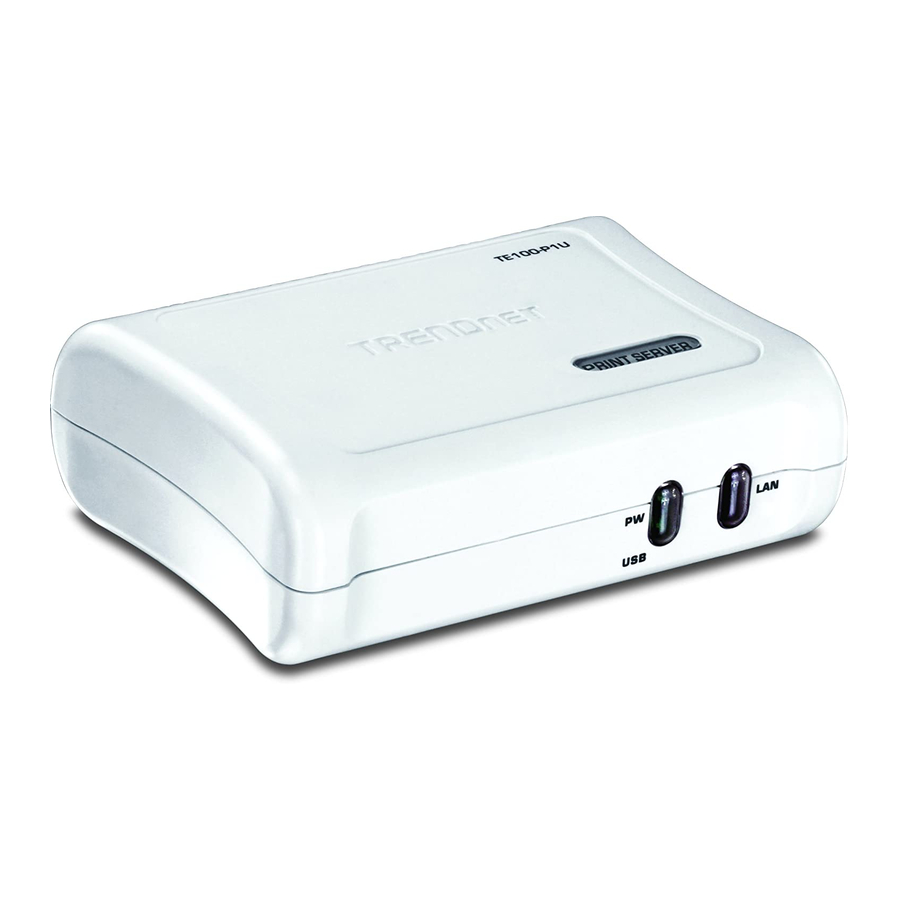
General Features Product View ♦ Compliant with USB 2.0 Hi-Speed printing This section describes the externally visible features of the print ♦ Equipped 10/100 Auto-MDIX Fast Ethernet LAN port server. ♦ Multi protocol support is ideal for shared printing in mixed-LAN Front View environments LEDs*... -
Page 5: Hardware Installation
* There are three green LED indicators on the rear panel: LEDs Description Power Steady light confirms that the Print Server is powered on. ARDWARE When it is blinging, the connected printer is printing NSTALLATION Link/Act Steady light confirms that the print server has a good connection to your network. -
Page 6: Installing The Print Server
Installing the Print Server Follow these steps for a trouble-free start of print server operations with your TE100-P1U USB 2.0 Print Server. SING TILITIES 1. Confirm proper operation of the printer to be connected to the print server. 2. When you have confirmed proper operation of the printer, turn off the power. -
Page 7: Auto-Run Installation
Auto-Run Installation PS-Utility Insert the Installation CD-ROM into your computer’s CD-ROM drive To avoid the conflict in your network, you can use PS-Utility to to initiate the Auto-Run program, and the menu screen will appear as change the related settings of your print server (such as the IP address) below. -
Page 8: Using Ps-Utility
3. The InstallShield Wizard starts to install the software, and the 2. The main screen will appear as below, and it starts to search the Progress bar indicates the installation is proceeding. connected print server within the network. 4. When completed, click Finish. Your print server After installing the utility, the application program for the print server is automatically installed to your computer, and creates a folder in... -
Page 9: Ps Wizard
Change IP Address: PS Wizard Click this button to bring up the following dialog Note: The PS Wizard doesn’t support Windows 95. The user can box, allowing you to refer chapter 5 “Printing in Windows 95/98/ME” to set up for change the IP Address. - Page 10 4) Click Next. 2) Select the print server, select the desired port and then click Add Printer. 5) Click Print Test Page. 3) Click Select from manufacturer list. Select the appropriate driver for your printer and then click Next. 6) Click OK. - 19 - - 20 -...
- Page 11 7) Click Finish. 8) Repeat steps 1 to 7 to add the printer to other computers on the network. Windows 98SE/ME : NOTE: For some specific printers, you may need to connect the 1. Insert the Installation CD-ROM into your computer’s CD-ROM printer to the computer and install the driver.
-
Page 12: Web Configuration
ONFIGURATION Choose one connected You can access and manage the Print Server through: 1) the enclosed printer within the network. software PS-Utility, and 2) a web browser. This chapter describes the second method – the Web Configuration Utility, and explains how to set up your print server with the web browser. -
Page 13: Home
Home Setup Wizard The Management Screen of the Configuration Utility The “Setup Wizard” will lead you to change all the configurations step by step. Please follow below steps to finish it The Home screen displays the basic information of the print server. As System shown above, the System displays the status of your print server and network. -
Page 14: Second Http Port
Microsoft Network Enter the name of the Workgroup that you want the print server associated with in this field. IP Address This option allows you to set the IP address manually or Second HTTP Port automatically. When you choose Manually Assign, you should enter the related information in the following boxes, including IP Address, This field allows settings to open a second port for the remote printing Subnet Mask, and Default Gateway. -
Page 15: Change Ip Address
Change IP Address The Setup Wizard is now completed. This feature is helping you to change IP address only.If you have run the Setup Wizard already, you may skip this procedure. Please type in IP address that applies to your existing network (i.e. 192.168.X.X) Type in the Default Gateway (i.e. -
Page 16: Printer Information
Printer Information Factory Reset Please click Yes to reload the factory settings of the print server. “Printer Information” will display all printer information such as Manufacturer, Model Number, Command Set and Status. - 31 - - 32 -... -
Page 17: Firmware Upgrade
The firmware can be easily upgrade through “Firmware Upgrade” feature. Click Browse to get the firmware file, and then click Upgrade to flash firmware. The new firmware can be downloading from www.trendnet.com once it is available. - 33 - - 34 -... -
Page 18: Printing In Windows 95/98/Me
Installing the LPR for TCP/IP Printing Client RINTING IN INDOWS Before your Windows 95/98/Me workstation can print using the lpr 95/98/ME protocol, you will need to install the client program, as follows: Make sure that you have installed the TCP/IP protocol, and have properly configured the Windows 95/98/Me TCP/IP settings. -
Page 19: Adding Lpr Printer Ports
Insert the Print Server installation CD in your computer’s CD- ROM, enter the proper pathname (for example , D:\ lpr), and Adding LPR Printer Ports click OK. Select the LPR for TCP/IP Printing client and click OK. Once you have installed the client, and have enabled TCP/IP printing for the Print Servers, then you need to add a printer port for each printer you will be printing to using the lpr/lpd protocol. -
Page 20: Printing From Windows 95/98/Me
Click the Add Port... button to add a new lpd-accessible printer port. Printing from Windows 95/98/Me Enter the IP address of the Print Server and the name of the printer port that you will be printing to, then press OK. After you have added the necessary printer ports, you can add a printer device for printing to the port. - Page 21 Press OK when you have located the proper printer port. Click Next > to continue to the next step. At this point Windows will ask you to choose the correct printer driver for the printer. Choose you printer’s make and model from the list, or use the driver disk included with the printer.
-
Page 22: Setting Tcp/Ip Printing Settings
Setting TCP/IP Printing Settings The lpr client’s Properties dialog allows you to change several of the client’s settings. To change these settings, From the Start menu, choose the Settings submenu, then the Control Panel item within it. Windows will display the Control Panel folder. -
Page 23: Printing In Windows 2000/Xp/Vista
Create a new “Standard TCP/IP Port” RINTING IN INDOWS 2000/XP/VISTA Setting Up Windows 2000 TCP/IP Printing Following is the correct procedure for setting up TCP/IP LPR printing under Windows 2000. Click Start > Settings > Printers. Double Click “Add Printer” Click “Next”... - Page 24 Input the IP Address of the Print Server, and the Port name of the Port Select “LPR”, and put the Port name in the field labeled “Queue that will be printed to, then click “Next”. Name”. Then Click “OK”. Hint: You can get the Port name from the print server’s system information through web browser.
- Page 25 Click “Next”. The Printer Install Wizard will now prompt for drivers. Select the correct Make and Model, or click “Have Disk”, to provide the Manufacturer’s Driver Disk. Click “Finish” Click “Next”. - 49 - - 50 -...
- Page 26 Select a “Printer Name”. Also, a Test Page can be printed to confirm proper configuration. When the Test Page has been printed, click “Finish” to complete the installation. Sharing can be enabled here. - 51 - - 52 -...
-
Page 27: Setting Up Windows Xp Tcp/Ip Printing
Select “Local Printer” Setting Up Windows XP TCP/IP Printing Following is the correct procedure for setting up TCP/IP LPR printing under Windows XP. Click Start > Printer and Faxes Double Click “Add a Printer” Click “Next” Create a new “Standard TCP/IP Port” - 53 - - 54 -... - Page 28 1Select “Custom”, and click “Settings”. Click “Next” Input the IP Address of the Print Server, and the Port name of the Port that will be printed to, then click “Next”. Select “LPR”, and put the Port name in the field labeled “Queue Name”.
- Page 29 Click “Finish” Click “Next”. - 57 - - 58 -...
- Page 30 The Printer Install Wizard will now prompt for drivers. Select the correct Make and Model, or click “Have Disk”, to provide the Manufacturer’s Driver Disk. Click “Next”. A Test Page can be printed to confirm proper configuration. Select a “Printer Name”. - 59 - - 60 -...
-
Page 31: Setting Up Windows Vista Tcp/Ip Printing
When the test page has been printed, click “Finish” to complete the Setting Up Windows Vista TCP/IP installation. Printing Following is the correct procedure for setting up TCP/IP LPR printing under Windows Vista. Click Start > Control Panel > Printers Click “Add a Printer”... - Page 32 Select Create a new port, select Standard TCP/IP Port and then Select “Custom”, and click “Settings”. click Next. Input the IP Address of the Print Server, and the Port name of the Port Select “LPR”, and put the Port name in the field labeled “Queue that will be printed to, then click “Next”.
- Page 33 Select a “Printer Name”. Click “Next”. A Test Page can be printed to confirm proper configuration. The Printer Install Wizard will now prompt for drivers. Select the correct Make and Model, or click “Have Disk”, to provide the Manufacturer’s Driver Disk. Click “Next”. - 65 - - 66 -...
-
Page 34: Printing In Mac Os
Once a test page has been sent to your printer, click Close. MAC OS RINTING IN Rendezvous Uses in MAC OS 10.2 Click Finish. The latest version of MAC OS provides a new feature that is called Rendezvous. Rendezvous is a revolutionary networking technology standard that lets you create an instant network of computers and devices, which can be used throughout Mac OS 10.2 to provide innovative ways to share files and printers and even contact other... - Page 35 4. Select the desired printer, and the following pop-up menu displays 1. Launch Print Center. Press and hold the Option key, click the the printer’s manufacturer. Select Generic. Add button. 2. Select Rendezvous from the pop-up menu. 5. The printer is installed into the system successfully. 3.
-
Page 36: Limited Warranty
If a product does not operate as warranted above during the applicable MAINTENANCE OR USE OF TRENDNET’S PRODUCTS. warranty period, TRENDnet shall, at its option and expense, repair the defective product or part, deliver to customer an equivalent product or part to...
Need help?
Do you have a question about the TE100-P1U and is the answer not in the manual?
Questions and answers