Table of Contents
Advertisement
Available languages
Available languages
Quick Links
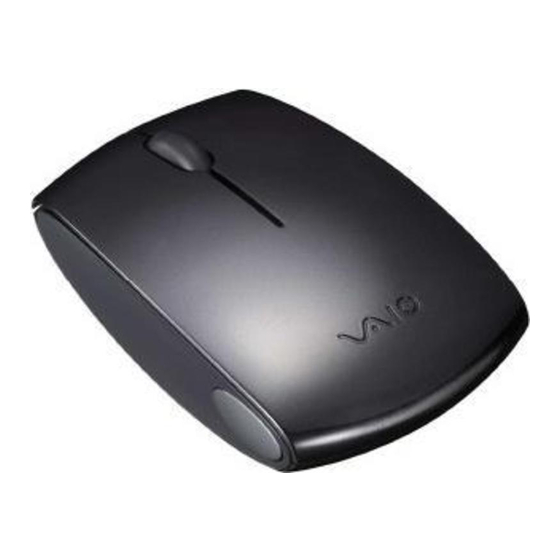
Wireless Laser Mouse
VGP-WMS20
Operating Instructions
Mode d'emploi
2-890-581-11(1)
© 2006 Sony Corporation Printed in Japan
English
WARNING
To prevent fire or shock hazard, do not expose the unit
to rain or moisture.
For customers in Europe
Sony hereby declares that this product is in compliance with the essential
requirements and other relevant provisions of European Directive 1999/5/EC.
To obtain a copy of the declaration of conformity (DoC) with the R&TTE
Directive, please access the following URL: http://www.compliance.sony.de/
It also complies with the EN 60825-1, being classified as a CLASS 1 Laser
product.
Repair and maintenance only by authorized Sony technicians. Improper use and
repairs can create a safety hazard.
Located on bottom side
Do not open the wireless devices, as opening them, for whatever reason, could
lead to damages that are not covered by the guarantee.
Disposal of AA batteries
• All wireless devices are powered by AA batteries.
• For installing the batteries, please refer to the instruction manual.
• Do not handle damaged or leaking batteries. Dispose of promptly and
properly.
• Batteries may explode or leak if recharged, disposed of in fire, or improperly
installed.
• Batteries used in these devices may present a fire or chemical burn hazard if
mistreated. Do not disassemble, heat above 60°C (140°F) or incinerate.
• Replace only with the same or equivalent type recommended by the
manufacturer.
• Keep away from children.
• Dispose of properly at end-of-life.
• In some areas, the disposal of batteries in household or business waste may be
prohibited. Please use the public collection system.
Disposal of Old Electrical & Electronic Equipment
(Applicable in the European Union and other European
countries with separate collection systems)
This symbol on the product or on its packaging indicates
that this product shall not be treated as household waste.
Instead it shall be handed over to the applicable collection
point for the recycling of electrical and electronic
equipment. By ensuring this product is disposed of
correctly, you will help prevent potential negative
consequences for the environment and human health,
which could otherwise be caused by inappropriate waste
handling of this product. The recycling of materials will
help to conserve natural resources. For more detailed
information about recycling of this product, please contact
your local city office, your household waste disposal
service or the shop where you purchased the product.
• VAIO and
are trademarks of Sony Corporation.
• Microsoft and Windows are registered trademarks of Microsoft Corporation
in the United States and/or other countries.
• All other names of systems, products, and services are trademarks of their
respective owners. In this manual, the ™ or ® marks are not specified.
In this manual, Microsoft
Windows
XP Home Edition and Microsoft
®
®
Windows
®
XP Professional are referred to as Windows XP.
Before Use
The Wireless Mouse is designed for use with Sony VAIO
®
personal
computers* and IBM PC/AT compatible computers with USB
connectors and pre-installed with Windows XP.
* This includes Windows XP Ready PCs upgraded with the Windows
XP Upgrade Program distributed by Sony Corporation.
• Its built-in laser pickup sensor enables use on a variety of materials
so you do not have to worry about the surface you are using it on.
• When not in use, the receiver can be stored directly in the storage to
make it easier to carry around.
Notes
• The extension cable for the USB receiver is not supplied. Depending on the
size or location of the computer's USB connector, it may be impossible to
insert the receiver. Check that the space around the computer's USB connector
is enough for connecting the receiver beforehand.
• Operation is not guaranteed for every computer that meets the above
conditions.
• Operation is not guaranteed for home-built computers, white box PCs, and
computers with OS upgrades and multi-boot systems.
Names of Parts
Wireless mouse
Wheel button
Right button
Left button
Receiver storage
Battery compartment
cover
CONNECT button
Low battery lamp
EJECT button
Printed on 70% recycled paper using VOC (Volatile Organic
Compound)-free vegetable oil based ink.
Imprimé sur papier 70% recyclé avec de l'encre à base
d'huile végétale sans COV (composés organiques volatils).
Wireless receiver
USB Plug
CONNECT lamp
Preparations
Inserting the battery into the mouse
1
Check that the receiver is stored in the mouse.
2
Open the battery compartment cover.
3
Insert the supplied IEC R6 (size AA) battery with the
correct + – orientation.
4
Close the battery compartment cover.
z
Under normal operating conditions, an alkaline battery lasts about three
months*. If the cursor movement becomes sluggish and the communication
distance between the mouse and receiver decreases, check the low battery
lamp on the mouse. Replace the battery if the low battery lamp flashes red.
When not in use, store the receiver in the mouse. This will make the battery
last longer.
The power turns on when the receiver is removed from the mouse, and the power turns
off when the receiver is stored in the mouse.
* Based on 5 hours a day/5 days a week usage. However, battery life will vary
considerably depending on operating conditions and condition of the battery
itself.
Ejecting the receiver
1
Press the EJECT button on the mouse.
The receiver is ejected, and the low battery lamp lights up green
for a while.
2
®
Remove the receiver from the mouse.
The storage cover will automatically close after the receiver is
removed.
To store the receiver in the mouse
Insert the receiver fully until the low battery lamp lights up green for a
while. The receiver can be stored either front or rear side up.
Note
Do not insert anything in the receiver storage other than the receiver, as
it may cause malfunction.
Connecting the mouse with the receiver
1
Insert the receiver into the computer's USB connector.
The power lamp on the receiver lights up green.
USB connector
2
Press the CONNECT button on the receiver.
The CONNECT lamp lights up orange, and the mouse will be
recognized after about 15 seconds.
3
Press the CONNECT button on the mouse.
The CONNECT lamp on the receiver goes off, and communication
between the mouse and receiver starts.
The CONNECT lamp on the receiver lights up when the mouse is
moved, indicating communication with the mouse.
If the CONNECT lamp does not light up orange when the mouse
is moved, the mouse is not connecting with the receiver. Retry
from step 2.
To stop using the mouse
Disconnect the receiver from the USB connector of the computer.
You can disconnect and connect the receiver without turning the
computer off. By storing the receiver in the mouse, you can conserve
the battery power.
Confirming installation
Perform this procedure with the receiver connected.
CONNECT button
Windows XP operating system:
Power lamp
1
Click "Start," and then "Control Panel" .
2
Click "Performance and Maintenance," and then click
"System".
3
Click the "Hardware" tab, and then "Device Manager".
4
Confirm the following:
1 Click the "+" mark on the left of "Human Interface Devices" and
confirm that "USB Human Interface Device" is displayed.
2 Click the "+" mark on the left of "Mice and other pointing
devices" and confirm that "HID-compliant mouse" is displayed.
Using the Wireless Mouse
When you move the mouse, the pointer displayed on your screen
moves in the same direction.
This section describes basic mouse operations and how to use the
wheel button.
Note
Due to the characteristics of the laser sensor, the mouse may not work properly
on transparent surfaces or on a mouse pad that has a clear surface. Avoid using
on such materials, or use a commercially-available mouse pad that is compatible
with a laser sensor mouse.
z
If necessary, you can adjust the mouse pointer speed in the "Mouse Properties"
dialog box. To display the "Mouse Properties" dialog box, click "Start",
"Settings", "Control Panel", and select "Printers and Other Hardware" in the
"Control Panel", then select "Mouse".
Operating distance of the mouse
The mouse can normally be operated within about a 32 ft. (10 m) radius
around the receiver. Depending on the usage environment, sometimes
the usable distance may be notably shorter, preventing normal
operation.
In such a case, take the following measures:
• Use the mouse as far away from other wireless devices as possible.
• Use the mouse closer to the receiver.
• Use a mouse pad.
Basic operations
1
3
1
Wheel button
Rotate the wheel to scroll up and down.
2
Right button
Press to perform specific shortcut functions.
3
Left button
Press to perform specific mouse functions.
Note
If the USB wake-up function is set on your computer, it may recover
from standby mode if the mouse is touched unintentionally or it is
exposed to a vibration or shock.
To avoid this, disconnect the receiver from your computer before
entering standby mode.
Precautions
Safety
If any solid object or liquid falls onto the mouse, disconnect
it and have it checked by qualified personnel before
continuing its use.
Location
Do not place the mouse in a location where it is:
• On an unstable surface
• In very humid areas or where there is no ventilation
• Subject to excessive dust
• Subject to direct sunlight or extreme heat
• Extremely cold
Operation
If the mouse is brought directly from a cold to a warm
location or is placed in a very damp room, moisture may
condense on the inside of the mouse. If this occurs, the
mouse may not work properly.
In this case, wait about 30 minutes for the moisture to
evaporate. If the mouse does not work properly after one
hour, consult your nearest Sony dealer.
Cleaning the outside of the mouse
Clean the mouse with a soft, dry cloth or a soft cloth lightly moistened
with a mild detergent solution. Do not use any type of abrasive pad,
scouring powder, or solvent such as alcohol or benzine.
Replacing the battery
When the low battery lamp flashes red, the remaining battery is low.
Replace the battery.
When the battery is replaced, the low battery lamp will stop flashing
and the mouse icon will return to normal.
Specifications
Wireless mouse
Interface
System
Sensor resolution
Transmission distance
Power requirements
Dimensions
Mass
Wireless receiver
Interface
Frequency band
Dimensions
Mass
Miscellaneous
Supported models
Operating temperature
Operating humidity
Storage temperature
Storage humidity
Accessories
*
1
This unit does not support communication with wireless LAN and
Bluetooth
*
2
The value may vary depending on the setting and operating conditions.
*
3
The supplied battery is for testing purposes only. You can use the mouse
longer by using alkaline battery.
Design and specifications are subject to change without notice.
Troubleshooting
If you experience any of the following difficulties while using the
mouse, use this troubleshooting guide to solve the problem. If a
problem persists, consult your nearest Sony dealer.
Nothing happens when I press a mouse button.
❒ The receiver is not connected properly to the USB connector.
c Close all programs, and then reconnect the receiver to your computer.
❒ The operating system is not compatible.
c Use a supported operating system.
❒ The USB connector is not available.
c Check the "System Properties" of your computer.
❒ The mouse battery is exhausted.
c If the low battery lamp flashes red, replace the battery. For details, see
"Preparations".
c If the mouse cannot be used when the low battery lamp does not flash,
the battery may be completely exhausted. Replace the battery.
❒ The mouse and receiver are not communicating.
2
c Perform steps 2 and 3 of "Connecting the mouse with the receiver" to
ensure that proper communication is possible.
c In some operating environments, the usable distance may be notably
shorter, preventing normal operation. Should this occur, ensure the
mouse is not being operated close to other electronic devices such as
other computers or displays.
c If the mouse is too far from the receiver, communication is not
possible. Place the receiver closer to the mouse.
❒ The mouse is being used on an unsuitable surface.
c Due to the characteristics of the laser sensor, the mouse may not work
properly on transparent surfaces or on a mouse pad that has a clear
surface. Avoid using on such materials, or use a commercially-
available mouse pad that is compatible with a laser sensor mouse.
The CONNECT button was pressed, but communication is not possible.
c Check whether battery is inserted in the mouse. For details, see
"Preparations".
c If the low battery lamp flashes red, the battery may be exhausted.
Under normal operating conditions, an alkaline battery lasts about
three months. Replace the battery. For details, see "Preparations".
c Communication between the mouse and receiver may not have been
properly established. If the CONNECT button on the mouse is not
pressed within 15 seconds of pressing the CONNECT button on the
receiver, the receiver cancels communication. In such a case, perform
the procedure once more to enable communication. For details, see
"Connecting the mouse with the receiver".
c If the mouse is too far from the receiver, communication is not
possible. The maximum distance between the mouse and receiver is
about 32 feet (10 m). If used on a metal table or if there are obstacles
between the mouse and receiver, the usable distance may be less.
The scrolling features do not work.
❒ The operating system is not compatible.
c Use a supported operating system.
❒ The scrolling features do not work with the program I am using.
c The scrolling features work only with programs that use scroll bars.
c Some programs do not support the scrolling features.
❒ The receiver was connected in power-save mode, and the computer has
now returned to normal mode.
c Disconnect the receiver from the USB connector, wait a few seconds,
and then connect the receiver again.
The pointer doesn't move when I move the mouse.
c Windows or other software processes may temporarily disable the
mouse. In this case, you may need to wait for the processing to finish
before using the mouse.
c You may find some useful solutions in your computer's operating
manual. Refer to the manuals provided with your computer.
❒ The mouse battery is exhausted.
c If the low battery lamp flashes red, replace the battery. For details, see
"Preparations".
❒ The mouse and receiver are not communicating.
c Perform steps 2 and 3 of "Connecting the mouse with the receiver" to
ensure that proper communication is possible.
c In some operating environments, the usable distance may be notably
shorter, preventing normal operation. Should this occur, ensure the
mouse is not being operated close to other electronic devices such as
other computers or displays.
c If the mouse is too far from the receiver, communication is not
possible. Place the receiver closer to the mouse.
❒ The mouse is being used on an unsuitable surface.
c Due to the characteristics of the laser sensor, the mouse may not work
properly on transparent surfaces or on a mouse pad that has a clear
surface. Avoid using on such materials, or use a commercially-
available mouse pad that is compatible with a laser sensor mouse.
When I press the wheel button, the quick/auto scroll function does not
work.
❒ The software does not support the quick/auto scroll function.
c This function is available only with programs that support it.
The zoom function does not work when I rotate the wheel button.
❒ The program does not support the zoom function.
c This function is available only with programs that support it.
❒ The document has been zoomed out to the maximum level, and the scroll
Digital wireless transmission *
1
bar appears.
Laser sensor type (Class 1 Laser)
c Use a method other than wheel button operation to return to the zoom
800 dots per inch
function by zooming out until the scroll bar disappears.
32 ft. (10 m) max. line of sight *
2
When I'm using the mouse, the display goes dark or the computer
1.5 V DC (manganese IEC R6 [size AA]
enters a power-saving mode.
battery)
❒ The computer enters a power-saving mode while the mouse is in use.
Approx. 2.5 (w) × 1.1 (h) × 3.8 (d) inches
c When using the mouse, change the power management setting so that
(61.7 (w) × 27.0 (h) × 95.8 (d) mm)
the computer does not enter a power-saving mode. For details, refer to
Approx. 3.2 oz. (90 g) (including battery)
the manuals provided with your computer.
c Touch the touchpad or press any key to return from a power-saving
mode.
1
USB *
The computer does not return from Standby mode.
2.4 GHz
c Touch the touchpad or press any key to exit this mode.
Approx. 0.8 (w) × 0.4 (h) × 2.2 (d) inches
The mouse pointer does not move smoothly across the screen.
(20.0 (w) × 9.7 (h) ×55.1 (d) mm)
c Due to the characteristics of the laser sensor, the mouse may not work
Approx. 0.4 oz. (10 g)
properly on transparent surfaces or on a mouse pad that has a clear
surface. Avoid using on such materials, or use a commercially-
available mouse pad that is compatible with a laser sensor mouse.
The mouse does not cause recovery from energy-saving mode, or
recovery takes a long time.
c Press any key or the power button.
When I start the computer an error message appears, saying that the
mouse is not connected.
c Select the option that states this message will not be displayed again,
and click "OK".
The mouse does not move smoothly after returning from energy-
saving mode.
c Disconnect the receiver from the USB connector, wait a few seconds,
and then connect the receiver again.
After the receiver was connected, it takes some time until the mouse
can be used.
c If Windows, a software program or another USB device is currently
busy, it may take a while for the receiver to be recognized.
Computers with the Windows XP operating
system
41°F to 95°F (5°C to 35°C)
(temperature gradient less than 18°F (10°C)/hour)
20% to 80% (not condensed), provided that
humidity is less than 65% at 95°F (35°C)
(hygrometer reading of less than 84°F (29°C))
–4°F to 140°F (–20°C to 60°C)
(temperature gradient less than 18°F (10°C)/hour)
10% to 90% (not condensed), provided that
humidity is less than 20% at 140°F (60°C)
(hygrometer reading of less than 95°F (35°C)
Wireless receiver (VGP-WRC4) (1)
Manganese IEC R6 (size AA) battery (for
testing purposes) (1)*
3
Operating Instructions (this document) (1)
Warranty Card (1)
®
.
Advertisement
Table of Contents

Related Manuals for Sony VGP-WMS20


Summary of Contents for Sony VGP-WMS20
-
Page 1: Troubleshooting
Troubleshooting with a laser sensor mouse. Sony hereby declares that this product is in compliance with the essential requirements and other relevant provisions of European Directive 1999/5/EC. If you experience any of the following difficulties while using the To obtain a copy of the declaration of conformity (DoC) with the R&TTE... - Page 2 Remarque Insérez la pile IEC R6 (taille AA) fournie en respectant Par la présente, Sony déclare que ce produit est conforme aux exigences de base ❒ Le récepteur n’est pas raccordé correctement au connecteur USB. En raison des caractéristiques du capteur laser, il est possible que la souris ne et autres conditions applicables de la directive européenne 1999/5/CE.
Need help?
Do you have a question about the VGP-WMS20 and is the answer not in the manual?
Questions and answers