Sign In
Upload
Manuals
Brands
Sharp Manuals
All in One Printer
MX-2010U
Sharp MX-2010U Manuals
Manuals and User Guides for Sharp MX-2010U. We have
8
Sharp MX-2010U manuals available for free PDF download: Operation Manual, Service Manual, Installation Manual, Technical Handy Manual, Software Setup Manual, Brochure & Specs, Quick Manual
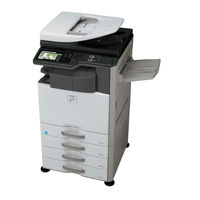
Sharp MX-2010U Operation Manual (832 pages)
Digital full colour multifunctional system
Brand:
Sharp
| Category:
All in One Printer
| Size: 17.61 MB
Table of Contents
Chapter 1 Before Using the Machine
42
Operation Guide
1
Other Convenient Functions
9
Manuals Provided with the Machine
40
Table of Contents
42
Part Names and Functions
44
Exterior
44
Interior
46
Automatic Document Feeder and Document Glass
47
Side and Back
48
Operation Panel
49
Touch Panel
51
Status Display
53
System Bar
54
Turning the Power on and off
56
Restarting the Machine
56
Energy Save Functions
57
[Power Save] Key
57
User Authentication
58
Authentication by User Number
58
Authentication by Login Name / Password
60
Home Screen
63
Remote Operation of the Machine
64
Items Recorded in the Job Log
65
Loading Paper
68
Important Points about Paper
68
Names and Locations of Trays
68
The Meaning of "R" in Paper Sizes
68
Useable Paper
69
Tray Settings for Tray 1 to 4
71
Loading Paper and Changing the Paper Size
71
Loading Paper in the Bypass Tray
73
Important Points When Using the Bypass Tray
74
Loading Envelopes
75
Originals
76
Placing the Original
76
Placing Originals in the Automatic Document Feeder
76
Placing the Original on the Document Glass
78
Peripheral Devices
80
Finisher
82
Part Names
82
Supplies
82
Finisher Maintenance
83
Replacing the Staple Cartridge
83
Punch Module
85
Discarding Punch Waste
85
Sharp Osa
87
Application Communication Module (MX-Amx2)
87
Selecting a Standard Application
87
Standard Application Setup
87
External Account Module (MX-Amx3)
88
External Account Application Setup
88
Operation in External Account Mode
88
Regular Maintenance
90
Cleaning the Document Glass and Automatic Document Feeder
90
Cleaning the Main Charger of the Photoconductive Drum
92
Cleaning the Pt Charger of the Primary Transfer Belt
95
Cleaning the Bypass Feed Roller
97
Cleaning the Original Feed Roller
97
Cleaning the Laser Unit
98
Replacing the Toner Cartridges
102
Replacing the Waste Toner Box
105
Replacing the Stamp Cartridge
107
Entering Text
108
Functions of the Main Keys
108
Chapter 2 Copier
110
Convenient Copy Functions
111
Base Screen of Copy Mode
112
Before Using the Machine as Acopier
112
Copying Sequence
115
Basic Copy Settings
115
Output Settings
116
Start Copying
116
Originals
118
Checking the Original Size
118
Paper Trays
120
Basic Procedure for Making Copies
121
Making Copies
121
Using the Automatic Document Feeder to Make Copies
121
Making a Copy Using the Document Glass
123
Automatic 2-Sided Copying
125
Using the Automatic Document Feeder to Make 2-Sided Copies
125
Automatic 2-Sided Copying Using the Document Glass
127
Copy Colour Modes
130
Changing the Exposure and Original Image Type
132
Automatic Adjustment of the Exposure and Original Type
132
Selecting the Original Type and Manually Adjusting the Exposure
132
Reduction/Enlargement/Zoom
134
AUTOMATIC RATIO SELECTION (Auto Image)
134
MANUALLY SELECTING the RATIO (Preset Ratios/Zoom)
135
ENLARGING/REDUCING the LENGTH and WIDTH SEPARATELY (XY Zoom)
137
Original Sizes
138
Specifying the Original Size
138
Storing Frequently Used Original Sizes
139
Output
142
Output Modes
144
Group Mode
144
Offset Function
144
Sort Mode
144
Making Copies Using the Bypass Tray
147
Set the Paper Size
148
Special Modes
150
ADDING MARGINS (Margin Shift)
153
ERASING PERIPHERAL SHADOWS (Erase)
155
COPYING each FACING PAGE of ABOUND DOCUMENT (Dual
157
MAKING COPIES in PAMPHLET FORMAT (Pamphlet Copy)
159
COPYING a LARGE NUMBER of ORIGINALS at ONCE (Job Build)
162
USING TWO MACHINES to MAKE a LARGE NUMBER of COPIES (Tandem Copy)
165
USING a DIFFERENT PAPER TYPE for COVERS (Covers/Inserts)
168
INSERTING COVERS in COPIES (Cover Settings)
169
INSERTING INSERT SHEETS in COPIES (Insert Settings)
172
Changing Cover/Insert Settings
175
Changing Cover/Insert Settings
176
Adding Inserts When Copying on Transparency Film
179
Inserts
179
COPYING MULTIPLE ORIGINALS ONTO ONE SHEET (Multi Shot)
181
COPYING a PAMPHLET (Book Copy)
183
Document Glass
185
COPYING CAPTIONS ONTO TAB PAPER (Tab Copy)
187
Relation between the Originals and the Tab Paper
187
COPYING both SIDES of a CARD on ONE SHEET of PAPER (Card Shot)
190
PRINTING the DATE and a STAMP on COPIES (Stamp)
193
General Procedure for Using Stamp
194
Select Stamp
195
ADDING the DATE to COPIES (Date)
197
STAMPING COPIES (Stamp)
199
Printing Page Numbers on Copies
201
Page Numbering
201
PRINTING TEXT on COPIES (Text)
205
CHECKING the STAMP LAYOUT (Layout)
209
ADDING a WATERMARK to a COPY (Watermark)
211
[Image Edit] KEY
213
REPEATING PHOTOS on a COPY (Photo Repeat)
214
CREATING a LARGE POSTER (Multi
216
REVERSING the IMAGE (Mirror Image)
219
COPYING A3 (11" X 17") ORIGINALS with no EDGE CUT-OFF (A3 (11" X 17") Full Bleed)
220
COPYING in the CENTRE of the PAPER (Centring)
222
REVERSING WHITE and BLACK in ACOPY (B/W Reverse)
224
[Colour Adjustments] KEY
226
ADJUSTING RED/GREEN/BLUE in COPIES (RGB Adjust)
227
ADJUSTING the SHARPNESS of an IMAGE (Sharpness)
228
WHITENING FAINT COLOURS in COPIES (Suppress Background)
229
ADJUSTING the COLOUR (Colour Balance)
231
ADJUSTING the BRIGHTNESS of ACOPY (Brightness)
233
ADJUSTING the INTENSITY of a COPY (Intensity)
234
CHECKING COPIES before PRINTING (Proof Copy)
235
CHECKING the NUMBER of SCANNED ORIGINAL SHEETS before COPYING (Original Count)
238
COPYING ORIGINALS of DIFFERENT SIZES (Mixed Size Original)
240
Copying Thin Originals
243
Mode)
243
Convenient Copy Functions
245
Interrupting a Copy Run
245
Interrupt Copy
245
CHECKING a PREVIEW IMAGE of a COPY (Preview)
247
Preview Screen
249
Job Status Screen
250
Job Queue Screen and Completed Job Screen
251
Cancelling a Job that Is Waiting in the Queue
253
Giving Priority to a Job in the Queue
254
Checking Information on a Copy Job Waiting in the Queue
255
STORING COPY OPERATIONS (Job Programs)
256
Storing (Editing/Deleting) a Job Program
257
Appendix
259
Chapter 3 Printer
265
Printer Function of the Machine
267
Printing from Windows
268
Basic Printing Procedure
268
Selecting the Paper
270
Printing on Envelopes
271
Printing When the User Authentication Function Is Enabled
272
Viewing Printer Driver Help
275
Saving Frequently Used Print Settings
276
Saving Settings at the Time of Printing
276
Using Saved Settings
278
Deleting Saved Settings
278
Changing the Printer Driver Default Settings
279
Printing from a Macintosh
281
Basic Printing Procedure
281
Selecting Paper Settings
281
Printing
282
Selecting the Paper
284
Printing on Envelopes
285
Printing When the User Authentication Function Is Enabled
286
Frequently Used Functions
288
Selecting the Colour Mode
288
Selecting a Print Mode Setting
290
Two-Sided Printing
291
Fitting the Print Image to the Paper
293
Printing Multiple Pages on One Page
294
Stapling Output/Punching Holes in Output
296
Convenient Printing Functions
298
Convenient Functions for Creating Pamphlets and Posters
298
CREATING a PAMPHLET (Pamphlet)
298
INCREASING the MARGIN (Margin Shift)
300
CREATING a LARGE POSTER (Poster Printing)
301
Functions to Adjust the Size and Orientation of the Image
302
ROTATING the PRINT IMAGE 180 DEGREES (Rotate 180 Degrees)
302
ENLARGING/REDUCING the PRINT IMAGE (Zoom/Xy-Zoom)
303
ADJUSTING LINE WIDTHS WHEN PRINTING (Line Width Settings)
304
REVERSING the IMAGE (Mirror Image)
305
Colour Mode Adjustment Function
306
ADJUSTING the BRIGHTNESS and CONTRAST of the IMAGE (Colour Adjustment)
306
PRINTING FAINT TEXT and LINES in BLACK (Text to Black/Vector to Black)
307
SELECTING COLOUR SETTINGS to MATCH the IMAGE TYPE (Advanced Colour)
308
Printing in Accordance with the Colour Balance of the Machine
310
Functions that Combine Text and Images
311
ADDING a WATERMARK to PRINTED PAGES (Watermark)
311
PRINTING an IMAGE over the PRINT DATA (Image Stamp)
312
CREATING OVERLAYS for PRINT DATA (Overlays)
313
Print Functions for Special Purposes
314
PRINTING SPECIFIED PAGES on DIFFERENT PAPER (Different Paper)
314
ADDING INSERTS WHEN PRINTING on TRANSPARENCY FILM (Transparency Inserts)
316
PRINTING a CARBON COPY (Carbon Copy)
317
PRINTING TEXT on TABS of TAB PAPER (Tab Paper Print/Tab Paper Settings)
318
TWO-SIDED PRINTING with SPECIFIC PAGES PRINTED on the FRONT SIDE (Chapter Inserts)
321
Convenient Printer Functions
322
USING TWO MACHINES to PRINT ALARGE PRINT JOB (Tandem Print)
322
SAVING and USING PRINT FILES (Retention/Document Filing)
323
Printing Without the Printer Driver
326
Directly Printing from the Machine
326
Directly Printing a File on an Ftp Server
327
Directly Printing a File in Usb Memory
328
Directly Printing a File in Anetwork Folder
330
Directly Printing from a Computer
333
Submit Print Job
333
Ftp Print
333
E-Mail Print
334
Checking the Print Status
335
Job Status Screen
335
Spool Screen/Job Queue Screen/Completed Job Screen
336
Printing an Encrypted Pdf File
338
Giving a Print Job Priority/Cancelling a Print Job
339
Giving a Print Job Priority
339
Cancelling a Print Job
340
Changing to Another Paper Size and Printing When Paper Runs out
341
Appendix
342
Printer Driver Specification List
342
Printer Specifications
344
Chapter 4 Facsimile
345
Before Using the Machine as Afax
348
Preparations for Fax
348
Connection to the Telephone Line
348
Setting the Telephone Line Type
349
Make Sure the Main Power Switch Is in the "On" Position
349
Checking the Date and Time
350
Storing the Sender Fax Number
350
Base Screen of Fax Mode
351
Address Book Screen
355
Changing the Display of One-Touch Keys in the Address Book Screen
356
Fax Transmission Sequence
358
Entering Destinations
361
Entering a Fax Number with the Numeric Keys
361
Retrieving a Fax Number from the Address Book
362
Retrieving a Stored Destination
363
Checking and Deleting Entered Destinations
364
Using a Search Number to Retrievea Destination
365
Retrieving a Destination from Aglobal Address Book
366
Using the Resend Function
368
Chain Dialling
369
Basic Transmission Methods
370
Transmission Methods
370
Placement Orientation of the Original
372
Automatic Reduction of the Transmitted Image
372
Transmittable Original Sizes
373
The Size of the Placed Original
373
When the Line Is Busy
374
When a Communication Error Occurs
374
Fax Destination Confirmation Mode
375
Using the Automatic Document Feeder for Transmission
376
Using the Automatic Document Feeder to Send a Fax in Direct Transmission Mode
377
Using the Document Glass for Transmission
379
Using the Document Glass to Send a Fax in Direct Transmission Mode
381
Transmission Using the Speaker
383
SENDING the same FAX to MULTIPLE DESTINATIONS (Broadcast Transmission)
384
SENDING a FAX DIRECTLY from ACOMPUTER (PC-Fax)
389
Image Settings
390
AUTOMATICALLY SCANNING both SIDES of an ORIGINAL (2-Sided Original)
391
SPECIFYING the SCAN SIZE and SEND SIZE (Enlarge/Reduce)
392
Changing the Exposure
399
Changing the Resolution
400
CHECKING the IMAGE to be TRANSMITTED (Preview)
401
Preview Check Screen
402
Fax Reception
403
Receiving Faxes
403
Receiving a Fax
404
Receiving a Fax Manually
405
PRINTING a PASSWORD-PROTECTED FAX (Hold Setting for Received Data Print)
406
Checking the Image before Printing
407
Checking the Image before Forwarding
408
Image Check Screen
410
Forward)
411
Forwarding Received Faxes
411
Forwarding Received Faxes to Anetwork Address
412
Settings)
412
Configuring Inbound Routing Settings
412
Special Modes
416
STORING FAX OPERATIONS (Program)
418
ERASING PERIPHERAL SHADOWS on the IMAGE (Erase)
420
TRANSMITTING an ORIGINAL as TWO SEPARATE PAGES (Dual
422
(Timer)
424
Sending a Fax at a Specified Time
424
(2In1)
426
Sending Two Pages as a Single Page
426
SENDING both SIDES of a CARD as ASINGLE PAGE (Card Shot)
429
SENDING a LARGE NUMBER of PAGES (Job Build)
432
TRANSMITTING ORIGINALS of DIFFERENT SIZES (Mixed Size Original)
434
FAXING THIN ORIGINALS (Slow Scan Mode)
436
CHECKING the NUMBER of SCANNED ORIGINAL SHEETS before TRANSMISSION (Original Count)
438
Stamp
440
Stamping Scanned Originals
440
Changing the Print Settings for the Transaction Report
442
ADDING YOUR SENDER INFORMATION to FAXES (Own Number Sending)
444
TEMPORARILY CHANGING the SENDER INFORMATION (Own Name Select)
445
CALLING a FAX MACHINE and INITIATING RECEPTION (Polling)
446
Initiating Polling Reception Manually
448
SENDING a FAX WHEN ANOTHER MACHINE POLLS YOUR MACHINE (Polling Memory)
449
RESTRICTING POLLING ACCESS (Polling Security)
449
Scanning a Document into Polling Memory
450
Checking the Document in the Public Box
452
Deleting a Document from the Public Box
453
Performing F-Code Communication
454
F-Code Communication
454
How F-Codes Work
454
Creating Memory Boxes in the Machine for F-Code Communication
455
F-Code Dialling
455
Confidential Communication Using F-Codes
456
F-Code Confidential Transmission
457
Checking Faxes Received by F-Code Confidential Reception
458
Numeric Keys
459
Polling Reception Using F-Codes
460
Polling Memory Transmission Using F-Codes
462
Scanning a Document into Amemory Box for F-Code Polling Transmission
462
Checking the Document in the F-Code Memory Polling Box
465
Deleting a Document Stored for F-Code Polling Transmission
466
Relay Request Transmission Using F-Codes
467
Relay Broadcast Transmission Using F-Codes
469
Using an Extension Phone
470
CONNECTING and USING an EXISTING PHONE (Extension Phone Connection)
470
RECEIVING a FAX after ANSWERINGA CALL on the EXTENSION PHONE (Remote Reception)
471
Making and Receiving Phone Calls
471
Checking the Status of Fax Jobs
472
Job Status Screen
472
Job Queue Screen and Completed Job Screen
473
Operation When a Job in the Job Queue Is Completed
476
Checking a Reserved Job or the Job in Progress
477
Checking Completed Jobs
478
Cancelling a Fax in Progress or Areserved Fax
479
Giving Priority to a Reserved Fax
480
Job
480
CHECKING the ACTIVITY LOG (Image Sending Activity Report)
481
Image Sending Activity Report
481
Information Appearing in the Result Column
482
Facsimile Specifications
483
Chapter 5 Scanner/Internet Fax
484
Before Using the Machine as Anetwork Scanner
486
Network Scanner Function
486
Usb Memory Scan
487
Pc Scan
487
Preparations for Use as a Network Scanner
488
Make Sure the Main Power Switch Is in the "On" Position
488
Checking the Date and Time
488
Storing Sender Information
488
Settings Required in the Web Pages
489
Storing Destination Addresses for each Scan Mode in the Address Book
489
Storing a Destination for Scan to Desktop
490
Before Sending to a Direct Smtp Address
491
Base Screen
492
Address Book Screen
495
Changing the Display of One-Touch Keys in the Address Book Screen
496
Scan Send Sequence
498
Original Sizes
500
Transmittable Original Sizes
500
The Size of the Placed Original
500
Entering Destinations
501
Retrieving a Destination from the Address Book
501
Retrieving a Destination
502
Specify the Destination
502
Checking and Deleting the Selected Destinations
503
Using a Search Number to Retrievea Destination
504
Entering an Address Manually
505
Specifying a Network Folder
506
Retrieving a Destination from Aglobal Address Book
508
Using the Resend Function
510
Transmitting an Image
511
Sending an Image in Scan Mode
511
Changing the Subject, File Name, Reply-To, and Body Text
515
Specify the Folder in Which the File will be Stored
522
Entering a File Name
523
Sending a Fax in Internet Fax Mode
524
Changing the Subject, File Name, and Body Text
527
SENDING the same IMAGE to MULTIPLE DESTINATIONS (Broadcast Transmission)
530
Broadcast Transmissions that Include Internet Fax Destinations
533
SENDING an INTERNET FAX from ACOMPUTER (PC-I-Fax)
535
Image Settings
536
AUTOMATICALLY SCANNING both SIDES of an ORIGINAL (2-Sided Original)
537
SPECIFYING the ORIGINAL SCAN SIZE and SEND SIZE (Enlarge/Reduce)
538
Changing the Exposure and Original Image Type
544
Changing the Resolution
546
Changing the File Format
547
Changing the Colour Mode
551
CHECKING the IMAGE to be TRANSMITTED (Preview)
552
Preview Check Screen
553
Special Modes
554
STORING SCAN OPERATIONS (Programs)
556
ERASING PERIPHERAL SHADOWS on the IMAGE (Erase)
558
SCANNING an ORIGINAL as TWO SEPARATE PAGES (Dual
560
SENDING an IMAGE at a SPECIFIED TIME (Timer Transmission)
562
WHITENING FAINT COLOURS in the IMAGE (Suppress Background)
564
SCANNING both SIDES of a CARD ONTOA SINGLE PAGE (Card Shot)
566
SCANNING MANY ORIGINALS at ONCE (Job Build)
569
SCANNING ORIGINALS of DIFFERENT SIZES (Mixed Size Original)
571
SCANNING THIN ORIGINALS (Slow Scan Mode)
573
CHECKING the NUMBER of SCANNED ORIGINAL SHEETS before TRANSMISSION (Original Count)
575
STAMPING SCANNED ORIGINALS (Verif. Stamp)
577
ELIMINATING BLANK PAGES from ATRANSMISSION (Blank
579
(2In1)
581
Sending Two Pages as a Single Page
581
CHANGING the PRINT SETTINGS for the TRANSACTION REPORT (Transaction Report)
584
Checking the Status of Transmission/Reception Jobs
586
Job Status Screen
586
Job Queue Screen and Completed Job Screen
587
Operation When a Job in the Job Queue Is Completed
590
Checking Completed Jobs
591
Stopping a Scan Job Being Transmitted or Waiting to be Transmitted
592
Giving Priority to a Scan Transmission Job
593
Checking the Internet Fax Activity
594
LOG (Image Sending Activity Report)
594
Image Sending Activity Report
594
Information Appearing in the Result Column
594
Internet Fax Reception Functions
595
Receiving an Internet Fax
595
Manually Receiving Internet Faxes
596
PRINTING a PASSWORD-PROTECTED FAX (Hold Setting for Received Data Print)
597
Checking the Image before Printing
598
Checking the Image before Forwarding
599
Image Check Screen
601
FORWARDING RECEIVED INTERNET FAXES to a NETWORK ADDRESS (Inbound Routing Settings)
602
Configuring Inbound Routing Settings
602
SCANNING from a COMPUTER (PC Scan Mode)
606
Basic Scanning Procedure
606
At the Machine
610
Metadata Delivery
611
METADATA DELIVERY (Data Entry)
611
Preparations for Metadata
612
Transmission
612
Settings Required in the Web Pages
612
Metadata Transmission for Scan to Desktop
612
Transmitting Metadata
613
Metadata Fields
615
Network Scanner / Internet Fax Specifications
616
Pull Scan Function (Twain) Specifications
616
Chapter 6 Document Filing
617
Overview
618
Types of Document Filing
618
Uses of Document Filing
619
Before Using Document Filing
620
Important Points When Using Document Filing
623
Using Document Filing in each Mode
624
Copy Mode
624
Document Filing
625
Base Screen of Document Filing
626
Mode
626
SAVING a FILE with "Quick File
627
Saving Files with Document Filing
627
SAVING a FILE with "File
629
File Information
631
Saving a Document File Only
634
Scan to HDD" SCREEN
634
PERFORMING "Scan to HDD
639
Sequence for Using a Stored File
640
Using Stored Files
640
Folder and File Selection Screens
642
Folder Selection Screen
642
File Selection Screen
643
Selecting a File
645
Job Settings Screen
646
Printing a Stored File
647
Print Settings Screen
648
Multi-File Printing
649
Batch Printing
651
Sending a Stored File
653
Send Settings Screen
654
Properties of Stored Files
655
File Properties
655
Changing the Property
655
Moving a Stored File
657
Deleting a Stored File
659
Checking an Image of a Stored File
660
Image Check Screen
661
Retrieving and Using a File from the Job Status Screen
662
Searching for a Stored File
663
Chapter 7 System Settings
669
System Settings
671
Common Operation Methods
672
System Settings (General)
673
Accessing the System Settings (General)
673
System Settings (General) List
674
Total Count
678
Job Count
678
Device Count
678
Default Settings
679
Clock Adjust
679
Date Format
680
Keyboard Select
680
List Print (User)
680
Paper Tray Settings
681
Tray Settings
681
Paper Type Registration
683
Auto Tray Switching
683
Custom Size Registration (Bypass)
683
Address Control
684
Address Book
684
Custom Index
688
Program
689
Editing and Deleting Programs
689
Storing a Program
689
Fax Data Receive/Forward
690
I-Fax Settings
690
Printer Condition Settings
691
Printer Default Settings
691
PCL Settings
692
Postscript Setting
693
Document Filing Control
694
USB-Device Check
695
User Control
695
Amend User Information
695
Accessing the System Settings (Administrator)
696
When User Authentication Is Not Enabled
696
When User Authentication Is Enabled
697
System Settings (Administrator)
696
System Settings (Administrator) List
699
Energy Save
700
Image Send Settings
705
Table of Contents
708
Change Administrator Password
713
User Control
715
User Authentication Setting
715
Authentication Method Setting
715
Other Settings
716
Actions When the Limit of Pages for Output Jobs
716
Automatically Print Stored Jobs after Login
716
Perform Ldap Server Access Control
717
User List
719
Page Limit Group List
721
Authority Group List
722
Favourite Operation Group List
725
User Count
727
Card Reader Device Registration
728
Card Setting
728
When the Hid Card Reader Is Available
728
Energy Save
729
Auto Clear Setting
730
Disabling of Bypass Printing
730
Disabling of Job Priority Operation
730
Display Language Setting
730
Key Operation Setting
730
Keys Touch Sound
730
Message Time Setting
730
Operation Settings
730
Other Settings
730
Disabling of Clock Adjustment
731
Disabling of Covers/Inserts Mode
731
Initial Original Count Setting
731
MFP Display Pattern Setting
732
Customize Key Setting
732
Home Screen Settings
732
My Menu Settings
733
Preview Setting
734
Remote Operation Settings
734
Soft Keyboard Template Setting
734
Set Keyboard Priority
731
Device Control
735
Other Settings
735
Auto Paper Selection Setting
735
Clear All Job Log Data
735
Detect Standard in Auto Colour Mode
735
Optimization of a Hard Disk
735
Original Feeding Mode
735
Registration Adjustment
735
Tandem Connection Setting
735
Original Size Detector Setting
736
Disabling of Document Feeder
737
Disabling of Duplex
737
Disabling of Finisher
737
Disabling of Optional Paper Drawer
737
Disabling of Punch
737
Disabling of Stapler
737
Disabling of Devices
737
Fusing Control Settings
737
Copy Function Settings
738
Initial Status Settings
738
Other Settings
739
Add or Change Extra Preset Ratios
739
Copy Exposure Adjustment
739
Initial Margin Shift Setting
739
Initial Tab Copy Setting
739
Rotation Copy Setting
739
Setting a Maximum Number of Copies
739
Disabling Deletion of Job Programs
740
Disabling of Auto Paper Selection
740
Initial Colour Balance Setting
741
Colour Adjustments
741
Ipv6 Settings
742
Network Settings
742
Printer Settings
743
Default Settings
743
A4/Letter Size Auto Change
743
Bypass Tray Settings
743
Interface Settings
744
Enable Network Port
744
I/O Timeout
744
Auto Colour Calibration
745
Image Send Settings
746
Operation Settings
746
Address Book Default Selection
746
Default Exposure Settings
746
Initial Resolution Setting
746
Settings to Disable Registration
747
Disable Registering Destination from Operation Panel
747
Disable Switching of Display Order
747
Disable Registration of Program
748
Disable [Resend] on Image Send Mode
748
Disable Selection from Address Book
748
Disable Registration of Memory Box
748
Disable Direct Entry
748
Scan Settings
750
Disable Scan Function
751
I-Fax Settings
752
Original Print on Transaction Report
752
Speaker Volume Setting
752
Transaction Report Print Select Setting
752
Auto Wake up Print
752
Activity Report Print Select Setting
753
Auto Receive Reduce Setting
754
Duplex Reception Setting
754
Printing Page Number at Receiver
754
Recall in Case of Communication Error
754
Recall in Case of Line Busy
754
Rotation Sending Setting
754
Set Address for Data Forwarding
754
Allow/Reject Mail or Domain Name Setting
755
I-Fax Output Setting
755
Pop3 Communication Timeout Setting
755
Reception Check Interval Setting
755
Document Filing Settings
756
Default Mode Settings
756
Delete All Quick Files
756
Other Settings
756
Sort Method Setting
756
Default Output Tray
757
Disable Stamp for Reprinting
757
Batch Print Settings
757
Automatic Deletion of File Settings
758
Document Output Options
758
List Print (Administrator)
759
Security Settings
760
Ipsec Settings
760
Enable/Disable Settings
761
Change Administrator Password
764
Product Key
764
External Account Module
764
Data Backup
765
Storage Backup
765
Device Cloning
765
Restore Factory Defaults
766
Storing/Calling of System Settings
766
Store Current Configuration
766
Restore Configuration
766
Sharp OSA Settings
767
External Account Setting
767
System Settings for Fax
768
System Settings for Fax (General) List
768
Address Control
769
Address Book
769
Editing and Deleting a Memory Box
771
F-Code Memory Box
771
Fax Data Receive/Forward
773
Fax Settings
773
System Settings for Fax (Administrator) List
774
Image Send Settings
776
Dial Mode Setting
776
Fax Default Settings
776
Fax Settings
776
Pause Time Setting
776
Pbx Setting
777
Auto Reduction Sending Setting
778
Fax Send Settings
778
Quick on Line Sending
778
Fax Receive Settings
780
Number of Calls in Auto Reception
780
Print Style Setting
780
A3 Rx Reduce
781
Fax Output Settings
781
Letter Size Rx Reduce Print
781
Fax Polling Security
782
System Settings Menu
783
Advertisement
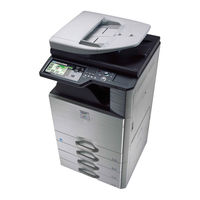
Sharp MX-2010U Service Manual (192 pages)
Brand:
Sharp
| Category:
All in One Printer
| Size: 13.35 MB
Table of Contents
Contents
1
Service Manual
1
Table of Contents
2
Symbols in this Manual
3
General
3
Note for Servicing
5
Precautions for Servicing
5
Note for Installing Site
5
Warning for Servicing
5
Note for Handling PWB and Electronic Parts
6
Place of Direct Sunlight
6
Place of Much Dust
6
Place Near a Wall
6
Note for Repairing/Replacing the LSU
7
Note for Handling the Drum Unit, Transfer Unit, Developing Unit
7
Screw Tightening Torque
7
Tapping Screws (for Iron)
7
Product Outline
8
System Diagram
8
20Cpm Machine
9
23Cpm/31Cpm(G) Machine
10
26Cpm/36Cpm/31Cpm(A) Machine
11
Option List
12
Consumable Parts
13
18Cpm Machine
13
Supply System Table
13
Maintenance Parts List
19
Definition of Developer/Drum Life End
31
Environmental Conditions
33
OPC Drum
33
Production Number Identification
33
Toner Cartridge
33
External View and Internal Structure
34
18Cpm/20Cpm/23Cpm/31Cpm(G) Machine
34
Automatic Document Feeder and Document Glass
36
Internal Structure
37
I/F Connectors
38
Operation Panel
39
Sensors and Detectors
41
Switches
46
Clutches and Solenoids
48
Motors
51
Rollers
54
Lamps
59
Fans and Filter
62
Gates
64
Heater
66
Pwb/Memory Device
67
Fuses and Thermostats
73
Lock
76
Adjustments and Settings
77
Adjustment Item List
77
Adjust the Developing Doctor Gap
79
Adjust the Developing Roller Main Pole Position
79
Adjust the Developing Unit
79
Details of Adjustment
79
Toner Density Control Reference Value Setting
80
Adjust the Main Charger Grid Voltage
82
Adjusting High Voltage Values
82
Adjust the Developing Bias Voltage
83
Transfer Current and Voltage Adjustment
84
Image Density Sensor Adjustment
86
Image Density Sensor Calibration
86
Print Engine
88
Ratio Adjustment
88
Print Image Off-Center Automatic Adjustment (Print Engine)
89
Color Registration Offset Adjustment
96
Scan Image Distortion Adjustment
97
Scanner (Reading) Unit Parallelism Adjustment
97
Scan Image (Sub Scanning Direction) Distortion Adjustment
98
Scan Image (Main Scanning Direction) Distortion Adjustment
99
Scanner Image Skew Adjustment (RSPF Mode)
100
Scan Image Focus Adjustment
101
Print Lead Edge Image Position Adjustment (Printer Mode)
102
Color Balance/Density Adjustment
103
Monochrome Copy Check Items
106
Scanner Calibration (CCD Calibration)
107
Adjustment Procedures
108
Color Balance Adjustment Target Setup
108
Printer Color Balance Adjustment Target Setup
111
Copy/Printer Color Balance/Density Adjustment (Automatic Adjustment)
113
Copy Color Balance and Density Adjustment (Automatic Adjustment)
117
Copy Quality Adjustment (Basic Adjustment)
117
Color Copy Density Adjustment
126
Color Copy Color Balance, Gamma Adjustment
127
Monochrome Copy Density Adjustment
127
Monochrome Copy Density, Gamma Adjustment
128
Color Copy, Text, Line Image Reproduction Adjustment
131
Copy/Scan Low Density Image Density Adjustment (for each Mode)
131
Monochrome (Copy/Scan/Fax) Mode Color Document Reproduction Adjustment
133
Color (Copy/Scan) Mode Sharpness Adjustment
134
Copy Color Balance Adjustment
137
RSPF Mode (Copy/Scan/Fax) Density Adjustment
137
Automatic Color Balance Adjustment by the User
138
Copy Gamma, Color Balance Adjustment for each Dither
139
Dropout Color Adjustment
140
Watermark Adjustment
141
Printer Color Balance Adjustment
143
Printer Image Quality Adjustment
143
Printer Density Adjustment
148
Printer High Density Image Density Reproduction Setting
148
Printer Gamma Adjustment for each Dither
149
Manual Paper Feed Tray Paper Size (Width) Sensor Adjustment
150
Paper Size Sensor Adjustment
150
Document Size Detection Adjustment
152
Document Size Sensor Detection Point Adjustment
152
RSPF Paper Feed Tray Document Size (Width) Sensor Adjustment
152
Adjust the Sensitivity of the Original Size Sensor
153
Fusing Paper Guide Position Adjustment
153
Touch Panel Coordinate Setting
153
Print Image Magnification Ratio Adjustment
154
Print Image Print Area Adjustment
154
Print Image Off-Center Adjustment
156
Scan Image Magnification Ratio Adjustment
157
Scan Image Off-Center Adjustment
160
Scan Image Off-Center Adjustment (Manual Adjustment)
160
Copy Image Position and Image Loss Adjustment
162
Copy Image Position, Image Loss, and Void Area Adjustment
162
Copy Image Position, Image Loss, Void Area Adjustment
164
Image Scanning Position Adjustment
164
Lead Edge Image Loss Adjustment
165
Rear Edge Image Loss Adjustment
165
Finisher and Punch Unit Adjustments
166
Front/Rear Frame Direction Image Loss Adjustment
166
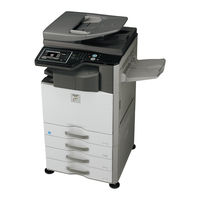
Sharp MX-2010U Installation Manual (126 pages)
DIGITAL FULL COLOR MULTIFUNCTIONAL SYSTEM
Brand:
Sharp
| Category:
All in One Printer
| Size: 26.5 MB
Table of Contents
Table of Contents
1
Sharp Corporation
1
Transit, Installation (Using) Environment, Note
6
Machine
6
Transit and Delivery
8
Configuration
9
Option List
12
MX-2010U/2310U/2610N/3110N/3610N (Main Unit)
13
Image Quality Check
19
Dehumidifying Heater
28
Drawer)
46
MX-Kb11 (Keyboard)
50
MX-Hd10 (Hard Disk Expansion Kit)
54
Operation Check
56
MX-Pb14 (Printer Expansion Kit)
57
MX-Sm10 (Expansion Memory Board)
58
MX-Pux1 (Xps Expansion Kit)
60
MX-Pk11 (Ps3 Expansion Kit)
61
MX-Pf10 (Barcode Font Kit)
62
MX-Fr25U (Data Security Kit)
63
MX-Fr30U (Data Security Kit)
65
MX-Eb11
68
MX-Eb12 (Mirroring Kit)
69
Ar-Su1 (Stamp Unit)
73
MX-Vr11 (Document Cover)
76
MX-Fx11 (Facsimile Expansion Kit)
77
MX-Lc11 (Large Capacity Tray)
80
MX-Tu12 (Exit Tray Cabinet)
89
MX-Fn17 (Finisher)
91
MX-Pn11A/B/C/D (Punch Module)
97
MX-Rb10/Fn10 (Paper Pass Unit/Finisher)
100
MX-Pnx5A/B/C/D (Punch Module)
107
MX-Tr12 (Exit Tray Unit)
111
MX-Tr13 (Exit Tray Unit)
113
MX-Fwx1
115
MX-Amx1
116
MX-Amx2
117
MX-Amx3
118
MX-Am10
119
Setting
119
Setting, Adjustments, Operation Check
121
[35] Setup and Adjustment Data Recording
122
Necessary Works before Moving the Machine
123
Advertisement
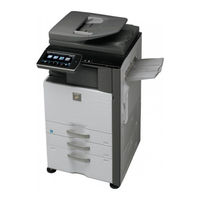
Sharp MX-2010U Technical Handy Manual (64 pages)
Brand:
Sharp
| Category:
All in One Printer
| Size: 2.42 MB
Table of Contents
Table of Contents
1
Product Specification
2
Product Options
4
Consumables
6
Initial Setup
8
Colour Calibration
11
Maintenance
13
Operating System Support 17 Updated
18
Electrical
19
Coin Vend Interface
20
Firmware Upgrade
22
Firmware Recovery
26
E-Manual Update
27
Watermark Update
29
EEPROM Replacement Procedure
31
HDD Replacement Procedure
32
SD Card Replacement Procedure
34
Test Simulation
37
Trouble Codes
42
Job Log Error Codes
45
Sensor Location
50
Jam Cause Codes
51
Repair Hints 53 Updated
53
Technical Bulletin Index 59 Updated
59
Document Reference
63
Notes
64
Sharp MX-2010U Software Setup Manual (46 pages)
DIGITAL FULL COLOR MULTIFUNCTIONAL SYSTEM
Brand:
Sharp
| Category:
All in One Printer
| Size: 0.98 MB
Table of Contents
Software License
2
Table of Contents
3
1 Before Installing the Software
4
CD-Roms and Software
4
For Windows
4
Software CD-Rom
4
Software for Macintosh
5
Other CD-Roms
6
Verifying System Requirements
7
System Requirements
7
Software Requirements
8
Connecting the Machine
9
Checking IP Address of Machine
9
CONNECTING the MACHINE with a USB CABLE (Windows)
9
Connecting to a Network
9
2 Setup in a Windows Environment
10
Opening the Software Selection Screen (for All Software)
10
Driver
11
When the Machine Is Connected to Anetwork
11
Advanced Installation
14
When the Machine will be Connected with Ausb Cable
20
Using the Machine as a Shared
21
Printer
24
Configuring the Printer Driver for the Options Installed on the Machine
25
Properties Window
26
The Machine
26
Installing the Printer Driver / Pc-Fax
11
Installing the Printer Status Monitor
28
Installing the Scanner Driver
29
Installing the Ps Display Fonts
31
Changing the Port
32
Mac os X
35
Setup in a Macintosh Environment
35
Printing Using the Ipp Function
39
Mac os 9.0 - 9.2.2
40
4 Troubleshooting
42
When Installation was Not Successful
42
Removing the Software
45
Sharp MX-2010U Brochure & Specs (13 pages)
Digital Full Colour Multifunctional System
Brand:
Sharp
| Category:
All in One Printer
| Size: 2.72 MB
Table of Contents
Image Editing Functions
5
Image Sending
6
Quick Scanning
6
Internet Fax
6
Document Control Function
7
User Authentication
7
Data Security Kit
7
Scan to Me Function
7
Document Management
8
Device Management
9
User Control
9
Device Cloning
9
Remote Diagnosis
9
Remote Operation
9
Job Status Screen
10
System Configuration
11
Specifications for Options
11
Base Unit
11
Specifications
12
Sharp MX-2010U Service Manual (20 pages)
DIGITAL FULL COLOR MULTIFUNCTIONAL SYSTEM
Brand:
Sharp
| Category:
All in One Printer
| Size: 0.81 MB
Sharp MX-2010U Quick Manual (12 pages)
Brand:
Sharp
| Category:
All in One Printer
| Size: 3.07 MB
Advertisement
Related Products
Sharp MX-2300N Guide
Sharp MX-2600N
Sharp MX-2310U
Sharp MX-2700N Guide
Sharp MX-2640N
SHARP MX-2615N
Sharp MX-2616N
Sharp MX-2630N
Sharp MX-2651
Sharp MX-2600G
Sharp Categories
Microwave Oven
LCD TV
TV
Stereo System
All in One Printer
More Sharp Manuals
Login
Sign In
OR
Sign in with Facebook
Sign in with Google
Upload manual
Upload from disk
Upload from URL