SAMSUNG DVD-R130 Manuals
Manuals and User Guides for SAMSUNG DVD-R130. We have 7 SAMSUNG DVD-R130 manuals available for free PDF download: Instruction Manual, Service Manual, Manual De Instrucciones

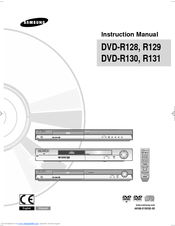
Samsung DVD-R130 Instruction Manual (196 pages)
Brand: Samsung
|
Category: DVD Recorder
|
Size: 7.59 MB
Table of Contents
Advertisement
Samsung DVD-R130 Instruction Manual (93 pages)
Brand: Samsung
|
Category: DVD Player
|
Size: 5.09 MB
Table of Contents

Samsung DVD-R130 Instruction Manual (99 pages)
Brand: Samsung
|
Category: DVD Player
|
Size: 4.7 MB
Table of Contents
Advertisement

Samsung DVD-R130 Instruction Manual (196 pages)
User Manual (ENGLISH)
Brand: Samsung
|
Category: DVD Recorder
|
Size: 7.59 MB
Table of Contents

Samsung DVD-R130 Instruction Manual (98 pages)
Brand: Samsung
|
Category: DVD Player
|
Size: 17.82 MB
Table of Contents

Samsung DVD-R130 Service Manual (130 pages)
Brand: Samsung
|
Category: DVD Recorder
|
Size: 12.55 MB
Table of Contents

(Spanish) Samsung DVD-R130 Manual De Instrucciones (99 pages)
User Manual (SPANISH)
Brand: Samsung
|
Category: DVD Recorder
|
Size: 5.44 MB
Table of Contents
Advertisement