Sign In
Upload
Manuals
Brands
Canon Manuals
All in One Printer
imagePRESS C1 P
Canon imagePRESS C1 P Manuals
Manuals and User Guides for Canon imagePRESS C1 P. We have
1
Canon imagePRESS C1 P manual available for free PDF download: Service Manual
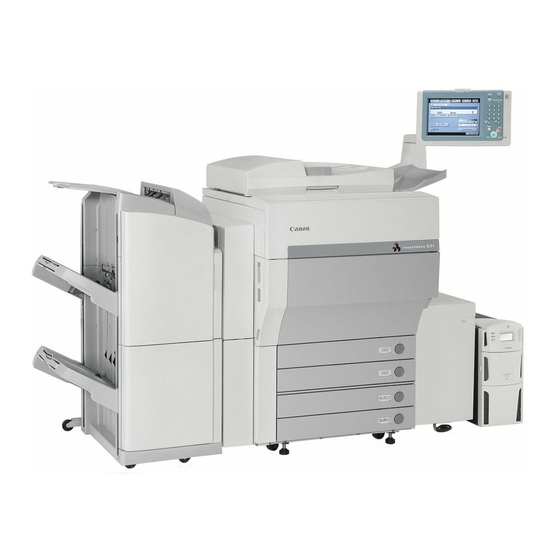
Canon imagePRESS C1 P Service Manual (1265 pages)
imagePRESS C1 Series
Brand:
Canon
| Category:
All in One Printer
| Size: 59.22 MB
Table of Contents
Service Manual
1
Table of Contents
7
Chapter 1 Introduction
43
System Construction
43
Functions of Printing/Transmission Accessories
44
Product Specifications
46
Cross Section
47
Cross Section
49
Using the Machine
50
Points to Note When Turning off the Main Power Switch
51
User Mode Items
52
Timer Settings
54
System Control Settings
55
Copy Settings
57
Mail Box Settings
58
Address Book Settings
59
User Administrator Mode
60
Common Settings
62
Timer Settings
64
Adjustment/Cleaning
65
Copy Settings
68
Mail Box Settings
69
User Administrator Mode
70
User Maintenance
73
Inspection
74
Inspection
76
Safety
78
Safety of the Toner
79
Machine Specifications
80
Function List
82
Printing Speed
83
Paper Types
84
Chapter 2 Installation
95
Making Pre-Checks
95
Selecting the Site of Installation
98
Checking the Contents
99
Checking the Contents
102
Checking the Contents
105
Checking the Contents
108
Checking the Contents
111
Checking the Contents
113
Checking the Contents
116
Checking the Contents
118
Checking the Contents
120
Unpacking and Installation
122
Mounting Scanning System
124
Locking the Primary Transfer Roller in Place
125
Mounting the Delivery Tray
127
Decurler Open / Close Angle Adjustment
128
Preparation for Mounting the Developing Assembly
129
Mounting the Balancing Cylinder
132
Mounting the Balancing Cylinder
134
Mounting the Developing Assembly
135
Mounting the Developing Assembly
138
Mounting the Process Unit
141
Mounting the Process Unit
144
Mounting the Fixing Assembly
147
Fitting the Control Panel in Place
149
Setting of Environmental Switch
154
Turning the Main Power on
155
Turning the Main Power on
156
Turning the Main Power on
157
Turning the Main Power on
158
Turning the Main Power on
159
Setting the Toner Container
160
Setting the Toner Container
162
Supplying Toner
163
Automatic Gradation Correction Setting
164
Adjusting Margin Along Leading Edge of Image
165
Cleaning the Charging Assembly
169
Other Works
173
Putting the Rating Plate
174
Setting after the Installation (Imagepress C1 Series)
177
Installation Procedure (Imageprss C7000 Series)
178
Setting after the Installation(Imagepress C7000 Series)
186
Installing the Card Reader
187
Installation Procedure in the Imageware Accounting Manager (Henceforth: Iwam) Environment
189
Checking the Contents
190
Installation Procedure
191
After Installing the Key Switch Unit
192
Installing the Deck Heater
194
Checking the Parts to Install
195
Installing Procedure
202
Installing the Voice Guidance Kit
209
Checking Components
210
Turning off the Machine
211
Installing the Printer Cover
221
Turning off the Machine
222
Installing the Serial Interface Kit
226
Turning off the Machine
227
Construction
237
Chapter 3 Basic Operation
239
Function Configuration
239
DC Controller
240
Main PCB Connection
241
Chapter 5 Original Exposure System
249
Construction
249
Chapter 4 Main Controller
250
Configuration and Functions
250
Construction of the Electrical Circuitry
252
Main Controller Circuit Board (MAIN)
254
SRAM Circuit Board
255
Actions When HDD Error
257
Image Processing
260
Reader Input Image Processing
261
Printer Output Image Processing
262
Block for Compression, Expansion, and Editing Processing
263
Block for Compression, Expansion, and Editing Processing
264
Image Data Flow When Using the Copy Function
265
Image Data Flow When Using the BOX Function
266
Image Data Flow When Using the SEND Function
267
Image Data Flow When Using the FAX Receive Function
268
Image Data Flow When Using the PDL Function
270
Parts Replacement Procedure
271
Main Controller PCB (Main)
272
Removing the Main Controller PCB (Main)
273
Preparation for Removing the HDD
274
Construction
280
Construction of the Control System
282
Basic Sequence
283
Various Control Mechanisms
285
Enlargement/Reduction
286
Scanning Lamp
287
Overview of Operation
289
Dirt Sensor Control
290
White Plate Dust Detection Control
291
Image Processing
292
CCD Drive
293
CCD Gain Correction, Offset Correction
294
Parts Replacement Procedure
295
Scanner Parts Replacement Procedure (Imagepress C1 Series/Imagepress C7000 Series)
296
Removing the Scanner Lamp (Imagepress C1 Series)
298
Removing the Scanner Lamp (Imagepress C7000 Series)
300
Reader Controller PCB
303
Removing the Reader Controller PCB (Imagepress C7000 Series)
304
Procedure after Replacement of the Reader Controller PCB (Imagepress C1 Series/Imagepress C7000 Series)
306
Inverter PCB
307
Removing the Inverter PCB (Imagepress C7000 Series)
308
CCD Unit
310
Removing the CCD Unit (Imagepress C7000 Series)
311
Scanner Parts Replacement Procedure (Imagepress C1 Series/Imagepress C7000 Series)
313
Removing the Scanner Motor (Imagepress C7000 Series)
314
Attaching the Scanner Motor (Imagepress C1 Series/Imagepress C7000 Series)
315
Removing the ADF Open/Close Sensor(Imagepress C7000 Series)
316
Scanner Home Position Sensor
317
Removing the Scanner Home Position Sensor (Imagepress C7000 Series)
318
Original Sensor
319
Removing the Original Size Sensor (Imagepress C7000 Series)
320
Scanner Drive Cable
321
Removing the Scanner Drive Wire (Imagepress C7000 Series)
325
Attaching the Scanner Drive Wire (Imagepress C1 Series/Imagepress C7000 Series)
329
Points to Note When Attaching the Control Panel (Imagepress C1 Series)
330
Construction
335
Control System Configuration
336
Various Control
337
Main Scan Sync Control
338
Sub Scan Sync Control
339
Controlling the Intensity of Laser Light
340
Controlling the Laser Shutter
341
Parts Replacement Procedure
343
Construction
350
Chapter 7 Image Formation
351
Main Components
351
Charge Specification
352
Charge Specification
353
Image Formation Process
354
Basic Sequence
357
When Turning the Power on
358
Copy / Print (Normal Speed)
359
Copy / Print (1/3 Speed)
361
Overview of Image Stabilization Control
362
Image Stabilization Control Timing
364
Potential Control
365
ATVC Control
366
ATR Control
369
ATR Control
370
ACVC Control
372
D-Max Control
373
D-Max Control
374
D-Half Control
375
D-Half Control
377
ARCDAT Control
379
ARCDAT Control
381
PASCAL Control
383
ACR Control (Auto Carrier Refresh Control)
386
ACR Control (Auto Carrier Refresh Control)
387
Charging Meachanism
388
Primary Charging Assembly Cleaning Control
389
Pre-Transfer Charging Bias Control
390
Pre-Transfer Charging Assembly Cleaning Control
391
Pre-Exposure LED
392
Overview of Developing Rotary
393
Developing Rotary Control
394
Developing Rotary Control
396
Developing Unit
398
Developing Bias Control
399
Developing Bias Control
400
Toner Container
401
Outline
402
Toner Bottle Presence Detection
403
Toner Bottle Presence Detection
404
Toner Supply
406
Toner Level Detection
407
Toner Level Detection
408
Transfer Device
409
Transfer Bias Control
410
Overview of the Primary Transfer Assembly
412
ITB Cleaner Attachment/Detachment Detection
413
Overview of the Secondary Transfer Assembly
414
Secondary Transfer Outside Roller Attachment/Detachment Control
415
Secondary Transfer Roller Attachment/Detachment Detection
416
Secondary Transfer Roller Cleaning Control
417
ITB Home Position Detection
419
ITB Home Position Detection
420
Photosensitive Drum Cleaning
423
Waste Toner Collection Mechanism
424
Waste Toner Full Detection
425
Drum Heater
428
ITB Heater
429
Parts Replacement Procedure
432
Sliding the Processing Unit
433
Pre-Exposure LED Array
435
After Replacing the Primary Charging Assembly
436
Primary Corona Slider
437
Removing the Pre-Transfer Corona Assembly Pad Folder
438
Photosensitive Drum
439
Seal Support Plate (Front)
440
Scoop-Up Sheet Support Plate
441
Removing the End Seal (Rear)
442
Removing the Sub Hopper Unit
443
Procedure after Replacing the Sub Hopper Unit
445
Development Clutch
446
ITB Cleaning Unit
448
Intermediate Transfer Unit
449
Secondary Transfer Outside Roller Unit
450
Secondary Transfer Outside Roller Sub Unit
451
Primary Transfer Roller
452
Secondary Transfer External Roller
453
Secondary Transfer Bias Roller Cleaning Blade
454
ITB Cleaner Brush (Small)
455
Secondary Transfer Roller Brush (Lower)
456
Potential Sensor Unit
457
ATR Sensor Unit
458
After Replacing the ATR Sensor
459
Patch Image Sensor
460
After Replacing the Primary Charging Wire
461
Construction
466
Chapter 8 Pickup/Feeding System
467
Arrangement of Rollers
467
Paper Delivery Path
468
Arrangement of Sensors
469
Distribution of Drives
471
Interval Speed
473
Basic Sequence
478
Detecting Jams
480
Operation at Jam Occurrence
481
Other than Cassette Pickup Assembly
482
Stationary Jams
483
Stationary Jam (Residual Jam) at the Power on
484
Cassette
485
Paper Size Detection
486
Setting the Universal Cassette
487
Cassette Pick-Up Unit
490
Behavior of Pickup
491
Feeding Control (Cassette 1)
492
Pickup Control (Cassette 2 to 4)
493
Manual Feed Pickup Unit
494
Paper Size Detection
495
Last Paper Detection
496
Registration Unit
497
Duplex Feeding Unit
498
Side Registration Position Detection
500
A4 Size 5-Sheet-Circulation
502
A3 Size 3-Sheet-Circulation
508
Delivery
515
Curl-Removing Operation (Decurler Unit)
519
Parts Replacement Procedure
523
Cassette Heater
524
Cassette Pickup/Feed/Separation Roller
525
Manual Feed Separation Roller
526
Pre-Fixing Feeding Unit
527
Removing the Pre-Fixing/Feeding Unit
528
Buffer Decurler
530
Decurler Adjustment Roller (Upper)
531
Decurler Adjustment Roller (Lower)
532
Chapter 16 Service Mode
538
Construction
538
Chapter 9 Fixing System
539
Major Components (Section)
539
Major Components (Thermistor / Thermal Switch)
540
Major Components (Sensor/Solenoid)
541
Control System Configuration
542
Fixing Roller/Belt Drive Control
545
Chapter 6 Laser Exposure
547
Basic Sequence
547
Print (Constant Speed)
548
Print (1/3-Speed)
549
Various Control Mechanisms
550
Power Save Mode
551
External Heat Roller Drive Control
554
Belting Inclined Control
556
Belt Pressurizing Mechanism
559
Fixing Cleaning Web Mechanisms
561
Control of the Fixing Cleaning Web Length Detection
562
Detached/Attached Mechanism of the Cleaning Web (Web Roller)
563
Refresh Roller Attach/Detach Mechanism
565
Protective Functions
566
Related Error Code
568
Parts Replacement Procedure
571
Fixing Unit
572
Removing the Fixing Assembly Unit
573
Fixing Belt Unit
575
Preparation for Removing the Fixing Separation Roller Ball Bearing
577
Fixing Belt
579
After Replacing the Fixing Belt
580
External Heat Roller
581
Fixing Web Roller
582
Removing the Web Roller
583
Removing the Refresh Roller
585
Steering Roller
586
After Replacing the Pressure Pad Cover
587
Outside Heating Main Thermistor
588
Inlet Thermistor
589
Thermal Switch
590
Fixing Main Heater/Fixing Sub Heater
591
Inlet Heater
592
Fixing Locking Heater
593
Fixing Web
594
Removing the Fixing Cleaning Web
595
After Replacing the Fixing Cleaning Web
596
Lower Separation Claw
597
Delivery Upper Separation Plate
598
Control Panel
603
Chapter 10 Externals and Controls
605
Count Increment Timing
605
Sequence of Fan Operation
607
Power Supply
608
Protection Function
610
SNMP Setup
612
Parts Replacement Procedure
613
Right Lower Cover
614
Left Middle Cover
615
Left Rear Cover (Lower)
616
Toner Replacement Cover
617
Pulling the Hopper Unit up
619
Removing the Hopper Unit
620
Removing the Hopper Unit
622
DC Power Supply Unit
624
Control Panel
625
DC Controller PCB
627
After Replacing the DC Controller PCB
628
DC/DC Converter PCB
629
Removing the High-Voltage Box Unit
630
Hv1 Pcb
631
Hv3 Pcb
632
Hv8 Pcb
633
Feeding Driver PCB
634
AC Driver PCB
635
Decurler Driver PCB
636
Backside Driver Cover
637
Ozone Filter (Right)
638
Ozone Filter (Lower Left)
639
Toner Filter (Right)
640
Toner Filter (Rear)
641
Chapter 11 MEAP
646
Meap
646
Setting up the Network
649
Login to SMS
651
Setting the Method to Login to SMS
652
Checking Application List
656
Starting and Stopping a MEAP Application
657
Checking the Platform Information
658
MEAP Specifications
659
Mfid
661
Checking the System Information of a MEAP Application with SMS
663
Printing the System Information of a MEAP Application
664
Reference (Application System Information)
665
Installing an Application
666
MEAP Enterprise Service Manager
668
Adding a License File
669
Disabling a License File (Suspending a License)
671
Downloading/Removing an Invalidated License File
672
Reusable License
674
Uninstalling an Application
677
Login Service
678
Changing Login Services
683
Initializing the Password
684
Replacing the Hard Disk Drive
685
Setting HTTP Port for MEAP Application (Level 2)
686
USB Keyboard Support (Ir3245 Series Only)
689
Reference Material
691
Option for Exclusive Individual Measure
693
Chapter 12 Maintenance and Inspection
699
Periodically Replaced Parts
699
Durables and Consumables
702
Scheduled Servicing Basic Procedure
706
Scheduled Servicing List Printer Unit
707
Cleaning
712
Cleaning of Registration Roller, Registration Guide and Transparency Sensor
713
Cleaning for Buffer Decurler
714
Chapter 13 Standards and Adjustments
720
Image Adjustment Basic Procedure
720
Image Adjustment Basic Procedure 3
721
Image Adjustment Basic Procedure 4
722
Scanning System
724
Replacing the Potential Sensor
725
After Replacing the Pre-Transfer Charging Assembly
726
After Replacing the Fixing Roller
727
When Replacing Pressure Belt Unit-Related Durable Parts
728
Electrical Components
729
After Replacing the HDD
730
Registering Paper Width Standard Value at Manual Feeder Tray
731
Void Occurs in Sub Scanning Direction Upon Installation: ATR Shutter Solenoid Cable Comes into Contact with Developing
733
When Saddle Finisher-AA2 Saddle-Stitches 12X18 Size Papers, Paper Folding Position Does Not Align with Paper Stapling
734
Outline of Electrical Components
735
Chapter 14 Correcting Faulty Images
736
Making Initial Checks
736
Others
737
Selecting the Test Print TYPE
738
Grid (TYPE=6)
739
Gradation (TYPE=12)
740
Troubleshooting
741
Uneven Density
742
Image Displacement/Out of Focus
743
When Duplex Printing, Position of Image on both 1St and 2Nd Sides Is Displaced in Sub Scanning Direction
744
Developing Cylinder
745
Hue Variation Occurs in Continuous Copy Job Performed Right after Replacement of Photosensitive Drum
755
Gradation Changes after Shading Correction
756
Paper Misalignment Occurs When Stapling: Return Guide Sheet of Finisher-AA1/AA2 Has Ridden on Operation Tray bin
757
In Booklet Printing, Paper Misalignment/Unstapled Sheet Problem Occurs with 2Nd Page and Later: Stack Delivery Rollers of Finisher AA1/AA2 Lack Pressure
758
Wrinkle
760
Malfunction
761
On Initial Copy Screen, "Black" Cannot be Set as Standard Setting for Auto-Color Select Mode: Forced Secure Watermark Mode Is Set to on
762
During Copying, Paper Jam Suddenly Occurs and E748-4901 Follows Power-Off/On Operation
763
ATR Error (E020-XXXX) Display Due to Dirt on ATR Sensor Window
764
ATR Error (E020-XXXX) Display at the Time of Drum Replacement
765
Message "Waste Toner Container Full. Call Service Representative." Does Not Disappear: Part Counter Is Not Cleared
766
Part Breakage/Detachment
767
Jam (Main Unit)
768
E020-01A9: ATR Shutter Malfunctions
773
E025-0102: J301D Connector of Hopper Motor Has Poor Contact
774
E025-0102: Connector of Yellow Toner Supply Screw HP Sensor (PS68) Has Poor Contact
775
E198-1000: J3502 Connector on Color Sensor Driver PCB Has Poor Contact
776
E733-0001 Sometimes Occurs During Printing
777
E000/E004: Drawer Connector Pin of Fixing Heater Cable Unit Moves Back (JP Model)
778
E820-0003 Is Indicated: Primary Corona Assembly Is Mounted Incorrectly
780
Specifications-Related FAQ
781
How to Check Value of Sensor (PS63) on the Waste Toner Box
782
List of Clutch / Solenoid
783
Motor
784
List of Motor
788
List of Motor
789
List of Fan
792
List of Fan
795
Sensor
797
List of Sensor
803
List of Sensor
804
Switch
809
List of Switch
811
Lamps, Heaters, and Others
813
List of Lamp / Heater/ Others
815
List of Lamp / Heater/ Others
816
Pcbs
817
List of PCB
820
List of PCB
821
Connectors
823
List of Connector
842
Chapter 15 Self Diagnosis
864
Error Code Table
864
Error Code Details
866
E602 (Hdd/Encryption Board Error)Detail
882
Error Codes (SEND)
886
Jam Codes
887
Jam Code (Finisher-Related)
888
Jam Code (ADF-Related)
889
Alarm Codes
892
Chapter 17 Upgrading
898
Outline
898
Entering or Selecting Service Modes
899
Initial Screen
900
Sub- Item Screen
901
DISPLAY (Status Display Mode)
902
COPIER List
916
COPIER List
930
Feeder
945
DC-Con>
946
R-Con>
957
Feeder>
958
Sorter>
960
Mn-Cont>
965
ADJUST (Adjustment Mode)
968
COPIER List
987
COPIER List
998
Feeder
1012
Sorter
1014
COPIER List
1028
COPIER List
1042
Feeder
1053
COPIER List (Subheadings under USER)
1073
COPIER List P (BODY)
1101
COPIER List P (Subheadings under USER)
1120
COPIER List (BODY)
1148
COPIER List (Subheadings under USER)
1163
Feeder
1186
Sorter
1187
TEST (Test Print Mode)
1188
COPIER List
1190
COUNTER (Counter Mode)
1192
COPIER List
1202
COPIER List
1211
Outline
1226
Upgrading Overview
1227
Outline of the Functions and Operations
1228
Points to Note at Time of Downloading
1231
Installing the System Software (SST -> USB)
1233
Making Connections (SST in Use)
1235
Making Connections (USB Device in Use)
1236
Formatting Selected Partitions
1237
Formatting the Partitions
1238
Downloading System Software
1239
Downloading the System Software (Single)
1242
Uploading and Downloading Backup Data
1245
Downloading Procedure
1247
Version Upgrade Using USB
1248
Points to Note
1249
Downloading/Writing the System Software (Auto)
1251
Downloading the System Software (All Overwriting)
1252
Formatting the HDD
1253
Other Functions
1254
Service Tools
1257
Special Tools
1258
Advertisement
Advertisement
Related Products
Canon imageRUNNER C1028i
Canon Color imageRUNNER C1022i
Canon ImageRunner C1225
Canon C1127P
Canon C1127iF
Canon C1127i
Canon imageRUNNER C1335iFC
Canon ImageRunner C1225if
Canon imagePRESS C165
Canon imagePRESS C1
Canon Categories
Printer
Digital Camera
All in One Printer
Camcorder
Scanner
More Canon Manuals
Login
Sign In
OR
Sign in with Facebook
Sign in with Google
Upload manual
Upload from disk
Upload from URL