Ricoh SP 213NW User Manual
Hide thumbs
Also See for SP 213NW:
- Setup manual (24 pages) ,
- Manual (268 pages) ,
- Setup manual (24 pages)
Table of Contents

Related Manuals for Ricoh SP 213NW


Summary of Contents for Ricoh SP 213NW
- Page 1 User Guide Guide to the Machine Loading Paper Printing Documents Configuring the Machine Using Utilities Maintaining the Machine Troubleshooting Appendix For safe and correct use, be sure to read Safety Information before using the machine.
-
Page 3: Table Of Contents
TABLE OF CONTENTS How to Read This Manual..........................4 Introduction..............................4 Legal Prohibition............................. 4 Disclaimer................................4 About IP Address............................5 Note to Administrator.............................5 1. Guide to the Machine Guide to Components............................7 Exterior................................7 Interior................................9 About Operation Tools............................ 10 Installing the Driver and Software........................11 Network Quick Install..........................11 Smart Organizing Monitor..........................11 Configuring Network Settings......................... - Page 4 Checking the System Information........................36 Status Tab..............................36 Counter Tab..............................36 Machine Information Tab..........................37 Configuring the System Settings........................38 Tray Paper Settings Tab..........................38 Interface Tab..............................39 Configuring the Network Settings........................40 Network Status Tab............................. 40 IPv6 Configuration Tab..........................41 Network Application Tab..........................41 DNS Tab...............................42 Auto E-mail Notification Tab........................43 SNMP Tab..............................44 SMTP Tab..............................
- Page 5 Cleaning the Inside of the Machine........................64 6. Troubleshooting Common Problems............................65 Paper Feed Problems............................66 Removing Printing Jams..........................67 Print Quality Problems............................73 Checking the Condition of the Machine....................73 Printer Problems..............................74 Print Positions Do Not Match Display Positions..................75 Error and Status Indicate on the Control Panel....................76 Error and Status Messages Appear on Smart Organizing Monitor............
-
Page 6: How To Read This Manual
How to Read This Manual Introduction This manual contains detailed instructions and notes on the operation and use of this machine. For your safety and benefit, read this manual carefully before using the machine. Keep this manual in a handy place for quick reference. -
Page 7: About Ip Address
About IP Address In this manual, "IP address" covers both IPv4 and IPv6 environments. Read the instructions that are relevant to the environment you are using. Note to Administrator Password Certain configurations of this machine can be password-protected to prevent unauthorized modifications by others. -
Page 9: Guide To The Machine
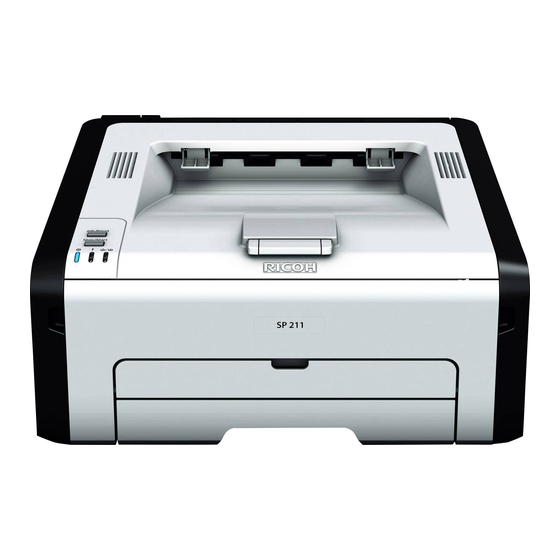
1. Guide to the Machine Guide to Components This section introduces the names of the various parts on the front and rear side of the machine and outlines their functions. Exterior DCT831 1. [Wi-Fi] key To switch to wireless LAN, press this key. By holding down the key, you can display the menu for configuring the WPS using the PIN code or when in PBC mode. - Page 10 1. Guide to the Machine 4. Power Indicator This indicator lights up blue when the machine is turned on. It flashes when a print job is received and while printing is in progress. 5. Alert Indicator This indicator flashes in red if the paper jams, and lights continuously if another error occurs. 6.
-
Page 11: Interior
Guide to Components Interior DCT064 1. Print Cartridge A replacement consumable that is required to make prints on paper. For details about replacing the cartridge, see page 61 "Replacing the Print Cartridge". -
Page 12: About Operation Tools
1. Guide to the Machine About Operation Tools This section explains the operation tools of this machine. Smart Organizing Monitor Install this utility on your computer from the included CD-ROM before using it. Using Smart Organizing Monitor, you can check the machine's status, configure its settings, and use other functions. -
Page 13: Installing The Driver And Software
Installing the Driver and Software Installing the Driver and Software Network Quick Install Turn on the power of the computer. Insert the CD-ROM into the CD-ROM drive. Select a language and product for the interface, and then click [OK]. Click [Network Quick Install]. Read the entire license agreement carefully. -
Page 14: Configuring Network Settings
1. Guide to the Machine Configuring Network Settings This section explains how to configure network settings. • Ethernet and wireless LAN settings cannot be enabled at the same time. Configuring the IP Address Settings Using the Smart Organizing Monitor The procedure for configuring network settings differs depending on whether IP address information is assigned automatically by the network (DHCP), or manually. -
Page 15: Assigning Machine's Ipv6 Address Manually
Configuring Network Settings Assigning the machine's IPv6 address manually • The IPv6 address assigned to the machine must not be used by any other device on the same network. On the [Start] menu, click [All Programs]. Click [Smart Organizing Monitor for SP xxx Series]. Click [Smart Organizing Monitor Status]. - Page 16 1. Guide to the Machine Click [Smart Organizing Monitor for SP xxx Series]. Click [Smart Organizing Monitor Status]. If the machine you are using is not selected, click [Connect Printer], and then select the machine's model. Click the [User Tools] tab. Click [Printer Configuration].
-
Page 17: Configuring Ad Hoc Mode
Configuring Network Settings Configuring the Ad hoc mode using Smart Organizing Monitor • In Ad Hoc network, every device must be manually assigned an IP address for TCP/IP if there is no DHCP server. • In Ad Hoc mode, only Open System or WEP encryption is supported. WPA2-PSK and Mix Mode WPA2/WPA authentication methods are not supported. - Page 18 1. Guide to the Machine Connection has failed: The alert indicators start flashing, then, after 30 seconds, the alert indicator goes out and the power indicator lights continuously. • For details about how to use Smart Organizing Monitor, see page 56 "Using Smart Organizing Monitor".
-
Page 19: Loading Paper
2. Loading Paper Supported Paper Paper Size • A4 • 8 " × 11 " (Letter) • 8 " × 14 " (Legal) • B5 JIS • 5 " × 8 " (Half Letter) • 7 " × 10 " (Executive) •... - Page 20 2. Loading Paper • Bypass Tray 1 sheet (70 g/m , 19 lb.)
-
Page 21: Non-Recommended Paper Types
Non-Recommended Paper Types Non-Recommended Paper Types Do not use the following types of paper: • Ink-jet printer paper • GelJet special paper • Bent, folded, or creased paper • Curled or twisted paper • Wrinkled paper • Damp paper • Dirty or damaged paper •... -
Page 22: Print Area
2. Loading Paper Print Area The diagram below shows the area of the paper that the machine can print on. From the printer driver CHZ904 1. Print area 2. Feed direction 3. Approx. 4.2 mm (0.2 inches) 4. Approx. 4.2 mm (0.2 inches) •... -
Page 23: Loading Paper
Loading Paper Loading Paper Load a stack of paper for printing in the input tray. • When loading paper, be sure to configure the paper size and paper type for the bypass tray and Tray 1. When printing a document, specify the paper size and paper type and select the paper tray in the printer driver so that the settings configured when paper is loaded can be used for printing. - Page 24 2. Loading Paper Pinch the end paper guide and slide it inward to match the standard size. DCT031 When loading A4 or letter size paper, align the paper guide to the following position: DCT871 Fan the paper before loading it in the tray. Load the new paper stack print side down.
- Page 25 Loading Paper Check there are no gaps between the paper and the paper guides (both side and end paper guides). DCT049 Carefully push Tray 1 straight into the machine. DCT011 To avoid paper jams, make sure the tray is securely inserted. To deliver the sheets face up, open the rear cover.
- Page 26 2. Loading Paper Release the extender locks on both sides of the tray, and then pull out the extender. DCT034 Make sure the extender's inner surface and the scale are aligned. You can adjust the length of the extender in three steps. When using A4 or letter size paper, adjust the length to the position indicated by the mark "...
-
Page 27: Loading Paper Into Bypass Tray
Loading Paper Attach the tray cover. DCT038 • Legal paper or custom-size paper longer than A4 must be loaded without attaching the tray cover. Loading Paper into Bypass Tray • Do not load paper in the bypass tray unless the message "Ready" appears in Smart Organizing Monitor. -
Page 28: Specifying Paper Type And Paper Size Using Smart Organizing Monitor
2. Loading Paper Slide the side guides outward, load paper with the print side up, and then push in until it stops against the machine. DCT013 Adjust the side guides to the paper width. DCT014 To deliver the sheets face up, open the rear cover. DCT037 Specifying Paper Type and Paper Size Using Smart Organizing Monitor The procedure in this section is an example based on Windows 7. - Page 29 Loading Paper Specifying the paper type and paper size On the [Start] menu, click [All Programs]. Click [Smart Organizing Monitor for SP xxx Series]. Click [Smart Organizing Monitor Status]. If the machine you are using is not selected, click [Connect Printer], and then select the machine's model.
- Page 30 2. Loading Paper...
-
Page 31: Printing Documents
3. Printing Documents Basic Operation Use the printer driver to print a document from your computer. After creating a document, open the [Printing Preferences] dialog box in the document's native application. Change any print settings if necessary. For details about each setting items, click [Help]. When setting changes are completed, click [OK]. -
Page 32: Canceling A Print Job
3. Printing Documents Start printing. The machine prints only the one side of pages first, and then displays on Smart Organizing Monitor screen a message to reload the outputs turned over. Take out all of the prints from the output tray and place them in Tray 1. To print on the reverse side of the prints, turn them over so that the blank side faces down and place them in Tray 1. - Page 33 Basic Operation Canceling a print job before printing has started Double-click the printer icon on the task tray of your computer. Select the print job you want to cancel, click the [Document] menu, and then click [Cancel]. • If you cancel a print job that has already been processed, printing may continue for a few pages before being canceled.
- Page 34 3. Printing Documents...
-
Page 35: Configuring The Machine Using Utilities
4. Configuring the Machine Using Utilities Using Web Image Monitor • To operate the machine via Web Image Monitor, you must first configure the machine's TCP/IP or wireless LAN settings. For details, see page 40 "Configuring the Network Settings". Available operations The following operations can be performed remotely using Web Image Monitor on a computer: •... -
Page 36: Displaying Top Page
4. Configuring the Machine Using Utilities Displaying Top Page When you access the machine using Web Image Monitor, the top page appears in your browser's window. Launch the Web browser. In the Web browser's address bar, enter "http://(machine’s IP address)/" to access the machine. -
Page 37: Changing The Interface Language
Displaying Top Page 4. Main area Displays the contents of the item selected in the menu area. Information in the main area is not automatically updated. Click [Refresh] at the upper-right in the main area to update the information. Click the Web browser's [Refresh] button to refresh the entire browser screen. -
Page 38: Checking The System Information
4. Configuring the Machine Using Utilities Checking the System Information Click [Home] to display the main page of Web Image Monitor. You can check the current system information on this page. This page contains three tabs: [Status], [Counter], and [Machine Information]. Status Tab Item Description... -
Page 39: Machine Information Tab
Checking the System Information Machine Information Tab Machine Information Item Description Firmware Version Shows the version of firmware installed on the machine. Engine FW Version Shows the version of firmware for the machine engine. Machine ID Shows the identification number of the machine. Total Memory Shows the total memory installed on the machine. -
Page 40: Configuring The System Settings
4. Configuring the Machine Using Utilities Configuring the System Settings Click [System Settings] to display the page for configuring the system settings. This page contains the following tabs: [Tray Paper Settings] and [Interface]. Tray Paper Settings Tab Tray 1 Item Description Paper Size Select the paper size for Tray 1 from the following:... -
Page 41: Interface Tab
Configuring the System Settings Interface Tab Interface Item Description Fixed USB Port Specifies whether the same printer can be used for multiple machines or not under USB connection. If this setting is enabled, the same printer driver you have installed in your computer can be used with any machine other than the one originally used for installation, if the machine is of the same model. -
Page 42: Configuring The Network Settings
4. Configuring the Machine Using Utilities Configuring the Network Settings Click [Network Settings] to display the page for configuring the network settings. This page contains the following tabs: [Network Status], [IPv6 Configuration], [Network Application], [DNS], [Auto E-mail Notification], [SNMP], [SMTP], [POP3], and [Wireless]. •... -
Page 43: Ipv6 Configuration Tab
Configuring the Network Settings IPv6 Configuration Tab IPv6 Item Description IPv6 Select whether to enable or disable IPv6. You cannot disable IPv6 using Web Image Monitor if the machine is currently in use in an IPv6 environment. When disabled, [DHCP], [Manual Configuration Address], [Prefix Length], and [Gateway Address] below cannot be configured. -
Page 44: Dns Tab
4. Configuring the Machine Using Utilities Item Description Select to enable network printing using an embedded FTP server in the machine (via TCP port 20/21). Select to enable network raw printing. Port No. Enter the TCP port number to use for raw printing. The valid range is 1024 to 65535, except 53550 and 49999 (default is 9100). -
Page 45: Auto E-Mail Notification Tab
Configuring the Network Settings Item Description Primary IPv6 DNS Enter the IPv6 address of the primary IPv6 DNS server. Can contain up to Server 39 characters. Secondary IPv6 DNS Enter the IPv6 address of the secondary IPv6 DNS server. Can contain up Server to 39 characters. -
Page 46: Snmp Tab
4. Configuring the Machine Using Utilities SNMP Tab SNMP Item Description SNMP Select whether to enable the machine to use SNMP services. Trap Item Description Target Trap Select whether to enable the machine to send traps to the management host (NMS). -
Page 47: Smtp Tab
Configuring the Network Settings SMTP Tab SMTP Item Description Primary SMTP Server Enter the IP address or host name of the SMTP server. Can contain up to 64 characters. Port No. Enter the port number for SMTP (1 to 65535). Authentication Method Select an authentication method from the following: [Anonymous]: The user name and password are not necessary. -
Page 48: Wireless Tab
4. Configuring the Machine Using Utilities Item Description User Password Enter the password for logging in to the POP3 server. Can contain up to 32 characters. Authentication Select an authentication method from the following: [None]: Password will not be encrypted. [APOP Authentication]: Password will be encrypted. - Page 49 Configuring the Network Settings Item Description Communication Mode Select the mode to connect in. If the machine will be connected to a wireless router or access point, select [Infrastructure]. If the machine will be connected to a device equipped with a wireless LAN directly, select [Ad-Hoc].
-
Page 50: Configuring The Ipsec Settings
4. Configuring the Machine Using Utilities Configuring the IPsec Settings Click [IPsec Settings] to display the page for configuring the IPsec settings. This page contains the following tabs: [IPsec Global Settings] and [IPsec Policy List]. • This function is available only when an administrator password is specified. IPsec Global Settings Tab Item Description... - Page 51 Configuring the IPsec Settings Item Description Status Displays the status of the IPsec policy as "Active" or "Inactive". To configure IPsec policies, select the desired IPsec policy, and then click [Change] to open the "IPsec Policy Settings" page. The following settings can be made on the "IPsec Policy Settings" page. IP Policy Settings Item Description...
- Page 52 4. Configuring the Machine Using Utilities IPsec Settings Item Description Encapsulation Type Specify the encapsulation type from the following: • [Transport]: Select this mode to secure only the payload section of each IP packet when communicating with IPsec compliant devices. •...
- Page 53 Configuring the IPsec Settings Item Description Key Perfect Forward Select whether to enable or disable PFS (Perfect Forward Secrecy). Secrecy IKE Settings Item Description IKE Version Displays the IKE version. Encryption Algorithm Specify the encryption algorithm from the following: [DES], [3DES], [AES-128], [AES-192], [AES-256] Authentication Specify the authentication algorithm from the following: Algorithm...
-
Page 54: Printing Lists/Reports
4. Configuring the Machine Using Utilities Printing Lists/Reports Click [Print List/Report] to display the page for printing reports. Then, select an item and click [Print] to print out information for that item. Print List/Report Item Description Configuration Page Prints general information about the machine and its current configuration. Test Page Prints a test page for checking the printing condition. -
Page 55: Configuring The Administrator Settings
Configuring the Administrator Settings Configuring the Administrator Settings Click [Administrator Tools] to display the page for configuring the administrator settings. This page contains the following tabs: [Administrator], [Reset Settings], [Backup Setting], [Restore Setting], and [Help Source File Setting]. Administrator Tab Administrator Settings Item Description... -
Page 56: Restore Setting Tab
4. Configuring the Machine Using Utilities Backup Setting Item Description Back up Network Backs up settings configured under the [Network Settings] and Settings [Administrator Tools]. Back up Menu Settings Backs up settings that are not related to the network. Back up IPsec Settings Backs up the IPsec settings to a file. -
Page 57: Help Source File Setting Tab
Configuring the Administrator Settings • If the settings are not restored successfully, an error message appears. Try again to restore the file completely. Help Source File Setting Tab Help Source File Setting Item Description Help Source File Enter the address (URL) of the Help button. Up to 50 alphanumeric characters can be entered. -
Page 58: Using Smart Organizing Monitor
4. Configuring the Machine Using Utilities Using Smart Organizing Monitor The state and status information of the machine can be checked using Smart Organizing Monitor. DCT881 1. Image area Displays the status of this machine with an icon. 2. Status area •... -
Page 59: Configuring The Machine Settings
Using Smart Organizing Monitor 3. Message area Displays the status of this machine with a message. For details about error messages, see page 77 "Error and Status Messages Appear on Smart Organizing Monitor". 4. [Connect Printer] button Click to select a printer driver. 5. -
Page 60: Printing The Configuration Page
4. Configuring the Machine Using Utilities Paper Input tab • You can change paper size and other paper settings. Maintenance tab • You can adjust print starting positions. System tab • You can set basic functions required to use the printer. The printer can be used on factory-set defaults, but the configuration can be changed depending on the condition of the user. - Page 61 Using Smart Organizing Monitor Click [Print]. • You can check the firmware version on the configuration page or maintenance page. By updating the firmware, you can resolve problems or add a number of new functions. For details about updating the firmware, see the Firmware Update Guide. The Firmware Update Guide can be downloaded from our Web site.
- Page 62 4. Configuring the Machine Using Utilities...
-
Page 63: Maintaining The Machine
5. Maintaining the Machine Replacing the Print Cartridge • Store print cartridges in a cool dark place. • Actual printable numbers vary depending on image volume and density, number of pages printed at a time, paper type and size, and environmental conditions such as temperature and humidity. Toner quality degrades over time. - Page 64 5. Maintaining the Machine Slide the print cartridge in horizontally, and then slowly push it in all the way. Finally, push the cartridge down until it clicks into place. DCT026 Carefully push up the front cover until it closes.
-
Page 65: Cautions When Cleaning
Cautions When Cleaning Cautions When Cleaning Clean the machine periodically to maintain high print quality. Dry wipe the exterior with a soft cloth. If dry wiping is not sufficient, wipe with a soft, damp cloth that has been wrung out thoroughly. If you still cannot remove the stain or grime, use a neutral detergent, wipe over the area with a thoroughly-wrung damp cloth, and then dry wipe the area and allow it to dry. -
Page 66: Cleaning The Inside Of The Machine
5. Maintaining the Machine Cleaning the Inside of the Machine Open the front cover, and then carefully lower it. Carefully pull out the print cartridge horizontally, holding its center. DCT024 Use a cloth to wipe the inside of the machine toward and away from yourself. DCT040 Wipe carefully so as not to touch any protrusions inside the machine. -
Page 67: Troubleshooting
6. Troubleshooting Common Problems This section describes how to troubleshoot common problems that may occur while operating the machine. Problem Possible cause Solution • Make sure that the power plug is firmly inserted into the wall outlet. The power cord is not The machine does not turn on. -
Page 68: Paper Feed Problems
6. Troubleshooting Paper Feed Problems If the machine is operating but paper will not feed or paper jams occur frequently, check the condition of the machine and paper. Problem Solution Paper does not feed smoothly. • Use supported types of paper. See page 17 "Supported Paper". -
Page 69: Removing Printing Jams
Paper Feed Problems Problem Solution Paper gets wrinkles. • Paper is damp. Use paper that has been stored properly. • Paper is too thin. See page 17 "Supported Paper". • If there are gaps between the paper and the paper guides, adjust the paper guides to remove the gaps. - Page 70 6. Troubleshooting Removing Jammed Paper from Tray 1 Pull Tray 1 halfway out, and check for jammed paper. If there is jammed paper, remove it carefully. DCT012 Carefully slide Tray 1 back in until it stops. Open the front cover, and then carefully lower it. DCT027 Carefully pull out the print cartridge horizontally, holding its center.
- Page 71 Paper Feed Problems Lifting the guide plate, remove the jammed paper carefully. DCT025 Slide the print cartridge in horizontally, and then slowly push it in all the way. Finally, push the cartridge down until it clicks into place. DCT026 Carefully push up the front cover until it closes. DCT028 If the error display continues to appear, perform the procedure described in "Opening the Rear Cover to Remove Jammed Paper".
- Page 72 6. Troubleshooting Removing Jammed Paper from the Bypass Tray • Since the temperature around the guide is high, wait for it to cool before checking for jammed paper. If paper is jammed in the bypass tray input area, remove the jammed paper carefully. DCT015 Close the bypass tray.
- Page 73 Paper Feed Problems Open the fusing cover. DCT035 Push the levers on the sides down with your thumbs. DCT036 Remove the jammed paper carefully. DCT068 Push the levers on the sides up with your thumbs. Close the fusing cover.
- Page 74 6. Troubleshooting Close the rear cover. DCT023...
-
Page 75: Print Quality Problems
Print Quality Problems Print Quality Problems Checking the Condition of the Machine If there is a problem with the quality of printing, first check the condition of the machine. Possible Cause Solution There is a problem with the Make sure that the machine is on a level surface. Place the machine's location. -
Page 76: Printer Problems
6. Troubleshooting Printer Problems Problem Solution An error occurs. If an error occurs when printing, change the computer or printer driver settings. • Check the printer icon name does not exceed 32 alphanumeric characters. If it does, shorten it. • Check whether other applications are operating. Close any other applications, as they may be interfering with printing. -
Page 77: Print Positions Do Not Match Display Positions
Printer Problems Print Positions Do Not Match Display Positions If the position of items on the printed page differs from the position displayed on the computer screen, the cause may be one of the following. Possible Cause Solution Page layout settings are not configured properly. Check that the page layout settings are properly configured in the application. -
Page 78: Error And Status Indicate On The Control Panel
6. Troubleshooting Error and Status Indicate on the Control Panel The LED on the operation panel indicates the machine status, including any errors. Toner/ Alarm Power Status Solution Paper The power is on. The status is normal. Flashing Importing data. The status is normal. -
Page 79: Error And Status Messages Appear On Smart Organizing Monitor
Error and Status Messages Appear on Smart Organizing Monitor Error and Status Messages Appear on Smart Organizing Monitor "X" represents a displayed message that varies according to the situation. Message Causes Solutions No Response from • The power cable of the •... - Page 80 6. Troubleshooting Message Causes Solutions Printing has been The data is too large or Select [600 x 600 dpi] in [Resolution:] to interrupted because complex to print. reduce the size of data. For details, see the of the memory printer driver Help. overflow.
-
Page 81: Appendix
7. Appendix Notes About the Toner • Proper operation cannot be guaranteed if any third-party toner is used. • Depending on printing conditions, there are cases where the printer cannot print the number of sheets indicated in the specifications. -
Page 82: Moving And Transporting The Machine
7. Appendix Moving and Transporting the Machine This section provides cautions that you must follow when moving the machine both short and long distances. Repack the machine in its original packing materials when moving it over a long distance. • Be sure to disconnect all cables from the machine before transporting it. •... -
Page 83: Consumables
Consumables Consumables Print Cartridge Print cartridge Average printable number of pages per cartridge Black 1,500 pages, 2,600 pages *1 The printable number of pages is based on pages that are compliant with ISO/IEC 19752 with the image density set as the factory default. ISO/IEC 19752 is an international standard for measurement of printable pages, set by the International Organization for Standardization. -
Page 84: Specifications Of The Machine
7. Appendix Specifications of the Machine This section lists the machine's specifications. General Function Specifications Configuration Desktop Print process Laser electrostatic transfer Maximum paper size for printing 216 mm × 356 mm (8.5 × 14 inches) Warm-up time Less than 25 seconds (23 °C, 71.6 °F) Paper sizes A4, 8 "... -
Page 85: Printer Function Specifications
Specifications of the Machine Maximum loading height 15.5 mm (0.6 inches) Paper output capacity • Output Tray 50 sheets (70 g/m , 19 lb.) • Rear 1 sheet (70 g/m , 19 lb.) Memory 128 MB Power requirements 110 V, 8 A, 60 Hz Power consumption •... - Page 86 7. Appendix • Wi-Fi Printer language...
-
Page 87: Trademarks
Trademarks Trademarks Firefox is a registered trademark of the Mozilla Foundation. Microsoft, Windows, Windows Server, Windows Vista, and Internet Explorer are either registered trademarks or trademarks of Microsoft Corporation in the United States and/or other countries. Other product names used herein are for identification purposes only and might be trademarks of their respective companies. - Page 88 7. Appendix • The product names of Windows 8.1 are as follows: ® ® Microsoft Windows ® ® Microsoft Windows 8.1 Pro ® ® Microsoft Windows 8.1 Enterprise • The product names of Windows Server 2003 are as follows: ® ®...
-
Page 89: Index
INDEX Administrator password........Job cancel.............. 5, 53 Administrator settings..........Auto e-mail notification settings......Language............... Legal prohibition............Backup settings............Lists................Basic operation............Loading paper............Bypass tray............. Machine information..........Changing the custom paper size......Machine settings............ Cleaning............Manual IP address..........63, 64 Common problems.......... - Page 90 Specifying the paper type........Specifying the paper type and paper size... 26, 27 Specifying the standard paper size..... Status indicate............Status information..........Status messages............. Supported paper........... System information.......... 36, 56 System settings............Toner..............36, 79 Top page..............Trademarks............Tray 1..............Tray paper settings..........
- Page 91 © 2014...
- Page 92 M215-8631...