Table of Contents
Advertisement
User's Guide
Guide to the Machine
Paper Specifications and Adding Paper
Printing Documents
Configuring the Machine Using Utilities
Maintaining the Machine
Troubleshooting
Configuring Network Settings Using OS X
Appendix
For safe and correct use, be sure to read Safety Information before
using the machine.
Advertisement
Table of Contents
Troubleshooting

Related Manuals for Ricoh SP 220NW


Summary of Contents for Ricoh SP 220NW
- Page 1 User’s Guide Guide to the Machine Paper Specifications and Adding Paper Printing Documents Configuring the Machine Using Utilities Maintaining the Machine Troubleshooting Configuring Network Settings Using OS X Appendix For safe and correct use, be sure to read Safety Information before using the machine.
-
Page 3: Table Of Contents
TABLE OF CONTENTS How to Find Information about Operations and Troubleshooting..............5 Operating Manual (Printed)..........................5 Operating Manual (Digital Format)......................5 Help................................. 6 How to Read This Manual..........................8 Introduction..............................8 Symbols Used in This Manual........................8 Model-Specific Information...........................8 Disclaimer................................9 Notes................................9 Note to Administrator.......................... - Page 4 Non-Recommended Paper Types......................33 Paper Storage.............................. 34 Print Area..............................34 3. Printing Documents What You Can Do with the Printer Function....................37 Displaying the Printing Preferences Dialog Box.....................38 Displaying the Printing Preferences Dialog Box from the [Start] Menu........... 38 Displaying the Printing Preferences Dialog Box in an Application............38 Basic Operation of Printing..........................
- Page 5 Disposal................................ 66 Where to Inquire............................66 6. Troubleshooting Error and Status Indicate on the Control Panel....................67 Error and Status Messages Appear on Smart Organizing Monitor............69 Clearing Misfeeds............................71 Removing Jammed Paper from Tray 1....................... 71 Removing Jammed Paper from the Bypass Tray..................73 Opening the Rear Cover to Remove Jammed Paper................
- Page 6 Specifying IPsec Settings on the Computer....................96 Notes About the Toner.............................99 Specifications of the Machine........................100 General Function Specifications......................100 Printer Function Specifications........................102 Consumables..............................103 Print Cartridge............................103 Information for This Machine........................104 User Information on Electrical & Electronic Equipment (mainly Europe and Asia)..104 Note for the Battery and/or Accumulator Symbol (For EU countries only).........
-
Page 7: How To Find Information About Operations And Troubleshooting
This manual explains how to set up the machine. It also explains how to remove the machine from the packaging and how to connect it to a computer. Operating Manual (Digital Format) Operating manuals can be viewed from Ricoh's website or from the provided CD-ROM. Viewing from a web browser Access the Internet from a web browser. -
Page 8: Help
Click the manual you want to refer to. The PDF file manual opens. Help Use the following procedure to open the Help files learn about the printer driver, Web Image Monitor, and Smart Organizing Monitor functions. Depending on the model, Web Image Monitor may not be available. For details about model-specific differences, see "Differences in Performance/Functions between Different Models"... - Page 9 Web Image Monitor Click on the top right of the screen. DSH251 To display Help, install the help source file beforehand. For details about installing the file, see page 44 "Using Web Image Monitor". Smart Organizing Monitor Click [Help] on the [Printer Configuration] screen. DSH252...
-
Page 10: How To Read This Manual
How to Read This Manual Introduction This manual contains detailed instructions and notes on the operation and use of this machine. For your safety and benefit, read this manual carefully before using the machine. Keep this manual in a handy place for quick reference. -
Page 11: Disclaimer
The following information is region-specific. Read the information under the symbol that corresponds to the region of your machine. (mainly Europe and Asia) If the label contains the following, your machine is a region A model: • CODE XXXX -27, -29, -67 •... -
Page 12: Note To Administrator
In this manual, "IP address" covers both IPv4 and IPv6 environments. Read the instructions that are relevant to the environment you are using. Differences in Performance/Functions between Different Models The differences in main performance/functions between different models are as follows: SP 220Nw SP 221 SP 221Nw Ethernet Port (Network) -
Page 13: Guide To The Machine
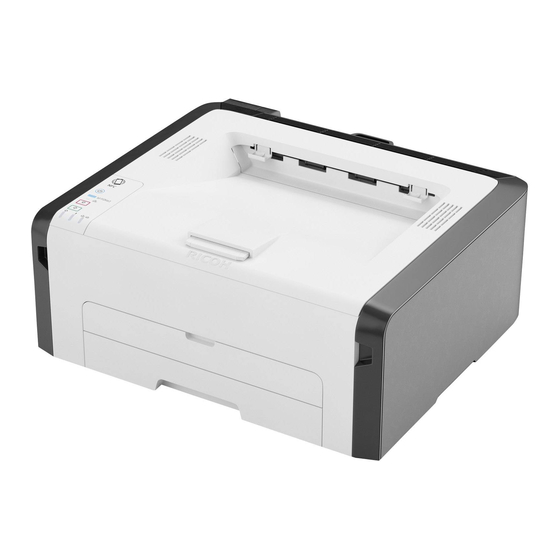
1. Guide to the Machine This chapter describes preparations for using the machine and its operating instructions. Guide to Components This section introduces the names of the various parts on the front and rear side of the machine and outlines their functions. Exterior DSH105 •... -
Page 14: Interior
For details about replacing the cartridge, see page 61 "Replacing the Print Cartridge". Control Panel This section introduces the names of the parts of the control panel and explains their functions. The illustration of the control panel is for SP 220Nw and SP 221Nw. - Page 15 [Wi-Fi Direct] key Pressing this key while Wi-Fi is disabled activates Wi-Fi and reboots the machine automatically. Press this key while Wi-Fi is (only SP 220Nw and enabled to activate or deactivate the Wi-Fi Direct function. This SP 221Nw) indicator lights blue when the Wi-Fi Direct function is active. After a long press of this key, configure the WPS using the PIN code or in PBC mode.
- Page 16 1. Guide to the Machine • For details about printing a list of the machine's configurations or about doing a test print using Smart Organizing Monitor, see page 57 "Using Smart Organizing Monitor".
-
Page 17: About Operation Tools
About Operation Tools About Operation Tools This section explains the operation tools of this machine. Depending on the model, Web Image Monitor may not be available. For details about model-specific differences, see "Differences in Performance/Functions between Different Models" in page 8 "How to Read This Manual". - Page 18 1. Guide to the Machine...
-
Page 19: Paper Specifications And Adding Paper
2. Paper Specifications and Adding Paper This chapter describes how to load paper and originals and about their specifications. Workflow for Loading Paper and Configuring Paper Sizes and Types This section explains how to load paper and the operations required after loading paper. After following the procedures below, you can print on the paper that is loaded in the machine. -
Page 20: Loading Paper
2. Paper Specifications and Adding Paper Loading Paper This section explains how to load paper into the paper tray and the bypass tray. • When loading paper, take care not to trap or injure your fingers. For information about supported paper, precautions for storing paper and print areas, see page 30 "Supported Paper". - Page 21 Loading Paper Slide the side and end paper guides outward. DSH112 Fan the paper before loading it in the tray. Load the new paper stack print side down. Make sure paper is not stacked higher than the upper limit marked inside the side paper guide. DSH115 Align the end paper guide to the paper size mark in the tray.
- Page 22 2. Paper Specifications and Adding Paper Check there are no gaps between the paper and the paper guides (both side and end paper guides). DSH116 Carefully push Tray 1 straight into the machine. DSH211 To avoid paper jams, make sure the tray is securely inserted. To deliver the sheets face up, open the rear cover.
- Page 23 Loading Paper Extending Tray 1 to load paper This section explains how to load paper larger than A4 (297 mm) into the machine. Remove the tray cover. DSH213 Pull Tray 1 out slowly, and then remove it using both hands. Release the extender locks on both sides of the tray, and then pull out the extender.
- Page 24 2. Paper Specifications and Adding Paper When using legal size paper, adjust the length to the position indicated by the mark " " in the tray. DSH180 Lock the extender. DSH122 Follow Steps 2 to 7 in "Loading Paper into Tray 1". Attach the tray cover.
-
Page 25: Loading Paper Into The Bypass Tray
Loading Paper Loading Paper into the Bypass Tray • Do not load paper in the bypass tray unless the message "Ready" appears in Smart Organizing Monitor. Open the bypass tray. DSH215 Slide the side guides outward, load paper with the print side up, and then push in until it stops against the machine. - Page 26 2. Paper Specifications and Adding Paper To deliver the sheets face up, open the rear cover. DSH212 • Sheets can be delivered face down from the output tray without opening the rear cover.
-
Page 27: Specifying Paper Type And Paper Size Using Smart Organizing Monitor
Specifying Paper Type and Paper Size Using Smart Organizing Monitor Specifying Paper Type and Paper Size Using Smart Organizing Monitor The procedure in this section is an example based on Windows 7. The actual procedure may vary depending on the operating system you are using. On the [Start] menu, click [All Programs]. - Page 28 2. Paper Specifications and Adding Paper Click [SP 220 Series Software Utilities]. Click [Smart Organizing Monitor for SP 220 Series]. If the machine you are using is not selected, click [Connect Printer], and then do one of the following: • Select the machine's model. •...
-
Page 29: Specifying Paper Type And Paper Size Using Web Image Monitor
Specifying Paper Type and Paper Size Using Web Image Monitor Specifying Paper Type and Paper Size Using Web Image Monitor This section describes how to specify paper sizes and types using Web Image Monitor. Depending on the model, Web Image Monitor may not be available. For details about model-specific differences, see "Differences in Performance/Functions between Different Models"... -
Page 30: Specifying Paper Type And Paper Size Using The Printer Driver
2. Paper Specifications and Adding Paper Specifying Paper Type and Paper Size Using the Printer Driver • Make sure that the paper type and size specified with the printer driver matches the type and size of the paper loaded in the tray. Since this machine does not detect paper sizes automatically, the type or size of the paper may be mismatched and the print job may not print correctly. -
Page 31: When Using Os X
Specifying Paper Type and Paper Size Using the Printer Driver Click [OK]. When Using OS X The procedure in this section is an example based on OS X 10.11. The actual procedure may vary depending on the operating system you are using. Start System Preferences. -
Page 32: Supported Paper
2. Paper Specifications and Adding Paper Supported Paper • After loading paper in the tray, specify the paper type and size using Smart Organizing Monitor and the printer driver. This machine does not detect the paper size automatically. • When loading custom size paper, specify the width and length using printer driver. Type Size Weight... - Page 33 Supported Paper • Depending on the paper type, the toner may take a while to dry. Before handling printed sheets, make sure that they have fully dried. Otherwise, the toner may smudge. • Print quality can be guaranteed only if recommended paper is used. For more information about the recommended paper, contact your sales or service representative.
- Page 34 2. Paper Specifications and Adding Paper Color Paper Item Description Paper thickness 75 to 90 g/m (20 to 24 lb.) Supported paper tray Tray 1 and bypass tray Notes If the paper thickness is outside the specified range, select [Thin Paper], [Plain Paper], or [Thick Paper 1].
-
Page 35: Non-Recommended Paper Types
Supported Paper Bond Paper Item Description Paper thickness 100 to 130 g/m (28 to 43 lb.) Supported paper tray Tray 1 and bypass tray Notes If the paper thickness is outside the specified range, select [Thin Paper], [Plain Paper], or [Thick Paper 1]. Cardstock Item Description... -
Page 36: Paper Storage
2. Paper Specifications and Adding Paper • Paper with windows, holes, perforations, cutouts, or embossing • Adhesive label paper on which glue or base paper is exposed • Paper with clips or staples • When loading paper, take care not to touch the surface of the paper. •... - Page 37 Supported Paper 1. Print area 2. Feed direction 3. Approx. 4.2 mm (0.2 inches) 4. Approx. 4.2 mm (0.2 inches) • The print area may vary depending on the paper size, printer language and printer driver settings.
- Page 38 2. Paper Specifications and Adding Paper...
-
Page 39: Printing Documents
3. Printing Documents This chapter describes how to configure settings on the printer driver and print documents. What You Can Do with the Printer Function Combined printing You can combine multiple pages and print them on a single sheet of paper. For details, see the printer driver Help. -
Page 40: Displaying The Printing Preferences Dialog Box
3. Printing Documents Displaying the Printing Preferences Dialog Box To change the default settings of the printer driver, configure settings in the [Printing Preferences] dialog box. To change the default settings of all applications, open the [Printing Preferences] dialog box from the OS. - Page 41 Displaying the Printing Preferences Dialog Box In the [Select Printer] list, select the printer you want to use. Click [Preferences]. • Procedures for opening the [Printing Preferences] dialog box vary depending on the application. For details, see the printer driver Help or the manuals provided with the application. Displaying the Printing Preferences Dialog Box in an Application When Using OS X The following procedure is explained using OS X 10.11 as an example.
-
Page 42: Basic Operation Of Printing
3. Printing Documents Basic Operation of Printing The following procedure explains how to perform basic printing. For details of printing options, see the printer driver Help. The procedure in this section is an example based on Windows 7. The actual procedure may vary depending on the operating system you are using. - Page 43 Basic Operation of Printing Canceling a print job before printing has started Double-click the printer icon on the task tray of your computer. Select the print job you want to cancel, click the [Document] menu, and then click [Cancel]. Click [Yes]. •...
- Page 44 3. Printing Documents...
-
Page 45: Configuring The Machine Using Utilities
4. Configuring the Machine Using Utilities This chapter describes how to configure the machine using utilities. Available Setting Functions Using Web Image Monitor and Smart Organizing Monitor Use Web Image Monitor or Smart Organizing Monitor to change the configuration of the machine from a computer. -
Page 46: Using Web Image Monitor
4. Configuring the Machine Using Utilities Using Web Image Monitor • Some items might not appear, depending on the model type you are using. Available operations The following operations can be remotely performed using Web Image Monitor on a computer: •... -
Page 47: Changing The Interface Language
Using Web Image Monitor DSH134 1. Menu area If you select menu, its content will be shown on main area. 2. Tab area Contains tabs for switching between information and settings you want to see or configure. 3. Help If you click this icon, help index page opens. 4. -
Page 48: Installing The Help Source File
4. Configuring the Machine Using Utilities Installing the Help Source File Follow the procedure below to install the help. Copy the [WIMHELP] folder on the CD-ROM to your computer's hard drive. The example procedures explain how to copy the [WIMHELP] folder to the C:\tmp\WIMHELP directory. -
Page 49: Home
Using Web Image Monitor Network Settings Configure network settings. IPsec Settings Configure IPsec settings. Print List/Report Print a list/report related to the printer. Administrator Tools Configure administrator settings. Home [Status] tab Click the [Status] tab on the main page to display system information, paper tray status and toner levels. -
Page 50: Network Settings
• [General Status] You can check [Ethernet Speed], [IPP Printer Name], [Network Version], [Ethernet MAC Address], [Active Interface], and [Wi-Fi Direct IP Address] (only SP 220Nw and SP 221Nw). • [TCP/IP Status] You can specify [DHCP], [IP Address], [Subnet Mask], and [Gateway] for IPv4. - Page 51 [POP3] tab You can specify [POP3 Server], [User Account], [User Password], and [Authentication]. [Wireless] tab This function is available for only SP 220Nw and SP 221Nw. • [Wireless LAN Status] The status of the following items is displayed: [Wireless LAN Status], [MAC Address], [Communication Mode], [SSID], [Wireless Signal Status], and [Wireless].
- Page 52 • [SSID] Enter the SSID name. Can contain 32 characters. [Google Cloud] tab This function is available for only SP 220Nw and SP 221Nw. • [Google Cloud Print] Select whether to enable [Google Cloud Print]. When disabled, [Local Discovery] and [Timeout (Seconds)] below cannot be configured.
-
Page 53: Ipsec Settings
Using Web Image Monitor Displays the Account (email address) of Google Cloud Print registration. • [Local Discovery] Select whether to enable local discovery. • [Timeout (seconds)] Enter the number of seconds the machine waits before considering an XMPP operation to have timed out. - Page 54 4. Configuring the Machine Using Utilities Specify a number between 1 and 10 for the IPsec policy. The number you specify will determine the position of the policy in the IPsec Policy List. • [Activity] Select whether to enable or disable the policy. •...
- Page 55 Using Web Image Monitor Select this mode to secure every section of each IP packet. We recommend this type for communication between security gateways (such as VPN devices). • [Security Protocol] Select the security protocol from the following: • [AH] Establishes secure communication that supports authentication only.
-
Page 56: Print List/Report
4. Configuring the Machine Using Utilities Specify the encryption algorithm from the following: [DES], [3DES], [AES-128], [AES-192], [AES-256] • [Authentication Algorithm] Specify the authentication algorithm from the following: [MD5], [SHA1] • [IKE Life Time] Specify the life time of the ISAKMP SA as a time period. Enter a number of seconds. •... - Page 57 Using Web Image Monitor Select to restore network settings to their defaults. • [Reset Menu Settings] Select to restore settings that are not related to the network. • [Reset IPsec Settings] Select to clear the IP security settings. • [Reset IPsec Settings] appears only when a password is specified in [Administrator]. Backup Setting Create backup files containing the printer's configuration settings.
- Page 58 4. Configuring the Machine Using Utilities Enter the administrator password if required. Click [OK]. Help Source File Setting • [Help Source File] Enter the help source file path.
-
Page 59: Using Smart Organizing Monitor
Using Smart Organizing Monitor Using Smart Organizing Monitor The state and status information of the machine can be checked using Smart Organizing Monitor. • Some items might not appear, depending on the model type you are using. Displaying the Smart Organizing Monitor Dialog On the [Start] menu, click [All Programs]. -
Page 60: Checking The Status Information
4. Configuring the Machine Using Utilities Checking the Status Information DSH160 1. Image area Displays the status of this machine with an icon. 2. Tab area • Status tab • Printer Name • Print Cartridge Displays the following messages to indicate remaining toner levels: Remaining Level 1 to 5, "Almost Empty"... -
Page 61: Configuring The Machine Settings
Using Smart Organizing Monitor Displays the job log information. • User Tools tab Click to print test pages or maintenance pages, or to configure settings of the machine. 3. Message area Displays the status of this machine with a message. For details about error messages, see page 69 "Error and Status Messages Appear on Smart Organizing Monitor". - Page 62 • You can set configurations about wireless LAN network connection and communication. • The following operations are possible on the tab: • Checking the wireless LAN status • Connecting wireless LAN manually • Connecting with one touch using WPS (only SP 220Nw and SP 221Nw)
-
Page 63: Maintaining The Machine
5. Maintaining the Machine This chapter describes how to replace supplies and how to clean the machine. Replacing the Print Cartridge • Replace the print cartridge if the printed image suddenly becomes pale or blurred. • Store print cartridges in a cool dark place. •... - Page 64 5. Maintaining the Machine Slide the print cartridge in horizontally, and then slowly push it in all the way. Finally, push the cartridge down until it clicks into place. DSH219 Carefully push up the front cover until it closes.
-
Page 65: Cautions When Cleaning
Cautions When Cleaning Cautions When Cleaning Clean the machine periodically to maintain high print quality. Dry wipe the exterior with a soft cloth. If dry wiping is not sufficient, wipe with a soft, damp cloth that has been wrung out thoroughly. If you still cannot remove the stain or grime, use a neutral detergent, wipe over the area with a thoroughly-wrung damp cloth, and then dry wipe the area and allow it to dry. -
Page 66: Cleaning The Inside Of The Machine
5. Maintaining the Machine Cleaning the Inside of the Machine Open the front cover, and then carefully lower it. Hold the center of the print cartridge and carefully raise it slightly and then pull it out horizontally. DSH218 Use a cloth to wipe the inside of the machine toward and away from yourself. DSH220 Wipe carefully so as not to touch any protrusions inside the machine. -
Page 67: Moving And Transporting The Machine
Moving and Transporting the Machine Moving and Transporting the Machine This section provides cautions that you must follow when moving the machine both short and long distances. Repack the machine in its original packing materials when moving it over a long distance. •... -
Page 68: Disposal
5. Maintaining the Machine • Toner might spill inside the machine if the machine is not kept level during transit. • For more information about moving the machine, contact your sales or service representative. Disposal Ask your sales or service representative for information about correct disposal of this machine. Where to Inquire Contact your sales or service representative for further information about the topics included in this manual or to inquire about other topics not included in this manual. -
Page 69: Troubleshooting
6. Troubleshooting This chapter provides solutions for error messages and other problems. Error and Status Indicate on the Control Panel The LED on the operation panel indicates the machine status, including any errors. Power Alert Toner/ Status Solution Paper The power is on. The status is normal. - Page 70 6. Troubleshooting Power Alert Toner/ Status Solution Paper Another type of error has Use Web Image Monitor or occurred. Smart Organizing Monitor to check the error, and then take appropriate measures. See page 44 "Using Web Image Monitor" or page 57 "Using Smart Organizing Monitor".
-
Page 71: Error And Status Messages Appear On Smart Organizing Monitor
Error and Status Messages Appear on Smart Organizing Monitor Error and Status Messages Appear on Smart Organizing Monitor "X" represents a displayed message that varies according to the situation. Message Causes Solutions No Response from • The power cable of the •... - Page 72 6. Troubleshooting Message Causes Solutions Printing has been The data is too large or Select [600 x 600 dpi] in [Resolution] to interrupted because complex to print. reduce the size of data. For details, see the of the memory printer driver Help. overflow.
-
Page 73: Clearing Misfeeds
Clearing Misfeeds Clearing Misfeeds • Jammed paper may be covered in toner. Be careful not to get toner on your hands or clothes. • Toner on prints made immediately after clearing a paper jam may be insufficiently fused and can smudge. - Page 74 6. Troubleshooting Hold the center of the print cartridge and carefully raise it slightly and then pull it out horizontally. DSH161 • Do not shake the removed print cartridge. Doing so can cause remaining toner to leak. • Place the print cartridge on paper or similar material to avoid dirtying your workspace. Lifting the guide plate, remove the jammed paper carefully.
-
Page 75: Removing Jammed Paper From The Bypass Tray
Clearing Misfeeds Carefully push up the front cover until it closes. DSH166 If the error display continues to appear, perform the procedure described in page 74 "Opening the Rear Cover to Remove Jammed Paper". Removing Jammed Paper from the Bypass Tray •... -
Page 76: Opening The Rear Cover To Remove Jammed Paper
6. Troubleshooting Opening the Rear Cover to Remove Jammed Paper • Since the temperature around the guide is high, wait for it to cool before checking for jammed paper. Open the rear cover. DSH168 Open the fusing cover. DSH169 Push the levers on the sides down with your thumbs. DSH170... - Page 77 Clearing Misfeeds Remove the jammed paper carefully. DSH171 Push the levers on the sides up with your thumbs. Close the fusing cover. Close the rear cover. DSH172...
-
Page 78: When You Cannot Print Test Page
6. Troubleshooting When You Cannot Print Test Page Possible cause Solution The power cord, a USB cable, or a Make sure that the power cord, USB cable, and network network cable is not connected cable are connected correctly. Also confirm that they are not correctly. -
Page 79: Paper Feed Problems
Paper Feed Problems Paper Feed Problems If the machine is operating but paper will not feed or paper jams occur frequently, check the condition of the machine and paper. Problem Solution Paper does not feed smoothly. • Use supported types of paper. See page 30 "Supported Paper". - Page 80 6. Troubleshooting Problem Solution Paper gets wrinkles. • Paper is damp. Use paper that has been stored properly. See page 30 "Supported Paper". • Paper is too thin. See page 30 "Supported Paper". • If there are gaps between the paper and the paper guides, adjust the paper guides to remove the gaps.
-
Page 81: Print Quality Problems
Print Quality Problems Print Quality Problems Checking the Condition of the Machine If there is a problem with the quality of printing, first check the condition of the machine. Possible Cause Solution There is a problem with the Make sure that the machine is on a level surface. Place the machine's location. - Page 82 6. Troubleshooting Problem Solution Images smudge when rubbed. On the printer driver's [Paper] tab, select a proper paper type (Toner is not fixed.) in the [Paper Type:] list. When printing graphics, the output To print accurately, specify the printer driver setting to print and the screen are different.
-
Page 83: Printer Problems
Printer Problems Printer Problems This section describes printing problems and possible solutions. Problem Solution An error occurs. If an error occurs when printing, change the computer or printer driver settings. • Check the printer icon name does not exceed 32 alphanumeric characters. -
Page 84: Print Positions Do Not Match Display Positions
6. Troubleshooting Print Positions Do Not Match Display Positions If the position of items on the printed page differs from the position displayed on the computer screen, the cause may be one of the following. Problem Solution Page layout settings are not Check that the page layout settings are properly configured in configured properly. -
Page 85: Common Problems
Common Problems Common Problems This section describes how to troubleshoot common problems that may occur while operating the machine. Problem Possible cause Solution The machine does not turn on. The power cord is not • Make sure that the power connected properly. - Page 86 6. Troubleshooting...
-
Page 87: Configuring Network Settings Using Os
Insert the provided CD-ROM into the CD-ROM drive of the computer. If your computer does not have a CD-ROM drive, download a setup file from our website (http:// www.ricoh.com/printers/sp200/support/gateway/). Double-click the CD-ROM drive icon. Double-click the [Mac OS X] folder. -
Page 88: Using An Ethernet Cable
Insert the provided CD-ROM into the CD-ROM drive of the computer. If your computer does not have a CD-ROM drive, download a setup file from our website (http:// www.ricoh.com/printers/sp200/support/gateway/). Double-click the CD-ROM drive icon. Double-click the [Mac OS X] folder. - Page 89 Connecting the Machine to a Wired Network On the [Network 1] tab, select [On] for [DHCP] to automatically obtain the IP address or [Off] to specify the IP address manually. If you have selected [On], proceed to Step 25. Enter the machine's IPv4 address in [IP Address]. Enter the subnet mask in [Subnet Mask].
-
Page 90: Connecting The Machine To A Wireless Network
7. Configuring Network Settings Using OS X Connecting the Machine to a Wireless Network You can use this function on SP 220Nw and SP 221Nw only. There are four methods for connecting the machine to a wireless network: • Using the WPS button See page 89 "Using the WPS Button". -
Page 91: Using The Wps Button
Insert the provided CD-ROM into the CD-ROM drive of the computer. If your computer does not have a CD-ROM drive, download a setup file from our website (http:// www.ricoh.com/printers/sp200/support/gateway/). Double-click the CD-ROM drive icon. Double-click the [Mac OS X] folder. -
Page 92: Using A Pin Code
7. Configuring Network Settings Using OS X Click [OK]. Wait until the machine restarts. Click [User Tools] tab. Click [Printer Configuration]. Enter the access code, and then click [OK]. The default access code is "Admin". On the [Wireless] tab, select [Setup with WPS] for [Configuration Method]. Click [Connect]. -
Page 93: Manual Setup
Connecting the Machine to a Wireless Network Enter the access code, and then click [OK]. The default access code is "Admin". On the [Wireless] tab, select [Setup with WPS] for [Configuration Method]. Select [Wi-Fi Protected Setup with PIN Code] for [One-Touch Connection Setting (WPS)]. Click [Get PIN Code] and check the PIN code. - Page 94 7. Configuring Network Settings Using OS X Enter the access code, and then click [OK]. The default access code is "Admin". On the [Wireless] tab, select [Manual Setup] for [Configuration Method]. Select the authentication method in [Authentication]. Configurations differ according to the authentication method.
-
Page 95: Appendix
8. Appendix This chapter describes the machine specifications and consumables. Transmission Using IPsec For securer communications, this machine supports the IPsec protocol. When applied, IPsec encrypts data packets at the network layer using shared key encryption. The machine uses encryption key exchange to create a shared key for both sender and receiver. -
Page 96: Security Association
8. Appendix • For successful authentication, the sender and receiver must specify the same authentication algorithm and authentication key. The authentication algorithm and authentication key are specified automatically. AH Protocol The AH protocol provides secure transmission through authentication of packets only, including headers. -
Page 97: Encryption Key Exchange Settings Configuration Flow
Transmission Using IPsec Encryption Key Exchange Settings Configuration Flow This section explains the procedure for specifying encryption key exchange settings. Machine 1. Set the same IPsec settings as the machine on 1. Set the IPsec settings on Web Image Monitor. 2. -
Page 98: Specifying Ipsec Settings On The Computer
8. Appendix • An administrator password can be specified in the [Administrator] tab. Specifying IPsec Settings on the Computer Specify exactly the same settings for IPsec SA settings on your computer as are specified for the IPsec Settings on the machine. Setting methods differ according to the computer's operating system. The following procedure is based on Windows 7 in an IPv4 environment as an example. - Page 99 Transmission Using IPsec In [Description:], enter a name or a detailed explanation of the IP filter, and then click [Next]. You may click [Next] and proceed to the next step without entering any information in this field. Select "My IP Address" in "Source address", and then click [Next]. Select "A specific IP Address or Subnet"...
- Page 100 8. Appendix In the Session key settings, select "Generate a new key every", and enter the same validity period (in [Seconds] or [Kbytes]) as that specified for [Life Time] on the machine. Click [OK], and then click [Next]. Click [Finish]. If you are using IPv6, you must repeat this procedure from Step 12 and specify ICMPv6 as an exception.
-
Page 101: Notes About The Toner
Notes About the Toner Notes About the Toner • Proper operation cannot be guaranteed if any third-party toner is used. • Depending on printing conditions, there are cases where the printer cannot print the number of sheets indicated in the specifications. •... -
Page 102: Specifications Of The Machine
8. Appendix Specifications of the Machine This section lists the machine's specifications. General Function Specifications Item Description Configuration Desktop Print process Laser electrostatic transfer Maximum paper size for printing 216 mm × 356 mm (8.5 × 14 inches) Warm-up time (23 °C, 71.6 °F) 25 seconds Paper sizes For details, see page 30 "Supported Paper". - Page 103 Specifications of the Machine Item Description Power consumption • Ready 50.2 W • During printing 358 W • Maximum 784 W The power level when the main switch is turned off and the power cord is plugged into an outlet: 1 W or less Power consumption •...
-
Page 104: Printer Function Specifications
600 × 600 dpi (maximum: 1200 × 1200 dpi) First print speed 10 seconds or less Interface • Ethernet (10BASE-T, 100BASE-TX) (only SP 220Nw and SP 221Nw) • USB 2.0 • Wi-Fi (only SP 220Nw and SP 221Nw) Printer language... -
Page 105: Consumables
ISO/IEC 19752 is an international standard on measurement of printable pages, set by the International Organization for Standardization. • For information about consumables, see our website (http://www.ricoh.com/printers/sp200/ support/gateway/). • If print cartridges are not changed when necessary, printing will become impossible. For easy replacement, we recommend you purchase and store extra print cartridges. -
Page 106: Information For This Machine
8. Appendix Information for This Machine User Information on Electrical & Electronic Equipment (mainly Europe and Asia) Users in the countries where this symbol shown in this section has been specified in national law on collection and treatment of E-waste Our Products contain high quality components and are designed to facilitate recycling. -
Page 107: Note For The Battery And/Or Accumulator Symbol (For Eu Countries Only)
Information for This Machine For Turkey only Üretici: Ricoh Company, Ltd. 8-13-1 Ginza, Chuo-ku, Tokyo 104-8222 Japan +81-36278-2111(English only/Sadece İngilizce) Note for the Battery and/or Accumulator Symbol (For EU countries only) In accordance with the Battery Directive 2006/66/EC Article 20 Information for end-users Annex II, the above symbol is printed on batteries and accumulators. -
Page 108: Notice To Wireless Lan Interface Users (Mainly Europe)
Declaration of Conformity Notice to Users in EEA Countries This product complies with the essential requirements and provisions of Directive 2014/53/EU. The CE Declaration of Conformity is available by accessing the URL: http://www.ricoh.com/products/ ce_doc/ and selecting the product applicable. Operating frequency band: 2400 - 2483.5 MHz maximum radio-frequency power: less than 20.0 dBm... -
Page 109: Notes To Users In The State Of California (Notes To Users In Usa)
Information for This Machine Notes to users in the state of California (Notes to Users in USA) Perchlorate Material - special handling may apply. See: www.dtsc.ca.gov/hazardouswaste/ perchlorate Notes to users in the United States of America Part 15 of the FCC Rules Note: This equipment has been tested and found to comply with the limits for a Class B digital device, pursuant to Part 15 of the FCC Rules. -
Page 110: Notes To Canadian Users Of Wireless Devices
(1) This device may not cause harmful interference, and (2) this device must accept any interference received, including interference that may cause undesired operation. Model Number: SP 220Nw Notes to Canadian Users of Wireless Devices This device complies with Industry Canada’s licence-exempt RSSs. -
Page 111: Energy Star Program
Information for This Machine ENERGY STAR Program ® ENERGY STAR Program Requirements for Imaging Equipment ® The ENERGY STAR Program Requirements for Imaging Equipment encourage energy conservation by promoting energy efficient computers and other office equipment. The program backs the development and dissemination of products that feature energy saving functions. - Page 112 8. Appendix Specifications Energy Saver mode 1 Power Consumption 28.7 W 29.3 W Recovery Time 10 seconds Energy Saver mode 2 Power Consumption 0.94 W 0.87 W Default Interval 30 seconds Recovery Time 18 seconds 19 seconds *1 Recovery time and power consumption may differ depending on the conditions and environment of the machine.
-
Page 113: Copyright Information About Installed Applications
Copyright Information about Installed Applications Copyright Information about Installed Applications Apache License Apache License Version 2.0, January 2004 http://www.apache.org/licenses/ TERMS AND CONDITIONS FOR USE, REPRODUCTION, AND DISTRIBUTION 1. Definitions. "License" shall mean the terms and conditions for use, reproduction, and distribution as defined by Sections 1 through 9 of this document. - Page 114 8. Appendix form of electronic, verbal, or written communication sent to the Licensor or its representatives, including but not limited to communication on electronic mailing lists, source code control systems, and issue tracking systems that are managed by, or on behalf of, the Licensor for the purpose of discussing and improving the Work, but excluding communication that is conspicuously marked or otherwise designated in writing by the copyright owner as "Not a Contribution."...
-
Page 115: Dnsmasq
Copyright Information about Installed Applications You may add Your own copyright statement to Your modifications and may provide additional or different license terms and conditions for use, reproduction, or distribution of Your modifications, or for any such Derivative Works as a whole, provided Your use, reproduction, and distribution of the Work otherwise complies with the conditions stated in this License. -
Page 116: Gpl Version 2
8. Appendix the Free Software Foundation; version 2 dated June, 1991. This program is distributed in the hope that it will be useful, but WITHOUT ANY WARRANTY; without even the implied warranty of MERCHANTABILITY or FITNESS FOR A PARTICULAR PURPOSE. See the GNU General Public License for more details. - Page 117 Copyright Information about Installed Applications distribute copies of the software, or if you modify it. For example, if you distribute copies of such a program, whether gratis or for a fee, you must give the recipients all the rights that you have.
- Page 118 8. Appendix Activities other than copying, distribution and modification are not covered by this License; they are outside its scope. The act of running the Program is not restricted, and the output from the Program is covered only if its contents constitute a work based on the Program (independent of having been made by running the Program).
- Page 119 Copyright Information about Installed Applications does not normally print such an announcement, your work based on the Program is not required to print an announcement.) These requirements apply to the modified work as a whole. If identifiable sections of that work are not derived from the Program, and can be reasonably considered independent and separate works in themselves, then this License, and its terms, do not apply to those sections when you distribute them as separate works.
- Page 120 8. Appendix allowed only for noncommercial distribution and only if you received the program in object code or executable form with such an offer, in accord with Subsection b above.) The source code for a work means the preferred form of the work for making modifications to it.
- Page 121 Copyright Information about Installed Applications 6. Each time you redistribute the Program (or any work based on the Program), the recipient automatically receives a license from the original licensor to copy, distribute or modify the Program subject to these terms and conditions. You may not impose any further restrictions on the recipients' exercise of the rights granted herein.
- Page 122 8. Appendix This section is intended to make thoroughly clear what is believed to be a consequence of the rest of this License. 8. If the distribution and/or use of the Program is restricted in certain countries either by patents or by copyrighted interfaces, the original copyright holder who places the Program under this License may add an explicit geographical distribution limitation excluding those countries, so that distribution is permitted only in or among...
- Page 123 Copyright Information about Installed Applications MERCHANTABILITY AND FITNESS FOR A PARTICULAR PURPOSE. THE ENTIRE RISK AS TO THE QUALITY AND PERFORMANCE OF THE PROGRAM IS WITH YOU. SHOULD THE PROGRAM PROVE DEFECTIVE, YOU ASSUME THE COST OF ALL NECESSARY SERVICING, REPAIR OR CORRECTION.
-
Page 124: Iperf
8. Appendix with this program; if not, write to the Free Software Foundation, Inc., 51 Franklin Street, Fifth Floor, Boston, MA 02110-1301 USA. Also add information on how to contact you by electronic and paper mail. If the program is interactive, make it output a short notice like this when it starts in an interactive mode: Gnomovision version 69, Copyright (C) year name of author Gnomovision comes with ABSOLUTELY NO WARRANTY;... - Page 125 Copyright Information about Installed Applications Ajay Tirumala Jim Ferguson Jon Dugan Feng Qin Kevin Gibbs John Estabrook National Laboratory for Applied Network Research National Center for Supercomputing Applications University of Illinois at Urbana-Champaign http://www.ncsa.uiuc.edu Permission is hereby granted, free of charge, to any person obtaining a copy of this software (Iperf) and associated documentation files (the "Software"), to deal in the Software without restriction, including without limitation the rights to use, copy, modify, merge, publish, distribute, sublicense, and/or sell copies of the Software, and to permit persons to whom the Software is furnished to do so, subject to the...
-
Page 126: Libharu
8. Appendix Thanks to Mark Gates (NLANR), Alex Warshavsky (NLANR) and Justin Pietsch (University of Washington) who were responsible for the 1.1.x releases of Iperf. For this release, we would like to thank Bill Cerveny (Internet2), Micheal Lambert (PSC), Dale Finkelson (UNL) and Matthew Zekauskas (Internet2) for help in getting access to IPv6 networks / machines. - Page 127 Copyright Information about Installed Applications * notice, this list of conditions and the following disclaimer. * 2. Redistributions in binary form must reproduce the above copyright * notice, this list of conditions and the following disclaimer in * the documentation and/or other materials provided with the * distribution.
-
Page 128: Mdnsresponser
8. Appendix mDNSResponser * Copyright (c) 2002-2006 Apple Computer, Inc. All rights reserved. * Licensed under the Apache License, Version 2.0 (the "License"); * you may not use this file except in compliance with the License. * You may obtain a copy of the License at * http://www.apache.org/licenses/LICENSE-2.0 * Unless required by applicable law or agreed to in writing, software * distributed under the License is distributed on an "AS IS"... -
Page 129: Opencv
Copyright Information about Installed Applications * understand why variable y is not of type "char*" just proves the point that poor code * layout leads people to unfortunate misunderstandings about how the C language really works.) OpenCV By downloading, copying, installing or using the software you agree to this license. If you do not agree to this license, do not download, install, copy or use the software. -
Page 130: Open Ssl
8. Appendix Open SSL LICENSE ISSUES ============== The OpenSSL toolkit stays under a dual license, i.e. both the conditions of the OpenSSL License and the original SSLeay license apply to the toolkit. See below for the actual license texts. Actually both licenses are BSD-style Open Source licenses. - Page 131 Copyright Information about Installed Applications * prior written permission. For written permission, please contact * openssl-core@openssl.org. * 5. Products derived from this software may not be called "OpenSSL" * nor may "OpenSSL" appear in their names without prior written * permission of the OpenSSL Project. * 6.
- Page 132 8. Appendix /* Copyright (C) 1995-1998 Eric Young (eay@cryptsoft.com) * All rights reserved. * This package is an SSL implementation written * by Eric Young (eay@cryptsoft.com). * The implementation was written so as to conform with Netscapes SSL. * This library is free for commercial and non-commercial use as long as * the following conditions are aheared to.
-
Page 133: Wpa Supplicant
Copyright Information about Installed Applications * The word 'cryptographic' can be left out if the rouines from the library * being used are not cryptographic related :-). * 4. If you include any Windows specific code (or a derivative thereof) from * the apps directory (application code) you must include an acknowledgement: * "This product includes software written by Tim Hudson (tjh@cryptsoft.com)"... - Page 134 8. Appendix License ------- This software may be distributed, used, and modified under the terms of BSD license: Redistribution and use in source and binary forms, with or without modification, are permitted provided that the following conditions are met: 1. Redistributions of source code must retain the above copyright notice, this list of conditions and the following disclaimer.
-
Page 135: Trademarks
Trademarks Trademarks Adobe and Acrobat are either registered trademarks or trademarks of Adobe Systems Incorporated in the United States and/or other countries. OS X, TrueType, and Safari are trademarks of Apple Inc., registered in the U.S. and other countries. ® Firefox is a registered trademark of the Mozilla Foundation. - Page 136 8. Appendix ® ® Microsoft Windows 8.1 Enterprise • The product names of Windows 10 are as follows: ® Microsoft® Windows 10 Home Premium ® Microsoft® Windows 10 Pro ® Microsoft® Windows 10 Enterprise ® Microsoft® Windows 10 Education • The product names of Windows Server 2003 are as follows: ®...
- Page 137 Trademarks ® ® Microsoft Windows Server 2012 Essentials ® ® Microsoft Windows Server 2012 Standard ® ® Microsoft Windows Server 2012 Datacenter • The product names of Windows Server 2012 R2 are as follows: ® ® Microsoft Windows Server 2012 R2 Foundation ®...
- Page 138 8. Appendix...
-
Page 139: Index
INDEX 63, 64 Cleaning the machine..........Replacing the print cartridge..........Authentication............Model-specific information........Moving..............Bypass tray............. Non-recommended paper........Notes..............Configuring Network Settings Using OS X Ethernet................Installing Smart Organizing Monitor....... Operation tools............. Installing the driver............. USB..................Wireless LAN..............Paper jam............71, 73 Configuring the machine Paper Storage............ - Page 140 Supported paper........... System information..........Trademarks............Tray 1..............Tray paper settings..........Troubleshooting Clearing misfeeds.............. Error and status indicate on the control panel....Error and status messages appear on Smart Organizing Monitor................76, 77, 79, 81, 83 Other problems......... Web Image Monitor..........What you can do with this machine Printer function..............
- Page 141 MEMO...
- Page 142 MEMO M0A4-8604...
- Page 143 © 2016...
- Page 144 M0A4-8604...