Advertisement
Advertisement
Table of Contents

Summary of Contents for NewAir AC-12200E
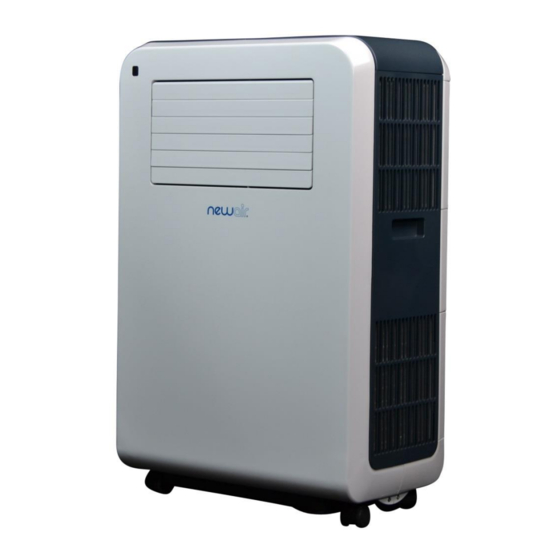
- Page 1 AC-12200E Portable Air Conditioner OWNERS MANUAL Read and save these instructions.
- Page 2 Count on NewAir. As a proud NewAir owner, welcome to our family. There are no robots here, real people shipped your product and real people are here to help you.
-
Page 3: Table Of Contents
Control Operation ..................9 Efficiency Booster ..................11 Draining the unit ..................12 Cleaning & Maintenance ..................13 End of Season Storage ................14 Troubleshooting ....................14 Limited Manufacturer’s Warranty ..............16 SPECIFICATIONS AC-12200E ODEL 115V OLTAGE 60Hz REQUENCY 1120W / 10.5A OWER ONSUMPTION 220.7 CFM... -
Page 4: Safety Information & Warnings
Do not pull or strain the power cord when moving this appliance. If the power cord is damaged, it must be replaced by an electrician or specialized technician authorized by NewAir. Always operate the unit in an upright position and place it on a flat, level surface at least 14”... -
Page 5: Parts List
PARTS LIST Front Back Exhaust hose compartment Air filter (air inlet) Control panel 10. Carrying handle Remote control receiver 11. Cord compartment Carrying handle 12. Air filter (air inlet) Water funnel 13. Air filter (air inlet) Horizontal louver 14. Exhaust outlet Vertical louver 15. -
Page 6: Assembly Instructions
Unscrew the slide at the top. Unscrew here Remove the slider at the top. 3. Remove the exhaust hose. 4. Attach the exhaust hose to the vent. 5. To store the exhaust hose, reverse the steps. Remember to put the screw back in place. http://www.NewAir.com... -
Page 7: Installation Instructions
Use only the provided hose and attach exhaust hose and adaptor to the back of the air conditioner Avoid kinks and bends in the exhaust hose as this will cause expelled humid air to build up causing the unit to overheat and shut down. The hose may extend from 12”... -
Page 8: Operating Instructions
9. Sleep indicator Temp Down button 4. Cool mode indicator 10. High fan indicator Temp Up button 5. Fan mode indicator 11. Med fan indicator Sleep button 6. Dry mode indicator 12. Low fan indicator Fan Speed button Display window http://www.NewAir.com... -
Page 9: Adjusting The Louvers
ADJUSTING THE LOUVERS Before using the unit, please open the horizontal louvers. Adjust the louvers as desired. CONTROL OPERATION Turn the unit ON/OFF Press the ON/OFF button to start the unit. ° The preset temp is 75 F. If the room temp is higher than this, the unit will work in cooling mode. - Page 10 In sleep mode, the fan will stay on low speed. If you press the SLEEP button again, the set temp and fan speed will return to the previous settings. http://www.NewAir.com...
-
Page 11: Efficiency Booster
Self-diagnosis Function This machine is equipped with a self-diagnosis function. If there is an issue with the machine, the LCD will show an E1 or E2 error. Please contact NewAir if you see either of these errors. Remote Control All of the functions can be performed with the supplied remote control. -
Page 12: Draining The Unit
Repeat until the unit is emptied. Replace the rubber plug and tighten the drain knob firmly. Switch on the unit - the full water or compressor operating indicator should not be flashing. http://www.NewAir.com... -
Page 13: Cleaning & Maintenance
Should you prefer to use the appliance without having to empty the tank every so often, proceed as follows: Remove the drain knob and rubber plug and retain for future use. Connect the drain tube supplied to the water outlet as shown and locate the other end into a drain. -
Page 14: End Of Season Storage
The unit does not The unit is in direct Close any curtains or move produce sunlight. the unit to a more shaded adequate cooling. area. Too many windows or Close doors and windows. doors are open. http://www.NewAir.com... - Page 15 Problem Possible Causes Solution There is an additional Lower the set temperature. heat source in the room or there are too many people in the room. The filter is dusty or Clean the filter per dirty. instructions above. Air inlet or air outlet is Make sure there are no blocked.
-
Page 16: Limited Manufacturer's Warranty
When making a warranty claim, please have the original bill of purchase with purchase date available. Once confirmed that your appliance is eligible for warranty service, all repairs will be performed by a NewAir™ authorized repair facility. The purchaser will be responsible for any removal or transportation costs.


