Stihl FS110 Instruction Manual
Hide thumbs
Also See for FS110:
- Instruction manual (118 pages) ,
- Manual (120 pages) ,
- Instruction manual (100 pages)
Table of Contents
Advertisement
Available languages
Available languages
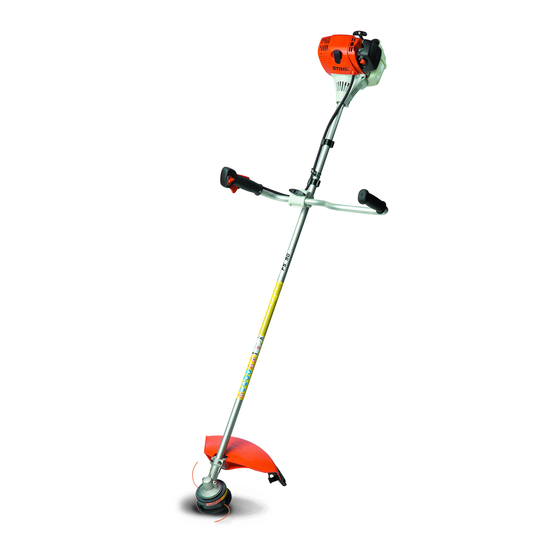
STIHL FS 110
{
Instruction Manual
Manual de instrucciones
WARNING
Read Instruction Manual thoroughly
before use and follow all safety
precautions – improper use can
cause serious or fatal injury.
ADVERTENCIA
Antes de usar la máquina lea y siga
todas las precauciones de
seguridad dadas en el manual de
instrucciones – el uso incorrecto
puede causar lesiones graves o
mortales.
Advertisement
Chapters
Table of Contents

Related Manuals for Stihl FS110


Summary of Contents for Stihl FS110
- Page 1 STIHL FS 110 Instruction Manual Manual de instrucciones WARNING Read Instruction Manual thoroughly before use and follow all safety precautions – improper use can cause serious or fatal injury. ADVERTENCIA Antes de usar la máquina lea y siga todas las precauciones de seguridad dadas en el manual de instrucciones –...
- Page 2 Instruction Manual 1 - 53 Manual de instrucciones 54 - 110...
-
Page 3: Table Of Contents
Fitting the Carrying Ring can go to www.stihlusa.com. Statement Mounting the Deflector Trademarks Contact your STIHL dealer or the STIHL Mounting the Cutting Attachment distributor for your area if you do not Fuel understand any of the instructions in this Fueling manual. -
Page 4: Guide To Using This Manual
STIHL dealer or the STIHL illustration. Example: Fuel tank for gasoline distributor for your area for assistance. Loosen the screw (1). -
Page 5: Safety Precautions And Working Techniques
Most of these safety precautions and FS models may be used as either a WARNING warnings apply to the use of all STIHL trimmer or a brushcutter – therefore, the The use of this machine may be trimmers / brushcutters. Different power tool is referred in this manual as a hazardous. - Page 6 All factors which contribute to WARNING involves whitefinger disease are not known, but cold weather, smoking and diseases or The ignition system of the STIHL unit 1. the operator physical conditions that affect blood produces an electromagnetic field of a 2. the power tool vessels and blood transport, as well as very low intensity.
- Page 7 STIHL for operate your power tool and metal blades. Heavy- use with the specific STIHL model are unless wearing goggles duty, nonslip gloves authorized. Although certain or properly fitted protec -...
- Page 8 See also the "Fueling" chapter in your vapor and fumes, remove the fuel filler Your STIHL power tool uses an oil- Instruction Manual for additional cap on your power tool carefully so as to gasoline mixture for fuel (see the information.
- Page 9 English Before Starting WARNING WARNING The cutting attachment must be properly WARNING To reduce the risk tightened and in safe operating of personal injury Always check your power tool for proper condition. Inspect for loose parts (nuts, to the operator condition and operation before starting, screws, etc.) and for cracked or from blade or line...
- Page 10 If you cannot set the correct idle speed, and allow the engine to slow down to Arrows on the deflector (A) and limit have your STIHL dealer check your idle. stop (B) (as seen from the underside) power tool and make proper...
- Page 11 English During Operation WARNING WARNING Holding and Controlling the Power Tool Never attempt to operate As soon as the engine is your power tool with one running, this product gen - hand. Loss of control of erates toxic exhaust the power tool resulting in fumes containing chemi - serious or fatal injury may cals, such as unburned...
- Page 12 If the blade or head continues throttle trigger is released attachment and property to loosen, see your STIHL dealer. Never (flywheel effect.) (e.g. parked vehicles, use a trimmer / brushcutter with a loose windows).
- Page 13 To reduce the risk of fire or burn mowing heads. STIHL recommends use of the nylon line injury, do not continue work with a heads for such jobs. In addition, be alert damaged or improperly mounted...
- Page 14 WARNING WARNING Do not use with mowing line longer than To reduce the risk of serious injury, Some STIHL power tools the intended length. With a properly never use wire or metal-reinforced line are equipped with a cata - mounted deflector, the built-in line-...
- Page 15 STIHL FixCut mowing head area) of a rotating blade The 4-tooth grass cutting blade is comes in contact with a Uses pre-cut lengths of nylon line.
- Page 16 When a trimmer / brushcutter with a circular saw blade is used to cut down small trees, STIHL recommends that the standard deflector be removed and FS 110, FS 110 R...
- Page 17 WARNING properly or if nonapproved replacement possible kickout (described above and parts were used, STIHL may deny The risk of kickout is highest when briefly again below). coverage. cutting in the darker shaded area. To...
- Page 18 English the spark plug terminal of the proper fire agency or forest service for the laws size. (Note: If the terminal has a or regulations relating to fire protection detachable SAE adapter nut, it must be requirements. securely attached.) A loose connection between the spark plug and the ignition WARNING wire connector in the boot may create...
-
Page 19: Approved Combinations Of Cutting Attachment, Deflector, Handle And Harness
English Approved Combinations of Cutting Attachment, Deflector, Handle and Harness Cutting Attachment Deflector, Limit Stop Handle Harness FS 110, FS 110 R... - Page 20 Cutting attachments attachments 8 to 10 17 Limit stop for circular saw blades Mowing heads Handles STIHL SuperCut 20-2 STIHL AutoCut C 25-2 18 Loop handle STIHL AutoCut 25-2 19 Loop handle with STIHL TrimCut 31-2 20 barrier bar STIHL FixCut 25-2...
-
Page 21: Approved Power Tool Attachments
English Interchangeable Approved Power Tool Mounting the Bike Handle attachment Attachments Soil cultivator The following STIHL interchangeable 1) 2) Edger Mounting Bike Handle with Swivelling attachments may be mounted on the Scrub cutter Handle Support basic machine: HL 0° Hedge trimmer HL 135°... - Page 22 English Pull out the wing screw – the Mounting the control handle washer (6) remains on the wing screw. Separate the clamp moldings – the springs (4 and 5) remain in the lower clamp. Securing the handlebar Place the handlebar (7) in the lower clamp (1) so that distance A is no Place the secured assembly on the more than 15 cm (6 in).
-
Page 23: Mounting The Loop Handle
English Swivelling the handlebar Mounting the Loop Handle Transport position Mounting Loop Handle with Barrier Bar Push the throttle cable (14) into the retainers (15). Adjusting the throttle cable Loosen the wing screw (3) and unscrew it until the handlebar (7) Check adjustment of throttle cable –... - Page 24 English Mounting the Loop Handle without Securing the Loop Handle Barrier Bar Place the clamp (3) in the loop handle (4) and position them both against the drive tube (5). The loop handle can be adjusted to suit Position the clamp (6) against the the height and reach of the operator and Place the clamp (3) in the loop drive tube.
-
Page 25: Adjusting The Throttle Cable
English Adjusting the Throttle Cable Fitting the Carrying Ring Mounting the Deflector A properly adjusted throttle cable is the The carrying ring comes standard with Mounting the Deflector precondition for correct operation in the the machine or is available as a special full throttle, starting throttle and idle accessory. -
Page 26: Mounting The Cutting Attachment
English Fitting the Skirt and Blade Mounting the Limit Stop Mounting the Cutting Attachment Placing power tool on the ground WARNING Always fit the limit stop (6) when you use a circular saw blade. Shut off the engine. Position the limit stop (6) on the Lay your power tool on its back so gearbox flange. - Page 27 English Blocking the Shaft Removing the Mounting Hardware The output shaft (2) must be blocked with the stop pin (6) or screwdriver (6) to mount or remove cutting tools. These parts come standard with the machine or are available as special accessories. Insert the stop pin (6) or screwdriver (6) in the hole (7) in the Depending on the cutting attachment, it...
- Page 28 English Fitting Mowing Head with Screw Mounting Metal Cutting Attachment WARNING Mounting Direction of rotation is indicated by an Keep the leaflet and packaging of the arrow on the inside of the deflector. metal cutting tool in a safe place. Keep the instruction leaflet for the mowing head in a safe place.
-
Page 29: Fuel
Use STIHL HP Ultra oil or ask your Block the shaft. dealer for an equivalent high quality oil The chemical composition of the fuel is... -
Page 30: Fueling
Remove the filler cap. with the fuel. Refueling Gasoline Oil (STIHL 50:1 or equiva - lent high-quality oils) Before fueling, clean the filler cap Take care not to spill fuel while fueling and the area around it to ensure that... -
Page 31: Fitting The Harness
English Full Harness Fitting the Harness Balancing the Machine The type and style of the Attaching the unit to the harness harness/shoulder strap depend on the market. The use of the shoulder strap is described in the chapter on "Approved Combinations of Cutting Attachment, Deflector, Handle and Harness". - Page 32 English Floating positions Detaching the unit from the harness Mowing tools (A) such as mowing heads, grass cutting blades and brush knives should just touch the ground. Loosen the screw (3). Balancing the brushcutter Press down the bar on the carabiner (1) and pull the carrying ring (2) out of the carabiner.
-
Page 33: Starting / Stopping The Engine
English Control handle on shaft Starting Starting / Stopping the Engine Press the throttle trigger lockout and throttle trigger in succession Operating elements Hold both triggers down Move the slide control to START Control handle on handlebar and hold it in position too Release the throttle trigger, slide STOP- START... - Page 34 English Starting Switching off the engine Push the slide control in the direction of the arrow at the stop sign h to STOP-0 At very low temperatures As soon as engine is running: Grab the starter grip with your right hand Blip the throttle trigger = disengage starting throttle position –...
-
Page 35: Transporting The Unit
English Crank the engine several times with Transporting the Unit the starter – to clear the combustion chamber Replace the spark plug – see "Spark Using a transport guard plug" Set the slide control to START The type of transport guard used Turn the choke knob to e –... - Page 36 English Unhook the retainer on the transport guard and swing outward If a grass cutting blade 250 is fitted: Fitting the transport guards for grass Fit the transport guard (2) to the cutting blades 250 and circular saw cutting attachment from below, blades ensuring that the stop is centered in the recess.
-
Page 37: Operating Instructions
English Operating Instructions Cleaning the Air Filter Engine Management Exhaust emissions are controlled by the During break-in period If there is a noticeable loss of engine design of the fundamental engine power parameters and components (e.g. carburation, ignition, timing and valve or A factory-new machine should not be port timing) without the addition of any run at high revs (full throttle off load) for... -
Page 38: Adjusting The Carburetor
English Adjusting the Carburetor Spark Arresting Screen in Muffler The carburetor of the machine has been The muffler is equipped with a spark adjusted for optimum performance and arresting screen. fuel efficiency in all operating states at If the engine is down on power, the factory. -
Page 39: Spark Plug
– use only spark plugs authorized by dirty air filter, – STIHL. Always press spark plug boot (1) snugly onto spark plug terminal (2) of the unfavorable running conditions, e.g. – proper size. (Note: If terminal has operating at part load. -
Page 40: Engine Running Behavior
(carbonization) by your environmental requirements. servicing dealer. Run the engine until the carburetor STIHL recommends that you have is dry – this helps prevent the servicing and repair work carried out carburetor diaphragms sticking Check the grease level regularly –... -
Page 41: Sharpening Metal Cutting Blades
Resharpen with a grinder or have balanced as necessary – STIHL the work done by a dealer – STIHL recommends a STIHL servicing recommends a STIHL servicing dealer. - Page 42 Replace blades as shown in the rotating mowing head above the PolyCut in place of the cutting blades. illustrated instructions. grass surface. STIHL DuroCut, STIHL FixCut, Mount the mowing head on the Tap it on the ground once – fresh STIHL PolyCut machine.
-
Page 43: Inspections And Maintenance By Dealer
English Inspections and Maintenance by Dealer Maintenance Work STIHL recommends that you have servicing and repair work carried out exclusively by an authorized STIHL servicing dealer. Fuel Pickup Body in Tank Check the pickup body in the fuel tank every year and have it replaced if necessary. -
Page 44: Maintenance And Care
English Maintenance and Care The following intervals apply to normal operating conditions only. If your daily work - ing time is longer or operating conditions are difficult (very dusty work area, etc.), shorten the specified intervals accordingly. Visual inspection (condition, leaks) Complete machine Clean Replace any damaged parts... - Page 45 Have replaced by servicing dealer Visual inspection Cutting attachment Replace Check tightness Metal cutting attachment Sharpen Check Gearbox lubrication Replenish Safety labels Replace STIHL recommends an authorized STIHL servicing dealer. Remove shroud - see "Spark Arresting Screen in Muffler" FS 110, FS 110 R...
-
Page 46: Main Parts
English Main Parts Fuel Filler Cap Carburetor Adjusting Screws Starter Grip Spark Plug Boot Muffler with Spark Arresting Screen Bike Handle Throttle Trigger Slide Control Throttle Trigger Lockout 10 Throttle Cable Retainer 11 Carrying Ring 12 Manual Fuel Pump 13 Choke Knob 14 Air Filter Cover 15 Fuel Tank 16 Machine Support... - Page 47 English Definitions 12 Manual Fuel Pump Provides additional fuel feed for a cold start. Fuel Filler Cap 13 Choke Knob For closing the fuel tank. Eases engine starting by enriching Carburetor Adjusting Screws mixture. For tuning the carburetor. 14 Air Filter Cover Starter Grip Encloses and protects the air filter The grip of the pull starter, for...
-
Page 48: Specifications
Skirt Engine The skirt at the bottom of the deflector must be utilized as described in the chapter "Mounting STIHL single cylinder four-stroke engine the Deflector". with mixture lubrication Metal Mowing Tool The cutting attachment, i. e. blade, made from metal for different purposes. -
Page 49: Maintenance And Repairs
1800 mm (71 in) Engine power to 1.05 kW (1.4 bhp) the maintenance operations described ISO 8893: at 7,000 rpm in this manual. STIHL recommends that Features Idle speed: 2,800 rpm other repair work be performed only by Cut-off speed authorized STIHL servicing dealers. -
Page 50: Disposal
STIHL Incorporated 1997 and later model year small off-road recommends that you retain all receipts STIHL products must not be thrown in equipment engines must be designed, covering maintenance on your small off- the garbage can. Take the product,... - Page 51 Coverage by STIHL Incorporated machine is tested as non-defective, Injection Valve (if applicable) – STIHL Incorporated warrants to the STIHL Incorporated will charge you for ultimate purchaser and each Injection Pump (if applicable) the cost of the emission test. Mechanical –...
-
Page 52: Stihl Incorporated California Exhaust And Evaporative Emissions Control Warranty Statement
You are responsible for presenting your connectors or other emission-related small off-road equipment engine to a assemblies. STIHL servicing dealer as soon as the Where a warrantable condition exists, problem exists. The warranty repairs STIHL Incorporated will repair your should be completed in a reasonable small off-road equipment engine at no amount of time, not to exceed 30 days. - Page 53 BY STIHL INCORPORATED, see defective, the part will be replaced by above. A statement in such written Warranty Work STIHL Incorporated at no cost to the instructions to the effect of "repair or owner. STIHL Incorporated shall remedy replace as necessary" will not...
-
Page 54: Trademarks
Fuel Cap, Fuel Line, Fuel Line Fittings, Clamps, Fasteners. Where to make a Claim for Warranty Service Bring the STIHL product to any authorized STIHL servicing dealer and present the signed STIHL product registration card, or the print-out of the electronic product registration. - Page 55 ElastoStart ™ Any unauthorized use of these Ematic ™ trademarks without the express written FixCut ™ consent of ANDREAS STIHL AG & Co. KG, HT Plus ™ Waiblingen is strictly prohibited. IntelliCarb ™ Master Control Lever ™ Micro ™ Pro Mark ™...
- Page 56 Declaración de garantía de STIHL Comuníquese con su representante de Incorporated sobre el control de Montaje del accesorio de corte STIHL o el distribuidor de STIHL para su emisiones de gases de escape y Combustible zona si no se entiende alguna de las emisiones por evaporación para el...
-
Page 57: Acerca De Este Manual De Instrucciones
La filosofía de STIHL es mejorar maneras: continuamente todos sus productos. Según el modelo, los pictogramas Se usa un punto para denotar un Como resultado de ello, periódicamente... -
Page 58: Medidas De Seguridad Y Técnicas De Manejo
FS. en la misma. La palabra "orilladora" se Pida a su concesionario STIHL que le usa para identificar una unidad FS ADVERTENCIA enseñe el manejo de la herramienta equipada con un cabezal de hilo de nilón No debe usarse para ningún otro... - Page 59 Use guantes y mantenga las manos – utilizar esta máquina. uso de todas las orilladoras / cortadoras abrigadas. de matorrales de STIHL. Los distintos Mantenga el sistema AV en buen – modelos pueden contar con piezas y ADVERTENCIA estado. Una herramienta controles diferentes.
- Page 60 Siempre use guantes El sistema de encendido de la máquina tiene puestas gafas o gruesos (por ejemplo, STIHL produce un campo anteojos de seguridad fabricados de cuero u electromagnético de intensidad muy bien ajustados con una otro material resistente al baja.
- Page 61 STIHL. Si bien es posible conectar a la y el accesorio de corte detrás de usted. herramienta motorizada de STIHL ciertos accesorios no autorizados, su ADVERTENCIA uso puede ser, en la práctica,...
- Page 62 / EE.UU Combustible ADVERTENCIA ADVERTENCIA La herramienta motorizada STIHL utiliza Cargue de combustible su herramienta Compruebe que no exis - una mezcla de aceite-gasolina como motorizada en lugares al aire libre bien ten fugas de combustible combustible (vea el capítulo ventilados.
- Page 63 español / EE.UU Consulte también el capítulo ADVERTENCIA ADVERTENCIA "Combustible" del Manual de instrucciones para obtener información No instale ningún accesorio de corte en Para reducir el adicional. una máquina sin que todas las piezas riesgo de sufrir requeridas estén correctamente lesiones corpora - Antes de arrancar instaladas.
- Page 64 ADVERTENCIA control correcto y menos fatiga de concesionario STIHL que revise la trabajo. Para prepararse para herramienta motorizada y haga los Su herramienta motorizada es una emergencias, practique la liberación ajustes o reparaciones máquina que debe ser manejada por...
- Page 65 español / EE.UU Durante el funcionamiento poco seguro. Nunca mantenga el ADVERTENCIA accesorio de corte a una altura más Sujeción y control de la herramienta arriba de la cintura. Nunca intente manejar la motorizada herramienta motorizada Condiciones de trabajo con una sola mano. La Maneje y arranque su herramienta pérdida de control de la motorizada solamente al aire libre en un...
- Page 66 español / EE.UU Instrucciones de manejo distancia mínima de 15 metros, esto no ADVERTENCIA elimina el peligro potencial. Los trabajadores que deben quedar en la Si la vegetación que se está cortando o ADVERTENCIA zona prohibida también deben usar la tierra en el lugar está recubierta de No maneje la herramienta motorizada gafas o protección ocular.
- Page 67 ADVERTENCIA herramienta motorizada o daños a la el accesorio y revise la cuchilla o el cuchilla. Para ese tipo de trabajo, STIHL Para reducir el riesgo de la rotación cabezal en busca de grietas, desgaste y recomienda el uso de cabezas con hilo inesperada del accesorio de corte y la daños.
- Page 68 El silenciador y otros componentes del Algunas herramientas servicio STIHL. Para ciertas motor (por ej., aletas del cilindro, bujía) motorizadas STIHL están aplicaciones, las leyes o los se calientan durante el funcionamiento y...
- Page 69 Uso de las cabezas segadoras Sin embargo, la cabeza PolyCut de No use con un hilo de segado más largo STIHL con cuchilla de polímero produce que el deseado. Con un deflector un mejor corte si no hay plantas a lo debidamente instalado, la cuchilla largo de la orilla del césped.
- Page 70 español / EE.UU El riesgo de expulsión (disparo de la las precauciones a la hora de cortar con la zona sombreada de cualquier cuchilla cuchilla) existe con todas las cuchillas rígida. rígidas Uso de la cuchilla de cortar pasto No siga trabajando con la cabeza segadora si le faltan las piezas moldeadas (1) elevadas en la base o si las mismas están desgastadas - vea la...
- Page 71 español / EE.UU Uso de la cuchilla para matorrales Uso de la sierra circular ADVERTENCIA Cuando se instala la cuchilla para El uso incorrecto de una cuchilla para matorrales en la herramienta matorrales puede causar agrietaciones, motorizada, es adecuada para cortar picaduras o roturas.
- Page 72 El uso recomienda aplicar la sierra circular por de la cuchilla, utilice una sierra circular de piezas no fabricadas por STIHL el lado derecho del árbol, usando la solamente en una orilladora / cortadora puede causar lesiones graves o...
- Page 73 únicamente por el concesionario de herramienta motorizada si le falta el excepto los tornillos de ajuste del servicio de STIHL. chispero o está dañado. Recuerde que carburador, después de cada uso. el riesgo de incendios de matorrales o Use guantes para manipular o reparar No limpie la máquina con una lavadora...
-
Page 74: Combinaciones Aprobadas De Accesorio De Corte, Deflector, Mango Y Arnés
español / EE.UU Combinaciones aprobadas de accesorio de corte, deflector, mango y arnés Accesorio de corte Deflector, límite de tope Mango Arnés FS 110, FS 110 R... - Page 75 Cabezas segadoras máquina está equipada con un manillar 17 Tope limitador para sierras tipo bicicleta. STIHL SuperCut 20-2 circulares STIHL AutoCut C 25-2 No utilice cuchillas de plástico rígidas con esta máquina. STIHL AutoCut 25-2 Mangos STIHL TrimCut 31-2 STIHL FixCut 25-2 18 Mango tórico...
-
Page 76: Accesorios Aprobados Para Herramientas Motorizadas
Cultivadora Los siguientes accesorios 1) 2) Cortabordes Montaje del manillar tipo bicicleta con intercambiables de STIHL pueden Cortadora de soporte de mango giratorio instalarse en la máquina de base: matorrales HL 0° Cortasetos La máquina viene con el soporte HL 135°... - Page 77 español / EE.UU Quite el tornillo mariposa – la Montaje del mango de control arandela (6) queda en el tornillo mariposa. Separe las abrazaderas – los resortes (4, 5) quedan en la abrazadera inferior. Fijación del manillar Coloque el manillar (7) en la abrazadera inferior (1) de manera Coloque el conjunto armado en el que la distancia A no mida más de...
-
Page 78: Montaje Del Mango Tórico
español / EE.UU Giro del manillar Montaje del mango tórico Posición de transporte Montaje del mango tórico con barra de defensa Inserte el cable del acelerador (14) en los retenedores (15). Ajuste del cable del acelerador Suelte el tornillo mariposa (3) y destorníllelo hasta que el Revise el ajuste del cable del manillar (7) pueda girarse en... - Page 79 español / EE.UU Montaje del mango tórico sin la barra de Fijación del mango tórico defensa Coloque la abrazadera (3) en el mango tórico (4) y ponga los dos en posición contra el tubo de El mango tórico puede ajustarse de mando (5).
-
Page 80: Ajuste Del Cable Del Acelerador
español / EE.UU Ajuste del cable del Montaje de la argolla de Montaje de la barra de acelerador transporte defensa Un cable del acelerador correctamente La argolla de transporte se suministra Montaje del deflector ajustado es necesario para el como equipo estándar o puede ser funcionamiento correcto en las disponible como un accesorio especial. -
Page 81: Montaje Del Accesorio De Corte
español / EE.UU Instalación de la faldilla y cuchilla Montaje del tope limitador Montaje del accesorio de corte Colocación de la herramienta motorizada en el suelo ADVERTENCIA Siempre instale el tope limitador (6) cuando se usa una sierra circular. Coloque el tope limitador (6) en la Apague el motor. - Page 82 español / EE.UU Si la tornillería de montaje no se embala Inserte el pasador de tope (6) o el destornillador (6) en el agujero (7) con la máquina hasta fondo en la caja de engranajes y aplique algo de presión. Gire el eje, la tuerca o el accesorio de corte hasta que el pasador de tope se deslice en su lugar y...
- Page 83 español / EE.UU Montaje del accesorio de corte Verifique el sentido de rotación del INDICACIÓN accesorio de corte Quite la herramienta usada para bloquear el eje. ADVERTENCIA Utilice el deflector apropiado para la Retiro de la cabeza segadora máquina – vea "Montaje del deflector". Bloquee el eje.
-
Page 84: Combustible
Este motor está certificado para funcionar con una mezcla de 50 a 1 de Retiro del accesorio de corte metálico gasolina sin plomo y aceite STIHL para motores de dos tiempos. Su motor requiere una mezcla de ADVERTENCIA... - Page 85 Mezcle una cantidad suficiente de Utilice aceite STIHL HP Ultra o consulte combustible para trabajar unos pocos con su concesionario para obtener un días, no lo guarde por más de 30 días.
-
Page 86: Llenado De Combustible
español / EE.UU Apertura de la tapa de llenado Llenado de combustible Uso de la correa para hombro El tipo y el estilo de arnés/correa para hombro dependen del lugar de venta. El uso de la correa para el hombro se describe en el capítulo "Combinaciones Preparaciones aprobadas de accesorio de corte,... -
Page 87: Equilibrio De La Máquina
español / EE.UU Arnés completo Equilibrio de la máquina Fijación de la unidad al arnés Suelte el tornillo (3). Equilibrio de la cortadora de matorrales Colóquese el arnés (1) y cierre la placa de bloqueo (3). La unidad se equilibra de forma Ajuste el largo de la correa –... -
Page 88: Arranque / Parada Del Motor
español / EE.UU Posiciones de flotación Desconexión de la unidad del arnés Arranque / parada del motor Elementos funcionales Mango de control en manillar STOP- START Las herramientas de segado (A), tales como las cabezas segadoras, cuchillas para cortar pasto y las cuchillas para matorrales apenas deben tocar el suelo. - Page 89 español / EE.UU Mango de control en varilla Arranque Oprima el bulbo (9) de la bomba de combustible por lo menos 5 veces, aunque el bulbo esté lleno de Pulse sucesivamente el bloqueo del combustible gatillo de aceleración y el gatillo de aceleración Arranque Mantenga los dos gatillos oprimidos...
- Page 90 español / EE.UU aceleración ni su bloqueo al Cuando el motor se encuentre en Si el motor no arranca presionarla – su pulgar debe estar marcha debajo de la carcasa del ventilador. Oprima el gatillo de aceleración Perilla de estrangulador momentáneamente;...
-
Page 91: Traslado De La Unidad
español / EE.UU Ajuste del cable del acelerador Traslado de la unidad Revise el ajuste del cable del acelerador – vea "Ajuste del cable del acelerador" Uso de un protector de transporte Si el tanque ha sido completamente vaciado El tipo de protector de transporte que se utilice depende del accesorio de corte Después de llenar el depósito, de metal provisto con la máquina. - Page 92 español / EE.UU Desenganche el retenedor del protector de transporte y gírelo hacia fuera Si tiene montada una cuchilla para cortar pasto 250: Montaje del protector de transporte para Monte el protector de transporte (2) cuchillas para cortar pasto 250 y discos en el accesorio de corte por su parte de sierra inferior, asegurando que el tope...
-
Page 93: Instrucciones Para El Uso
español / EE.UU intervalos de almacenamiento por Instrucciones para el uso Limpieza del filtro de aire tiempo prolongado – vea "Almacenamiento de la máquina". Durante el período de rodaje Si se nota una pérdida considerable de la potencia del motor Una máquina nueva de fábrica no debe hacerse funcionar a velocidad alta (aceleración máxima sin carga) por el... -
Page 94: Gestión Del Motor
español / EE.UU Gestión del motor Ajuste del carburador ADVERTENCIA Si el accesorio de corte sigue girando con el motor en marcha en vacío Las emisiones de gases de escape son El carburador de la máquina ha sido después de llevarse a cabo el ajuste, controladas por el diseño de parámetros ajustado en la fábrica para ofrecer el pida que un concesionario de servicio... -
Page 95: Chispero En El Silenciador
español / EE.UU Chispero en el silenciador Bujía El silenciador tiene un chispero. Si el motor pierde potencia, es difícil arrancarlo o funciona de modo irregular Si el motor pierde potencia, revise el a ralentí, revise la bujía primero. chispero del silenciador. Instale una bujía nueva después de Espere hasta que el silenciador se aprox. -
Page 96: Funcionamiento Del Motor
Corrija los problemas que hayan Para reducir el riesgo de incendio y de causado la contaminación de la bujía: quemaduras, utilice solamente las bujías autorizadas por STIHL. Siempre demasiado aceite en la mezcla de – empuje el casquillo (1) de la bujía combustible, firmemente en el borne (2) del tamaño... -
Page 97: Lubricación De La Caja De Engranajes
Vuelva a afilar con una Deseche el combustible de acuerdo rectificadora o pida que el trabajo se con los requerimientos locales de lo haga el concesionario – STIHL protección del medio ambiente. recomienda acudir a un concesionario de STIHL. -
Page 98: Mantenimiento De La Cabeza Segadora
Un pedazo de hilo nuevo avanza vuelva a ajustar el equilibrio según automáticamente si el hilo todavía tiene sea necesario – STIHL recomienda una longitud mínima de 6 cm acudir a un concesionario STIHL (2 1/2 pulg). La cuchilla en el deflector para servicio. -
Page 99: Inspección Y Mantenimiento Por El Concesionario
Revise siempre la cabeza segadora en afuera. busca de desgaste antes de instalar las cuchillas de corte nuevas. STIHL recomienda que un Repita el procedimiento anterior según concesionario STIHL autorizado efectúe sea necesario, hasta que ambos hilos los trabajos de mantenimiento y... -
Page 100: Información Para Mantenimiento
español / EE.UU Información para mantenimiento Los intervalos que se indican a continuación corresponden únicamente a condicio - nes normales de funcionamiento. Si la jornada diaria es más prolongada que lo normal, o bien si las condiciones son extremas (zonas con demasiado polvo, etc.), acorte apropiadamente los intervalos indicados. - Page 101 Accesorio de corte metálico Afilar Revisar Lubricación de caja de engranajes Restituir Etiquetas de seguridad Reemplazar STIHL recomienda acudir a un concesionario STIHL autorizado para servicio. Retiro de la envuelta - vea "Chispero en silenciador" FS 110, FS 110 R...
-
Page 102: Componentes Importantes
español / EE.UU Componentes importantes Tapa de llenado de combustible Tornillos de ajuste del carburador Mango de arranque Casquillo de bujía Silenciador con chispero Manillar tipo bicicleta Gatillo de aceleración Control deslizante Bloqueo de gatillo de aceleración 10 Retenedor del cable del acelerador 11 Argolla de transporte 12 Bomba de combustible manual 13 Perilla de estrangulador... - Page 103 español / EE.UU Definiciones 10 Retenedor del cable del acelerador Sujeta el cable del acelerador al tubo de mando. Tapa de llenado de combustible 11 Argolla de transporte Para tapar el depósito de combustible. Conecta la orilladora/cortadora de matorrales al arnés. Tornillos de ajuste del carburador 12 Bomba de combustible manual Para afinar el carburador.
-
Page 104: Especificaciones
La faldilla en la parte inferior del deflector debe usarse de la manera Motor descrita en el capítulo "Montaje del deflector". Motor STIHL de un cilindro, cuatro Herramienta segadora metálica tiempos, lubricado por una mezcla de El accesorio de corte, por ejemplo la gasolina con aceite cuchilla, hecho de metal para varios propósitos. -
Page 105: Información De Reparación
Los repuestos genuinos STIHL se Chispero en silenciador Válvula de escape: 0,10 mm identifican por medio del número de (0,004 pulg) pieza STIHL, el logotipo { y el símbolo de piezas STIHL K. El símbolo aparece solo en algunas piezas Sistema de encendido pequeñas. -
Page 106: Desecho
Incorporated se complacen en explicarle la garantía del sistema de Cobertura de garantía del fabricante No se debe botar los aparatos STIHL en control de emisiones instalado en el el basurero. Lleve el producto, los En los EE.UU., los motores pequeños motor de su equipo. - Page 107 STIHL Incorporated sin repuesto aprobada por el fabricante o carretera a un centro de servicio STIHL costo alguno para el propietario. equivalente en las piezas relacionadas tan pronto surja el problema. Las...
-
Page 108: Declaración De Garantía De Stihl
Carcasa del acelerador (si reparaciones mal hechas o El Consejo de Recursos del Aire del – corresponde) sustituciones contrarias a las Estado de California (CARB) y STIHL especificaciones de STIHL Incorporated se complacen en Cilindro – Incorporated que afecten explicarle la Garantía del sistema de... - Page 109 STIHL tan pronto surja el problema. Las defectuoso, el mismo será sustituido por Responsabilidades del fabricante reparaciones bajo garantía deben STIHL Incorporated sin costo alguno relativas a la garantía...
- Page 110 (4) más normalmente abarcado por la garantía componentes relacionados con el abajo. Un componente de este tipo se puede excluir de la garantía si STIHL sistema de control de emisiones, y la reparado o sustituido bajo la Incorporated demuestra el maltrato,...
-
Page 111: Marcas Comerciales
/ EE.UU ® del producto de STIHL, y que tal OILOMATIC Marcas comerciales maltrato, negligencia, o mantenimiento ® Rock Boss incorrecto era la causa directa de la ® STIHL Cutquik necesidad de reparación o sustitución Marcas registradas de STIHL del componente. - Page 112 TapAction ™ TrimCut ™ Esta lista de marcas comerciales está sujeta a cambios. Queda terminantemente prohibido todo uso de estas marcas comerciales sin el consentimiento expreso por escrito de ANDREAS STIHL AG & Co. KG, Waiblingen. FS 110, FS 110 R...
- Page 113 español / EE.UU FS 110, FS 110 R...
- Page 114 español / EE.UU FS 110, FS 110 R...
- Page 116 California son considerados como causantes de of California to cause cancer, birth cáncer, defectos de nacimiento u otros efectos defects or other reproductive harm. nocivos para los órganos de la reproducción. 0458-254-8621-D englisch / spanisch USA englisch / spanisch USA www.stihl.com *04582548621D* 0458-254-8621-D...