Lowrance iWAY 500C Operation Instructions Manual
Turn-by-turn mapping gps and mp3 player
Hide thumbs
Also See for Lowrance iWAY 500C:
- Quick start manual (8 pages) ,
- Additional instructions (8 pages) ,
- Mounting instructions (6 pages)
Table of Contents
Advertisement
Advertisement
Table of Contents

Related Manuals for Lowrance Lowrance iWAY 500C


Summary of Contents for Lowrance Lowrance iWAY 500C
-
Page 1: Operation Instructions
Pub. 988-0148-542 Turn-by-Turn Mapping GPS and MP3 Player Operation Instructions... - Page 2 Copyright © 2005 Lowrance Electronics, Inc. No part of this manual may be copied, reproduced, republished, trans- mitted or distributed for any purpose, without prior written consent of Lowrance. Any unauthorized commercial distribution of this manual is strictly prohibited. Lowrance is a registered trademark and iWAY...
-
Page 3: Table Of Contents
Preface: Introducing GPS ... 1 How Lowrance GPS and the GPS System Work ... 2 Section 1: Installation & Accessories... 3 Power Cable ... 3 Connecting the iWAY to Your Car's Stereo... 4 Resolving Audio Distortion in iWAY Audio Output... 6 USB-to-PC Cable Connection... - Page 4 Section 3: Music Mode Operation ... 29 Keyboard ... 29 Using the Touch Screen... 30 The Music Mode Display and On-Screen Commands ... 30 Using the Play Control Buttons ... 31 Using the Now Playing Box to Launch Music Browser ... 32 Using the Visualization Area to Change Effects ...
- Page 5 Using the iWAY's Virtual Keyboard ... 50 Find Fuel, Lodging, Restaurants, and other POIs ... 51 Using the "To Exit" and "From Exit" Distances ... 52 Using the Name Filter ... 52 Navigating to the Selected POI... 53 Recent Finds ... 54 Find Address ...
- Page 6 WARNING! A CAREFUL NAVIGATOR NEVER RELIES ON ONLY ONE METHOD TO OBTAIN POSITION INFORMATION. CAUTION When showing turn-by-turn navigation data, a GPS unit will show the shortest, most direct route to the destination. There are times when it may give directions, such as a U-turn, that may be prohibited in some locations.
-
Page 7: Preface: Introducing Gps
Preface: Introducing GPS And, how this manual can get you out on the road, fast! Welcome to the exciting world of turn-by-turn GPS navigation! We know you're anxious to begin finding your way, but we have a favor to ask. Be- ... -
Page 8: How Lowrance Gps And The Gps System Work
How Lowrance GPS and the GPS System Work You'll navigate a little easier if you understand the basics of how the iWAY 500 scans the sky to tell you where you are and where you're going. (If you already understand GPS receivers and the GPS system, skip on ahead to Section 1, Installation &... -
Page 9: Section 1: Installation & Accessories
Section 1: Installation & Accessories This section describes the various accessories and cables that came with your iWAY, and exactly how to use them. Some of the most impor- tant information in this section is how to connect the iWAY to your car's stereo, and how to use the USB-to-PC cable to copy your music onto the iWAY. -
Page 10: Connecting The Iway To Your Car's Stereo
Attach power cable to iWAY. You can control the speaker's volume either by adjusting the level on the control on the side of the speaker (shown in an earlier image), or by adjusting the iWAY's volume in the Main Menu. We'll explain how to do that in the next section of this manual. - Page 11 The direct cable connection, shown in the preceding and following im- ages, is a Y-shaped cable that includes the following: a line-in connector that plugs into your stereo; a power plug that attaches to the power socket on the back of your iWAY; and red and black wires that connect directly to your car's power supply.
-
Page 12: Resolving Audio Distortion In Iway Audio Output
high-pitched squeal or the sound is otherwise distorted, a ground loop isolator can eliminate the problem. These are available at many electronics stores. For example, Radio Shack tive isolator, catalog number 270-054. This or other ground loop isolators may require additional cable adapters to connect with the iWAY and your radio. -
Page 13: Usb-To-Pc Cable Connection
2. Try reducing the iWAY's output level. This step will resolve the issue if you're overloading the input to your stereo or your FM modula- tor. To reduce the iWAY's output level, pressing and hold the key until the Sounds menu appears. Notice that there are independent Voice Volume and Music Volume controls. - Page 14 1. Right-click the iWAY drive letter. (This can be found by first double- clicking the "My Computer" icon on the Windows desktop.) 2. If the file is still copying (or another file operation is under way), you will see the standard Windows hourglass symbol. This indicates the unit's hard drive is still active.
-
Page 15: R-A-M Mounting Systems
R-A-M Mounting Systems Several R-A-M mounting brackets are available for your iWAY. There are permanent mounts and temporary mounts suitable for virtually any boat, aircraft or other vehicle, even motorcycle handlebars. Two R-A-M mounting systems for your unit. One model is a suction cup base that attaches to any smooth surface. -
Page 16: Moving On: Iway Operation
A special lint-free, microfiber towel is included for cleaning the unit’s screen. The towel is highly effective in clearing away smudges and fin- ger prints. Just wipe the screen with the dry towel — it's not necessary to moisten the towel with water. If you lose the towel or wear it out, you can replace it with a similar microfiber cloth. -
Page 17: Section 2: Mapping Mode Operation
Mapping Mode Operation This section addresses the unit's Mapping Mode operation. Mapping Mode includes all navigation features, from finding the nearest restau- rant to plotting a road trip across the country. If you would prefer to start out using the built-in music player, skip ahead to Sec. 3, Music Mode Operation. -
Page 18: Using The Touch Screen
2. MAP/MUSIC – Press this key to toggle between the two page screens. Each page represents one of the unit's major operation modes. See Sec. 3 for full details on the Music Mode. 3. MENU – Press this key to show the menus and submenus, which allow you to select a command or adjust a feature. -
Page 19: The Map Mode Display And On-Screen Commands
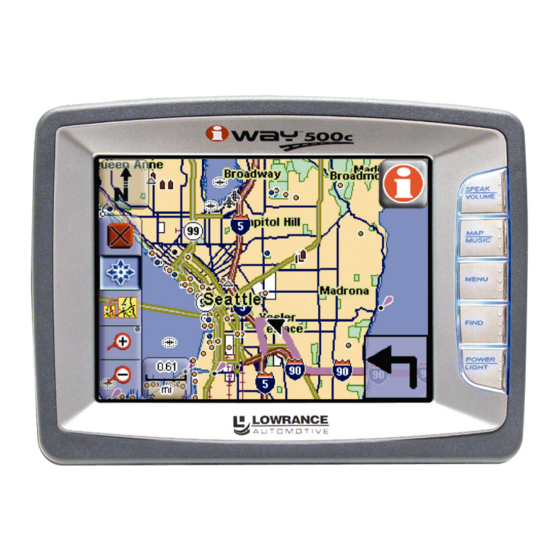
The Map Mode Display and On-Screen Commands The Map Mode screen shows your current position and the path of your cur- rent route from a "bird's-eye" view. By default, the iWAY rotates the map so that the direction you're currently traveling stays at the top of the screen. NOTE: This can be changed, if you'd prefer to keep north at the top of the screen. -
Page 20: Using The Map Display Toolbar
When tracking your current position, the toolbar buttons on the left of the page are hidden, so that you can see as much of the menu as possi- ble. You can change what's visible on the map display at any time, though, simply by touching the screen. -
Page 21: Using The Map Orientation Button
Note that either the Move Map or the Zoom Box button is always se- lected. When you want to drag the map, make sure you have Move Map selected and not Zoom Box, otherwise you'll quickly zoom in on a very small area and have to zoom out a lot before you can pan. -
Page 22: Using The Location Information Button
top of the screen. 3D renders the path ahead from a position above and behind your current position, so that the display on the map more closely matches what you'll actually see through your windshield. Prac- tice some with each mode, and find out which one is right for you. Using the Location Information Button There's one more button that appears whenever the cursor is up. -
Page 23: Selecting A Contact
Book" will appear on the Location Information Screen. Choose from the Location Information Screen to save a contact at DDRESS the selected location. NOTE: You can also create a contact at your current position. If your map cursor is active, choose and the toolbar and cursor will disappear. -
Page 24: Editing A Contact
formation Screen will appear, which includes detailed information about the contact as well as buttons to begin navigating to the contact (Go To), to show it on the map, to edit its name and display informa- tion, or to delete it from memory. Editing a Contact You can edit a contact's name, address, phone number or symbol by selecting it on the map and pushing the... -
Page 25: Map Mode Practice Run
Start with the iWAY installed in your car. As you practice, try navigat- ing to a location at least a few blocks away. You should start out navi- gating to a destination you're already familiar with. Don't be too sur- prised if iWAY suggests a different route than you would take. -
Page 26: The Map Menu
The Map Menu Any time you're using the iWAY in Map Mode you can press MENU open a special Map Menu containing several settings and commands relating to Map Mode operation. You can use these settings to change the information iWAY provides you, as well as the way it generates that information. -
Page 27: Turn Preview (On/Off)
The Directions List for a generated route. You can look up and down the list by pressing and dragging the blue slider bar to the right. You can select any individual instruction on-screen for more detailed information. This screen is called a Turn Preview. Turn Preview (On/Off) A Turn Preview is a special screen designed to prepare you for upcom- ing turns. -
Page 28: Overlay Data Setup
direction of the turn (in this case, straight ahead), and the total dis- tance from the turn to the end of the route. If you want the iWAY to automatically show you Turn Previews when- ever you're navigating, from the Map Menu choose to tog- REVIEW gle the option "On."... -
Page 29: Route Via Waypoints
Route Via Waypoints Although the iWAY is designed to generate your route from your start location all the way to your destination, sometimes you’ll want a little bit of control over the path it makes. The Route Via Waypoints menu allows you to add intermediate locations along your route. -
Page 30: Sort
on your road trip (maybe Albuquerque, Las Vegas, Denver), in the or- der you want to visit them. Once you’ve got all your major stops en- tered, in order, have the iWAY start navigating. It will give you direc- tions to your friend's house, so go pick him up, and then head for the road. -
Page 31: Avoid Cross-Traffic Turns
Use the Routing Options menu to control how iWAY generates routes. When generating a route, the iWAY is able to analyze certain types of roads or turns and adjust their value to either prefer or avoid them. Preferred road types will occur more often in your routes – the iWAY will deliberately try to take those types of roads. -
Page 32: Prefer/Avoid Interstates
Of course, the convenience of toll roads comes at a price. If you'd rather save some of the cost of travelling toll roads, consider setting the iWAY to generally Avoid toll roads (press and drag the slider to the OADS right). -
Page 33: Categories Drawn
Categories Drawn The Categories Drawn command lets you choose how much of the map- ping detail available in our database you want shown on the screen. This information includes contacts, Points of Interest, cities, highways, etc. If you draw too much detail, your screen can feel cluttered. If you don't draw enough, you're not getting the most value out of your mapping GPS. - Page 34 Notes...
-
Page 35: Section 3: Music Mode Operation
Section 3: Music Mode Operation This section addresses the unit's Music Mode operation. Music Mode is designed as a powerful but simple interface for playing back your music collection while navigating. If you'd rather skip ahead, you can look at Sec. -
Page 36: Using The Touch Screen
backlight settings and turn off the backlight. Turn off the unit by pressing and holding the key for 3 seconds. POWER Using the Touch Screen At the beginning of Sec. 2 we gave detailed instructions on how to in- teract with the iWAY's touch screen. If you skipped Sec. 2, you might want to turn back to the heading "Using the Touch Screen"... -
Page 37: Using The Play Control Buttons
Music Mode always runs using a "play list," even if this consists of a single song. You can copy pre-made play list files from your PC to your iWAY and play the songs in these play lists by selecting them from the song browser. -
Page 38: Using The Now Playing Box To Launch Music Browser
Pause will stop the song currently playing but save its position (and its position in the current play list). When you pause a song, the Pause button is replaced by a Play button. Stop cancels the current song playing. Volume Slider adjusts the playback volume. Press and drag the blue button to the left or right to get the desired volume. -
Page 39: Music Mode Practice Run
Music Mode Practice Run Start at your computer. You should already have some MP3 or Ogg Vor- bis music files available. If you need help ripping your CDs to these for- mats, consult the documentation for the CD ripper software. 1. -
Page 40: The Music Menu
The Music Menu Any time you're using the iWAY in Music Mode you can press MENU open a special Music Menu containing several settings and commands relating to Music Mode operation. You can use these settings to change the way iWAY plays back music. The iWAY works great right out of the box, but as you become more familiar with the unit and what it can do, you'll eventually want to begin tweaking some of these settings. -
Page 41: Copying Music To Your Iway
Use the Browse Music Files screen to choose which songs to play next. From the music browser you can choose individual songs, play list files, or subfolders to play. Choose selected folder and its subfolders. Copying Music to Your iWAY Of course, to use your iWAY's Music Mode, you'll need to get some mu- sic onto the unit. -
Page 42: Visualization Effects - Waveform/Spectrum Analyzer
Visualization Effects – Waveform/Spectrum Analyzer The Visualization Area takes up the center of the Music Mode display and provides either a Waveform Analyzer or Spectrum Analyzer effect in time with the music that's playing. The visualization effects are controlled by a toggle button in the Music Menu. -
Page 43: Using The Find Button
Use the Equalizer to precisely control iWAY's audio playback. Significantly increasing any of the Equalizer levels may cause audio distortion. If you're having problems with audio distortion, decreasing level will probably resolve them. REAMP Using the Find Button In Music Mode, the Find button launches a special Audio Search menu. To find a particular audio file by its filename, press and then FIND... - Page 44 Notes...
-
Page 45: Section 4: Main Menu Options
Section 4: Main Menu Options The iWAY has a Main Menu containing a handful of options and menus designed to let you customize the operation of your iWAY. To access the Main Menu, from either operation mode, press and then choose MENU from the options on-screen. -
Page 46: Skin Selection
Skin Selection Skin Selection allows you to change the visual appearance of the entire iWAY interface. We provide a handful of skins with the unit, and very advanced users can even generate their own and add them directly to the unit. -
Page 47: Transparency
To increase your screen's brightness, press and drag the button on the slider bar to the right. To decrease it, press and drag the button to the left. Transparency The Transparency Slider controls the transparency of icons and other Overlays drawn over the background map, such as the Toolbar, and any navigation instruction boxes. -
Page 48: Trip Calculator
Press each of the targets in turn. After the third, the screen should be calibrated. The calibration screen will disappear, returning you to the Screen Setup Menu. You may want to use a stylus for more accurate calibration (or even the plunger of a ballpoint pen) – if you do, take ex- tra care not to scratch the touch screen. -
Page 49: Calculated Data
time in snack stops along the way or the idle time spent in a traffic jam. If you're interested in complete details for this trip, set your threshold low (0 mph will monitor conditions all the time). If you'd prefer a more accurate average measure, raise the Threshold above idle speed. -
Page 50: Current Position Lock
The GPS Status Screen contains several graphical elements that repre- sent a lot of information. Current Position Lock A set of three buttons along the left side of the screen indicates the quality of position lock your iWAY currently has. The button that's se- lected indicates your current position lock. -
Page 51: Reset Options
Reset Options To reset all customizable settings to their factory defaults, from the Main Menu choose you're sure. Choose Reset Options confirmation dialog. NOTE: Reset Options does not erase any of your contacts, or saved routes or trails . Sound and Voice Setup Much of the information you'll receive from the iWAY will come in the form of sounds. -
Page 52: Units Of Measure
To adjust Periodic Instruction frequency: Press and drag the blue button on the ERIODIC the frequency of spoken instructions, or to the left to decrease it. Periodic Instructions are repeated at set intervals and, like the Instruc- tion at Halfway Mark, are intended as reminders. Use this slider to adjust the frequency of Period Instructions until your iWAY is giving you exactly as much information as you need. -
Page 53: Safety Mode (On/Off)
To change any setting: simply tap the button next to the format you prefer. The button you select should become selected, and the previous format should become unselected. Safety Mode (On/Off) The iWAY has a Safety Mode to prevent vehicle drivers from operating the GPS while the vehicle is in motion. -
Page 54: Device Information
Device Information From time to time, Lowrance updates the operating system software in some of its products. These software upgrades are usually offered to customers as free downloads from our web site, www.lowrance.com. These upgrades make the unit perform better or introduce a new fea- ture or function. -
Page 55: Section 5: Searching, Finding, And Navigating
Searching, Finding and Navigating One of the most important uses of the iWAY is generating routes to help you get from where you are, to where you want to be. In this sec- tion, we'll teach you how to make iWAY generate a route for you, as well as how to use the information iWAY provides. -
Page 56: Using The Iway's Virtual Keyboard
NOTE: Any time you perform a search while the map cursor is up, the dis- tances listed for search results will be calculated from the cursor position, not your current position. That means you can scroll ahead to a destination a hundred miles away, and find the nearest hotel there, or you could clear the cursor and do a search for the ho- tel nearest your current location, then finish the trip tomorrow. -
Page 57: Find Fuel, Lodging, Restaurants, And Other Pois
The other important button to notice is the one on the top right, Push when the text field contains the information you want to en- ter. When you do this, the iWAY will sometimes provide you with a list of several options that closely resemble whatever information you en- tered. -
Page 58: Using The "To Exit" And "From Exit" Distances
For our example, though, we'll assume we're running low on gas and need the first gas station available, so we’ll just use the iWAY’s default Find By setting, The list of search results contains two entry fields at the top, and three columns across the bottom of the screen. -
Page 59: Navigating To The Selected Poi
To use the Name Filter, press anywhere inside the field, and ILTER the virtual keyboard will appear. Type all or part of the name you are looking for, and press . The iWAY will return to the previous list, but it will only show those locations whose names contain the text you entered in the Name Filter field. -
Page 60: Recent Finds
NOTE: There are several optional settings that control exactly how the iWAY generates its route. These options are discussed in detail in Sec. 4. See the heading "Route Options" there for more details. As soon as the route is generated the iWAY will draw the course of your route in magenta on the map, and begin providing visual and spo- ken directions along the route. - Page 61 quires only the number, and "Street" requires only the street's name (not identifiers such as "Ave."). text fields, simply press anywhere inside the field. 2. To enter an address number, press inside the the virtual keyboard will appear. Enter the desired address number, and then choose the information you entered in the Address field.
-
Page 62: Address Book
Find Address generates a list of possible matches. Of course, you already know how to use the Location Information Screen. You can see how far away the address is, or choose Find On Map or Go To if you want to begin navigating to it. Address Book Address Book allows you to navigate to contacts you've created across the map. -
Page 63: More
More If you're looking for POIs, the More button provides a handy menu that divides the "Everything" POI list into eight subcategories. If you're searching for POIs in a particular category other than Gas and ATMs, Lodging or Restaurants, this can be a handy menu for narrowing sim- plifying your search. -
Page 64: Find A Street
The iWAY will return to the Find Streets menu, with the entered name showing in the First Street field. (In this example, it's 80th Street.) You can use the Intersections command to find a single street by en- tering a name and choosing Find First Street. Find a Street If you just want to find your way to a single street, choose IRST... -
Page 65: Choosing New Destinations While Navigating
Choosing New Destinations while Navigating So far we've taught you all the ways to make the iWAY generate a route for you from scratch. No matter which method you use, the iWAY responds in the same way. It begins examining the roads between your current position, and your selected destination. -
Page 66: Following A Generated Route
Following a Generated Route By default, the iWAY tries to find you the fastest, shortest route to your destination. It will generate a list of instructions detailing the turns you need to make and the roads you need to follow along the way. It will also draw a magenta line on the map display, showing the route you're supposed to take. -
Page 67: Using Turn Preview And The Directions List
As soon as you leave the iWAY's recommended course, it will begin generating a new route based on your new position. This will likely match the path you planned to take. Using Turn Preview and the Directions List Turn Preview and the Directions List are both described in Sec. 2. The main navigation mode of the iWAY is the Map Mode with its Overlay Data and voice instructions. -
Page 68: Considering Temporary Or Local Conditions
Considering Temporary or Local Conditions Of course, the iWAY cannot possibly be aware of all temporary or local conditions that could affect your course. Short-term construction, traffic jams, or local bans on U-turns could all impact the usefulness of an iWAY-generated route. -
Page 69: Index
Accessories, 1, 2, 3, 9 Address Book, 2, 12, 17, 18, 19, 50, 56, Antenna, 2, 10, 67 Batteries, 3, 6 Brightness, 1, 39, 40, 41 Calibrate Screen, 39, 41 Cancel Navigation, 24 Contact, 1, 2, 7, 12, 16, 17, 18, 19, 27, 44, 45, 50, 56, 72 Contrast, 39, 41 Cursor, 14, 15, 16, 17, 18, 19, 26, 50, 51,... - Page 70 52, 53, 54, 59, 60, 61, 62 Routing Options, 24, 25 Cross-Traffic Turns, 25 Interstates, 26 Toll Roads, 25 Screen Calibration, 39, 41 Searching, 12, 16, 18, 19, 29, 37, 49, 50, 51, 52, 53, 54, 55, 56, 57, 58 Intersections, 57 Streets, 57, 58 Shuffle Play List, 33, 36...
- Page 71 Notes...
- Page 72 Notes...
-
Page 73: Fcc Compliance
This device complies with Part 15 of the U.S. Federal Communi- cations Commission (FCC) Rules. Operation is subject to the fol- lowing two conditions: (1) this device may not cause harmful in- terference, and (2) this device must accept any interference re- ceived, including interference that may cause undesired opera- tion. - Page 74 Lowrance Mapping Database End User License Agreement The data (“Data”) is provided for your personal, internal use only and not for resale. It is protected by copyright, and is subject to the following terms and conditions which are agreed to by you, on the one hand, and Lowrance Electronics, Inc.
- Page 75 including but not limited to, content, quality, accuracy, complete- ness, effectiveness, reliability, fitness for a particular purpose, use- fulness, use or results to be obtained from this Data, or that the Data or server will be uninterrupted or error-free. Disclaimer of Warranty: LOWRANCE AND ITS LICENSORS (INCLUDING THEIR LICENSORS AND SUPPLIERS) DISCLAIM ANY WARRANTIES, EXPRESS OR IMPLIED, OF QUALITY, PERFORMANCE, MERCHANTABILITY, FITNESS FOR A PAR-...
- Page 76 agreements previously existing between us with respect to such subject matter. Governing Law. The above terms and conditions shall be gov- erned by the laws of the Illinois, without giving effect to (i) its con- flict of laws provisions, or (ii) the United Nations Convention for Contracts for the International Sale of Goods, which is explicitly excluded.
- Page 77 LOWRANCE ELECTRONICS FULL ONE-YEAR WARRANTY "We," "our," or "us" refers to LOWRANCE ELECTRONICS, INC., the manufacturer of this product. "You" or "your" refers to the first person who purchases this product as a consumer item for personal, family or household use. We warrant this product against defects or malfunctions in materials and workmanship, and against failure to conform to this product's written specifications, all for one (1) year from the date of original purchase by you.
- Page 78 How to Obtain Service… …in the USA: We back your investment in quality products with quick, expert service and genuine Lowrance parts. If you're in the United States and you have technical, return or repair questions, please contact the Factory Customer Service Department.
- Page 79 Accessory Ordering Information for all countries To order Lowrance GPS accessories, please contact: 1) Your local sporting goods, marine, aviation, automobile or consumer electronics store. Most quality dealers that handle outdoor electronic equipment or other consumer electronics should be able to assist you with these items.
- Page 80 Visit our web site: Lowrance Pub. 988-0148-542 © Copyright 2005 All Rights Reserved Printed in USA 082305 Lowrance Electronics, Inc.