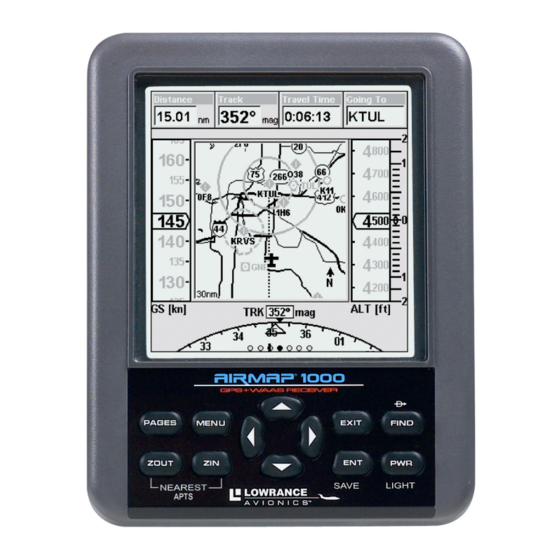
Lowrance AirMap 1000 Operation Instructions Manual
Aviation mapping gps receiver
Hide thumbs
Also See for AirMap 1000:
- Installation and operation instructions manual (34 pages) ,
- Operation instructions manual (8 pages) ,
- Addendum (1 page)
Table of Contents
Advertisement
Quick Links
Advertisement
Table of Contents

Related Manuals for Lowrance AirMap 1000


Summary of Contents for Lowrance AirMap 1000
- Page 1 AirMap 1000 Aviation Mapping GPS Receiver Operation Instructions...
- Page 2 Copyright © 2003 Lowrance Electronics, Inc. AirMap , Lowrance Avionics trademarks of Lowrance Electronics, Inc. Jeppesen is a registered trademark of Jeppesen Sanderson, Inc. Navionics DURACELL RAYOVAC is a registered trademark of Rayovac Corporation. Points of Interest Data in this unit are by infoUSA, copyright ...
-
Page 3: Table Of Contents
Sec. 1: Read Me First! ... I Capabilities and Specifications ... 3 How Airmap Works ... 5 Introduction to GPS and WAAS... 7 How to Use this Manual: Typographical Conventions... 9 Sec. 2: Installation & Accessories ... 11 Power ... 11 MMC or Sd Memory Card Installation ... - Page 4 Services... 50 Transfer Custom Maps and GPS Data Files ... 50 Switch to Land Mode ... 52 Switch Back to Aviation Mode from Land Mode ... 52 Aviation Calculators ... 53 E6B Altitude/Airspeed Calculator... 53 E6B Wind Speed/Direction Calculator... 53 Vertical Navigation Calculator ...
- Page 5 Delete a Trail ... 75 Edit a Trail Name ... 75 Transferring GPS Data Files ... 75 Utilities... 75 Alarm Clock... 75 Sun/Moon Rise & Set Calculator... 75 Trip Calculator... 76 Trip Down Timer... 76 Trip Up Timer ... 76 Waypoints...
- Page 6 Sounds and Alarm Sound Styles... 101 Track Smoothing... 102 Trail Options ... 103 Flash Trails on Screen Option... 103 Update Active Trail Option ... 103 Update Trail Criteria (Auto, Time, Distance) ... 104 Trail Update Rate (Time, Distance)... 105 New Trail... 105 Units of Measure...
- Page 7 12 steps. Not in that big of a hurry? Good, because we really recommend you practice a bit before taking your AirMap aloft. The AirMap 1000 is a powerful GPS+WAAS receiver, but its slim silhouette is crammed with lots of extra features and value.
- Page 8 Whether your AirMap 1000 is the only GPS in the cockpit or backing up an in-panel display, you're using the most versatile and most affordable large-screen hand-held GPS receiver in the aviation market today. Our goal for this book is to get you in the air (or out on the road) fast, with a minimum of fuss.
-
Page 9: Capabilities And Specifications
to try out some of AirMap's many advanced features. That brings us to Section Four, Land Mode Operation. After we introduce the Land Mode menus and submenus, the rest of the section contains AirMap's more advanced command functions. Your AirMap is ready to use right out of the box, but you can fine tune and customize its operation with dozens of options. - Page 10 Recording: ... Removable MMC or SD memory cards for MMC slots: ... One, inside battery compartment. Accepts Aeronautical map: ... Jeppesen Background map:... Built-in custom, detailed Lowrance map. Custom mapping: ... Accepts custom, higher-detail MapCreate 6 Mapping memory: ... Up to 512 MB on one MMC (MultiMedia Position updates: ...
-
Page 11: How Airmap Works
Man Overboard:... MOB feature precisely marks man overboard Com Port: ... One serial communications port, NMEA 0183 Zoom range:... 39 ranges; 0.02 to 4,000 miles. NOTE: The above memory capacities refer only to AirMap's on-board mem- ory. The amount of GPS data you can record and save for recall later is only limited by the number of MMC cards you carry with you. - Page 12 what's in the map, see the preceding segment on specifications.) We lock it in here at the factory — you can't change or erase this map. The background map, along with the Jeppesen and Lowrance aeronautical databases, are all you need for aerial navigation. (Your unit reads these databases automatically from the MMC card included in the package.) The background map is also suitable for many land and marine naviga- tion chores, but for maximum surface accuracy and much more detail,...
-
Page 13: Introduction To Gps And Waas
You make your own Custom Map Files with our MapCreate software, but you don't have to. We also sell ready-to-use FreedomMaps. These custom maps are pre-loaded on MMCs. (No computer work required!). Introduction to GPS and WAAS Well, now you know the basics of how AirMap does its work. You might be ready to jump ahead to Section 2, Installation &... - Page 14 A minimum of three satellites are required to determine a 2D fix. The system requires signal reception from three satellites in order to determine a position. This is called a 2D fix. It takes four satellites to determine both position and elevation (your height above sea level — also called altitude).
-
Page 15: How To Use This Manual: Typographical Conventions
WAAS signals make your GPS navigation even more accurate. Your AirMap automatically receives both GPS and WAAS signals. However, WAAS has some limits you should know about. First, the U.S. government has not completed construction of the WAAS system, so it is not yet fully operational. The ground stations are in place, but only a few of the needed WAAS satellites have been launched. - Page 16 Keyboard The other keys perform a variety of functions. When the text refers to a key to press, the key is shown in bold, sans serif type. For example, the "Enter/Save" key is shown as Menu Commands A menu command or a menu option will appear in small capital letters, in a bold sans serif type like this: are to select this command or option from a menu or take an action of some kind with the menu item.
-
Page 17: Sec. 2: Installation & Accessories
Installation & Accessories Power The AirMap operates from AA batteries or on 6 volts DC using an op- tional external power cable with a cigarette lighter adapter. If the power cable is used, the AirMap automatically switches to it if the ex- ternal power is greater than the battery voltage. -
Page 18: Cigarette Lighter Power Adapter
grips on the outside edge of the battery compartment cover. Press in on the grips and lift the cover away from the unit case. The battery cover will pull free. Loosen thumbscrew and remove AirMap battery cover. Install the batteries according to the decal in the battery compartment, which shows the correct polarity. -
Page 19: Mmc Or Sd Memory Card Installation
Attach external power cable to AirMap. MMC or SD Memory Card Installation Your AirMap uses a MultiMedia Card to store information, such as cus- tom maps, waypoints and other GPS data. The unit can also use Secure Digital Cards (SD cards) to store information. NOTE: Throughout this manual, we will use the term MMC, but just re- member that your unit can use an MMC or SD card to store data. -
Page 20: External Active Antenna
2. Hold unit facedown in left hand. With your right hand, press a finger against the label of the MMC and drag it from the slot. To add an MMC or SD Card 1. Remove battery compartment cover. 2. Hold the unit in one hand. Grasp the bottom edge of the MMC with your other hand. -
Page 21: R-A-M Bracket Mounting System
Since the "view" is restricted to what can be seen through the window, this operating mode will reduce position accuracy and will increase the chance of losing satellite lock. Inside a plane, the unit operates best with an external antenna mounted on the windshield or dash. You may achieve good results by simply placing the external RAA-4 antenna on the top of the dash, at the base of the windshield. -
Page 22: Protective Bag
Fit the ball mount into the mounting bracket's arm, and tighten the arm knob to hold the unit in place (shown left). At right, you can see an AirMap 1000 securely mounted above a yoke. Protective Bag Your AirMap comes with a cloth bag designed to protect the unit from minor scratches and dings when it's tucked into your flight bag or lug- gage. - Page 23 A protective cloth bag is included with your unit. Tip: The bag will guard against scratches on the display, but in a crowded flight bag, the Power key could be bumped and cause a battery drain. To avoid this, just pull out a battery and reinsert it upside down.
- Page 24 Notes...
-
Page 25: Sec. 3: Aviation Operation
BUT, if you just can't wait to get outside, grab the bat- teries and turn to the one-page Quick Reference on page 39. Keypad AirMap 1000 keypad. 1. PWR/LIGHT (Power & Light) – The PWR key turns the unit on and off and activates the backlight. -
Page 26: Power/Lights (Turn Unit On And Off)
6. EXIT – The Exit key lets you return to the previous screen, clear data or erase (clear) a menu. 7. FIND (Direct To) – The Find key launches the AirMap search menus. It also allows you to go Direct To items shown in search lists. 8. - Page 27 Point of Interest or map cursor location; or after you reach the end of a route or trail. GPS Setup command: sets various GPS receiver options and runs the GPS Simulator. System Setup command: sets general configuration options.
- Page 28 navigation calculator. alarm clock, up timer and down timer. Sun/Moon Calculations command: finds the rising and setting times of the sun and moon for any location on any day from the year 2000 to 2064. This also shows the moon phase. Trip Calculator command: shows trip status and statistics, such as trip time, distance and average speed.
-
Page 29: Satellite Status Page
This series of figures shows the Pages Menu for all three main screens and their various display options. Each of the three main Pages also has a submenu screen associated with it. You access a Page Submenu by pressing the key one time MENU while the page is displayed. - Page 30 The GPS receiver is tracking satellites that are in bold type. The re- ceiver hasn't locked onto a satellite if the number is grayed out, there- fore it isn't being used to solve the position.
-
Page 31: Navigation Page
Navigation Page: left, Navigation With Map display option; right, The Navigation Panel option is one of the AirMap 1000's most advanced fea- tures. It combines several instruments and situational awareness tools that... -
Page 32: Compass Rose With Hsi And Obs Hold
offer the look of a "glass cockpit" panel display. The instruments surround- ing the central compass rose are discussed when we describe the Map Page's Map Panel option on page 34. Now, we want to talk about the heart of this display –... - Page 33 tor of the relationship between your current direction (track) and de- sired direction (course). Pilots familiar with "fly to the needle" VOR in- struments or large in-panel GPS screens will quickly feel comfortable with this HSI feature. Track or compass heading indicator, showing direction of travel white Bearing arrow (pointing to destination)
-
Page 34: Navigating With Obs Hold
the course arrow. While you are on this page, you can use the keys to increase or decrease the cross track error range. ZOUT TO arrow Course arrow Fig. 1 Following a course by "chasing the needle." Fig. 1, plane has veered off course to the right by 1.34 nautical miles, away from the needle. - Page 35 In the example below, Air Traffic Control contacts a pilot flying north- east across Oklahoma and warns him of a dangerous storm ahead. To avoid it, they instruct him to fly outbound on a radial of 66° from the nearby VOR "VCT." To use OBS Hold: 1.
-
Page 36: Map Page
You can turn off OBS Hold at any time using the Navigation Page menu. 1. Press |↓ to MENU 2. A window will pop up asking you if you want to cancel OBS Hold. Press ←| . Press The navigation data will once again direct you to your destination, or the next waypoint in the route you're navigating. -
Page 37: Full Map Page Display Option
Map Page Menu To get to Map Page Menu: press The map menu has many options. It allows you to get information on the airspace you're in with the Airspace Status command. You can also find distances, change the orientation of your map, view map data, and other helpful map functions. - Page 38 The Zoom In and Zoom Out keys zoom the map to enlarge or reduce its cov- erage area and the amount of mapping detail shown. There are 39 available map zoom ranges, from 0.02 nautical miles to 4,000 nautical miles. AirMap's high resolution screen makes it possible to display aeronautical chart features that look like the "real thing."...
- Page 39 dium-sized lakes and streams; and more than 60,000 navigation aids and 10,000 wrecks and obstructions in U.S. coastal and Great Lakes waters. MapCreate custom maps include massive amounts of information not found in the background map. MapCreate contains: the searchable Points of Interest database, all the minor roads and streets, all the landmark features (such as summits, schools, radio towers, etc.);...
-
Page 40: Map Panel Page Display Option
ries Drawn menu to turn individual POI displays off and on.) Even though their display is turned off, you can still search for POIs and their icons will pop-up when your unit finds them for you. Map Panel page display option The Map Panel page has several features that offer the look of a “glass cockpit”... -
Page 41: Digital Data Page Display Option
Compass overlay data Map Page: Compass Overlay display option. The CDI shows the pilot is The four pieces of compass overlay data floating at the top of the page can be customized with the Compass Overlay Data command, which is discussed in Sec. - Page 42 Data boxes Map Page: Digital Data display option. Distance shows how far it is to the next waypoint you're navigating toward. Total Distance tells how far to a final destination when navi- gating a route or trail. If your route has multiple legs, this option will total them for you.
-
Page 43: Two Maps Page Display Option
Total Travel time tells how long it will take to reach a final destina- tion when navigating a route or trail. Total Arrival time predicts the local time it will be when you reach a final destination when navigating a route or trail. Two Maps page display option This option provides a split map, showing your current position in the left map, and an auto zoomed view of the destination airport in the... - Page 44 horizontal windows. Here's how to use the Resize Window com- mand: 1. From the Two Maps page, press 2. The window adjustment arrow appears. Use the arrow keys to adjust the window size. To switch to horizontal, press the ↑ or↓ keys.
-
Page 45: Aviation Gps Quick Reference
Aviation GPS Quick Reference Start outdoors, with a clear view of open sky. Imagine you're flying to a nearby airport to practice landings. (If you're practicing on foot or by car, substitute a restaurant for an airport. Pick one a few blocks away. While learning, navigation in too small an area constantly triggers alarms. -
Page 46: Find Your Current Position
Find Your Current Position Finding your current position is as simple as turning AirMap on. Under clear sky conditions, the unit automatically searches for satellites and calculates its position in approximately one minute or less. NOTE: "Clear sky" means open sky, unobstructed by terrain, dense foliage or structures. -
Page 47: Selecting Any Map Item With The Cursor
Tip: Use the cursor to determine the distance from your current position (or last known position, when working indoors) to any map object or location. Simply use the arrow keys to position the cursor over the object or place. The distance, measured in a straight line, appears in the data box at the bottom of the map. - Page 48 3. AirMap says it is calculating, then a list of VORs appears, with the closest at the top of the list, and the farthest at the bottom of the list. The nearest is highlighted. Find VORs Menu, left; Search Criteria menu, center; and list of the nearest VORs, right.
-
Page 49: Find Nearest Airport (Shortcut)
Map screen showing Finding Waypoint, 7. To clear the search and return to the last page displayed, press EXIT EXIT EXIT EXIT Search menus, you could have gone looking for another place.) NOTE: Search works from high detail mapping data loaded in AirMap. Aviation Navigation searches use information from a Jeppesen da- tabase, and general navigation searches use POI information avail- able with a MapCreate custom map. -
Page 50: Navigating To Nearest Airport With The Airmap
Then you can press press (the key)to begin navigating to the selected location. FIND Navigating to Nearest Airport with the AirMap Find your way to the selected airport with the Navigation Page or Map Page. Any time navigation is activated, the Navigation Page shows the compass rose with its bearing arrow pointing toward the desired destina- tion position, and the destination name shown in a data box. -
Page 51: Navigate Back To A Waypoint
This example shows a waypoint set at the cursor location. If the cursor was not active, the point would be placed at your current position. When you're traveling fast and want to set a waypoint in a hurry – at your current position –... -
Page 52: Navigate To A Point Of Interest
3. Press |↓ to MENU ing to the cursor location. The Map Page will display a dotted line from your current position to the cursor position. The Navigation Page displays a compass rose showing navigation information to your destination. See examples in the following images. -
Page 53: Airspace Status
pressing (which would bring up an information screen), if you press it will automatically begin navigating to the selected item in the list. You can also use Direct To when navigating a route, to force AirMap to navigate toward a particular waypoint in the route. To do this (from the Map Page), press |↓... -
Page 54: Runways
In the AirMap, airports have information screens packed with useful infor- mation. They include much of the same information as a VOR information screen. In addition, airport information screens contain a line drawing showing the general layout of the airport's runways. Also, note that the ra- dio frequencies listed at the bottom make a much longer list. -
Page 55: Runway Approach Guidance Feature
box at the bottom of the screen says "Extend" next to the runway name. (As long as we have sufficient information about it in our database, Air- Map can display a runway extension for any runway.) Press unit will ask "Do you want to setup Runway Guidance?" Press → to . -
Page 56: Services
CDI display. However, the hollow (white) bearing arrow will continue to point to the runway touchdown zone (TDZ). The automatic route will be created and set to track inbound on the extended runway's centerline from any distance from the airport. If you desire, you can navigate to the notch of the fan for an approximate five mile final approach. - Page 57 Instructions for copying Custom Map Files to an MMC are contained in the instruction manual for your MMC card reader and MapCreate 6 software. For instructions on inserting an MMC into AirMap, see Sec. 2, Installation/Accessories. GPS Data files, containing waypoints, routes, trails and event marker icons, must be copied from an MMC to AirMap's internal memory be- fore AirMap can read them.
-
Page 58: Switch To Land Mode
From left to right, these figures show the menu sequence for naming and saving a GPS Data File from AirMap's memory onto an MMC. The unit will display first a progress then a completion message when the data transfer is finished. To return to the Page view, press 4. -
Page 59: Aviation Calculators
Aviation Calculators To help you with flight planning, this unit has three aviation utilities built into it that let you calculate density altitude, true airspeed, wind speed and direction, plus vertical navigation. NOTE: AirMap also includes another set of general-purpose utilities. These are discussed in Sec. -
Page 60: Vertical Navigation Calculator
E6B Wind Speed/Direction Calculator Vertical Navigation Calculator With the Vertical Navigation Calculator, the AirMap 1000 can help you decide when to let down for an approach to an airport. To get to the verti- cal navigation calculator menu: while in Aviation Mode, press |↓... - Page 61 The solution to our vertical navigation problem shows at the top of the screen. Our current altitude is 4500 feet and at our current airspeed, we should begin our descent in 44 minutes and 20 seconds. If we main- tain a 450 fpm descent starting in about 44 minutes, then we should reach pattern altitude 5 nautical miles before we reach the airport.
- Page 62 Notes...
-
Page 63: Sec. 4: Land Operation
Section 4: Land Operation Keypad AirMap 1000 keypad. 1. PWR/LIGHT (Power & Light) – The PWR key turns the unit on and off and activates the backlight. 2. PAGES – Pressing this key and the arrow keys will switch the unit between the three different page screens in Land Mode. -
Page 64: Power/Lights (Turn Unit On And Off)
9. ZIN – (Zoom In) – This key lets you zoom the screen in to see greater detail in a smaller geographic area on the map. Power/lights on and off To turn on the unit, press . To turn on the backlight, press again. -
Page 65: Satellite Status Page
Satellite Status Page This page provides detailed information on the status of AirMap's sat- ellite lock-on and position acquisition. No matter what page you are on, a flashing current position indicator/question mark symbol and flashing GPS data displays indicate that satellite lock has been lost and there is no position confirmed. -
Page 66: Map Page
NOTE: Refer to Sec. 3, Aviation Operation, for further explanation and more illustrations of the Navigation Page. 1. To get to the Navigation Page: press 2. To get to Navigation Page Sub Menu: press Navigation Page, left, Navigation Menu, right. Navigation Menu The Navigation Menu allows you to cancel navigation, set up alarms, and plan or edit your route. -
Page 67: Moving Around The Map: Zoom & Cursor Arrow Keys
Map Page, left, Map Menu, right. Map Menu The map menu has many options. The map menu allows you to find distances, change the orientation of your map, view map data, and other helpful map functions. Moving Around the Map: Zoom & Cursor Arrow Keys The map is presented from a bird's-eye view perspective. -
Page 68: Find Distance From Point To Point
The distance to Dallas from the starting point is 201.6 nautical miles. Find Distance From Point to Point You can also measure distance between two other points on the map. 1. While on the Map page press: 2. Center your cursor over the first position. (A rubber band line ap- pears, connecting your current position to the cursor's location.) Press to set the first point, and the rubber band line disappears. -
Page 69: Icons
Icons Icons are graphic symbols used to mark some location, personal point of interest or event. They can be placed on the map screen, saved and re- called later for navigation purposes. These are sometimes referred to as event marker icons. AirMap has 42 different symbols you can pick from when creating an icon. -
Page 70: Delete An Icon
Delete an Icon You can delete all the icons at one time, you can delete all icons repre- sented by a particular symbol, or you can use the cursor to delete a se- lected icon from the map. 1. Press |↓... -
Page 71: Navigate
2. The Transfer My Data menu includes a message which tells you if an MMC is present or not. If no MMC is present, you must first insert a card into AirMap in order to activate the Load or Save commands. To load data from the MMC to AirMap: press →... -
Page 72: Navigate To An Icon
2. To navigate to the selected location: press ing arrow on Map Page or compass bearing arrow on Navigation Page. Navigate to an Icon Use the Navigate to Cursor command above, and use the cursor to se- lect the icon. Navigate to Point of Interest (POI) For POIs that are in view on the map, you can easily use the Navigate to Cursor command above;... - Page 73 during the trip, such as the time to your destination. The other requires only three key strokes and provides a full range of navigation data. Try both methods and see which you prefer. When hiking at walking speed, we often just use visual back trailing because it is better at following each little turn on a foot path.
-
Page 74: Routes
5. To follow the trail, press data along the trail. Follow the steering arrow on the Map Page or the compass bearing arrow on the Navigation Page. NOTE: If you are at or near the start of the trail, the arrival alarm will go off as soon as navigation begins because of your proximity to the trail's first point. - Page 75 Routes Created in AirMap If you plan on flying the route – or if you just want to make it quickly without using a computer – you can create a route in the unit. You do this by selecting existing waypoints from your waypoint list or the Aviation Waypoints, or by making new route waypoints on the map with cursor arrows and the Enter key.
- Page 76 handful of Aviation Waypoints but in between place some waypoints from the map, if you want to detour over a particular landmark. Or even include personal waypoints in your route, if you'd like to fly over a friend's house. Since you add one waypoint at a time, you can choose the best way to enter each one.
-
Page 77: Delete A Route
Route creation sequence, continued: Fig. 4. Point (3) set at on-ramp turn. Fig. 5. Waypoint (4) set at highway exit to frontage road leading to river. Waypoint (5) ends the route at a tree stand in the hunting area. Fig. 6. Press EXIT to save the route and you return to this screen. 7. -
Page 78: Searching
lection box. Press ↑ or ↓ to change the first character, then press → to the next character and repeat until the name is correct. Then, press |↓ to The unit will display first a progress then a completion message when the data transfer is finished. -
Page 79: Switch To Aviation Mode
POI information screen on hotel nearest this position. Screen shows name, street address, phone number, latitude/longitude, distance to the hotel and its compass bearing. Figure at left shows Go To command; right figure shows Find On Map command. 6. AirMap's map appears, with the cross-hair cursor highlighting the hotel's POI symbol. -
Page 80: Switch Back To Land Mode From Aviation Mode
2. Unit asks, "Are you sure you want to turn on aviation mode?" 3. Press ←| and the unit switches to Aviation Mode. Switch Back to Land Mode from Aviation Mode To leave Aviation Mode and switch back to Land Mode: 1. -
Page 81: Delete A Trail
Delete a Trail To erase or delete a trail: Press trail name| ENT|→ Edit a Trail Name To edit a trail name: press . Press ↑ or ↓ to change the first character, then press → name| ENT|ENT to the next character and repeat until the name is correct. Press EXIT EXIT EXIT... -
Page 82: Trip Calculator
Trip Calculator To get to the Calculator menu: press ALCULATOR Trip Down Timer To get to the Down Timer menu: press |↓ to TIES Trip Up Timer To get to the Up Timer menu: press IMER Waypoints A waypoint is simply an electronic "address," based on the latitude and longitude of a position on the earth. -
Page 83: Selecting A Waypoint
Create a Waypoint by Average Position This feature sets a waypoint at the current position after taking several position readings and averaging them. This boosts waypoint position accuracy by helping to eliminate errors caused by atmospheric condi- tions and other factors. 1. -
Page 84: Delete A Waypoint
Delete a Waypoint To delete a waypoint: press |↓ to waypoint name| . To return to the previous page, press Edit a Waypoint Waypoint Name To edit waypoint name: 1. Press |↓ to waypoint name| 2. Use the arrow keys to rename the waypoint, then press turn to the previous page, press Waypoint Symbol To edit waypoint symbol: 1. -
Page 85: Sec. 5: System & Gps Setup Options
System & GPS Setup Options Alarms This unit has several GPS alarms. You can set an arrival alarm to flash a warning message and sound a tone when you cross a preset distance from a waypoint. For example, if you have the arrival alarm set to 0.1 mile, then the alarm will flash a message when you come within 0.1 mile of the recalled waypoint. -
Page 86: Aviation Alarms
2. Scroll ↓ or ↑ to select the desired category, then press alarm on or off. 3. To change the alarm range, press → to change the first character, then press → to the next character and re- peat until the distance is correct. Then press 4. -
Page 87: Auto Satellite Search
It then searches for only those satellites. When your GPS receiver is turned on for the first time, it doesn't know what your position or elevation (altitude) is. The unit begins searching for the satellites using data that it acquired the last time it was turned on. -
Page 88: Battery Indicator
You can force the unit to immediately kick into auto search mode. Here's how: 1. Press |← to PAGES 2. Press |↓ to MENU Battery Indicator AirMap contains a battery capacity indicator, and will also flash low bat- tery warning messages when battery power declines to a certain level. When plugged into the DC cigarette lighter adapter, the power indica- tor instead displays the Voltage of the external power source. -
Page 89: Coordinate System Selection
Menus for changing Com Port settings. For connectors and wiring information for another device, consult the factory; phone numbers are in the back of this manual. To set Com Port Configuration: 1. Press MENU MENU 2. Press ↓ to OMMUNICATIONS Coordinate System Selection The Coordinate System Menu lets you select the coordinate system to use when displaying and entering position coordinates. -
Page 90: Map Fix
UTM's are marked on USGS topographic charts. This system divides the Earth into 60 zones, each 6 degrees wide in longitude. British, Irish, Finnish, German, New Zealand, Swedish, Swiss and Taiwan grid systems are the national coordinate system used only in their respective countries. - Page 91 on the map. It then shows the present position as distance on the map from that reference point. For example, if it shows a distance of UP 4.00" and LEFT 0.50", you then measure up four inches and to the left a half-inch from the refer- ence point on the map to find your location.
-
Page 92: Customize Page Displays
tion screen with the command unit returns to the Configure Map Fix menu. Finally, press erase this menu. Now press ↑ to from the list and press distance from the reference point you chose. Customize Page Displays Every Page display option except Compass Overlay (on the Map Page) has customizable data boxes to provide constant on-screen information. -
Page 93: Map Auto Zoom
Make the desired settings, then turn the simulator on by highlighting box and pressing the key. Press to erase this EXIT IMULATOR menu. A message appears periodically, warning you that the simulator is on. Repeat the above steps or turn the unit off to turn the simulator off. GPS Setup Menu, left, GPS Simulator Menu, right. -
Page 94: Show Map Data
Map Menu, left, Map Data Menu, right. Show Map Data Press |↓ to MENU using ARTH ETAIL the page display. NOTE: In Aviation Mode, turning map information from the map display, but the aviation map re- mains. You can also select other degrees of detail, from Low to High. -
Page 95: Map Datum Selection
To set range rings: Press . With the option highlighted, press INGS uncheck it (turn off). After the option is set, press page display. To set Lat/Lon Grid: Press . With the option highlighted, press INES (turn on) and uncheck it (turn off). After the option is set, press return to the page display. -
Page 96: Map Detail Category Selection
Map Detail Category Selection This menu determines which of the mapping features are shown on the screen. This includes, waypoints, trails, icons, cities, highways, etc. You can selectively turn on or off any of these items, customizing the map to your needs. -
Page 97: Navionics Charts
Map Menu, left, Map Orientation window with the Track Up map orientation option selected. By default, many receivers show the map with north always at the top of the screen. This is the way most maps and charts are printed on pa- per. - Page 98 WARNING: You should never format the MMC containing your Navionics chart. Formatting the MMC will permanently erase the chart from the card. To display a Navionics chart: 1. Install the Navionics MMC in the memory card compartment and turn on the unit. (For full card install instructions, see Sec. 2.) 2.
- Page 99 Cursor lines Port Services icon Navionics chart showing Port Services icon selected by cursor. When first highlighted, the Pop-Up name box appears. The position, distance and bearing are displayed at the bottom of the screen. The Port Services information screen has two windows. The top window lists the various service categories.
- Page 100 4. Depending on the location, the Detailed Services window may have a long list of services under the General Services category. To scroll through the Detailed Services window: from ETAILED ERVICES services. To return to the Map Page, press top service category window, press Tidal Current Information Navionics charts contain Tidal Current information, represented at large zoom ranges by a box icon with...
- Page 101 The Tidal Current Information screen displays daily tidal current data for this station on this date at the present time. The graph at the top of the screen is an approximate view of the flood and ebb pattern for the day, from midnight (MN), to noon (NN) to midnight (MN).
-
Page 102: Pop-Up Help
Tide Station icon in ani- mated mode Cursor lines At left, Navionics chart showing Tide Station icon selected by cursor. Right, icon animates automatically without selection at the 1/2 mile zoom range. In the example above, the tide is at 1.5 feet and falling, as shown by the down arrow at the top of the icon. -
Page 103: Reset Options
"pop-up" message appears that describes the function of the menu item. This feature is on by default. To set up Popup Help: Press . With the option highlighted, press OPUP on) and uncheck it (turn off). After the option is set, press return to the page display. -
Page 104: Require Dgps
Require DGPS You can force AirMap to require DGPS for reporting a valid position. (The default setting, off, uses DGPS automatically, but doesn't require it to yield a position.) Here's how to turn it on and off. 1. Press MENU MENU 2. - Page 105 To adjust the display's brightness: 1. Press ↓ to RIGHTNESS the scale is minimum backlight brightness; the right end is maximum backlight brightness. Screen menu with Brightness bar selected. To adjust the screen's display mode: 1. Press ↓ to ISPLAY To adjust the display's back light delay options: 1.
-
Page 106: Set Local Time
Set Local Time The local time and date are saved when a waypoint is created. Begin by pressing MENU MENU Set Local Time Command: left, Main Menu; center System Setup menu. Once in the Time Settings menu: To set Local Time: Press ter, then press →... -
Page 107: Software Version Information
The last field in this menu is . This feature allows your unit ONFIG to automatically adjust with the time change caused by Daylight Sav- ing Time (you should only have to set it once). You may select which set of rules matches DST in your region, or simply accept the default. -
Page 108: Track Smoothing
At left, Main Menu with Sounds command selected. At right, the Sounds menu. Once in the Sounds menu: To set Key Sounds: With the option highlighted, press to check it (turn on) and uncheck it (turn off). After the option is set, press to return to the page display. -
Page 109: Trail Options
Trail Options There are several options you can use with trails. Some affect all trails, other options can be applied to a particular trail. You can change the way trails are updated, you can display or hide trails, make them flash on the screen or not flash, create a new trail, delete a trail, etc. -
Page 110: Update Trail Criteria (Auto, Time, Distance)
WARNING: If you uncheck the Update Active Trail option, automatic trail crea- tion and recording will be turned off, and you must turn it back on to record trails. The default setting is on. Press ↓ or ↑ to PDATE to check it (turn on) and uncheck it (turn off). -
Page 111: Trail Update Rate (Time, Distance)
Trail Update Rate (Time, Distance) You can update a trail by time, with a range from 1 second to 9999 seconds; the default is 3 seconds. You can update by distance, with a range from 0.01 miles/nm/km to 9.99 miles/nm/km; the default is 0.10 nautical miles. With the proper Update Criteria activated, press ↓... -
Page 112: Units Of Measure
Press ↓ or ↑ to highlight the section you wish to change, then press . Press to erase this menu. EXIT Units of Measure This menu (shown below) sets the speed and distance (statute, nautical miles, meters), depth (feet, fathoms, or meters), temperature (degrees Fahrenheit or Celsius) and heading (true or magnetic) units. -
Page 113: Set Language
To set Obstruction Mode: Press ↓|→ to or ↓ to change the mode, then press to return to the page display. EXIT EXIT Set Language This unit's menus are available in 10 languages: English, French, Ger- man, Spanish, Italian, Danish, Swedish, Russian, Dutch and Finnish. To select a different language: 1. - Page 114 Notes...
-
Page 115: Sec. 6: Searching
Section 6: Searching Whether you are in Aviation Mode or Land Mode, AirMap's search func- tions all begin with the each mode. However, the Aviation Mode searches appear only in Aviation Mode (while the general searches appear in both Aviation and Land mode). Aviation Mode Find menu, left;... -
Page 116: Find Airports (Aviation Mode Only)
cursor to the far side of the airspace to check how far it is across, or move it to the exact spot you plan on entering the airspace for more precise navigation information. At left, we have selected the airspace around Tulsa Airport. Center, the Selected Airspace option on the Find menu. -
Page 117: Find Vors (Aviation Mode Only)
Calculating message, left, and list of the nearest airports, right. 4. If you're looking by name, there are two options: A. You can spell out the name in the top selection box. Press ↑ or ↓ to change the first letter, then press →... - Page 118 2. If searching for the Nearest VOR, press . If searching for a VOR By Name, press ↓ to . You can also search By Identifier, and By City. Find menu, left, and Find By Nearest, center, Find By Name, right. 3.
-
Page 119: Find Ndbs (Aviation Mode Only)
Find By Name menu. 5. If you're looking by identifier or by city, the method is the same as by name (described in step 4). Use the arrow keys to enter the VOR's identifier or the name of a city, and the AirMap will show you all avail- able VORs matching the criteria you entered. - Page 120 Calculating message, left, and list of the nearest NDBs, right. 4. If you're looking by name, there are two options: A. You can spell out the name in the top selection box. Press ↑ or ↓ to change the first letter, then press →...
-
Page 121: Find Intersections (Aviation Mode Only)
Find Intersections 1. Press |↓ to FIND 2. If searching for the Nearest intersection, press an airport By Identifier, press ↓ to Find menu, left, and Find By Nearest, center, Find By Identifier, right. 3. If you're looking for nearest, AirMap says it is calculating, then a list of intersections appears. -
Page 122: Land Mode Searches
Land Mode Searches Find Addresses 1. Press |↓ to FIND 2. Press to search in the Address field. 3. To enter an address number, press ↓ or ↑ to or ↓ to change the first number, then press → to move the cursor to the next number and repeat until the number is correct, then press 4. - Page 123 Tip: When entering a street name, do not enter the street's compass di- rection (N, S, E or W) in the street name field. Just enter the num- ber, or name. If the example below had been a search for "324 E. 9th St,"...
-
Page 124: Find Any Item Selected By Map Cursor
Map can search quicker without a city entered, and you save time by not entering one in. Find Any Item Selected by Map Cursor 1. With an item selected by the cursor, press previous page, press A POI selected by the cursor, left, The Find Menu, center, NOTE: You can "navigate"... - Page 125 Find Exit using the Highway Name. 3. Once you have selected a highway you can then select an exit by pressing ↓ then pressing ↓ or ↑ until you find the exit, then press 4. In the Exit information screen you have two choices. A. Press navigate or "go to"...
-
Page 126: Find Map Places
Find Map Places 1. Press |↓ to FIND 2. Press ↓ or ↑ to select a POI category then press given two options: Search by nearest or by name. NOTE: To narrow your search press → and then ↑ or ↓ to select a subcate- gory before pressing 3. - Page 127 Find by nearest option, left, Calculating screen, center, POI list, right. 4. Search by name of POI. Press ↓| . There are two options: A. You can spell out the POI in the top selection box. Press ↑ or ↓ to change the first letter, then press →...
-
Page 128: Find Streets Or (Street) Intersections
Find Streets or (Street) Intersections 1. Press |↓ to FIND 2. To find a street. Press out the street in the top selection box. Press ↑ or ↓ to change the first letter, then press → to move the cursor to the next letter and repeat until the name is correct, then press lection list by pressing list, then press... -
Page 129: Find Waypoints
Find first street, left, Street found, right. 3. To find an intersection. First enter an address into the "first street" field by pressing . There are two options: A. You can spell out the street in the top selection box. Press ↑ or ↓ to change the first letter, then press → to move the cursor to the next letter and repeat until the name is correct, then press . - Page 130 Find menu, left, and Find By nearest, center, Find by name, right. 3. If you're looking for nearest, AirMap says it is calculating, then a list of waypoints appears. The closest is highlighted at the top of the list and the farthest is at the bottom of the list. Press and the waypoint information screen appears.
-
Page 131: Sec. 7: Supplemental Material
Section 7: Supplemental Material Datums Used by This Unit WGS 1984 Default Adindan Mean for Ethiopia, Sudan Adindan Burkina Faso Adindan Cameroon Adindan Ethiopia Adindan Mali Adindan Senegal Adindan Sudan Afgooye Somalia Ain el Abd 1970 Bahrain Ain el Abd 1970 Saudi Arabia Anna 1 Astro 1965 Cocos Islands... - Page 132 Chua Astro Paraguay Corrego Alegre Brazil Dabola Guinea Djakarta (Batavia) Indonesia (Sumatra) DOS 1968 New Georgia Islands (Gizo Island) Easter Island 1967 Easter Island European 1950 Mean for Austria, Belgium, Denmark, Finland, France, West Germany, Gi- braltar, Greece, Italy, Luxembourg, Neth- erlands, Norway, Portugal, Spain, Sweden, Switzerland...
- Page 133 Naparima BWI Trinidad & Tobago North American 1927 Mean for Antigua, Barbados, Barbuda, Caicos Islands, Cuba, Dominican Republic, Grand Cayman, Jamaica, Turks Islands North American 1927 Mean for Belize, Costa Rica, El Sal- vador, Guatemala, Honduras, Nicaragua North American 1927 Mean for Canada North American 1927 Mean for CONUS...
- Page 134 Point 58 Sweden Santo (DOS) 1965 Espirito Santo Island Sao Braz Azores (Sao Miguel, Santa Maria Islands) Sapper Hill 1943 East Falkland Island Schwarzeck Nambia Selvagem Grande Salvage Islands SGS 85 Soviet Geodetic System 1985 South American 1969 Mean for Argentina, Bolivia, Brazil, Chile, Colombia, Ecuador, Guyana, Paraguay,...
-
Page 135: Fcc Compliance
FCC Compliance This device complies with Part 15 of the U.S. Federal Communi- cations Commission (FCC) Rules. Operation is subject to the fol- lowing two conditions: (1) this device may not cause harmful in- terference, and (2) this device must accept any interference re- ceived, including interference that may cause undesired opera- tion. - Page 136 Notes...
-
Page 137: Index
Accessories, 5, 7, 14, 15, 51, 75 Sec. 2, Installation & Accessories, 11 Airspace, 4, 31, 32, 47, 80, 109, 110 Alarm Clock, 75 Alarms, 21, 27, 68, 79, 80 Anchor Alarm, 79, 80 Antenna, 2, 3, 5, 14, 15, 39, 40, 59, 129 Arrival Alarm, 68, 79, 80 Aviation Alarms, 21, 79, 80, 81 Inside Airspace, 21... - Page 138 Land Mode, 1, 3, 5, 19, 52, 57, 58, 65, 68, 70, 73, 74, 109, 116, 118, 120, Sec. 4, Land Operation, 57 Languages, 107 Lat/Lon Grid (Map Data option), 89 Main Menu, 20, 21, 23, 58, 69, 82, 97, 100, 102, 103 Man Overboard, 5, 65, 76 Map Boundaries (Map Data option), 88...
- Page 139 NDBs, 113 VORs, 41, 42, 111 By Cursor, 118 Highway Exits, 118 POIs, 72, 120 Streets, 122 Waypoints, 123 Set Local Time, 100 Simulator, 21, 86, 87 Software Version Information, 101 Sounds, 101 Status Menu, 59, 81 Sun/Moon Rise & Set Calculator, 75 Text Boxes (Customize Display), 25, 26, 31, 34, 35, 86 Track Smoothing, 102...
- Page 140 Notes...
- Page 141 Notes...
- Page 142 Notes...
- Page 143 LOWRANCE DATABASES LICENSE AGREEMENT THIS IS A LEGAL AGREEMENT BETWEEN THE END-USER WHO FIRST PURCHASES THIS PRODUCT AS A CONSUMER ITEM FOR PERSONAL, FAMILY, OR HOUSEHOLD USE ("YOU") AND LOWRANCE ELECTRONICS, INC., THE MANUFACTURER OF THIS PRODUCT ("WE", "OUR", OR "US"). USING THE PRODUCT ACCOMPANIED BY THIS LICENSE AGREEMENT CONSTITUTES ACCEPTANCE OF THESE TERMS AND CONDITIONS.
- Page 144 DATABASES LIMITED WARRANTY "We", "our", or "us" refers to Lowrance Electronics, Inc., the manufacturer of this product. "You" or "your" refers to the first person who purchases the prod- uct as a consumer item for personal, family, or household use. The Databases Limited Warranty applies to the one or more databases that your product may contain.
- Page 145 LOWRANCE ELECTRONICS FULL ONE-YEAR WARRANTY "We," "our," or "us" refers to LOWRANCE ELECTRONICS, INC., the manufacturer of this product. "You" or "your" refers to the first person who purchases this product as a consumer item for personal, family or household use. We warrant this product against defects or malfunctions in materials and workmanship, and against failure to conform to this product's written specifications, all for one (1) year from the date of original purchase by you.
-
Page 146: How To Obtain Service
How to Obtain Service… …in the USA: We back your investment in quality products with quick, expert service and genuine Lowrance parts. If you're in the United States and you have technical, return or repair questions, please contact the Factory Customer Service Department. -
Page 147: Accessory Ordering Information
Accessory Ordering Information for all countries To order Lowrance accessories such as power cables, please contact: 1) Your local aviation equipment dealer or consumer electronics store. Most quality dealers that handle avionics equipment, marine electronics or other consumer electronics should be able to assist you with these items. -
Page 148: Visit Our Web Site
Visit our web site: © Copyright 2003 All Rights Reserved Printed in USA Lowrance Electronics, Inc.