D-Link DCS-4602EV User Manual
Vigilance full hd outdoor vandal-proof poe dome camera
Hide thumbs
Also See for DCS-4602EV:
- Quick installation manual (141 pages) ,
- User manual (92 pages) ,
- Quick installation manual (11 pages)

Related Manuals for D-Link DCS-4602EV


Summary of Contents for D-Link DCS-4602EV
-
Page 1: User Manual
Version 1.00 | 05/06/2015 User Manual Vigilance Full HD Outdoor Vandal-Proof PoE Dome Camera DCS-4602EV... -
Page 2: Manual Revisions
Preface D-Link reserves the right to revise this publication and to make changes in the content hereof without obligation to notify any person or organization of such revisions or changes. Information in this document may become obsolete as our services and websites develop and change. -
Page 3: Table Of Contents
Live Video ................20 Status ..................54 Setup ..................22 Device Info ................54 Setup Wizard ..............22 Logs ..................55 Network Setup ..............27 Help..................56 Technical Specifications ..........57 Dynamic DNS ..............30 Regulatory Information ..........60 Image Setup ..............31 Video ...................33 Preset ...................35 Motion Detection ............37 D-Link DCS-4602EV User Manual... -
Page 4: Product Overview
Section 1: Product Overview Product Overview Package Contents DCS-4602EV Vigilance Full HD Outdoor Vandal-Proof PoE Dome Camera Cable Waterproofing Connector Rubber Power Connector Plug Mounting Kit CD-ROM with User Manual and software Quick Installation Guide If any of the above items are missing, please contact your reseller. -
Page 5: Introduction
Full HD progressive scan CMOS sensor; the professional sensor results in low noise and high sensitivity capabilities ideal for surveillance applications. The DCS-4602EV is a complete system with a built-in CPU and incorporates a web server, allowing it to transmit excellent real- time Full HD resolution video for security and outdoor surveillance. -
Page 6: Features
Advanced Event Management The DCS-4602EV can be set up to send e-mail notifications with snapshots when an event occurs, such as when motion is detected. Events can be triggered from several sources, such as motion detection and time based events. -
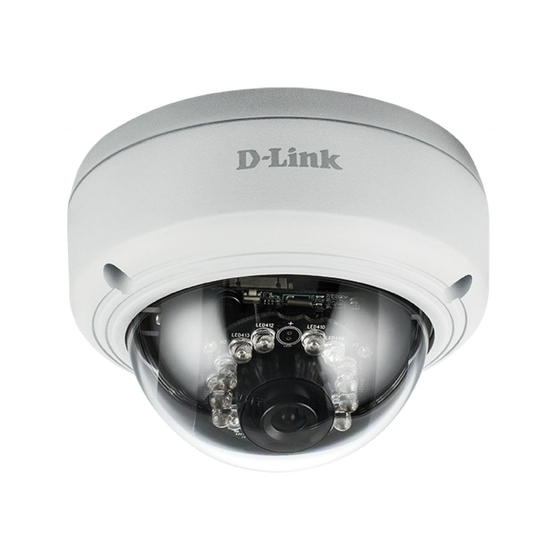
Page 7: Hardware Overview
Covers the camera components Reset Button Press and hold for 10 seconds to reset camera back to the factory default settings IR LEDs Provide illumination for low-light environments Tilt Adjustment Screw Can be loosened to adjust camera angle D-Link DCS-4602EV User Manual... - Page 8 Connects to an optional 12 V / 1.5 A power adapter (not included) RJ-45 connector for Ethernet which can also be used to power the camera using Ethernet Jack Power over Ethernet (PoE) Grounding Screw Can be attached to a grounding wire if desired D-Link DCS-4602EV User Manual...
-
Page 9: Mounting The Camera
If you are running the camera cables through the wall or ceiling, drill a hole in the center and pull the cables through the hole. Step 2 Use the included wrench to loosen the 3 screws on the top of the camera, then lift the camera cover off. D-Link DCS-4602EV User Manual... - Page 10 If you are running the camera cables out the side of the camera, guide the camera cables through the cable channel on the base. Step 4 Connect the power and Ethernet cables, or just the Ethernet cable if you are using a PoE connection. D-Link DCS-4602EV User Manual...
- Page 11 Note: The camera has a limited range of motion. If it stops when you are adjusting it, do not attempt to rotate or tilt the camera any further in that direction. Step 6 Reattach the camera cover. If you need to waterproof your installation, please continue to the next page. D-Link DCS-4602EV User Manual...
-
Page 12: Waterproofing Your Installation
Step 1 Place the washer around the base of the Ethernet connector as shown. Step 2 Thread bare Ethernet cable through the waterproof connector as shown, then crimp an RJ-45 plug onto the cable. D-Link DCS-4602EV User Manual... - Page 13 Screw the back part of the waterproof connector clockwise until there is a tight seal around the Ethernet cable. If you are using PoE to power your camera, use the included rubber power connector plug to the power connector. D-Link DCS-4602EV User Manual...
- Page 14 Section 2: Assembly and Installation If you are using a power adapter (not included) to power your camera, wind waterproof tape around the connection in an overlapping manner to cover it. D-Link DCS-4602EV User Manual...
-
Page 15: Software Installation
Insert the DCS-4602EV CD into your computer's CD-ROM drive to begin the installation. If the Autorun function on your computer is disabled, or if the D-Link Launcher fails to start automatically, click the Start button and type D:\autorun.exe (where D: represents the drive letter of your CD-ROM drive) and press Enter. - Page 16 Admin ID is admin with the password left blank. Click the checkboxes if you wish to change the admin ID and password for the camera, and enter the new ID and password you wish to use. Click Next to continue. D-Link DCS-4602EV User Manual...
- Page 17 Select Static IP if you want to manually enter the IP settings for the camera. Click Next to continue. Step 6 Take a moment to confirm your settings and click Restart. D-Link DCS-4602EV User Manual...
-
Page 18: Configuration
After completing the Camera Installation Wizard, you are ready to use your camera. The camera’s built-in Web configuration utility is designed to allow you to easily access and configure your DCS-4602EV. At the end of the wizard, click Link, or enter the IP address of your camera into a web browser, such as Firefox. - Page 19 Enter admin as the default username and leave the password blank. Click OK to continue. Step 4 This section displays your camera’s live video. You can select your video profile and view or operate the camera. D-Link DCS-4602EV User Manual...
-
Page 20: Live Video
Auto Pan Starts the automatic panning function. The ROI will pan from back and forth within the FOV. Stop Stops the camera ePTZ motion. Preset Path Starts the camera's motion along the predefined path. D-Link DCS-4602EV User Manual... - Page 21 Video Profile 2 Set a Storage Folder Full screen mode Take a Snapshot Go To: If any presets have been defined, you can select them here to move the (Preset List) camera to the selected preset. D-Link DCS-4602EV User Manual...
-
Page 22: Setup
To quickly configure your Network Camera’s motion detection settings, click Motion Detection Setup Wizard. If you want to enter your settings without running the wizard, click Manual Motion Detection Setup and skip to"Motion Detection" on page 37. D-Link DCS-4602EV User Manual... -
Page 23: Internet Connection Setup Wizard
Section 3: Configuration Internet Connection Setup Wizard This wizard will guide you through a step-by-step process to configure your new D-Link Camera and connect the camera to the internet. Click Next to continue. Select how the camera will connect to the Internet. - Page 24 If you have selected DHCP, you will see a summary of your settings, including the camera's IP address. Please write down all of this information as you will need it in order to access your camera. Click Apply to save your settings. D-Link DCS-4602EV User Manual...
-
Page 25: Motion Detection Setup Wizard
Refer to "Motion Detection" on page 37 for information about how to configure motion detection. Step 2 This step allows you to enable motion detection based on a customized schedule. Specify the day and hours. You may also choose to always record whenever motion is detected. D-Link DCS-4602EV User Manual... - Page 26 Click Next to continue. Step 4 You have completed the Motion Detection Wizard. Please verify your settings and click Apply to save them. Please wait a few moments while the camera saves your settings and restarts. D-Link DCS-4602EV User Manual...
-
Page 27: Network Setup
Invalid gateway settings may cause the failure of transmissions to a different subnet. Primary DNS: The primary domain name server translates names to IP addresses. Secondary DNS: The secondary DNS acts as a backup to the primary DNS. D-Link DCS-4602EV User Manual... - Page 28 For instance, live1.sdp can be accessed at rtsp://x.x.x.x/video1.sdp where the x.x.x.x represents the IP address of your camera. Enable CoS: Enabling the Class of Service setting implements a best-effort policy without making any bandwidth reservations. D-Link DCS-4602EV User Manual...
- Page 29 DNS. Enable Multicast for stream: The DCS-4602EV allows you to multicast each of the available streams via group address and specify the TTL value for each stream. Enter the port and TTL settings you wish to use if you do not want to use the defaults.
-
Page 30: Dynamic Dns
DDNS account. Password: Enter the password used to connect to your DDNS server account. Timeout: Enter the DNS timeout values you wish to use. Status: Indicates the connection status, which is automatically determined by the system. D-Link DCS-4602EV User Manual... -
Page 31: Image Setup
Select the frequency used by your power lines to avoid interference or distortion. White Balance: Use the drop-down box to change white balance settings to help balance colors for different environments. You can choose from Auto, Outdoor, Indoor, Fluorescent, and Push Hold. D-Link DCS-4602EV User Manual... - Page 32 3D filtering reduces the amount of image noise when viewing a low-light environment. Higher levels of 3D filtering will apply stronger levels of noise reduction. Reset Default: Click this button to reset the image to factory default settings. D-Link DCS-4602EV User Manual...
-
Page 33: Video
Maximum frame rate: A higher frame rate provides smoother motion for videos, and requires more bandwidth. Lower frame rates will result in stuttering motion, and requires less bandwidth. D-Link DCS-4602EV User Manual... - Page 34 The bps will affect the bit rate of the video recorded by the camera. Higher bit rates result in higher video quality. Fixed quality: Select the image quality level for the camera to try to maintain. High quality levels will result in increased bit rates. D-Link DCS-4602EV User Manual...
-
Page 35: Preset
Clicking the Remove button will delete the currently selected preset. Preset Sequence: This section allows you to create a preset sequence, which automatically moves the camera's view between a set of preset views. D-Link DCS-4602EV User Manual... - Page 36 Clicking the trash can button will remove the currently selected preset from the sequence. If you want to change the dwell time for a preset, select it from the list, enter a new dwell time, then click the Update button. D-Link DCS-4602EV User Manual...
-
Page 37: Motion Detection
Right click on the camera image to bring up the following menu options: Select All: Draws a motion detection area over the entire screen. Clear All: Clears any motion detection areas that have been drawn. Restore: Restores the previously specified motion detection areas. D-Link DCS-4602EV User Manual... -
Page 38: Time And Date
NTP server. NTP Server: Network Time Protocol (NTP) synchronizes the DCS-4602EV with an Internet time server. Choose the one that is closest to your location. Set the Date and Time Manually: This option allows you to set the time and date manually. -
Page 39: Event Setup
Event Setup In a typical application, when motion is detected, the DCS-4602EV sends images to a FTP server or via e-mail as notifications. As shown in the illustration below, an event can be triggered by many sources, such as motion detection. When an event is triggered, a specified action will be performed. -
Page 40: Add Server
Enter the unique name of your server. E-mail: Enter the configuration for the target e-mail server account. FTP: Enter the configuration for the target FTP server account. Network Storage: Specify a network storage device. Only one network storage device is supported. D-Link DCS-4602EV User Manual... -
Page 41: Add Media
9 images are generated after a trigger is activated. 1 pic. 2 pic. 3 pic. 4 pic. 5 pic. 6 pic. 7 pic. 8 pic. 9 pic. The moment the trigger is activated. D-Link DCS-4602EV User Manual... - Page 42 This is the prefix that will be added to the filename of saved video clips. System log: Select this option to set the media type to system logs. This will save the event to the camera system log, but will not record any snapshots or video. D-Link DCS-4602EV User Manual...
-
Page 43: Add Event
Action: If you have created Server and Media entries, you will see them appear here. Select which Server you want to send to and which Media you want the camera to send. D-Link DCS-4602EV User Manual... -
Page 44: Add Recording
Please note that if the free HDD space is not enough, the recording will stop. Before you set up this option please make sure your HDD has enough space, and it is better to not save other files in the same folder as recording files. D-Link DCS-4602EV User Manual... - Page 45 Time of each file for recording: If this is selected, files will be separated based on the maximum length you specify. File Name Prefix: The prefix name will be added on the file name of the recording file(s). D-Link DCS-4602EV User Manual...
-
Page 46: Advanced
The IR light will always be on. Sync with ICR: The IR light will turn on when the ICR filter is disabled (night mode). Schedule: The IR light will turn on or off according to the schedule that you specify below. D-Link DCS-4602EV User Manual... -
Page 47: Https
ƒ Create a certificate request and install Status: Displays the status of the certificate. Note: The certificate cannot be removed while HTTPS is still enabled. To remove the certificate, you must first uncheck Enable HTTPS secure connection. D-Link DCS-4602EV User Manual... -
Page 48: Access List
Section 3: Configuration Access List Here you can set access permissions for users to view your DCS-4602EV. Allow list: The list of IP addresses that have access rights to the camera. Note: When adding entries to the Allow list, make sure the first entry includes the IP address of the computer or device you are using to access the camera. -
Page 49: Snmp
Enter the authentication password used for your read/ write SNMP server. Encryption Password: Enter the encryption password used for your read/write SNMP server. Read Only Security Name Enter a name for the read-only community of your read- only SNMP server. D-Link DCS-4602EV User Manual... - Page 50 Enter the type of authentication used by your read-only SNMP server. Authentication Password: Enter the authentication password used for your read- only SNMP server. Encryption Password: Enter the encryption password used for your read-only SNMP server. D-Link DCS-4602EV User Manual...
-
Page 51: Maintenance
Enter a label for the camera, which will be shown on the OSD when it is enabled. Show Time: Select this option to enable the time-stamp display on the video screen. LED: You may specify whether or not to illuminate the status LED on the camera. D-Link DCS-4602EV User Manual... -
Page 52: System
This will restart your camera. Enable Schedule Reboot: If you want your camera to reboot on a regular schedule, check the Enable Schedule Reboot checkbox, then select the days and time you want the camera to reboot D-Link DCS-4602EV User Manual... -
Page 53: Firmware Upgrade
Section 3: Configuration Firmware Upgrade The camera's current firmware version will be displayed on this screen. You may visit the D-Link Support Website to check for the latest available firmware version. To upgrade the firmware on your DCS-4602EV, please download and save the latest firmware version from the D-Link Support Page to your local hard drive. -
Page 54: Status
Section 3: Configuration Status Device Info This page displays detailed information about your device and network connection. D-Link DCS-4602EV User Manual... -
Page 55: Logs
Section 3: Configuration Logs This page displays the log information of your camera. You may download the information by clicking Download. You may also click Clear to delete the saved log information. D-Link DCS-4602EV User Manual... -
Page 56: Help
Section 3: Configuration Help This page provides helpful information regarding camera operation. D-Link DCS-4602EV User Manual... -
Page 57: Technical Specifications
ƒ NTP client (D-Link) ƒ CoS ƒ DNS client ƒ QoS/DSCP ƒ DDNS client (D-Link) ƒ SNMP ƒ SMTP client ƒ ONVIF compliant ƒ FTP client Security Administrator and user group protection HTTP and RTSP authentication Password authentication D-Link DCS-4602EV User Manual... - Page 58 Power Consumption 5.5 watts ± 5% Temperature Operating: -30 to 50 °C (-22 to 122 °F) Storage: -20° to 70° C (-4° to 158° F) Humidity Operating: 20% to 80% non-condensing Storage: 5% to 95% non-condensing Certifications CE LVD C-Tick D-Link DCS-4602EV User Manual...
- Page 59 Appendix A: Technical Specifications Dimensions D-Link DCS-4602EV User Manual...
-
Page 60: Regulatory Information
Cet appareil numérique de la classe A est conforme à la norme NMB-003 du Canada. European Union CE EMI Class A Warning This is a Class A product. In a domestic environment, this product may cause radio interference, in which case the user may be required to take adequate measures. D-Link DCS-4602EV User Manual... - Page 61 D-Link may result in the loss of product warranty. Unless expressly approved by an authorized representative of D-Link in writing, you may not and may not permit others to: • Disassemble or reverse engineer the device or attempt to derive source code (underlying ideas, algorithms, or structure) from the device or from any other information provided by D-Link, except to the extent that this restriction is expressly prohibited by local law.
- Page 62 • Do not use this device near water (e.g. near a bathtub, sink, laundry tub, fish tank, in a wet basement or near a swimming pool). • Do not use this device in areas with high humidity. D-Link DCS-4602EV User Manual...
- Page 63 2. When transporting a sensitive component, first place it in an antistatic container or packaging. 3. Handle all sensitive components in a static-safe area. If possible, use antistatic floor pads, workbench pads, and an antistatic grounding strap. D-Link DCS-4602EV User Manual...
- Page 64 D-Link recommends that you always switch off or unplug your D-Link products when they are not in use. By doing so you will help to save energy and reduce CO2 emissions.
- Page 65 Chez D-Link, nous sommes conscients de l'impact de nos opérations et produits sur l'environnement et nous engageons à le réduire. Pour limiter cet impact, D-Link conçoit et fabrique ses produits de manière aussi écologique que possible, en utilisant des matériaux recyclables et faiblement toxiques, tant dans ses produits que ses emballages.
- Page 66 D-Link e l'ambiente D-Link cerca da sempre di ridurre l'impatto ambientale dei propri stabilimenti e dei propri prodotti. Allo scopo di ridurre al minimo tale impatto, D-Link progetta e realizza i propri prodotti in modo che rispettino il più possibile l'ambiente, utilizzando materiali riciclabili a basso tasso di tossicità...
- Page 67 D-Link raadt aan om steeds uw D-Link producten uit te schakelen of uit de stekker te halen wanneer u ze niet gebruikt. Door dit te doen bespaart u energie en beperkt u de CO2-emissies.
- Page 68 životní prostředí i lidské zdraví. D-Link a životní prostředí "Ve společnosti D-Link jsme si vědomi vlivu našich provozů a výrobků na životní prostředí a snažíme se o minimalizaci těchto vlivů. Proto své výrobky navrhujeme a vyrábíme tak, aby byly co nejekologičtější, a ve výrobcích i obalech používáme recyklovatelné...
- Page 69 For å minimalisere denne innvirkningen designer og lager D-Link produkter som er så miljøvennlig som mulig, ved å bruke resirkulerbare, lav-toksiske materialer både i produktene og forpakningen. D-Link anbefaler at du alltid slår av eller frakobler D-Link-produkter når de ikke er i bruk. Ved å gjøre dette hjelper du å spare energi og å redusere CO2-utslipp.
- Page 70 På D-Link förstår vi och är fast beslutna att minska den påverkan våra verksamheter och produkter kan ha på miljön. För att minska denna påverkan utformar och bygger D-Link sina produkter för att de ska vara så miljövänliga som möjligt, genom att använda återvinningsbara material med låg gifthalt i både produkter och förpackningar.
- Page 71 Na D-Link compreendemos e comprometemo-nos com a redução do impacto que as nossas operações e produtos possam ter no ambiente. Para minimizar este impacto a D-Link concebe e constrói os seus produtos para que estes sejam o mais inofensivos para o ambiente possível, utilizando meteriais recicláveis e não tóxicos tanto nos produtos como nas embalagens.