Alcatel-Lucent 400 User Manual
Alcatel-lucent omnipcx office communication server
Hide thumbs
Also See for 400:
- User manual (56 pages) ,
- Quick reference manual (10 pages) ,
- Technical specifications (2 pages)

Related Manuals for Alcatel-Lucent 400


Summary of Contents for Alcatel-Lucent 400
- Page 1 Alcatel-Lucent 400 DECT Handset Alcatel-Lucent 300 DECT Handset Alcatel-Lucent OmniPCX Office Communication Server...
- Page 3 To find out the essential features of the Alcatel-Lucent 300 DECT Handset or Alcatel- Lucent 400 DECT Handset, we suggest that you read carefully the first chapters of this guide. The availability of certain features described in this guide may depend on the version or configuration of your system.
-
Page 4: Table Of Contents
Contents Precautions for use ..... . p.8 Your telephone ......p.10 Display and corresponding icons . - Page 5 Contents Sharing ....... . p.27 Answering a night or a general bell ....p.27 Individual pick-up .
- Page 6 Contents Programming your telephone ... . . p.40 Initializing your voice mailbox ....p.40 Customizing your voice greeting .
- Page 7 Contents Accessories ......p.59 10.1 Chargers ........p.59 10.2 Characteristics of the mains power adapter .
-
Page 8: Precautions For Use
Precautions for use Reception OK (steady) The DECT features provided by your Alcatel system allow user mobility management via DECT cordless telephones. Radio coverage of the ALCATEL system is ensured by a network of radio terminals. The coverage area of a radio terminal is called a cell. •... -
Page 9: Operating Conditions
Operating conditions This terminal and the supporting radio equipment have been designed for use with an Alcatel OmniPCX Office system and have been officially approved for private use between wireless telephones via the associated private exchange The following conditions must be respected, notably concerning the use of radioelectric frequencies: •... -
Page 10: Your Telephone
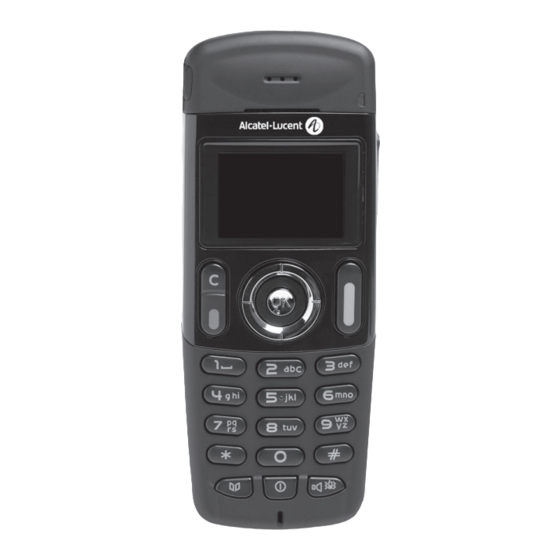
Your telephone Status icons Battery charge level: Message(s) waiting (flashing) Programmed callback time Call forwarding activated Call icons Making a call Answering a call In conversation Call on hold Access the directory feature Transferring a call Switching to DTMF signals Setting up a conference Forwarding your calls to your voice message service... - Page 11 Headset jack (400 DECT) Back-lit screen (in colour for the 400 DECT) The screen switches off automatically after a few seconds of inactivity. To turn it back on, press the key Light • Green steady: handset charging • Green fast flashing: outside the radio field •...
-
Page 12: Display And Corresponding Icons
Display and corresponding icons Your Reflexes telephone set features a display consisting of one line of icons and two lines of 16 alphanumerics characters. Status icons The status icons are displayed on the welcome screen and indicate the status of the telephone. Battery charge level: Message(s) waiting (flashing) Programmed callback time... -
Page 13: Shortcut Keys
Shortcut keys All features described here below can be accessed by a long press on specific keys (OK: It provides access to all the features available on your system. Directories: manage your personal directory and access the company directory. Redial: Auto call back Forward: forward your calls to another number. -
Page 14: Call Icons
Display and corresponding icons Call icons Making a call Incoming call - ringing Call in progress Call on hold Access the directory feature Transferring a call Switching to DTMF signals Setting up a conference Place a call on hold Parking an external communication * In the event of a multiple call, the icons are given indices to represent the different parties... -
Page 15: How To Read This Guide
How to read this guide Access the menus Move the navigation key up or down Move the navigation key to the left or right. Use the keypad to enter digits and letters Description of an action or context. Important information These symbols can be supplemented by small icons or texts. -
Page 16: Getting Started
Getting started Installing the battery pack • Installing the battery pack Position the battery 'connectors' side as shown in the drawing (A). Terminate the installation of the battery in its compartment by pressing as shown in the drawing (B). • To remove it Other Replace the cover. -
Page 17: Charging Your Telephone Battery
Charging your telephone battery Plug the charger into an appropriate electrical outlet and place the terminal into its charger slot. The telephone LED is green when charging. Recharge your telephone battery regularly. The telephone can be on or off when recharging the battery. -
Page 18: Switching On Your Telephone
Getting started Switching on your telephone switch on (long wait a few seconds (about press) If the display fails to light up or the battery icon is flashing, recharge the battery. If the radio reception icon doesn’t appear on the telephone display : •... -
Page 19: Using Your Telephone
Using your telephone Making a call dial the number send the call required To make an external call, dial the outside line access code (9) before dialing your party's number. To call from your personal directory (Individual number) select the directory feature 1-JOHN 2-PAUL select the party you wish to call... -
Page 20: Calling Your Party By Name (Company Directory)
Using your telephone Calling your party by name (company directory) select the directory feature PersSpDial Directory select 'directory' select the desired matching name * If several names come up, you can refine the search by entering the successive letters (second, third, etc.) of the name you are looking for. -
Page 21: Redial
Redial* redial 1-... 2-... 3-... select the no. from the last ten dialed Requesting automatic callback if internal number is busy The telephone of the internal party you are trying to contact is busy, and you want the person to call you back as soon as they are free. - Page 22 Using your telephone During a call During a call and without losing the connection, there are several ways to access the options offered by your system, using: • the list of icons at the top of the screen • the list of items at the bottom of the screen Sophie inconversation Transfer...
-
Page 23: During A Call
During a call Placing a call on hold (HOLD) Paul inconversation Transfer you are on call Making a second call Paul inconversation Transfer the first call is placed on hold You can also call a second party by selecting the icon or 2nd call text, or else by using your personal directory or the company directory. -
Page 24: Switching Between Two Calls (Broker Call)
During a call Switching between two calls (Broker call) During a call, to recover the party on hold: Paul inconversation Transfer press the line key with icon to recover the call on hold You can establish the identity of the waiting call without taking it by using the navigate-left-right key. -
Page 25: Transfer A Call To The Voice Mailbox Of An Absent Party
Transfer a call to the voice mailbox of an absent party During the call, you want to transfer your party to the voice mailbox of another party. Paul inconversation Transfer you are on a call with the destination number number of second confirm party Three-way conference with internal and/or external parties... -
Page 26: Store A Number
During a call Parking select the icon 'reconnection (call park)' dial the number of the set that originated parking If the parked call is not recovered within a preset time (by default 1 minute 30), it is directed to the attendant. Store a number* To store the displayed number in the personal directory while on a call: select the directory feature... -
Page 27: Sharing
Sharing Answering a night or a general bell When the attendant is absent, incoming external calls are forwarded to a general bell. You can answer these calls: select the 'pick-up' feature AnsGenBell select the 'answer general bell' feature Individual pick-up You hear a telephone ringing in an office where no-one can answer. -
Page 28: Hunt Groups
Sharing Hunt groups Hunt group call: Some extensions can be associated to form a group. You can contact any one of them by dialing the group number. Belonging to a group does not affect the handling of speed dials. A specific telephone within a group can always be called by using its own number. -
Page 29: Sending A Written Message To An Internal Party
Sending a written message to an internal party select the 'mail' feature 0 Text mail select the 'text mails' icon CALL ME BACK confirm select the message to be sent Number? ..confirm dial number to be called confirm... -
Page 30: Sending A Copy Of A Voice Message
Sharing The following 27 predefined messages exist: Call me back Call me back tomorrow CALL ME BACK AT xx : xx (*) 17 Out for a while CALL BACK xx.xx.xx (*) Call the attendant Call the assistant I will call back at _:_ (*) Use paging Please retrieve your fax 10 Please retrieve your mail... - Page 31 01/05 107 10 May 9:15 Send copy? Number? ..number or name of the recipient or list Sendcopy confirm * To record a comment Sendcopy Record start recording confirm Pleaseconfirm confirm While recording a comment you can select other features using the navigate-up-down key (navigate-up-down : confirm...
-
Page 32: Sending A Recorded Message To A Number/A Distribution List
Sharing Sending a recorded message to a number/a distribution list confirm access to the 'mail' feature personal code confirm Number? ..no. or name of the recipient or the list (000 - 050)* * Distribution lists: •... -
Page 33: Modify The Automated Attendant Welcome Message
Modify the automated attendant welcome message remotely This feature enables a user with the appropriate rights to modify the automated attendant night or day-time message. voice mail call send the call number of your personal code number voice mailbox follow the instructions of the voice guide access the 'personal access the 'welcome... -
Page 34: Keeping In Touch
Keeping in touch Selecting calls to be forwarded This feature enables you to select the calls to be forwarded. These can be: external calls, internal calls (local) or all calls. select the 'diversion' feature Allcalls Externcalls Intercalls select the 'list of calls' icon Immediate forwarding to your voice mailbox select the 'diversion' feature DivImmVMU... -
Page 35: Activating/Deactivating The Personal Assistant
• To access voice mail features: You can move horizontally along the various icons. 01/05 107 10 May 9:15 Play new? Listen to the messages Erase the current message Call back the person who left the message Send a copy of a message Pause while listening to the message Go back 10 seconds Go forward 10 seconds... -
Page 36: Personal Assistant: Reaching You With One Number Only
Keeping in touch Personal assistant: reaching you with one number only select the 'customizing your telephone' persoassist select the 'personal assistant' icon Menu select the 'menu' icon • To select the type of forwarding InternalNb Modify? enter the name of a colleague or your assistant or any other name ExternalNb Modify? -
Page 37: Diverting Calls To Another Number
MobileNb Modify? key in the number of your mobile ChoiceON ChoiceOFF activate/deactivate the transfer to the switchboard Number? ..dial the number Diverting calls to another number (immediate forwarding) The number can be your home, cell or mobile, voice message, or an internal extension (attendant, etc.). -
Page 38: Different Types Of Forwardings
Keeping in touch Different types of forwardings Example of forwarding on busy • Different types of forwardings You can initiate different types of forwarding from the call forward list. (Call forward list : Div Busy Div DND Div Follow Div to Pag •... -
Page 39: Consulting Messages Left While You Were Away
Consulting messages left while you were away When you have received a message, the voice mailbox icon flashes on the display. (Message : confirm access to the 'mail' feature 20 May 16:30 2/4 Read a msg? confirm select the desired message While the message is being read you can select other features with the navigate-up-down key. - Page 40 Programming your telephone Initializing your voice mailbox You can use the Message icon on the welcome screen to initialize your voice mailbox. (Message : Initial your voicemail Enter your password and record your name following the spoken instructions. Your personal code is used to access your voice mailbox and to lock your telephone.
- Page 41 • To go back to the default message select the 'customizing your telephone' feature Mbxgreeting select the 'voice-mail acceptance' Modifying your personal code Your personal code is used to access your voice mailbox and to lock your telephone. select the 'customizing your telephone' useroptions confirm access to 'options'...
-
Page 42: Programming Your Telephone
Programming your telephone Adjusting the audio features You can choose the ring melody of your telephone (6 options) and adjust the audio volume (4 levels). A progressing ringing tone (meeting mode) can be used. • Choose the tune: select the 'customizing your telephone' phoneset select the setting icon ;... -
Page 43: Adjusting The Ringer Volume
• Adjusting the ringer volume: select the 'customizing your telephone' feature phoneset select the setting icon Level1 Level2 Level3 select the volume of your choice • Activate the buzzer or the ringer MARTIN Paul Wed 24 May 16:30 long press vibrator activated and ringer disabled This key can be used to switch rapidly from the ringer to the vibrator and vice-versa. -
Page 44: Activating Headset Mode
Programming your telephone • Choosing the ringer melody You can choose from 5 different melodies for your terminal ringer.(Switch the station on or off: OK : Switch off the set? Switch off the telephone Activate/disable the vibrator Activate/disable the ringer Activate/disable meeting mode (progressive ringing) Lock/Unlock keypad Press the OK key to confirm (OK :... -
Page 45: Adjusting Your Telephone Features
Adjusting your telephone features select the 'adjustment' feature Ringing Keypad beep Warning beep select the feature* you want to activate or disable *You can activate or disable the following features: Lighting Bell Buzzer Keypad bleep Error bleep Outside area bleep Standby screen Adjusting screen brightness select the 'adjustment' feature... -
Page 46: Selecting Language
Programming your telephone Selecting language select the 'customizing your telephone' confirm Deutsch Français English select the language of your choice The initial language selection is made automatically by the system. Programming your personal directory (Individual number) Your personal directory may contain up to 10 numbers. PersSpDial Directory confirm access to... -
Page 47: Modifying A Card In The Personal Directory
7.10 Modifying a card in the personal directory PersSpDial Directory confirm access to 'pers sp dial' Name? MARTIN move onto the letter to be modified Number? 0123456789 move to the digit to be modified To delete an index card, delete the name and the number by holding down the delete key for a few seconds (delete : To delete a character, briefly press the delete key ( delete : 7.11... -
Page 48: Identifying The Terminal You Are On
Programming your telephone • Temporary appointment: call back within the next 24 hours • Permanent appointment: call back every day at the same time At the programmed time, your telephone rings: Press hang up or Off-hook to confirm the answer. (Hang up : , Lift the receiver : If you are on call, the display flashes, a tone is sent and you will hear... -
Page 49: Using The Telephone In Gap Mode
Using the telephone in GAP mode Your telephone complies with the GAP standard and can be used in simplified mode on another DECT/GAP system (other PABX or indoor relay unit). Unless otherwise specified, the features described below are available on your telephone in combination with the mandatory features provided by your fixed GAP system. -
Page 50: Sending Dtmf Signals
Using the telephone in GAP mode Sending DTMF signals During a call, you sometimes have to send DTMF signals, for example, for a voice message service, an automatic switchboard or when remotely consulting an answering machine. To do this: Press the star key (hold down for a few seconds). ( star : Sending a calibrated cut-off The calibrated cut-off activates features such as transfer to another telephone set. -
Page 51: Modifying A Name Or Number
Modifying a name or number select the directory feature 1-Edit 2-Delete 3-Call confirm select 'edit' modify the name confirm modify the digit confirm To delete a character, use the delete key. ( delete : Deleting a card select the directory feature 1-MARTIN 2-SOPHIE select the card to be deleted... -
Page 52: Customizing And Adjusting Your Telephone
Using the telephone in GAP mode 8.10 Customizing and adjusting your telephone Choosing your melody: select the 'ringer' feature confirm Adjusting the ringer volume: select the 'ringer' feature Volume: 3/4 select the 'volume' icon Selecting language: select the 'language' feature confirm return to idle increase / reduce the... -
Page 53: Adjusting Your Telephone Features
Adjusting screen contrast: select the 'adjustment' feature increase / reduce the contrast 8.11 Adjusting your telephone features select the 'adjustment' feature activate / disable *You can activate or disable the following features: Lighting Bell Buzzer Keypad bleep Error bleep Outside area bleep The phone bleeps when the radio link can no longer Standby screen return to idle select the feature* you want to activate or... -
Page 54: Registering The Telephone
Registering the telephone Registering the telephone on a system for the first time For the mobile telephone to feature, it must be registered on at least one Alcatel or GAP system (registration operation). If when first switched on the display indicates: 'System 1 — Auto install ?' your telephone has not been registered on any system;... - Page 55 The DECT set can be programmed and can address the 4 specified frequency bands. On installation, the user of a DECT set must declare the set in the appropriate frequency band according to the country in which the user finds himself: Region 1 Region 2 Region 3...
-
Page 56: Registering The Telephone On Other Systems
Registering the telephone Registering the telephone on other systems The telephone can be declared on several systems (maximum of 5). Note: the input is usually reserved for use with your main ALCATEL system. You can select the other inputs to register the telephone under another system (ALCATEL or other system). To make a new registration, when the telephone has already been registered on one or more systems, proceed as follows: 1. - Page 57 The DECT set can be programmed and can address the 4 specified frequency bands. On installation, the user of a DECT set must declare the set in the appropriate frequency band according to the country in which the user finds himself: Region 1 Region 2 Region 3...
- Page 58 Registering the telephone If the registration operation runs correctly (Subscription accepted), the telephone is ready for use, and the radio coverage icon appears. If the registration operation has not been successful, the station proposes launching the subscription again. Launch Subscription? Depending on the type of system concerned, registration may require one or more additional operations on the system.
-
Page 59: Accessories
Accessories 10.1 Chargers • Fixing a charger on a vertical surface • Assembling two chargers Other The 'Basic Desktop' charger includes: a telephone support, a mains cable, via an AC/DC adaptor. The 'Dual Desktop' charger includes: a support with : - a place for the telephone, - a place for an additional battery,... -
Page 60: Characteristics Of The Mains Power Adapter
These batteries contain polluting substances: do not dispose of them in a dustbin - take them to a specialized collection point. 300 DECT 135 hours 15 hours Battery On charge icon (minimum 3 flashing or 5 hours) 400 DECT 135 hours 13 hours Battery is fully charged (steady) -
Page 61: Headphone / External Microphone
10.4 Headphone / external microphone The side of the telephone features a headphone / external microphone socket. Contact your retailer to find out the characteristics of the various headphone models. 10.5 Cleaning your telephone Your telephone does not require any particular servicing. However, it may be cleaned using a soft, damp cloth. -
Page 62: Glossary
Glossary Broker call: Function enabling the user to switch back and forth between several simultaneous calls. Call transfer: Function enabling a call to be transferred to another telephone within the system. Common directory: This directory contains all the speed-dial numbers accessible to the users of the Alcatel system. Conference: The conference feature allows the user, in contact with two parties, to set up a three-way conference. -
Page 63: Declaration Of Compliance
Declaration of compliance We, Alcatel-Lucent Enterprise, hereby declare that we assume the Alcatel-Lucent 300 DECT Handset and Alcatel-Lucent 400 DECT Handset to be compliant with the essential requirements of Directive 1999/5/CE of the European Parliament and Council. This equipment uses the DECT harmonised frequency spectrum and can be used in all the countries of the European Community, Switzerland and Norway.No guarantee is given concerning possible...