Table of Contents
Advertisement
Available languages
Available languages
CD RDS RECEIVER
AUTORADIO CD RDS
SINTOLETTORE CD RDS
REPRODUCTOR DE CD CON RECEPTOR RDS
CD RDS-EMPFÄNGER
CD RDS-ONTVANGER
CD RDS ПРИЕМНИК
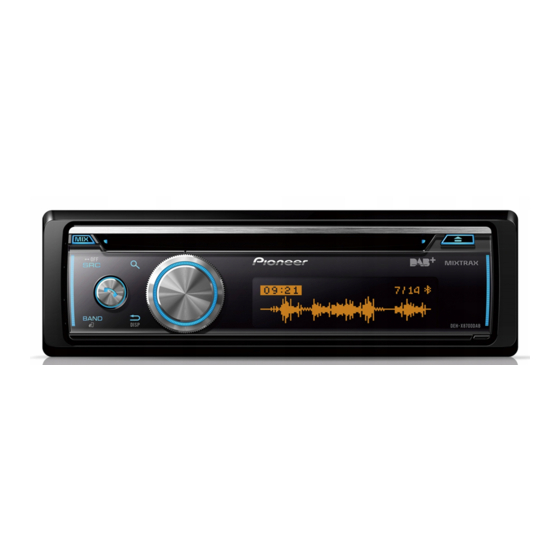
DEH-X8700DAB
DEH-X8700BT
Installation Manual
Manuel d'installation
Manuale d'installazione
Manual de instalación
Installationsanleitung
Installatiehandleiding
Руководство по установке
Advertisement
Table of Contents

Related Manuals for Pioneer DEH-X8700DAB


Summary of Contents for Pioneer DEH-X8700DAB
- Page 1 CD RDS RECEIVER AUTORADIO CD RDS SINTOLETTORE CD RDS REPRODUCTOR DE CD CON RECEPTOR RDS CD RDS-EMPFÄNGER CD RDS-ONTVANGER CD RDS ПРИЕМНИК DEH-X8700DAB DEH-X8700BT Installation Manual Manuel d’installation Manuale d’installazione Manual de instalación Installationsanleitung Installatiehandleiding Руководство по установке...
-
Page 2: Connections
This unit Power cord Connections/Installation – Never cut the insulation of the power Connections cable of this unit in order to share the power with other devices. The current Important capacity of the cable is limited. • When installing this unit in a vehicle –... -
Page 3: Power Amp (Sold Separately)
Blue/white • The semiconductor laser will be damaged Dashboard Power amp (sold separately) Connect to the system control terminal if it overheats. Install this unit away from Mounting sleeve Perform these connections when using the of the power amp (max. 300 mA 12 V hot places such as near the heater outlet. -
Page 4: Installing The Microphone
Install the microphone clip on the sun Install the microphone on the rear side visor. of the steering column. Lowering the sun visor reduces the voice recognition rate. Installing the microphone The microphone should be placed directly in front of the driver at a suitable distance to pick up their voice clearly. -
Page 6: Cet Appareil
– Haut-parleurs de 50 W (valeur de sortie) Entrée de l’antenne DAB (uniquement Jaune la borne de commande du relais et entre 4 Ω et 8 Ω (valeur pour le modèle DEH-X8700DAB) À raccorder à la borne d’alimentation d’antenne automatique du véhicule d’impédance). constante de 12 V. -
Page 7: Installation
Bleu/blanc • N’installez pas cet appareil aux endroits Fixez le manchon de montage à l’aide Amplificateur de puissance À raccorder à la borne de commande de où : d’un tournevis pour plier les (vendu séparément) système de l’amplificateur de puissance –... -
Page 8: Installation Du Microphone
Retrait de l’appareil REMARQUES Pour installer l’appareil sur la • Installez le microphone dans une Retirez l’anneau de garniture. colonne de direction position et une orientation qui lui permette de capter la voix de la personne Faites glisser la base du microphone qui utilise le système. -
Page 10: Cavo Di Alimentazione
(max. 300 mA 12 V Effettuare la connessione a un terminale impedenza compresa tra 4 Ω e 8 Ω DEH-X8700DAB) CC). Se il veicolo è dotato di un’antenna di alimentazione costante pari a 12 V. (valore di impedenza). -
Page 11: Installazione
Blu/bianco • In caso di surriscaldamento, il laser Fissare il riduttore di montaggio Effettuare il collegamento al terminale semiconduttore può subire danni. utilizzando un cacciavite per piegare di controllo del sistema Installare l’unità lontano da luoghi caldi, le linguette metalliche (90°) in dell’amplificatore di potenza (max. -
Page 12: Installazione Del Microfono
Rimozione dell’unità NOTE Per l’installazione sul piantone • Installare il microfono in una posizione e Rimuovere l’anello di rivestimento. dello sterzo un orientamento tale da consentire il rilevamento della voce della persona che Far scorrere la base del microfono per utilizza il sistema. -
Page 14: Esta Unidad
Entrada de antena DAB (solo para de control de relé de antena de producirse un incendio o una avería. DEH-X8700DAB) automóvil (máx. 300 mA 12 V CC). Si el A entrada de cable de alimentación – Vehículos con una batería de 12 V y una Entrada de cable de alimentación... -
Page 15: Instalación
Azul/blanco • El láser semiconductor puede resultar Fije la carcasa de montaje utilizando Conectar al terminal de control del dañado en caso de recalentamiento. un destornillador para doblar las sistema del amplificador (máx. 300 mA Instale esta unidad lejos de lugares lengüetas metálicas (90°) y encajarlas 12 V CC). -
Page 16: Instalación En La Columna De Dirección
Extracción de la unidad NOTAS Instalación en la columna de • Instale el micrófono en una posición y Extraiga el marco decorativo. dirección orientación que permita detectar la voz de la persona que utiliza el sistema. Deslice la base del micrófono para •... - Page 18 4 Ω bis 8 Ω (Impedanzwert). Eingang für DAB-Antenne (Nur für Automatikantennenrelais des Fahrzeugs Gelb • Um Kurzschlüsse, Überhitzung oder an (max. 300 mA 12 V Gleichspannung). DEH-X8700DAB) An der 12-V-Konstantspannungsbuchse Fehlfunktionen zu vermeiden, achten Sie Wenn das Fahrzeug eine Stromkabeleingang anschließen.
-
Page 19: Einbau
Blauweiß • Achten Sie bei Verwendung eines • Wenden Sie sich an Ihren Händler, wenn DIN-Montage von vorn Die Polanordnung des ISO-Steckers Subwoofers mit 70 W (2 Ω) darauf, den der Einbau das Bohren von Löchern oder Schieben Sie den Montagerahmen in variiert je nach Fahrzeugtyp. -
Page 20: Anbringen Des Mikrofons
Ziehen Sie auf jeder Seite zwei Anbringen des Mikrofons Schrauben an. Das Mikrofon sollte direkt vor dem Fahrer in einer geeigneten Entfernung angebracht werden, um die Stimme klar aufzufangen. VORSICHT Schneidschraube (5 mm × 8 mm) Es ist äußerst gefährlich, dem Befestigungswinkel Mikrofonkabel zu erlauben, sich um die Armaturenbrett oder Konsole... - Page 22 (uitgangswaarde) en 4 Ω tot 8 Ω DAB-antenne-ingang (alleen voor relaiscontact voor de automatische Reserve (of accessoire) (impedantiewaarde). DEH-X8700DAB) antenne (max. 300 mA 12 V gelijkstroom). Geel • Om kortsluiting, oververhitting of storing Stroomkabelingang Als de wagen uitgerust is met een...
- Page 23 Blauw/wit • Installeer het toestel niet op de volgende Zet de installatiekoker vast door de Eindversterker (afzonderlijk De penpositie van de ISO-connector is plaatsen: metalen lippen 90° te plooien met een verkocht) afhankelijk van het wagentype. Verbind – waar het de goede werking van de schroevendraaier.
-
Page 24: De Microfoon Installeren
Het toestel verwijderen OPMERKINGEN Installeren op de stuurkolom • Installeer de microfoon op een plaats Verwijder het sierkader. Verschuif de microfoonvoet om hem waar de stem van degene die het toestel los te maken van de microfoonklem. bedient, kan worden opgevangen. •... - Page 26 автоматической антенны автомобиля Вход для антенны DAB (только для – Перед установкой отключите Опция (или резервный) (макс. 300 мА, 12 В пост. тока). Если DEH-X8700DAB) отрицательную клемму батареи. Красный Вход шнура питания автомобиль оснащен антенной, – Закрепите провода с помощью...
- Page 27 Синий/белый ПРИМЕЧАНИЯ Установка Передняя/задняя установка Положение контакта разъема ISO • Измените исходное меню данного будет отличаться в зависимости от устройства. См. [SP-P/O MODE]. Выход Важно типа автомобиля. Подключите и сабвуфера данного устройства Данное устройство можно установить в • Перед установкой проверьте все , если...
-
Page 28: Установка Микрофона
Затяните по бокам два винта. ВНИМАНИЕ Установите зажим микрофона на Установите микрофон на заднюю солнцезащитный козырек. часть рулевой колонки. Запутывание провода микрофона При опускании солнцезащитного вокруг рулевой колонки или рычага козырька распознавание голоса переключения передач может привести ухудшается. к возникновению чрезвычайно опасной ситуации. - Page 32 © 2014 PIONEER CORPORATION. All rights reserved. © 2014 PIONEER CORPORATION. Tous droits de reproduction et de traduction réservés. © PIONEER CORPORATION, 2014. Все права защищены. <QRD3259-A> EW...