Table of Contents
Advertisement
Advertisement
Table of Contents

Related Manuals for York Fitness 52055


Summary of Contents for York Fitness 52055
- Page 1 Owner’s Manual Quest Crosstrainer 52055 V1.1 27APRIL2012 www.yorkfitness.com...
-
Page 2: Table Of Contents
Table of contents Congratulations on CONTENTS purchasing your exercise equipment from Safety information Customer support Assembly instructions Operational instructions You have chosen a high quality, safe and innovative piece of equipment as your training partner and we are certain it will keep you Fitness guide motivated on the way to achieving your personal fitness goals. -
Page 3: Safety Information
• Due to our continuous policy of product • Use only the adjustment setting as described in the development, York Fitness reserves the right to instructions. Always use the correct adjustment change specifications without notice. -
Page 4: Customer Support
Underside of the main body. IMPORTANT!! - Please retain your sales receipt, York Fitness Customer Care may request proof of purchase to validate eligibility for warranty service. Warranty cover starts from the date shown on the proof of purchase. -
Page 5: Assembly Instructions
Assembly instructions PREPARE YOUR WORK AREA - It is important you assemble the product in a clean and uncluttered space. WORK WITH A FRIEND - We recommend you have someone assist you with the assembly as some of the components are quite heavy. OPEN THE CARTON - Check any warnings on the carton and make sure you have it the right way up. - Page 6 Assembly instructions STEP 1 F-11 F-2 x 4 F-1 x 4 F-11 x 4 STEP 2 www.yorkfitness.com...
- Page 7 STEP 3 F-10 x 2 F-9 x 2 F-2 x 2 F-4 x 2 C-7 x 2 E-11 C-4 x 3 E-10 F-10 C-6 x 3 C-5 x 3 Pre-installed screw STEP 4 F-1 x 4 F-2 x 4 F-3 x 4 C-10 C-9 x 3 C-10 x 3...
- Page 8 Assembly instructions STEP 5 F-5 x 6 F-6 x 12 F-7 x 6 F-8 x 6 STEP 6 A-2 x 4 Pre-installed screw www.yorkfitness.com...
-
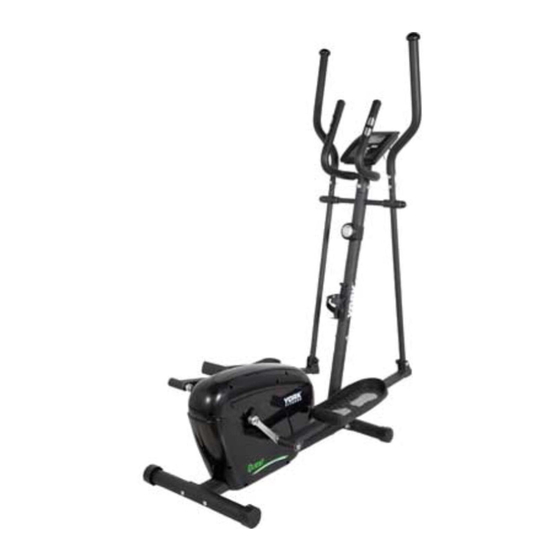
Page 9: Final Check
Final Check Your cross trainer is now assembled. Please make the following final checks: • Make sure all screws / bolts are tightened. • Make sure the equipment is on a flat, level surface. www.yorkfitness.com... -
Page 10: Operational Instructions
Operational instructions Console: Batteries Replacement Instructions: Remove the meter from the exercise equipment. Open the battery compartment cover. Remove battery by pulling the battery in direction of spring and lift opposite end upwards. Insert 2 AA batteries ensuring you match the polarity markings (+ and -) on the batteries with the indicators in the battery compartment. Push flat end ( - ) against spring and when clear push other end into holder. - Page 11 Key Function: DESCRIPTION • During setup, press RESET button once to reset current setting value. • Press and hold the RESET button for 2 seconds (the monitor will beep) to reset all function values. • Press the button once to add one increment to the current setting value. • TIME setting range: 00:00~99:00 (Each increment is 1:00) • CALORIES setting range: 0~9990 (Each increment is 10) • DISTANCE setting range: 0.00~99.50 (Each increment is 0.5)
- Page 12 Operational instructions Power On: When power on, the LCD monitor will beep and display all segments. Stand-by Mode: The LCD monitor will enter stand-by mode after 4 minutes of inactivity. Press on any key to wake the monitor. Operation: After power on the monitor for the first time, the user will be prompted to setup the clock and calendar setting.
-
Page 13: Adjusting The Resistance
Hand Pulse Sensors This cross trainer is fitted with 2 hand pulse sensors. To obtain a pulse reading you must have both your left and right hands on the sensors at the same time. Do not grip the hand sensors too tight Hand Pulse Sensor and allow the computer a few seconds to display the reading. -
Page 14: Fitness Guide
Fitness guide Starting and Finishing Your Workout Begin and end each workout with a Warm Up / Down session - a few minutes of stretching to help prevent strains, pulls and cramps. Correct Crosstraining Form To start using the cross trainer, simply stand on the foot pedals with the front of your shoes close to the front edge of the pedal cap. -
Page 15: Heart Rate Training
How Long Should I Exercise For? That really depends on your current level of fitness. If you’re just starting out on a new exercise program, you should start gradually and build up - do not try to do too much too quickly. 30 minutes, 3 times a week should be enough. -
Page 16: Care & Maintenance
Troubleshooting If you have a problem with your exercise equipment, before you do anything else please check that all the cables have been connected correctly. Loose cables are very common and many problems can be solved by making sure the cables are properly connected. The following table details the most common problems and how to fix them. -
Page 17: Part List
Part list YORK REF. REF. DESCRIPTION QTY. YORK REF. REF. DESCRIPTION QTY. 52055A00 CONSOLE SET 1 SET 52055F05 HEX HEAD SCREW (M6 X P1.0 X 40L) 6 PCS 52055A01 CONSOLE 1 PCS 52055F06 FLAT WAHSER (Ø8 X Ø16 X 1T) 12 PCS 52055A02 SCREW (M5 X 10) -
Page 18: Exploded Drawing
Exploded drawing C-10 F-11 E-10 E-11 F-2 F-9 F-10 F-11 www.yorkfitness.com... - Page 19 No.Z (contains the E, G, H, I, K ) C-10 C-12 C-15 C-13 C-11 C-14 E-10 E-11 E-12 E-10 www.yorkfitness.com...
- Page 20 www.yorkfitness.com...