Advertisement
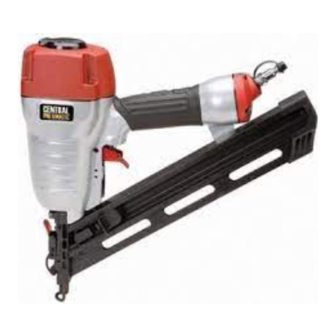
15 GAUGE AIR ANGLE NAILER
SEt Up ANd OpERAtING INStRUctIONS
distributed exclusively by Harbor Freight tools
Visit our website at: http://www.harborfreight.com
Read and understand tool labels and
manual. Failure to follow warnings could
result in dEAtH or SERIOUS INJURY.
SAVE tHIS mANUAL.
Copyright
2005 by Harbor Freight Tools
©
contained herein may be reproduced in any shape or form without the express written consent of
Harbor Freight Tools. Diagrams within this manual may not be drawn proportionally. Due to continuing
improvements, actual product may differ slightly from the product described herein. Tools required for
assembly and service may not be included.
For technical questions or replacement parts, please call 1-800-444-3353.
3491 Mission Oaks Blvd., Camarillo, CA 93011
. All rights reserved. No portion of this manual or any artwork
®
47612
.
®
cover revised 09b
Advertisement
Table of Contents

Related Manuals for Central Pneumatic 47612 Contractor Series


Summary of Contents for Central Pneumatic 47612 Contractor Series
- Page 1 15 GAUGE AIR ANGLE NAILER 47612 SEt Up ANd OpERAtING INStRUctIONS distributed exclusively by Harbor Freight tools ® 3491 Mission Oaks Blvd., Camarillo, CA 93011 Visit our website at: http://www.harborfreight.com Read and understand tool labels and manual. Failure to follow warnings could result in dEAtH or SERIOUS INJURY.
-
Page 2: Specifications
Specifications Air Inlet 1/4” NPT Recommended Air Pressure 70 – 120 PSI * Nail Size Capacity 1-1/4” to 2-1/2” Long Nails Nail Type 15 Gauge – 34° Magazine Capacity 100 Nails Safety Feature Full Sequential Contact Tip Overall Dimensions 15-1/4” x 10-3/4” x 3-5/8” Accessories Three Hex Wrenches, Air Tool Oil Fasteners Available At... - Page 3 Use the right tool for the job. Do not attempt to force a small tool or attachment to do the work of a larger industrial tool. There are certain applications for which this tool was designed. It will do the job better and more safely at the rate for which it was intended.
- Page 4 tion. Any part that is damaged should be properly repaired or replaced by a quali- fied technician. Do not use the tool if the trigger does not operate properly. Guard against electric shock. Prevent body contact with grounded surfaces such as pipes, radiators, ranges, and refrigerator enclosures. Replacement parts and accessories.
- Page 5 take caution, as some woods contain preservatives such as copper chromi- um arsenate (ccA) which can be toxic. When stapling or nailing these materials extra care should be taken to avoid inhalation and minimize skin contact. WARNING: Some dust created by power sanding, sawing, grinding, drilling, and other construction activities contain chemicals known (to the State of california) to cause cancer, birth defects, or other reproductive harm.
-
Page 6: Operation
Unpacking When unpacking, check to make sure all parts shown in the Parts List on page 11 are in- cluded. If any parts are missing or broken, please call Harbor Freight Tools at the number on the cover of this manual as soon as possible. Operation For best service, you should incorporate an oiler, regulator, and inline filter, as shown in the diagram below. -
Page 7: Loading Nails
the tool fires, stop immediately and have it repaired by a qualified service techni- cian. Depress the nose against the workpiece and squeeze the Trigger (47). the tool must cycle (fire) only once. Release the Trigger and squeeze it again. the tool must not cycle (fire). -
Page 8: Operating The Nailer
Operating the Nailer ALWAYS WEAR ANSI AppROVEd ImpAct SAFEtY GOGGLES WHEN RELOAdING OR dOING ANY OtHER mAINtENANcE ON tHIS tOOL. Other people in the work area must also wear ANSI approved impact safety goggles. Attach the Nailer to the air supply at the Air Inlet (57). Start your compressor and check the pressure making sure it is set at the recommended 70-120 PSI. -
Page 9: Clearing Jams
Anytime any maintenance or repairs are done (including clearing jams), FIRSt: Disconnect the Nailer from the air hose. Empty the Magazine (69) completely. Attempt to fire the Nailer into a piece of scrap wood to ensure that it is discon- nected and is incapable of firing any nails. -
Page 10: Inspection, Maintenance, And Cleaning
Anytime any maintenance or repairs are done (including clearing jams), FIRSt: Disconnect the Nailer from the air hose. Empty the Magazine (69) completely. Attempt to fire the Nailer into a piece of scrap wood to ensure that it is discon- nected and is incapable of firing any nails. -
Page 11: Parts List
pARtS LISt part description part description part description Nameplate Bolt Safety Warning Plate Grommet Safety Spring Bolt Valve Driver Guide Cover A Washer O-Ring Spring O-Ring O-Ring Magazine Deflector O-Ring Steel Channel Rubber Pad Valve Plunger Pusher Muffler O-Ring Rolling Element Spring Spring Set Screw... -
Page 12: Assembly Diagram
ASSEmbLY dIAGRAm SKU 47612 For technical questions, please call 1-800-444-3353. Page 12...