Table of Contents
Advertisement
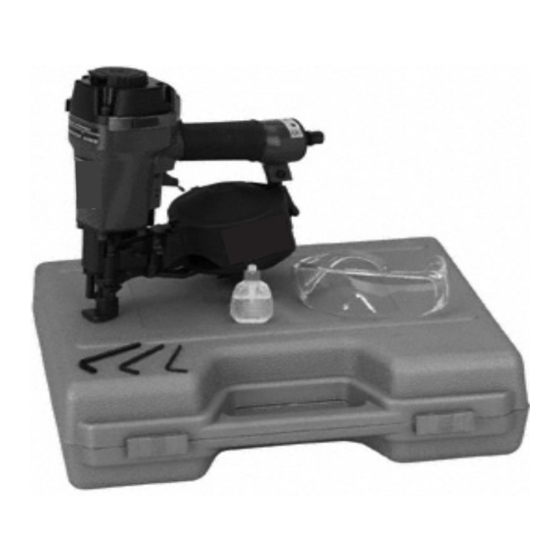
COIL ROOFING NAILER KIT
SET UP AND OPERATING INSTRUCTIONS
Distributed exclusively by Harbor Freight Tools
Visit our website at: http://www.harborfreight.com
Read and understand tool labels and
manual. Failure to follow warnings could
result in DEATH or SERIOUS INJURY.
SAVE THIS MANUAL.
©
Copyright
2004, 2009 by Harbor Freight Tools
artwork contained herein may be reproduced in any shape or form without the express written consent of
Harbor Freight Tools. Diagrams within this manual may not be drawn proportionally. Due to continuing
improvements, actual product may differ slightly from the product described herein. Tools required for
assembly and service may not be included.
For technical questions or replacement parts, please call 1-800-444-3353.
Revised Manual 09g
3491 Mission Oaks Blvd., Camarillo, CA 93011
92359
®
. All rights reserved. No portion of this manual or any
®
.
Advertisement
Table of Contents

Related Manuals for Central Pneumatic CONTRACTOR 92359


Summary of Contents for Central Pneumatic CONTRACTOR 92359
- Page 1 Harbor Freight Tools. Diagrams within this manual may not be drawn proportionally. Due to continuing improvements, actual product may differ slightly from the product described herein. Tools required for assembly and service may not be included.
-
Page 2: Safety Alert Symbol And Signal Words
SAVE THIS MANUAL Keep this manual for the safety warnings and precautions, assembly, operating, inspection, maintenance and cleaning procedures. Write the product’s serial number in the back of the manual near the assembly diagram (or month and year of purchase if product has no number). -
Page 3: Important Safety Instructions
IMPORTANT SAFETY INSTRUCTIONS INSTRUCTIONS PERTAINING TO A RISK OF FIRE, ELECTRIC SHOCK, OR INJURY TO PERSONS WARNING – When using tools, basic precautions should always be followed, including the following: General To reduce the risks of electric shock, fire, and injury to persons, read all the instructions before using the tool. - Page 4 Always assume that the tool contains fasteners. Do not point the tool toward yourself or anyone whether it contains fasteners or not. WARNING – Do not fire fastener on top of another fastener. This is able to cause the fastener to be deflected and hit someone, or cause the tool to react and result in a risk of injury to persons.
-
Page 5: Air Source
Use only the lubricants supplied with the tool or specified by the manufacturer. Air source Never connect to an air source that is capable of exceeding 90 PSI. Over pressurizing the tool may cause bursting, abnormal operation, breakage of the tool or serious injury to persons. - Page 6 on the proper maintenance of the tool. 15. Fire fasteners into an appropriate work surface only. Do not attempt to fire fasteners into surfaces too hard to penetrate. Do not drive fasteners on top of other fasteners, or at too steep of an angle.
- Page 7 product, but must be supplied by the operator. Vibration Precautions This tool vibrates during use. Repeated or long-term exposure to vibration may cause temporary or permanent physical injury, particularly to the hands, arms and shoulders. To reduce the risk of vibration-related injury: Anyone using vibrating tools regularly or for an extended period should first be examined by a doctor and...
-
Page 8: Functional Description
FUNCTIONAL DESCRIPTION Specifications Operating Air 65-90 PSI Maximum Pressure Air Inlet 1/4” -18 NPT Fastener .120” Dia. Shank, 3/4” to 1-3/4” L, Capacity (120 capacity) 2 SCFM @ 90 PSI Consumption 7 SCFM (For Continuous Use) Safety Full Sequential Safety Carrying Case Air Tool Oil Accessories... - Page 9 Note: If an automatic oiler system is not used, add a few drops of Pneumatic Tool Oil into the tool at the airline connection before operation. Add a few more drops after each hour of continual use. Attach an air hose to the compressor’s air outlet.
-
Page 10: Operating Instructions
OPERATING INSTRUCTIONS Read the ENTIRE IMPORTANT SAFETY INFORMATION section at the beginning of this manual including all text under subheadings therein before set up or use of this product. Inspect tool before use, looking for damaged, loose, and missing parts. If any problems are found, do not use tool until repaired. -
Page 11: Loading The Tool
Press the Safety Nosepiece against the workpiece and squeeze the Trigger. The tool must cycle (fire) only once. Release the Trigger and squeeze it again. The tool must not cycle (fire). With the Trigger held, carefully lift the tool and press it against the workpiece again. - Page 12 (64). Make sure the Latch closes securely. If it does not engage, the nail head is not in the slot in the upper portion of the Feed Hook (50). To adjust the Shingle Gauge: The Bracket (79) controls roof shingle spacing.
-
Page 13: User Maintenance Instructions
drive cylinder of the tool. Make sure to dry off the Roofing Nailer before use. Any oil film left after cleanup will accelerate tar buildup. When finished using the Roofing Nailer, always disconnect the tool from its compressed air supply. Attempt to fire the Roofing Nailer into a piece of scrap wood to ensure it is disconnected and is incapable... -
Page 14: Cleaning, Maintenance, And Lubrication
Cleaning, Maintenance, and Lubrication Note: These procedures are in addition to the regular checks and maintenance explained as part of the regular operation of the air-operated tool. Daily - Air Supply Maintenance: Every day, perform maintenance on the air supply according to the component manufacturers’... -
Page 15: Troubleshooting
Replace the coil of nails into the Roofing Nailer. Close Canister Cover (89) and Catch (64) securely. Then reconnect air supply hose to the tool. Problem Possible Causes Insufficient 1. Incorrect tool depth setting. fastener depth. 2. Not enough air pressure. 3. -
Page 16: Parts List
PARTS LIST Catch Latch Nail Canister Turntable Canister Cover SKU 92359 For technical questions, please call 1-800-444-3353. Page 16... -
Page 17: Assembly Diagram
ASSEMBLY DIAGRAM PLEASE READ THE FOLLOWING CAREFULLY THE MANUFACTURER AND/OR DISTRIBUTOR HAS PROVIDED THE PARTS LIST AND ASSEMBLY DIAGRAM IN THIS MANUAL AS A REFERENCE TOOL ONLY. NEITHER THE MANUFACTURER OR DISTRIBUTOR MAKES ANY REPRESENTATION OR WARRANTY OF ANY KIND TO THE BUYER THAT HE OR SHE IS QUALIFIED TO MAKE ANY REPAIRS TO THE PRODUCT, OR THAT HE OR SHE IS QUALIFIED TO REPLACE ANY PARTS OF THE PRODUCT. - Page 18 90 Day Warranty Harbor Freight Tools Co. makes every effort to assure that its products meet high quality and durability standards, and warrants to the original purchaser that this product is free from defects in materials and workmanship for the period of 90 days from the date of purchase.