
Related Manuals for Sony DAV-F200


Summary of Contents for Sony DAV-F200
- Page 1 3-398-069-51(1) DVD Home Theatre System Operating Instructions ©2008 Sony Corporation Sony Corporation http://www.sony.net/ Printed in China...
- Page 2 Precautions WARNING On power sources • AC power cord (mains lead) must be changed only at To reduce the risk of fire or electric the qualified service shop. shock, do not expose this apparatus to • The system is not disconnected from the AC power rain or moisture.
-
Page 3: About This Operating Instructions
About This Operating Instructions • The instructions in this Operating Instructions describe the controls on the remote. You can also use the controls on the control unit if they have the same or similar names as those on the remote. •... -
Page 4: Table Of Contents
Table of Contents About This Operating Instructions..3 Changing the Brightness of the Front Playable Discs......... 5 Panel Display and Illumination..81 Viewing Information About the Disc ... 82 Getting Started Controlling the TV with the Supplied Step 1: Positioning the System ...11 Remote ........... -
Page 5: Playable Discs
Playable Discs Type Disc logo Characteristics Icon DVD VIDEO • DVD VIDEO • DVD-R/DVD-RW in DVD VIDEO format or video mode • DVD+R/DVD+RW in DVD VIDEO format VR (Video • DVD-R/DVD-RW in VR (Video Recording) mode Recording) mode (except for DVD-R DL) VIDEO CD •... - Page 6 ® DivX is a video file compression technology, developed by DivX, Inc. DivX, DivX Certified, and associated logos are trademarks of DivX, Inc. and are used under license. A logical format of files and folders on CD-ROMs, defined by ISO (International Organization for Standardization).
- Page 7 Note on DualDiscs A DualDisc is a two sided disc product which mates DVD recorded material on one side with digital audio material on the other side. However, since the audio material side does not conform to the Compact Disc (CD) standard, playback on this product is not guaranteed. About Multi Session CD •...
- Page 8 This system incorporates High-Definition Multimedia Interface (HDMI ) technology. HDMI, the HDMI logo and High-Definition Multimedia Interface are trademarks or registered trademarks of HDMI Licensing LLC. “BRAVIA” is a trademark of Sony Corporation.
- Page 9 Getting Started Checking the supplied items • Control unit (1) • Stand cover (1) • Remote commander (remote) (1) • Screws (4) • R6 (size AA) batteries (2) • Front speakers (2) • Seals (for stand cover) (2) • Operating Instructions (this manual) •...
- Page 10 • If you do not intend to use the remote for an extended period of time, remove the batteries to avoid possible damage from battery leakage and corrosion. About operation of the remote You can operate this system and TV using the supplied remote. x System operation Press TV so that TV flashes four times.
-
Page 11: Step 1: Positioning The System
Step 1: Positioning the System For the best possible surround sound, all the speakers other than the subwoofer should be placed at the same distance from the listening position (A). Place the system as illustrated below. A Front speaker (L (left)) B Front speaker (R (right)) C Subwoofer D Control unit... - Page 12 • Do not place your hand on the speaker driver when lifting the subwoofer. Doing so, the speaker driver may be damaged. When lifting, hold the foot of the subwoofer. Speaker driver • It is recommended to place the subwoofer on a hard floor. •...
- Page 13 • It is recommended to place the front speakers on the edge of a table or rack, etc., to prevent sound reflection. Side view Recommended To install the speakers on a wall Before installing the speakers on the wall, prepare screws (not supplied) that are suitable for the hole on the rear of each speaker.
- Page 14 • Contact a screw shop or installer regarding the wall material or screws to be used. • Sony is not responsible for accident or damage caused by improper installation, insufficient wall strength or improper screw installation, natural calamity, etc.
-
Page 15: Step 2: Connecting The System
Step 2: Connecting the System See the connection diagram below, and read the additional information from 1 to 6 on the following pages. Note • Be sure to make connections securely to avoid hum and noise. • When you connect another component with a volume control, turn up the volume of the other components to a level where sound is not distorted. -
Page 16: Connecting The Speakers
To remove the panel cover of the control unit Before connecting the cables, remove the panel cover from the control unit. Push the mark on the left side of the panel cover, then slide to the right. 1 Connecting the Control unit Connect the system connector of the control unit to the SYSTEM CONTROL jack on the bottom of the subwoofer. - Page 17 Front speaker (L) Front speaker (R) White (Front speaker (L)) F R O F R O U S E N C E E D A I M P A K E S P E FRONT R FRONT L SPEAKER IMPEDANCE USE 3 SYSTEM CONTROL ONLY FOR HCD-F200 Red (Front speaker (R))
- Page 18 Thread the speaker cord though the slit of the stand base to prevent the cord being twisted or pinched. Tighten the screw to secure the speaker stand. Note • Be careful not to pinch the speaker cords while tightening screws.
-
Page 19: Connecting The Tv
3 Connecting the TV Be sure to disconnect the AC power cords of all components from their wall outlets (mains) before making connections. To listen to TV sound from the speakers of the system, connect the TV and the system with the audio cord (not supplied) (A). -
Page 20: Connecting The Other Components
Note • When connecting the jack, insert the plug into the jack as far as it will go. • When connecting the digital optical cord, insert the connector until it clicks (B). • During the “DMPORT” function, video signal is not output from the HDMI OUT and VIDEO OUT (COMPONENT) jacks. - Page 21 Digital optical cord (not supplied) Digital coaxial cord (not supplied) L IN D IG IT A O P TI C A B LE S AT /C A L IN D IG IT A C O A X IA B LE S AT /C A Connector panel of the control unit To the digital coaxial output jack of...
-
Page 22: Connecting The Fm Wire Antenna (Aerial)
To connect to a TV equipped with multiple audio/video inputs You can enjoy the sound with the speakers of the system through the connected TV. Connect the components as follows. VCR, digital satellite receiver or PlayStation, etc. VCR, digital satellite receiver or PlayStation, etc. - Page 23 To attach the stand cover and panel cover After connecting the cables, bundle excess cables and attach the panel cover and stand cover. Be sure to disconnect the AC power cords of all components from their wall outlets (mains) when attaching the stand cover.
- Page 24 Attach the stand cover to the rear of the control unit. Store the connected cables and excess portions of the cable ties inside the stand cover (1), then secure the stand cover with the 4 screws (2). Note • Make sure that the cables are not twisted or pinched when attaching the stand cover. •...
-
Page 25: About The Demonstration
About the demonstration After connecting the AC power cord (mains lead), the demonstration appears in the front panel display. To set the demonstration mode to on/off Press [/1. The system turns on. Press SYSTEM MENU on the remote. Press X/x repeatedly until “DEMO” appears in the front panel display, then press Press X/x to select a setting. -
Page 26: Step 3: Performing The Quick Setup
Press without inserting a disc. Step 3: Performing the The Setup Display for selecting the language. Quick Setup LANGUAGE SETUP ENGLISH OSD: Follow the Steps below to make the basic MENU: ENGLISH FRANÇAIS AUDIO: adjustments for using the system. DEUTSCH SUBTITLE: Displayed items vary depending on the country ITALIANO... - Page 27 To recall the Quick Setup display To select the type of video signal output from the HDMI OUT jack Press FUNCTION repeatedly until When you connect the control unit and the TV “DVD” appears in the front panel with the HDMI cable, select the type of video display.
- Page 28 Press FUNCTION repeatedly until The system outputs the progressive signal. “DVD” appears in the front panel When you select [NO], the system does not display. output the progressive signal. Press DISPLAY while the system is in stop mode. The Control Menu display appears on the TV screen.
-
Page 29: Step 4: Changing The Sound Source
Note Step 4: Changing the • When you use both the TV (AUDIO IN) jacks (analog connection) and TV (DIGITAL IN Sound Source OPTICAL) jack (digital connection) at the same time, the digital connection takes priority. • When you use both the SAT/CABLE (DIGITAL IN You can enjoy DVD, TV, or VCR sound, etc. -
Page 30: Disc
Press "/1. The system turns on. Disc Unless the system is set to “DVD,” press FUNCTION to select “DVD.” Playing a Disc “No Disc” appears in the front panel display and the system is ready for loading the disc. Load a disc. Push the disc into the disc slot until the disc Depending on the DVD VIDEO or VIDEO CD, is pulled in automatically. -
Page 31: Other Operations
Other operations Press Briefly fast forward the (instant advance) current scene (30 during playback. Press seconds after) Stop Pause Except for JPEG image files. Resume play after pause X or H Scan speeds may differ with some discs. Go to the next chapter, >... -
Page 32: Changing The Sound
are recorded on the disc. You also may not be able to Displaying multi-angles and turn them off. • You can change the subtitles if the DivX video file subtitles has an “.AVI” or “.DIVX” extension and contains subtitle information within the same file. Changing the sound SUBTITLE When the system is playing a DVD VIDEO or... - Page 33 displayed two or more times, the DVD VIDEO Checking the audio signal is recorded in multiple audio formats. format x DVD-VR The types of sound tracks recorded on a disc are displayed. Example: If you press AUDIO repeatedly during • [1: MAIN] (main sound) playback, the format of the current audio signal •...
- Page 34 Playing a VIDEO CD with PBC • To play without using the PBC function, press ./ > or the number buttons while the system is in stop functions (Ver.2.0) mode to select a track, then press H or . The system starts playback.
-
Page 35: Using Play Mode
Note Using Play Mode • Depending on where you stop the disc, the system may not resume playback from exactly the same point. Creating your own program • The point where you stopped playing may be cleared when: (Program Play) –... -
Page 36: Playing In Random Order
To change or cancel a program Press c. The cursor moves to the track row [T] (in Follow Steps 1 to 3 of “Creating your this case, [01]). own program.” Press X/x to select the program PROGRAM 0: 00:00 number of the track you want to ALL CLEAR change or cancel. -
Page 37: Playing Repeatedly
To turn off the Control Menu display Press DISPLAY repeatedly until the Control Menu display is turned off. Note • You cannot use Shuffle Play with a VIDEO CD or Super VCD with PBC playback. • When you press CLEAR to return to normal play, Program Play and Repeat Play are also canceled. -
Page 38: Searching/Selecting A Disc
• [TITLE]: You can repeat the current title Searching/Selecting a on a disc. • [CHAPTER]: You can repeat the current Disc chapter. x VIDEO CD/CD • [OFF]: Off. Using the DVD’s menu • [DISC]: You can repeats all of the tracks on the disc. - Page 39 To display the DVD’s menu on the Press X/x to select [ORIGINAL/ PLAY LIST], then press Control Menu display The options for [ORIGINAL/PLAY LIST] Press DISPLAY during playback. appear. The Control Menu display appears on the Press X/x to select a setting. TV screen.
- Page 40 To search for a scene using the Press X/x to select the search method. time code Example: [CHAPTER] [** (**)] is selected (** refers to a number). The number in parentheses indicates the In Step 2, select [TIME]. total number of titles, chapters, tracks, indexes, scenes, folders, or files.
-
Page 41: Playing Mp3 Files/Jpeg Image Files
Selecting an MP3 file or folder Playing MP3 Files/JPEG Image Files You can play the MP3 files or JPEG image files: • which have the extension “.MP3” (MP3 file) or “.JPG”/“.JPEG” (JPEG image file) • which conform to the DCF* image file format * “Design rule for Camera File system”: Image MENU X/x,... - Page 42 Selecting a JPEG image file or TRACK LIST 03 In the Middle of Nowher... folder 01_Geronimo_s_Cadillac 02_Riding_On_A_White_Swan 03_Give_Me_Peace_On_Earth 04_Sweet_Little_Shella 05_Ten_Thousand_Lonely_Drums 06_Lonely_Tears_In_Chinatown 07_In_Shaire Press X/x to select a file and press The system starts playing the selected file. PICTURE NAVI You can turn the file list off by pressing DVD MENU.
- Page 43 Displaying the list of MP3 files/JPEG image files Press C/X/x/c to select the JPEG image file you want to view, then press To return to normal screen, press O RETURN. X/x, Note • PICTURE NAVI does not work when you set [MODE (MUSIC, IMAGE)] to [MUSIC].
- Page 44 • If you play large MP3 file and JPEG image file at the same time, the sound may skip. Sony recommends that you set the MP3 bit rate to 128 kbps or lower when creating the file. If the sound still skips, reduce the size of the JPEG image file.
-
Page 45: Enjoying Divx ® Videos
To select an effect for JPEG ® Enjoying DivX Videos image files in the slide show Press DISPLAY twice. The Control Menu display appears on the TV screen. Press X/x to select [EFFECT], About DivX video files then press The options for [EFFECT] appear. ®... -
Page 46: Selecting A Folder
files with the extension “.AVI” or “.DIVX” if they do not contain a DivX video. FOLDER LIST SUMMER 2003 NEW YEAR'S DAY • For details about playable MP3 audio tracks or JPEG MY FAVOURITES image files on a DATA CD or DATA DVD, see “Playable Discs”... -
Page 47: Restricting Playback Of The Disc
Restricting Playback of FILE LIST MY FAVOURITES the Disc HAWAII 2004 VENUS [PARENTAL CONTROL] Playback of some DVD VIDEOs can be limited Press X/x to select a file and press according to a predetermined level such as the The selected file starts playing. age of the users. - Page 48 Press X/x to select [SYSTEM SETUP], “Parental Control Area Code List” then press (page 103) using the number buttons. The options for [SYSTEM SETUP] appear. Press X/x to select [LEVEL], then press Press X/x to select [PARENTAL CONTROL t], then press The selection items for [LEVEL] are displayed.
-
Page 49: Changing The Password
Enter a new 4-digit password using the Changing the password number buttons, then press To confirm your password, re-enter it using the number buttons, then press FUNCTION If you make a mistake entering Number your password button Press C before you press , then input the correct number. -
Page 50: Sound Adjustment
Sound Adjustment Enjoying Surround Sound by Using Decoding Mode You can enjoy surround sound simply by selecting one of the system’s pre-programmed decoding modes. They bring exciting and powerful sound of movie theaters into your home. X/x/c, SYSTEM MENU Press SYSTEM MENU. Press X/x repeatedly until “DEC. - Page 51 Press The selected decoding mode is applied. Press SYSTEM MENU. The system menu turns off. To turn the surround effect off Select “2CH STEREO” for “DEC. MODE” and set the sound mode (page 52) to “MOVIE” or “MUSIC.” Note • The surround effect might be difficult to hear depending on the type of source signals (e.g., digital stereo signals, digital multi signals, etc.) except for DVD multi-channel signals.
-
Page 52: Selecting The Sound Mode
Adjusting the Bass and Treble Selecting the Sound Level Mode You can adjust the bass and treble level easily. You can select a suitable sound mode for various sources such as movies or music. TONE X/x, SOUND MODE +/– Press TONE repeatedly until “BASS” or “TREBLE”... -
Page 53: Enjoying Multiplex Broadcast Sound
Enjoying Multiplex Broadcast Sound (DUAL MONO) You can enjoy multiplex broadcast sound when the system receives or plays the Dolby Digital multiplex broadcast signal. Note • To receive the Dolby Digital signal, you need to connect a TV or other component to the control unit with an optical or coaxial digital cord (page 19) and set the digital output mode of the TV or other component to Dolby Digital. -
Page 54: Tuner
Press “COMPLETE” appears in the front panel FM 10 : 88.00 MHz display, and the station is stored. SONY RADIO Repeat Steps 2 to 7 to store other stations. Station name Press SYSTEM MENU. The system menu turns off. -
Page 55: Listening To The Radio
To listen to radio stations when Listening to the Radio you know the frequencies Press FUNCTION repeatedly until “FM” Preset radio stations in the system’s memory appears in the front panel display. first (see “Presetting Radio Stations” (page 54)). Press D.TUNING. Press the number buttons to select the FUNCTION frequencies. -
Page 56: Naming Preset Stations
If you make a mistake Naming preset stations Press C/c repeatedly until the character to be changed flashes, then press X/x to select You can enter a name for preset stations. These the desired character. names (for example, “XYZ”) appear in the front To erase the character, press C/c panel display when a station is selected. -
Page 57: Control For Hdmi/External Audio Device
Device • The Control for HDMI function may not work if you connect a component other than Sony, even if the Using the Control for component is compatible with the Control for HDMI function. - Page 58 To set the [CONTROL FOR HDMI] Using the Theater/Theatre function to on/off Mode FUNCTION (Theater/Theatre Mode) If your TV is compatible with the Theater/ Theatre Mode, you can enjoy optimal image suited for movies and the sound is output from the system’s speaker automatically by pressing THEATER/THEATRE.
- Page 59 Note Turning the system off in sync • If the TV is turned on before turning on the system, TV sound will not be output for a moment. with the TV • While the TV is in PAP (picture and picture) mode, the System Audio Control function will not work.
-
Page 60: Playing Back Audio Files/Jpeg Image Files Of A Usb Device
Playing Back Audio FUNCTION Files/JPEG Image Files of a USB Device You can play audio files (MP3/WMA/AAC files)/JPEG image files transferred in a USB device (not supplied) by connecting the USB device to the control unit. For a list of USB devices that can be connected to the control unit, see “Playable USB Devices”... - Page 61 • The system can play back the following files. • Compatibility with all MP3/WMA/AAC encoding/writing softwares and USB devices File Extension of the file cannot be guaranteed. Incompatible USB MP3 file “.mp3” device may produce noise or interrupted audio WMA file “.wma”...
- Page 62 To play the next or previous FOLDER LIST audio file 01 Let's Talk About Love (1985) Press > to play the next MP3 file. Press . 02 1st Album (1986) 03 In the Middle of Nowhere (1986) twice to play the previous MP3 file. When you 04 Ready for Romance (1986) press .
- Page 63 Press X/x to select [MODE (MUSIC, IMAGE)], then press • A scroll box is displayed at the right side of the TV screen. To display the additional JPEG The options for [MODE (MUSIC, image files, select the bottom JPEG image file IMAGE)] appear.
- Page 64 • [FAST]: You can set the duration shorter Displaying the list of audio than [NORMAL]. • [SLOW 1]: You can set the duration files/JPEG image files longer than [NORMAL]. • [SLOW 2]: You can set the duration longer than [SLOW 1]. Press Note •...
- Page 65 To return to normal play Playing in random order Press CLEAR, or select [OFF] in Step 3. (Shuffle Play) To turn off the Control Menu display You can play the audio files on the USB device Press DISPLAY repeatedly until the Control in random order.
- Page 66 • [FOLDER]: You can repeat the current Press DISPLAY. (When playing a JPEG image files, press DISPLAY folder. twice.) • [TRACK] (audio files only): You can The Control Menu display appears on the repeat the current file. TV screen. Press Press X/x to select the search method.
- Page 67 Viewing the information of an Viewing the information of an audio file in the front panel audio file on the TV screen display DISPLAY DISPLAY You can display the information of an audio file such as time information, name of the folder/ Press DISPLAY repeatedly.
- Page 68 Note • Characters/marks may not be displayed in some • Date information is [DD/MM/YYYY]. languages. DD: Day MM: Month • Depending on the type of file being played, the YYYY: Year system can only display a limited number of characters. Also, depending on the file, not all text •...
-
Page 69: Transferring Songs In A Usb Device
Transferring songs on an audio Transferring Songs in a CD into a USB device USB Device You can transfer songs on an audio CD in a USB device by encoding to MP3 format. You can also transfer the MP3 files on a DATA CD/DATA DVD into the USB device. - Page 70 Select a track that you want to transfer. Transferring MP3 files on a Available space of DATA CD/DATA DVD into a USB the USB device device USB RECORDING Free: TRACK START TRACK TRACK TRACK TRACK TRACK TRACK TRACK Tracks to be transferred. x To select the desired track C/X/x/c, Press X/x to select the track, then press...
- Page 71 Select an MP3 file/folder that you want Erasing audio files on a USB to transfer. device Available space of the USB device You can erase audio files on the USB device. USB RECORDING Free: 2002_Remixes 01_Back_Seat_O... START FUNCTION 02_One_Nights_... 03_Are_You_Ma... 04_I_Can_Lose_...
-
Page 72: Using The Digital Media Port Adapter
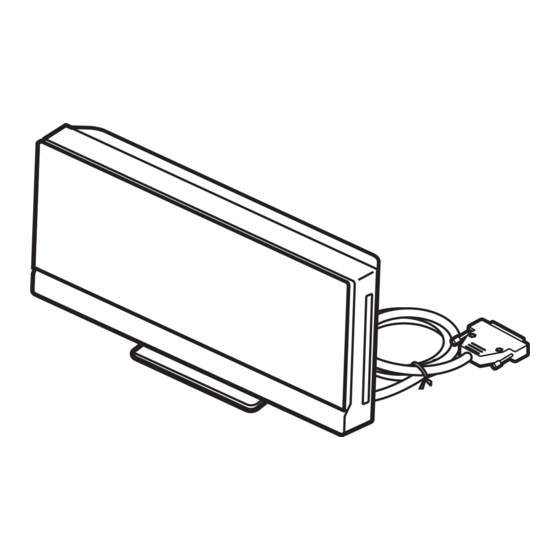
Start playback of the connected Using the DIGITAL MEDIA component. The sound and images from the connected PORT Adapter component are played on the system or connected TV. The DIGITAL MEDIA PORT (DMPORT) For operation details, refer to the operating adapter (not supplied) is for enjoying sound instructions of the DIGITAL MEDIA from a portable audio source or computer. -
Page 73: Other Operation
• [HDMI SETUP] (page 76) • [AUDIO SETUP] (page 77) Other Operation • [SYSTEM SETUP] (page 77) • [SPEAKER SETUP] (page 78) Using the Setup Display Example: [VIDEO SETUP] You can make various adjustments of items such Selected item as picture and sound. Displayed items vary depending on the country VIDEO SETUP model. -
Page 74: Settings For The Display
To reset all of the [SETUP] settings • If you select [OTHERS t] in [MENU], [AUDIO], and [SUBTITLE], select and enter a language code To reset all of the [SETUP] settings, see from “Language Code List” (page 103) using the “Returning the [SETUP] settings to the default”... - Page 75 Note • Depending on the DVD, [4:3 LETTER BOX] may be selected automatically instead of [4:3 PAN SCAN] or vice versa. 16:9 aspect ratio TV x [PROGRESSIVE (COMPONENT OUT)] You can set the progressive signal that is output Note from the VIDEO OUT (COMPONENT) jacks to •...
-
Page 76: Settings For The Hdmi
Settings for the HDMI x [VOLUME LIMIT] If you change the output method of the TV to the [HDMI SETUP] system speaker on the TV menu or by pressing THEATER/THEATRE, the System Audio Control (page 59) is activated and loud sound may be output depending on the volume level of HDMI SETUP HDMI RESOLUTION:... -
Page 77: Other Settings
[OFF]: No compression of dynamic range. x [JPEG RESOLUTION] [STANDARD]: The system reproduces the You can select the resolution of JPEG image sound track with the kind of dynamic range that files output from the HDMI OUT jack. the recording engineer intended. [MAX]: The system compresses dynamic range ]: The system outputs standard fully. -
Page 78: Settings For The Speakers
[ON]: The screen saver image appears if you do Settings for the speakers not operate the system for about 15 minutes. [OFF]: Off. [SPEAKER SETUP] x [BACKGROUND] To obtain the best possible sound, you can You can select the background color or picture change the level of the speakers. -
Page 79: Adjusting The Delay Between The Picture And Sound
Adjusting the Delay Changing the Input Level Between the Picture and of the Sound Sound Distortion may occur when you listen to a component connected to the TV (AUDIO IN) (A/V SYNC) jack on the control unit. Distortion is not a malfunction and will depend on the component connected. -
Page 80: Enjoying The Sound At Low Volume
Enjoying the Sound at Using the Sleep Timer Low Volume You can set the system to turn off at a preset time, so you can fall asleep listening to music. You can enjoy sound effects or dialogue, as you You can preset the time in 10 minutes would in a movie theater, even at low volume. -
Page 81: Changing The Brightness Of The Front Panel Display And Illumination
Changing the Display Changing the Brightness Mode of the Front Panel Display and Illumination (INFORMATION MODE) You can change the displayed information in the The brightness of the front panel display and front panel display. illumination can be set to either of 2 levels. DIMMER X/x/c, SYSTEM... -
Page 82: Viewing Information About The Disc
Illuminating the Front Viewing Information Panel Buttons About the Disc (ILLUMINATION MODE) You can set the type of illumination for the front panel. Viewing the playing time and remaining time in the front panel display DISPLAY X/x/c, SYSTEM MENU Press SYSTEM MENU. Press X/x repeatedly until “ILLUM MODE”... - Page 83 6 Track and index* Viewing the playing time and * VIDEO CD only. remaining time on the TV x Super VCD 1 Playing time of the current track screen 2 Track text 3 Track and index number x DATA CD (MP3 file)/DATA DVD (MP3 file) DISPLAY 1 Playing time and current track number 2 Track (file) name*...
-
Page 84: Checking The Play Information
To check DVD/CD text x VIDEO CD (without PBC functions)/ Press DISPLAY repeatedly during playback to • T **:** display text recorded in the DVD/CD. Playing time of the current track The DVD/CD text appears only when text is • T-**:** recorded in the disc. -
Page 85: Controlling The Tv With The Supplied Remote
TV with the supplied remote. JPEG image file. Note • When you replace the batteries of the remote, the code number may reset itself to the default (SONY) setting. Reset the appropriate code number. Preparing the remote for controlling the TV TV "/1... - Page 86 TV. JERROLD 830, 831 841, 842, 843 PANASONIC 816, 826, 832, 833, 834, 835 Manufacturer Code number PIONEER 828, 829 SONY 501 (default) SCIENTIFIC 815, 816, 817, 844 AIWA ATLANTA AKAI TOCOM/PHILIPS 830, 831 DAEWOO...
-
Page 87: Returning To The Default Settings
Press "/1. • The function of these buttons are same as the remote “CLEARING” appears in the front panel buttons of the SONY TV. For details, refer to the display and the default settings are returned. operating instructions of the TV. - Page 88 Press Returning the [SETUP] settings Do not press [/1 while resetting the system to the default as it takes a few seconds to complete. Note You can return the [SETUP] settings (page 73) • The [MODE (MUSIC, IMAGE)], [INTERVAL], and other than [PARENTAL CONTROL] to the [EFFECT] settings also return to the default settings.
-
Page 89: Additional Information
If you have any questions or problems concerning ventilation to prevent heat build-up in the system. your system, please consult your nearest Sony dealer. • At high volume, over long periods of time, the cabinet becomes hot to the touch. This is not a malfunction. -
Page 90: Notes About The Discs
Notes about the Discs On handling discs • To keep the disc clean, handle the disc by its edge. Do not touch the surface. • Do not stick paper or tape on the disc. • Do not expose the disc to direct sunlight or heat sources such as hot air ducts, or leave it in a car parked in direct sunlight as the temperature may rise considerably inside the... -
Page 91: Troubleshooting
• After checking the above items and fixing any problems, turn on the system. If the cause of the problem cannot be found even after checking all the above items, consult your nearest Sony dealer. The power cannot be turned off. • The demonstration mode (“DEMO”) is set to “ON.” Set “DEMO” to “OFF”... - Page 92 Symptom Remedy Picture noise appears. • The disc is dirty or flawed. • If the picture output from your system goes through your VCR to get to your TV, the copy-protection signal applied to some DVD programs could affect picture quality. If you still experience problems even when you connect your control unit directly to your TV, try connecting your control unit to your TV’s video input (page 19).
- Page 93 Symptom Remedy The sound loses stereo effect • Set [AUDIO] to [STEREO] by pressing AUDIO (page 32). when you play a VIDEO CD, a • Make sure the control unit is connected properly. CD, or an MP3 file. The surround effect is difficult to •...
- Page 94 • Multi-angles are not recorded on the DVD being played (page 32). • The DVD prohibits changing the angles. A disc cannot be ejected and • Contact your Sony dealer or local authorized Sony service facility. “LOCKED” appears in the front panel display.
- Page 95 (USB) port. Turn off the system and remove the USB device from the (USB) port. Make sure there is no problem with the USB device. If this display pattern persists, contact your nearest Sony dealer. Are you using a supported USB •...
- Page 96 – The file structure is extremely complex. – The memory capacity is excessive. – The internal memory is fragmented. • Sony recommends following these guidelines. – Total folders on the USB device: 200 or less. – Total files per folder: 150 or less.
- Page 97 • If the transfer and erase operations are repeated multiple times, the file structure within the USB device becomes complex. Follow the procedure in the operating instructions of the USB device to format the USB device. If the problem persists, contact your nearest Sony dealer.
- Page 98 USB device may be broken. Follow the procedure in the operating instructions of the USB device to format the USB device. If the problem persists, contact your nearest Sony dealer. Audio files or folders on the • Check if the USB device is write-protected.
-
Page 99: Self-Diagnosis Function
[VER.X.XX] (X is a number) may display) appear on the TV screen. Although this is not a malfunction and for Sony service use only, When the self-diagnosis function is activated to normal system operation will not be possible. prevent the system from malfunctioning, a 5- Turn off the system, and then turn on the system character service number (e.g., C 13 50) with a... -
Page 100: Specifications
Video Section Specifications Outputs VIDEO: 1 Vp-p 75 ohms COMPONENT: Y: 1 Vp-p 75 ohms Amplifier Section : 0.7 Vp-p Power output (rated) 108 W + 108 W (at 3 ohms, 75 ohms 1 kHz, 1% THD) HDMI OUT: Type A RMS output power (reference) (19 pin) FL/FR*: 135 W (per... -
Page 101: Glossary
Design and specifications are subject to change Glossary without notice. • Standby power consumption 0.3 W. • Halogenated flame retardants are not Dolby Digital used in the certain printed wiring This movie theater sound format is more boards. advanced than Dolby Surround Pro Logic. In •... - Page 102 Parental Control A function of the DVD to limit playback of the disc by the age of the users according to the limitation level in each country. The limitation varies from disc to disc; when it is activated, playback is completely prohibited, violent scenes are skipped or replaced with other scenes and so on.
-
Page 103: Language Code List
Language Code List The language spellings conform to the ISO 639: 1988 (E/F) standard. Code Language Code Language Code Language Code Language 1027 Afar 1183 Irish 1347 Maori 1507 Samoan 1028 Abkhazian 1186 Scots Gaelic 1349 Macedonian 1508 Shona 1032 Afrikaans 1194 Galician 1350 Malayalam 1509 Somali... -
Page 104: Index To Parts And Control
Index to Parts and Control For more information, refer to the pages indicated in parentheses. Control unit Top view Front view Right side view AUTO WIDE STAGE FUNCTION A Ventilation slots G Remote sensor (9) H VOL +/– buttons (30) B "/1 (on/standby) button (26, 87) I Z (eject) button (30) C AUTO (Decoding mode) indicator (50) - Page 105 Connector panel Left side view A ANTENNA (FM75Ω COAXIAL) jack (22) G SAT/CABLE (DIGITAL IN OPTICAL) jack (20) B VIDEO OUT (COMPONENT) jacks (19) H TV (DIGITAL IN OPTICAL) jack (19) C TV (AUDIO IN R/L) jacks (19) I DIGITAL OUT (COAXIAL) (DVD D VIDEO OUT (VIDEO) jack (19) function only) jack (20) E SAT/CABLE (DIGITAL IN COAXIAL)
-
Page 106: Front Panel Display
Front panel display SLEEP MUTING TUNED TITLE CHAP STEREO MONO NTSC NIGHT REPEAT 1 DIGITAL PROGRESSIVE A Flashes when the sleep timer is set. K Lights up when the night mode is on. (80) (80) B Lights up when the sound of the L Lights up when the HDMI OUT jack is system is muted. - Page 107 Subwoofer Rear view Bottom view FRONT R FRONT L SPEAKER IMPEDANCE USE 3 SYSTEM CONTROL ONLY FOR HCD-F200 A Ventilation slots C SYSTEM CONTROL jack (16) B SPEAKER (FRONT R/FRONT L) jacks (16)
-
Page 108: Remote Control
Remote control ALPHABETICAL ORDER BUTTON DESCRIPTIONS A – L M – Z ANALOG ws (86) MENU/HOME wl (86) Number buttons 4 (34, 54, 85) ANGLE 6 (32) MUTING wh (30) [/1 (on/standby) 1 (25, 26, 30) AUDIO ea (32, 53) NIGHT ed (80) TV [/1 (on/standby) w;... -
Page 109: Guide To The Control Menu Display
Guide to the Control Menu Display You can use the Control Menu display to select a function and to view related information. DISPLAY Press DISPLAY repeatedly. Each time you press DISPLAY, the Control Menu display changes: 1 t 2 t ... t 1 t ... 1 Control Menu display 1 2 Control Menu display 2 (appears when available) 3 Control Menu display off... - Page 110 Example: Control Menu display 1 when playing a DVD VIDEO. Currently playing title number Currently playing chapter number Total number of titles Playback status Total number of chapters (N Playback, Control Menu items X Pause, x Stop, etc.) 98( 99) Type of disc being 13( 99) DVD VIDEO...
- Page 111 [DISC MENU] (page 38) You can display the DVD’s menu. [BROWSING] (page 43) You can display the list of folders/JPEG image files. [SETUP] (page 73) [QUICK] (page 26) You can make the basic adjustments. Use Quick Setup to select the desired language of the on-screen display, the aspect ratio of the TV.
- Page 112 List of Control Menu Items for USB device Item Item Name, Function [REPEAT] (page 65) You can play the entire USB device (all folders/all files) repeatedly or one folder/file repeatedly. [BROWSING] (page 64) You can display the list of folders/JPEG image files. [DATE] (page 68) You can display the date the picture was taken by a digital camera.
-
Page 113: Index
Index Numerics HDMI (High-Definition Multimedia Interface) 101 4:3 OUTPUT 75 Quick Setup 26 HDMI RESOLUTION 76 5.1 Channel Surround 33 HDMI SETUP 76 Region Code 7 A/V SYNC 79 Remote 9 ILLUMINATION MODE 82 AAC file 60 Repeat Play 37 INFORMATION MODE 81 ANGLE 32 RESET 78, 88... -
Page 114: 關於本使用說明書
警語 關於本使用說明書 爲了預防發生火災或觸電,請勿將本設備放 • 本使用說明書中的說明描述遙控器上的控 在雨水所及或潮濕的地方。 制鍵。如果在控制器上有與遙控器上名稱 相同或相似的控制鍵,則也可以使用。 切勿將本設備安裝在狹窄的空間內,如書櫃或壁 • 控制菜單項目可能因地區而異。 櫥內。 •“DVD” 可能作為 DVD VIDEO、 DVD+RW/DVD+R 為了避免發生火災,請勿使用報紙、桌布、窗簾等 以及 DVD-RW/DVD-R 的一般術語使用。 物品蓋住設備的通風孔。請勿將點燃的蠟燭置放 於設備上。 • 預設設定有下劃線。 為了防止火災或電擊危險,請勿將花瓶等裝滿液 體的物體放置在本設備上。 請勿讓電池或安裝電池的設備暴露在過熱的環境 中,例如:陽光、火等。 本設備歸類為 CLASS 1 LASER 產品。 此標誌位 於控制器的背面外表 面。 注意事項 關於電源 • 僅能在合格的維修商店更換交流電源線。 •... - Page 115 目錄 關於本使用說明書 ....2 其他操作 可播放光碟 ...... 4 使用設定顯示 ....68 入門指南 調節圖像和聲音間的延遲 ..73 改變聲音輸入電平 ....74 步驟 1:放置系統....9 欣賞低音量音效 ....74 步驟 2:連接系統....13 使用睡眠定時器 ....75 步驟 3:執行快速設定....24 更改前面板顯示幕和照明的 步驟 4:變更聲音來源....26 亮度 ....... 75 光碟 觀看關於光碟的資訊 .... 77 播放光碟...
-
Page 116: 可播放光碟
可播放光碟 類型 光碟標誌 特性 圖示 DVD VIDEO • DVD VIDEO • DVD VIDEO 格式或視頻模式 的 DVD-R/DVD-RW • DVD VIDEO 格式的 DVD+R/DVD+RW VR (視頻錄製) • VR (視頻錄製)模式的 模式 DVD-R/DVD-RW(DVD-R DL 除外) VIDEO CD • VIDEO CD (1.1 和 2.0 版光碟) • Super VCD •... - Page 117 由 ISO (International Organization for Standardization)定義的 CD-ROM 檔案與資料夾邏輯格式。 “DVD-RW” 、 “DVD+RW” 、 “DVD+R” 、 “DVD VIDEO”和 “CD”標誌是商標。 本系統不能播放的光碟示例 本系統不能播放下列光碟: • 以非第 4 頁列出格式錄製的 CD-ROM/CD-R/CD-RW • 以 PHOTO CD 格式錄製的 CD-ROM • CD-Extra 的資料部分 • CD 圖像光碟 • DVD 聲音 • 不含有 MP3 檔案、JPEG 圖像檔案或 DivX 視頻檔案的 DATA DVD •...
- Page 118 或申請中的專利授權製造。 DTS 和 DTS 2.0 + Digital Out 為 DTS, Inc. 的註冊商標, DTS 標誌和圖示為其商標。 © 1996-2007 DTS, Inc. 保留所有權利。 本系統合併了 High-Definition Multimedia Interface (HDMI )技術。 HDMI、HDMI 標誌和 High-Definition Multimedia Interface 是 HDMI Licensing LLC 的商標 或註冊商標。 “BRAVIA”是 Sony Corporation 的商標。...
- Page 119 入門指南 檢查提供的物品 • 控制器 (1) • 底座蓋 (1) • 遙控器 (1) • R6 (AA 尺寸)電池 (2) • 螺絲 (4) • 前置揚聲器 (2) • 封條 (用於底座蓋) (2) • 使用說明書 (本手冊) • 揚聲器和電視機連接 (附 件) • 調頻導線式天線 (1) • 低音揚聲器 (1) • 視頻線 (1) •...
- Page 120 • 切勿將任何異物掉落到遙控器內,特別是在更換電池時。 • 如果長時間不打算使用遙控器,請取出電池以避免因電池漏液和腐蝕而造成損壞。 關於遙控器的操作 您可以用提供的遙控器操作本系統和電視機。 x 系統操作 按 TV 鍵,TV 鍵將閃爍四次。 遙控器會進入系統操作模式。操作系統時,請將遙控器指向面板顯示幕的中心。 A.F.D. STD D.C.S. FUNCTION DVD HOME THEATRE SYSTEM DAV-F500 遙控感應窗 x 電視機操作 按 TV 鍵,TV 鍵將亮起 1 秒鐘。 遙控器會進入電視機模式。若要操作系統,請將遙控器指向電視機。詳細說明,請參閱 “用 提供的遙控器控制電視機” (第 80 頁) 。 電視機 • 切勿將遙控感應窗暴露於直射陽光或照明設備下。否則可能引起故障。...
-
Page 121: 步驟 1:放置系統
步驟 1:放置系統 為盡可能獲得最佳的環繞聲效果,除低音揚聲器外的所有揚聲器都應放置在與聆聽位置相等 距離的位置 (A) 。 如下圖所示放置系統。 A 前置揚聲器 (L (左) ) B 前置揚聲器 (R (右) ) C 低音揚聲器 D 控制器 • 附近放置如揚聲器等物體時,在控制器的右 (光碟槽)側預留插入 / 退出光碟的空間 (約 15 cm) 。 約 15 cm A.F.D. STD A.F.D. STD D.C.S. D.C.S. FUNCTION FUNCTION DVD HOME THEATRE SYSTEM DAV-F500 DVD HOME THEATRE SYSTEM DAV-F500... - Page 122 • 抬起低音揚聲器時,切勿將手放在揚聲器驅動器上。否則,揚聲器驅動器可能損壞。抬起低音揚聲器時, 請握持低音揚聲器腳柱。 揚聲器驅動器 • 建議將低音揚聲器放置在硬質地板上。 • 您也可以將低音揚聲器面朝聆聽位置擺放在任一側。 有效使用揚聲器 適當擺放揚聲器,使各揚聲器到聆聽位置的距離 (A 與 B)相等 (0.0 至 7.0 m) 。 前置揚聲器 (L) 低音揚聲器 電視機 前置揚聲器 (R) • 將兩個前置揚聲器分別放在與聆聽位置等距離的左右兩側 (形成等腰三角形) 。 • 前置揚聲器應該放在至少距離 0.6 m 處。 • 將前置揚聲器放在比電視機更前面的位置。確定揚聲器前無反射障礙物。 • 兩個前置揚聲器應該朝向正前方。請勿傾斜放置揚聲器。 錯誤 正確...
- Page 123 • 建議將前置揚聲器放置在桌子或架子等設備的邊緣上,以免聲音反射。 側視圖 建議 將揚聲器安裝到牆壁上 將揚聲器安裝在牆上之前,先準備能適合每個揚聲器背後掛孔的螺絲 (不提供) 。 揚聲器背後的掛孔 4 mm 5 mm 30 mm 10 mm 卸下揚聲器背後的螺絲 (預裝) 。 螺絲 (預裝) 拆卸揚聲器底座。 從揚聲器上斷開揚聲器導線。 取出揚聲器底座。...
- Page 124 將揚聲器導線重新連接到揚聲器。 揚聲器導線上的接頭和色環與連接插孔的標記顏色相同。請確保揚聲器導線與對應揚聲器 端子的極性相一致:將有色環的揚聲器導線對應到 3,將無色環的揚聲器導線對應到 #。 切勿將揚聲器導線的絕緣部分夾在揚聲器端子中。 揚聲器背面 色環 (+) (–) 接頭 色環 前置揚聲器 (L) :白色 前置揚聲器 (R) :紅色 將螺絲擰入牆壁。 5 至 7 mm 將揚聲器掛於螺絲上。 揚聲器背面 • 使用適合牆面材料和強度的螺絲。由於石膏板牆壁易碎,請將螺絲牢固釘入柱子並擰入牆壁。將揚聲器安 裝在足夠牢固的垂直和平整的牆壁上。 • 關於使用的牆面材料或螺絲,請聯絡螺絲商店或安裝人員。 • Sony 對因不正確安裝、牆壁不夠堅固、不正確安裝螺絲、自然災害等引起的事故或損壞不承擔責任。...
-
Page 125: 步驟 2:連接系統
步驟 2:連接系統 請參閱後面幾頁的連接圖示和附加資訊 1 到 6。 • 請確保緊固連接以避免交流聲和噪音。 • 當您連接具有音量控制器的其他裝置時,將其他裝置的音量調高到聲音不失真的電平。 低音揚聲器 FRONT R FRONT L SPEAKER IMPEDANCE USE 3 SYSTEM CONTROL ONLY FOR HCD-F200 2 前置揚聲器 (L) 2 前置揚聲器 (R) 低音揚聲器底部 6 交流電源線 1 插頭 5 調頻導線式天線 A.F.D. STD D.C.S. FUNCTION 4 錄影機、數位衛星接收器... - Page 126 取下控制器的面板蓋 連接電纜前,請將面板蓋從控制器上取下。 推面板蓋左側的 標誌, 然後向右滑動。 1 連接控制器 將控制器的系統接頭連接到低音揚聲器底部的 SYSTEM CONTROL 插孔。 插入 SYSTEM CONTROL 接頭的插頭,然後旋緊插頭螺絲。 低音揚聲器底部 FRONT R FRONT L 控制器背面 SPEAKER IMPEDANCE USE 3 SYSTEM CONTROL ONLY FOR HCD-F200 插頭 螺絲 SYSTEM CONTROL 電纜...
- Page 127 2 連接揚聲器 將左前置揚聲器的揚聲器接頭插入低音揚聲器底部的 FRONT L 插孔, 右前置揚聲器的揚聲器接 頭插入 FRONT R 插孔。 前置揚聲器 (L) 前置揚聲器 (R) 白色 (前置揚聲器 (L) ) F R O F R O U S E N C E E D A I M P A K E S P E FRONT R FRONT L...
- Page 128 將揚聲器導線嵌在底座底部的狹縫中,防止扭曲或夾住導線。 擰緊螺絲,以固定揚聲器底座。 • 擰緊螺絲時請小心,不要夾住揚聲器導線。...
- Page 129 3 連接電視機 在連接之前,務必從所有裝置的電源插座上斷開其交流電源線。 若要從本系統的揚聲器聆聽電視機的聲音, 使用聲音導線(不提供) 連接電視機和系統(A) 。 對於視頻輸出至電視機,確認電視機的視頻輸入插孔,並選擇連接方法 A、 B 或 C。圖像 品質按 A (標準)至 C (HDMI)順序提高。 若電視機具備數位光纖輸出插孔,您可以使用數位導線進行連接,以改善聲音品質 (B) 。 分量視頻導線 聲音導線 (不提供) * (不提供) 綠色 白色 藍色 紅色 紅色 A U D IO O U T V ID E N T P O N C O M 連接至電視機的...
- Page 130 • 連接插孔時,將插頭插入插孔並插到底。 • 連接數位光纖導線時,插入接頭直至聽到喀嗒聲 (B) 。 • 在使用“DMPORT”功能時,不會從 HDMI OUT 和 VIDEO OUT(COMPONENT)插孔輸出視頻訊號。由於視頻訊 號從 VIDEO OUT (VIDEO)插孔輸出,選擇連接方法 A 以取得圖像。 • 本系統可接受數位和類比兩種訊號。數位訊號優先於類比訊號。 (COAXIAL 優先於 OPTICAL。 )如果數位訊 號停止,將在 2 秒鐘後處理類比訊號。 • 除了連接電視機以外,您還可以將其他裝置,例如錄影機、數位衛星接收器或 PlayStation 連接至 TV (AUDIO IN)插孔 (A)或 TV (DIGITAL IN OPTICAL)插孔 (B) 。 改變彩色系統...
- Page 131 數位光纖導線 (不提供) 數位同軸導線 (不提供) L IN D IG IT A O P TI C A B LE S AT /C A L IN D IG IT A C O A X IA B LE S AT /C A 或 控制器的接頭面板 連接至...
- Page 132 連接配備多重聲音 / 視頻輸入的電視機 您可以透過連接的電視機,從本系統的揚聲器欣賞聲音。如下連接裝置。 錄影機、數位衛星接收器或 電視機 PlayStation 等 錄影機、數位衛星接收器或 PlayStation 等 系統 A.F.D. STD D.C.S. FUNCTION DVD HOME THEATRE SYSTEM DAV-F500 :訊號流 選擇電視機上的裝置。詳細說明,請參閱電視機的使用說明書。 如果電視機沒有多重聲音 / 視頻輸入,必須具備切換器才能從兩個以上的裝置中接收聲音。 5 連接調頻導線式天線 A N T E N FM 75 調頻導線式天線 C O A X IA (提供)...
- Page 133 安裝底座蓋和面板蓋 連接電纜後,綑綁過長的電纜並蓋上面板蓋和底座蓋。 安裝底座蓋時,務必從所有裝置的電源插座上斷開其交流電源線。 將電纜綑綁在控制器的背面。 將連接的電纜透過底座 (1)穿到控制器 (2)背面,用電纜扎帶 (3)在 2 個位置處 綑綁電纜,然後鎖定電纜扎帶。 將電纜扎帶的多餘部分放入框架側壁中。 將面板蓋安裝到控制器的背面。 用電纜扎帶 (提供)綑綁。 • 必須將調頻導線式天線充分伸展開。 • 綑綁電纜後,應盡可能使調頻導線式天線保持水平。 • 如果電纜難以嵌入狹縫中,用電纜扎帶 (提供)綑綁電纜,然後安裝面板蓋。...
- Page 134 將底座蓋安裝到控制器的背面。 將連接的電纜和電纜扎帶的多餘部分放入底座蓋 (1)中,然後用 4 個螺絲 (2)固定 底座蓋。 • 安裝底座蓋時,要確保不要扭曲或夾住電纜。 • 如果無法蓋住底座蓋,請重新整理電纜。 • 擰緊螺絲時,請小心不要夾住電纜。 黏貼 2 個封條 (用於底座蓋)以隱藏擰緊的螺絲。 6 連接交流電源線 將低音揚聲器的交流電源線連接至電源插座之前,請將前置揚聲器連接至低音揚聲器。 低音揚聲器底部 低音揚聲器 FRONT R FRONT L SPEAKER IMPEDANCE USE 3 SYSTEM CONTROL ONLY FOR HCD-F200 連接至電源插座 交流電源線...
- Page 135 關於演示 連接交流電源線之後,前面板顯示幕中出現演示。 將演示模式設定為打開 / 關閉 按 [/1 鍵。 系統打開。 按遙控器上的 SYSTEM MENU 鍵。 反覆按 X/x 鍵,直至前面板顯示幕中出現 “DEMO” ,然後按 鍵或 c 鍵。 按 X/x 鍵選擇一項設定。 •“DEMO ON” :開啓。 •“DEMO OFF” :關閉。 按 鍵。 設定完成。 按 SYSTEM MENU 鍵。 系統菜單關閉。 • 當您新購買本系統,或者系統為出廠預設設定 (第 82 頁) ,您即可按下遙控器上的 [/1 鍵而關閉演示。...
-
Page 136: 步驟 3:執行快速設定
不插入光碟按 鍵。 步驟 3:執行快速設定 用於選擇語言的設定顯示。 按照以下步驟,為使用本系統進行基本 調整。 視該國家的機型而定,顯示項目會有不同。 • 當您使用分量視頻導線 (不提供)或 HDMI 電纜 (不提供)連接本系統和電視機時,必須設定符 合您電視機的視頻輸出類型。詳細說明,請參閱 按 X/x 鍵選擇語言。 “設定符合您電視機的視頻輸出類型” (第 25 頁) 。 系統以選擇的語言顯示菜單和字幕。 按 鍵。 "/1 出現用於選擇要連接的電視機的縱橫比 設定顯示。 C/X/x/c, DISPLAY 按 X/x 鍵選擇設定項。 x [16:9] 如果您有寬螢幕電視機或帶有寬螢幕模 式的 4:3 標準電視機 (第 69 頁) x [4:3 信箱形式... - Page 137 恢復快速設定顯示 選擇從 HDMI OUT 插孔輸出的視頻訊號類型 當您使用 HDMI 電纜連接控制器和電視機時, 反覆按 FUNCTION 鍵,直至前面板顯示幕中 選擇從HDMI OUT插孔輸出的視頻訊號類型。 出現 “DVD” 。 詳細說明,亦請參閱電視機 / 投影機等隨附 當系統處於停止模式中時按 DISPLAY 的使用說明書。 鍵。 反覆按 FUNCTION 鍵,直至前面板顯示幕中 電視機螢幕上出現控制菜單顯示。 出現 “DVD” 。 按 X/x 鍵選擇 [ 設定 ],然後按 當系統處於停止模式中時按 DISPLAY 鍵。 鍵。 出現...
-
Page 138: 步驟 4:變更聲音來源
按 X/x 鍵選擇 [ 常規 ],然後按 鍵。 步驟 4:變更聲音來源 出現設定顯示。 按 X/x 鍵選擇 [ 視訊設定 ], 然後按 鍵。 您可以變更聲音來源以欣賞 DVD、電視機或 出現 [ 視訊設定 ] 選項。 錄影機聲音等。 按 X/x 鍵選擇 [ 逐行(分量視頻輸出)], 然後按 鍵。 按 X/x 鍵選擇想要的設定,然後按 鍵。 FUNCTION • [ 關 ]:系統不輸出逐行訊號。在以下 情況時選擇此設定:... -
Page 139: 播放光碟
按 "/1 鍵。 系統打開。 光碟 除非系統設定為 “DVD” ,否則 按 FUNCTION 鍵選擇 “DVD” 。 播放光碟 前面板顯示幕中出現 “No Disc” ,系統 準備裝入光碟。 裝入光碟。 將光碟推入光碟槽,直至光碟被自動拖 視 DVD VIDEO 或 VIDEO CD 而定, 某些操作方 入。 法可能會有所不同或有所限制。 請參閱隨光碟提供的使用說明書。 貼標籤面向前 光碟槽 "/1 光碟被自動拖入控制器。 按 H 鍵。 FUNCTION 系統開始播放... - Page 140 其他操作 您無法搜尋 DVD-VR 上的靜止圖像。 對於 DATA CD/DATA DVD, 此功能僅能對 DivX 視頻 檔案有效運作。 若要 按鍵操作 僅適用於 DVD VIDEO/DVD-RW/DVD-R。 停止 除了 DivX 視頻檔案之外,均可使用此按鈕。 暫停 僅適用於 DVD VIDEO/DVD-RW/DVD-R/DVD+RW/ 暫停後重續播放 X 或 H DVD+R。 進 入 下 一 章、軌 跡 或 > 除了 DivX 視頻檔案之外,均可使用此按鈕。 場面...
- Page 141 顯示多角度與字幕 改變聲音 當系統播放以多聲音格式 (PCM、Dolby Digital、MPEG 聲音或 DTS)錄製的 DVD VIDEO 或 DATA CD/DATA DVD (DivX 視頻檔 案)時,您可以更改聲音格式。如果 DVD SUBTITLE VIDEO 錄製了多種語言軌跡,則您也可以改 ANGLE 變語言。 對於 VIDEO CD、CD、DATA CD 或 DATA DVD, 您可以選擇右聲道或左聲道的聲音,並通過 左右兩個揚聲器聆聽所選擇聲道的聲音。 改變角度 AUDIO 如果DVD VIDEO上對場面錄製了多個角度 (多 角度) ,則您可以改變觀看角度。 在播放時按 ANGLE 以選擇想要的角度。 •...
- Page 142 x DVD-VR 查看聲音訊號格式 顯示光碟上錄製的聲音軌跡的類型。 例如: • [1:主 ] (主音) • [1:副 ] (副音) 如果在播放過程中反覆按 AUDIO 鍵,則當前 • [1:主 + 副 ] (主和副音) 聲音訊號的格式(PCM,Dolby Digital,DTS • [2:主 ] 等)將如下所示出現。 • [2:副 ] x DVD • [2:主 + 副 ] 例如: Dolby Digital 5.1 聲道 •...
- Page 143 播放有 PBC 功能的 VIDEO CD • 若不使用 PBC 功能播放,則在系統處於停止模式 (2.0 版) 時按 ./> 鍵或數字鍵選擇一個軌跡,然後 按 H 鍵或 鍵。系統開始播放。您不能播放靜 止圖像,如菜單畫面。若要返回 PBC 播放,按兩 (PBC 播放) 次 x 鍵,然後按 H 鍵。 使用 PBC (Playback Control)功能,您可 從光碟停播點續播 以欣賞到簡單的交互式操作、搜尋功能和其 他類似操作。 (重續播放) PBC 播放能讓您按照電視機螢幕上的菜單, 交互式播放 VIDEO CD。 當您停止播放光碟,系統會記憶您按...
-
Page 144: 使用播放模式
• 對於DVD-VR、 VIDEO CD、 CD、 DATA CD或DATA DVD, 使用播放模式 系統會記憶當前光碟的續播點。 • 在編序播放和隨機播放過程中不能進行重續播 放。 • 有些光碟可能無法正常使用此功能。 建立自己的編序 (編序播放) • 若要從光碟的開頭播放, 按兩次 x 鍵, 然後按 H 鍵。 通過重續播放欣賞之前播放過的光碟 您可以將光碟中的軌跡進行排序,來建立自 (多重光碟續播) 己的編序,這樣您便能按照想要的順序播放 光碟中的內容。您最多可以編序 99 個軌跡。 本系統可在您下次插入相同光碟時,恢復上 次停播光碟的點並從該點續播。當續播記憶 體已滿時,第一片光碟 的重續播放 點被刪 除。 若要啓動此功能,則將 [ 系統設定 ] 中的 [ 多重光碟續播... - Page 145 按 c 鍵。 改變或取消編序 游標移至軌跡排 [T] (此時為 [01]) 。 請按照 “建立自己的編序” 的步驟 1 至 3 進 行操作。 按 X/x 鍵選擇您要改變或取消的軌跡的編 序號碼。 如果您要從編序中刪除軌跡, 則按 CLEAR 鍵。 按照步驟 5 進行新編序。 若要取消編序,則選擇 [T] 中的 [ 清除 ], 然後按 鍵。 選擇您想要編序的軌跡。 例如,選擇軌跡 [02]。 取消編序中的所有軌跡 按...
- Page 146 播放時按 DISPLAY 鍵。 重複播放 電視機螢幕上出現控制菜單顯示。 按 X/x 鍵選擇 [ 隨機 ],然後按 (重複播放) 鍵。 出現 [ 隨機 ] 選項。 按 X/x 鍵選擇要隨機播放的項目。 您可以重複播放光碟上的內容。 x VIDEO CD/CD 您可以使用隨機播放或編序播放模式的組 • [ 關 ]:關閉。 合。 • [ 軌跡 ]:您可以隨機播放光碟上的軌 跡。 x 編序播放時 REPEAT • [ 關 ]:關閉。 •...
-
Page 147: 搜尋 / 選擇光碟
x DATA CD/DATA DVD 搜尋 / 選擇光碟 • [ 關 ]:關閉。 • [ 光碟 ]:您可以重複播放光碟上所有 的資料夾。 使用 DVD 菜單 • [ 資料夾 ]:您可以重複播放當前資料 夾。 • [ 軌跡 ](僅 MP3 檔案) : 您可以重複播 放當前檔案。 DVD 被分為許多部分,由這些部分編排成 • [ 文件 ] (僅 DivX 視頻檔案) : 您可以重 一個圖像或音樂特輯。這些部分稱為... - Page 148 關閉控制菜單顯示 搜尋標題/章/軌跡/場面等等 反覆按 DISPLAY 鍵直至控制菜單顯示關 閉。 選擇 DVD-VR 上的 [ 原作品 ] 您可以用標題或章搜尋 DVD VIDEO/DVD-VR, 或 [ 播放目錄 ] 另外您可以用軌跡、索引或場面搜尋 VIDEO CD/CD/DATA CD/DATA DVD。對於 DATA CD/ DATA DVD,您可以用資料夾或檔案搜尋。由 於標題和軌跡在光碟上有分配的唯一編號, 此功能僅適用於有建立播放目錄的 DVD-VR。 您可以輸入它的編號選擇所需的標題或軌 跡。或者,您可以使用時間代碼搜尋場面。 數字鍵 X/x, X/x, DISPLAY DISPLAY 當系統處於停止模式中時按 DISPLAY 鍵。...
-
Page 149: 播放 Mp3 檔案 /Jpeg 圖像檔案
按 鍵。 播放 MP3 檔案 /JPEG 圖 [** (**)] 改變為 [- - (**)]。 像檔案 9 8 ( 9 9 ) 1 3 ( 9 9 ) DVD VIDEO 0 : 0 3 : 1 7 您可以播放以下 MP3 檔案或 JPEG 圖像檔案: •... - Page 150 按 X/x 鍵選擇檔案,然後按 鍵。 選擇 MP3 檔案或資料夾 系統開始播放所選擇的檔案。您可以按 DVD MENU 鍵關閉檔案列表。再按 DVD MENU 鍵將顯示資料夾列表。 停止播放 按 x 鍵。 播放下一個或前一個 MP3 檔案 按 > 鍵播放下一個 MP3 檔案。 按兩次 . 鍵播放上一個 MP3 檔案。 按一次 . 鍵時, DVD MENU 可以進入當前 MP3 檔案的開頭。請注意,在 X/x, 當前資料夾上最後一個檔案之後,您可以通...
- Page 151 選擇 JPEG 圖像檔案或資料夾 PICTURE NAVI 按 C/X/x/c 鍵,選擇您要觀看的 JPEG 圖像檔案,然後按 鍵。 若要返回正常螢幕,按 O RETURN 鍵。 MENU C/X/x/c, • 當您將 [ 模式 (音樂, 圖像) ] 設定為 [ 音樂 ] O RETURN 時,就無法使用 PICTURE NAVI。 • 電視機螢幕的右側顯示一個捲動方塊。若要 顯示另外的 JPEG 圖像檔案,請選擇底部的 JPEG 圖像檔案並按 x 鍵。若要返回前一個 JPEG 圖像檔案,請選擇頂部的...
- Page 152 顯示 MP3 檔案 /JPEG 圖像檔案 如同播放帶有聲音的幻燈片 的列表 一樣播放 MP3 檔案和 JPEG 圖 像檔案 首先將 MP3 檔案和 JPEG 圖像檔案放入一片 DATA CD 或 DATA DVD 中同一個資料夾內,您 便能播放帶有聲音的幻燈片。 X/x, DISPLAY DVD MENU X/x, DISPLAY 播放時按 DISPLAY 鍵。 電視機螢幕上出現控制菜單顯示。 按 X/x 鍵選擇 [ 瀏覽中 ],然後按 鍵。...
- Page 153 幕的中央展開。 • 當選擇 [ 音樂 ] 時,PICTURE NAVI 無效。 • [ 模式 4]:JPEG 圖像檔案任意循環所 • 如果您同時播放很大的 MP3 檔案和 JPEG 圖像檔 有的效果。 案,則聲音可能跳躍。Sony 建議您在製作檔案時 • [ 模式 5]:下一個 JPEG 圖像檔案滑動 將 MP3 位元率設定為 128 kbps 或更低。 如果聲音 覆蓋前一個圖像。 仍然跳躍,則再縮小 JPEG 圖像檔案的尺寸。...
-
Page 154: 欣賞 Divx ® 視頻
® 欣賞 DivX 視頻 • 當DivX視頻檔案是由兩種以上的DivX視頻檔案結 合而成時,本系統可能無法播放此類檔案。 • 本系統無法播放尺寸超過 720(寬)× 576(高) 或 2GB 的 DivX 視頻檔案。 • 視 DivX 視頻檔案而定, 聲音可能會跳躍或無法與 電視機畫面上的圖像對應。 關於 DivX 視頻檔案 • 本系統無法播放某些時間超過 3 小時的 DivX 視頻 檔案。 ® DivX 是一種由 DivX, Inc. 所研發的視頻 • 視 DivX 視頻檔案而定,圖像可能會暫停或不清 ®... - Page 155 按 H 鍵。 返回至先前的顯示 系統開始播放所選擇的資料夾。 按 O RETURN 鍵。 若要選擇 DivX 視頻檔案,請參閱“選擇 停止播放 DivX 視頻檔案” (第 43 頁) 。 按 x 鍵。 進入下一頁或上一頁 不打開上述檔案列表而播放下一個或上一 按 鍵。 個 DivX 視頻檔案 關閉顯示 您可以按 >/. 而選擇同一個資料夾中 重複按 DVD MENU 鍵。 的下一個或上一個 DivX 視頻檔案。 您也可以在播放當前資料夾的最後一個檔案...
-
Page 156: 限制光碟的播放
按 X/x 鍵選擇 [ 視聽者控制 t],然後按 限制光碟的播放 鍵。 x 如果您還沒有輸入密碼 [ 視聽者控制 ] 出現用於登入新密碼顯示。 有些 DVD VIDEO 的播放可以根據預先確定的 等級,如使用者年齡來加以限制。場面可能 被阻擋或用其他場面進行替換。 您可以用登入密碼的方式而設定播放限制。 當您設定 [ 視聽者控制 ] 功能為開啓時,您 需要輸入密碼以播放受限制的光碟。 使用數字鍵輸入 4 位數密碼,然後按 鍵。 FUNCTION 出現確認密碼顯示。 x 當您已經登入了一個密碼 數字鍵 出現輸入密碼顯示。 使用數字鍵輸入或重新輸入 4位數密碼, 然 後按... - Page 157 播放已設定 [ 視聽者控制 ] 的光碟 按 X/x 鍵選擇 [ 設定 ],然後按 鍵。 裝入光碟並按 H 鍵。 出現 [ 設定 ] 選項。 出現輸入密碼顯示。 按 X/x 鍵選擇 [ 常規 ],然後按 鍵。 使用數字鍵輸入 4 位數密碼,然後按 出現設定顯示。 鍵。 按 X/x 鍵選擇 [ 系統設定 ], 然後按 鍵。...
-
Page 158: 使用解碼模式欣賞環繞聲
聲音調節 使用解碼模式欣賞環繞聲 您只要選擇其中一種系統預編解碼模式,便能欣賞環繞聲。這些解碼模式將把電影院中動人和 強有力的聲音帶到您的家中。 X/x/c, SYSTEM MENU 按 SYSTEM MENU 鍵。 反覆按 X/x 鍵,直至前面板顯示幕中出現 “DEC. MODE” ,然後按 鍵或 c 鍵。 反覆按 X/x 鍵,直至前面板顯示幕中出現您想要的解碼模式。 顯示 解碼模式 效果 “AUTO” 可在 2 CHANNEL 視選擇的光碟或功能而定,自動選擇解碼模式。 STEREO、WIDE STAGE •“2CH STEREO” : 不管播放聲音光碟 (如CD、 DATA-CD (MP3) 和... - Page 159 關閉環繞聲效果 選擇 “DEC. MODE”的 “2CH STEREO”並將聲音模式(第 48 頁)設為 “MOVIE”或 “MUSIC” 。 • 視 DVD 多聲道訊號除外的音源訊號類型(如數位立體聲訊號、數位多聲道訊號等)而定,可能難以聽到環 繞效果。 • 當控制器正在讀取 USB 裝置中的檔案或是傳送歌曲時,無法選擇解碼模式。 • 視輸入流而定,解碼模式可能無效。 • 當聲音模式設為 “SPORTS”時,環繞效果會被取消。 • 系統將記憶每個功能模式最後選擇的解碼模式。 任何時候您選擇 “DVD”或 “FM”等功能,當返回該功能時最後套用的解碼模式將再次自動套用。例如, 如果您採用 “AUTO”作為解碼模式聆聽 “DVD”,然後您更換到另一個功能,隨後又返回到 “DVD”,則 “AUTO”將重新套用。...
-
Page 160: 選擇聲音模式
調節低音和高音電平 選擇聲音模式 您可以為如電影或音樂等多種來源選擇適合 您可以輕鬆調節低音和高音電平。 的聲音模式。 TONE X/x, SOUND MODE 反覆按 TONE 鍵,直至前面板顯示幕中出現 播放時反覆按 SOUND MODE +/- 鍵,直至想要的 “BASS”或 “TREBLE” 。 模式在前面板顯示幕中出現。 •“BASS” :調節低音電平 •“AUTO” :視光碟或聲音流而定,本系統自 (-6.0 - +6.0,以 0.5 遞增) 。 動選擇 “MOVIE”或 “MUSIC”模式產生 •“TREBLE” :調節高音電平 聲音效果。 (-6.0 - +6.0,以 0.5 遞增) 。 •“MOVIE”... -
Page 161: 欣賞多路廣播聲音
欣賞多路廣播聲音 (DUAL MONO) 當系統接收或播放 Dolby Digital 多路廣播 訊號時,您能夠欣賞多路廣播聲音。 • 若要接收Dolby Digital訊號, 您需要使用光纖或 同軸數位導線將電視機或其他裝置連接到控制器 (第 17 頁) ,並將電視機或其他裝置的數位輸出 模式設定為 Dolby Digital。 AUDIO 反覆按 AUDIO 鍵,直至前面板顯示幕中出現想 要的訊號。 •“MAIN” :輸出主語言的聲音。 •“SUB” :輸出副語言的聲音。 •“MAIN+SUB” : 混合輸出主、 副語言的聲音。... -
Page 162: 預設無線電電臺
當前電臺 按 鍵。 前面板顯示幕中出現 “COMPLETE” , 當前波段和預設號碼 表示此電臺儲存完成。 重複步驟 2 至 7 儲存其他電臺。 按 SYSTEM MENU 鍵。 FM 10 : 88.00 MHz SONY RADIO 系統菜單關閉。 更改預設號碼 電臺名稱 按 PRESET +/- 鍵選擇想要的預設號碼 (第 51 頁) ,然後從步驟 3 開始執行程序。 FUNCTION X/x/c, SYSTEM... -
Page 163: 收聽無線電
收聽您知道頻率的無線電電臺 收聽無線電 反覆按 FUNCTION 鍵,直至前面板顯示幕中 出現 “FM” 。 首先在系統記憶體中預設無線電電臺 (請參 按 D.TUNING 鍵。 閱 “預設無線電電臺” (第 50 頁) ) 。 按數字鍵選擇頻率。 按 鍵。 FUNCTION • 若要改善接收狀況,請重新確定連接天線方向。 如果調頻節目有噪音 D.TUNING 如果調頻節目有噪音,您可以選擇單聲道接 收。這樣將失去立體聲效果,但接收狀況將 X/x/c, 得到改善。 SYSTEM MENU 按 SYSTEM MENU 鍵。 PRESET +/- 反覆按... - Page 164 如果您操作有誤 命名預設電臺 反覆按 C/c 鍵,直至要更改的字元 閃爍, 然後按 X/x 鍵選擇想要的字元。 您可以為預設電臺輸入一個名稱。當選擇某 若要消除字元,則反覆按 C/c 鍵,直至 個電臺時,該電臺的名稱(例如“XYZ” )將 要消除的字元閃爍,然後按 CLEAR 鍵。 出現在前面板顯示幕中。 按 鍵。 每個預設電臺只能輸入一個名稱。 前面板顯示幕中出現 “COMPLETE” , 表示此電臺名稱儲存完成。 FUNCTION 按 SYSTEM MENU 鍵。 系統菜單關閉。 在前面板顯示幕上觀看電臺 名稱或頻率 C/X/x/c, SYSTEM MENU 您可以用前面板顯示幕查看頻率。 PRESET +/- DISPLAY 反覆按...
-
Page 165: Hdmi 控制 / 外接聲音裝置
將 [HDMI 控制 ] 設定為打開 / 關閉 系統遙控器具有可操作電視機的方便按鈕, 例如 THEATER/THEATRE、 ONE-TOUCH PLAY、 TV [/1。詳細說明,請參閱 “用提供的遙控器 FUNCTION 控制電視機” (第 80 頁)和電視機的使用說 明書。 ONE-TOUCH THEATRE PLAY BRAVIA Sync X/x, DISPLAY • 視連接的裝置而定,HDMI 控制功能可能不起 作用。請參閱隨裝置提供的使用說明書。 • 如果連接 Sony 以外的裝置,即使裝置與 HDMI 控 制功能相容,HDMI 控制功能也可能不起作用。 反覆按 FUNCTION 鍵,直至前面板顯示幕中 出現 “DVD” 。... - Page 166 當系統處於停止模式中時按 DISPLAY 系統和電視機如下作用 (例如) : 鍵。 電視機螢幕上出現控制菜單顯示。 本系統 電視機 打開。 (如果尚未打 打開。 (如果尚未打 按 X/x 鍵選擇 [ 設定 ],然後按 開。 ) 開。 ) 鍵。 出現 [ 設定 ] 選項。 切換為 “DVD”功能。 切換為 HDMI 輸入。 按 X/x 鍵選擇 [ 常規 ],然後按 鍵。...
-
Page 167: 播放 Usb 裝置的音訊文件 /Jpeg 圖像 檔案
您可以如下使用系統聲音控制功能: 播放 USB 裝置的音訊文 • 觀 看 電 視 機 時,如 果 將 系 統 功 能 切 換 為 “TV” ,系統揚聲器會自動輸出電視機的聲 件 /JPEG 圖像檔案 音。 • 您可以用電視機遙控器控制系統的音量。 您可以將 USB 裝置 (不提供)連接至控制 • 如 果 關 閉 系 統,或 將 系 統 的 功 能 設 定 為 器而播放傳送到... - Page 168 • 本系統可播放以下檔案。 檔案 檔案副檔名 FUNCTION MP3 檔案 “.mp3” WMA 檔案 “.wma” AAC 檔案 “.m4a” JPEG 圖像檔案 “.jpg”或 “.jpeg” 本系統會播放具有上述副檔名的資料,即 使資料不是 MP3/WMA/AAC/JPEG 格式亦可播 放。 播放這些資料可能會產生很響的噪音, 可能會損壞揚聲器。 • 以下 USB 裝置 / 情況會較慢開始播放: – 以複雜樹狀結構傳送的 USB 裝置。 – 剛播放 另一個 資料 夾中的 音訊文件或 JPEG 圖像檔案。...
- Page 169 x 選擇音訊文件 選擇音訊文件或資料夾 按 鍵。 出現資料夾中所含的檔案列表。 FUNCTION DVD MENU 按 X/x 鍵選擇檔案,然後按 鍵。 X/x, 系統開始播放所選擇的檔案。您可以按 DVD MENU 鍵關閉檔案列表。再按 DISPLAY DVD MENU 鍵將顯示資料夾列表。 • 系統最多可以識別單個資料夾中 150 個音訊 文件。 • 使用便攜式音源聆聽 MP3 檔案或其他壓縮音樂 反覆按 FUNCTION 鍵,直至前面板顯示幕中 時,可以增加音量。選擇 “DEC. MODE” (第 46 出現 “USB” 。 頁)的...
- Page 170 按 X/x 鍵選擇一個資料夾。 選擇 JPEG 圖像檔案或資料夾 x 如同 播 放幻 燈 片 一樣 播 放 資料 夾 中的 JPEG 圖像檔案 按 H 鍵開始播放所選擇的資料夾。 JPEG 圖像以幻燈片一樣播放。您可以更 FUNCTION 改幻燈片的間隔 (第 59 頁) ,並且為幻 燈片增加效果 (第 59 頁) 。 x 以顯示子畫面的方式選擇 JPEG 圖像檔案 PICTURE 按...
- Page 171 停止播放 • 當您將 [HDMI 設定 ] 的 [JPEG 解析度 ] 設為 按 x 鍵。 [ (1920 × 1080i)高畫質 ] 或 [ (1920 × 1080i)高畫質 ] 時,便無法使用 [ 效果 ] 設定 其他操作 (第 71 頁) 。 請參閱 “其他操作” (第 28 頁) 。 選擇...
- Page 172 關閉控制菜單顯示 以隨機順序播放 反覆按 DISPLAY 鍵直至控制菜單顯示 關閉。 (隨機播放) • 當您按 CLEAR 鍵返回正常播放時,重複播放也會 您可隨機播放 USB 裝置上的音訊文件。 被取消。 • 播放音訊文件時,可能重複播放同一首歌。 重複播放 (重複播放) 您可重複播放 USB 裝置的音訊文件 /JPEG 圖 像檔案。 您可以使用隨機播放模式的組合。 X/x, REPEAT DISPLAY X/x, 播放時按 DISPLAY 鍵。 電視機螢幕上出現控制菜單顯示。 DISPLAY 按 X/x 鍵選擇 [ 隨機 ],然後按 鍵。...
- Page 173 返回正常播放 選擇 [** (**)] (** 代表數字) 。 括號內的數字表示音訊文件、JPEG 圖像 按 CLEAR 或選擇步驟 3 中的 [ 關 ]。 檔案或資料夾的總數。 關閉控制菜單顯示 反覆按 DISPLAY 鍵直至控制菜單顯示 關閉。 • 當 [ 模式 (音樂,圖像)] 設定為 [ 圖像 ] (第 58 頁)時,您無法選擇 [ 軌跡 ]。 所選擇的行 • 您可以快速顯示 [ 重複 ] 狀態。按遙控器上的 REPEAT 鍵。...
- Page 174 觀看前面板顯示幕的音訊文 觀看電視機畫面的音訊文件 件資訊 資訊 DISPLAY DISPLAY 您可以在電視機畫面上顯示音訊文件的資 反覆按 DISPLAY 鍵。 訊,例如時間資訊、資料夾 / 音訊文件名稱 在播放 USB 裝置時,每按一次 DISPLAY 鍵, 以及聲音位元率 (當前聲音每秒的資料總 顯示幕改變如下: 數) 。 1 y 2 播放時按 DISPLAY 鍵。 1 播放時間和當前軌跡編號 電視機畫面中出現音訊文件資訊。 2 軌跡 (檔案)名稱 * 位元率 * 如果MP3檔案具有ID3標誌, 本系統就會依據ID3 標誌資訊而顯示資料夾名稱...
-
Page 175: 將歌曲傳送到 Usb 裝置
將歌曲傳送到 USB 裝置 • 有些語言可能不會顯示字元 / 標誌。 • 視正在播放的檔案類型而定,系統只能顯示有限 的字元數。同樣,視檔案而定,並不是所有的文 您可以將聲音 CD 上的歌曲編碼為 MP3 格式而 字字元都被顯示。 傳送到 USB 裝置。您亦可將 DATA CD/DATA DVD 上的 MP3 檔案傳送到 USB 裝置。 關於 USB 裝置的連接方式, 請參閱 “連接 USB 檢查 JPEG 圖像檔案的日期資 裝置” (第 55 頁) 。 訊... - Page 176 x 選擇想要的軌跡 將聲音 CD 的歌曲傳送到 USB 按 X/x 鍵選擇軌跡,然後按 鍵。 將以您選擇的順序標記軌跡。 裝置 x 選擇聲音 CD 的所有軌跡 按 C/X/x/c 鍵選擇 [x 所有 ],然後 按 鍵。 x 取消軌跡 按 X/x 鍵選擇軌跡,然後按 鍵。軌跡 的標記被移除。 x 取消所有軌跡 按 C/X/x/c 鍵選擇 [s 所有 ],然後 按 鍵。...
- Page 177 選擇想要傳送的 MP3 檔案 / 資料夾。 將 DATA CD/DATA DVD 的 MP3 檔案傳送到 USB 裝置 USB 裝置的可用空間 欲傳送的 MP3 檔案 / 資料夾。 C/X/x/c, x 選擇想要的 MP3 檔案 / 資料夾 按 X/x 鍵選擇 MP3 檔案 / 資料夾,然後 DISPLAY 按 鍵。 已標記 MP3 檔案 / 資料夾。 x 選擇所有...
-
Page 178: 使用 Digital Media Port 轉接器
消除 USB 裝置上的音訊文件 使用 DIGITAL MEDIA PORT 轉接器 您可以消除 USB 裝置上的音訊文件。 使用 DIGITAL MEDIA PORT(DMPORT)轉接器 FUNCTION (不提供) ,可以欣賞便攜式音源或電腦的 聲音。通過連接 DIGITAL MEDIA PORT 轉接 器,您可以欣賞連接到本系統的裝置聲音。 可以使用的 DIGITAL MEDIA PORT 轉接器因區 CLEAR 域各不相同。 有關連接 DIGITAL MEDIA PORT 轉接器的詳細 說明,請參閱“連接 DIGITAL MEDIA PORT 轉 C/X/x/c, 接器”... - Page 179 播放連接到系統的裝置 FUNCTION ./> 反覆按 FUNCTION 鍵,直至前面板顯示幕中 出現 “DMPORT” 。 開始播放連接的裝置。 在系統或連接的電視機上播放連接裝置 的聲音與圖像。 有關詳細使用說明,請參閱 DIGITAL MEDIA PORT 轉接器的使用說明書。 • 使用便攜式音源聆聽 MP3 檔案或其他壓縮音樂 時,可以增加音量。選擇 “DEC. MODE” (第 46 頁)的 “AUTO”並將聲音模式 (第 48 頁)設為 “MOVIE” 、 “MUSIC”或 “NEWS” 。若要取消,選擇 “2CH STEREO” 。 • 視 DIGITAL MEDIA PORT 轉接器的類型而定, 您可 能可以使用遙控器或控制器上的按鍵操作連接的...
-
Page 180: 使用設定顯示
例如:[ 視訊設定 ] 所選擇的項目 其他操作 使用設定顯示 您可以對圖像和聲音等項目進行多種調整。 視該國家的機型而定,顯示項目會有不同。 • 儲存在光碟中的播放設定比設定顯示設定具有優 設定項目 先權,並且不是全部所描述的功能都有效。 按 X/x 鍵選擇項目,然後按 鍵。 出現選擇項目的選項。 FUNCTION 例如:[ 電視機形式 ] 選項 X/x, DISPLAY 按 X/x 鍵選擇設定,然後按 鍵。 設定被選擇,設定完成。 反覆按 FUNCTION 鍵,直至前面板顯示幕中 出現 “DVD” 。 當系統處於停止模式中時按 DISPLAY 所選擇的設定 鍵。 電視機螢幕上出現控制菜單顯示。 按... - Page 181 設定顯示或聲音軌跡語言 顯示設定 [ 語言設定 ] [ 視訊設定 ] 為畫面顯示或聲音軌跡設定各種語言。 根據連接的電視機選擇設定。 x [ 電視機形式 ] x [ 畫面顯示語言 ] (畫面顯示) 您可以選擇所連接電視機的縱橫比。 您可以切換電視機螢幕上的顯示語言。 [16:9]:當您連接寬螢幕電視機或帶寬螢幕 模式功能的電視機時選擇此項。 x [ 選單語言 ] (僅適用於 DVD VIDEO) 您可以切換光碟的菜單語言。 x [ 聲音語言 ] (僅適用於 DVD VIDEO) 您可以切換聲音軌跡語言。 當您選擇 [ 原文 ] 時,將選擇光碟中具有優 [4:3 信箱形式...
- Page 182 x [ 逐行 (分量視頻輸出)] x [ 彩色系統 (VIDEO CD)] 您可以將 VIDEO OUT(COMPONENT)插孔所輸 (僅適用於東南亞機型) 出的逐行訊號設為開 / 關。詳細說明,請參 播放 VIDEO CD 時可以選擇彩色系統。 閱 “您的電視機接受逐行訊號嗎?” (第 25 頁) 。 [ 自動 ]:本系統會輸出光碟系統的 PAL 或 NTSC 視頻訊號。如果您的電視機使用 DUAL [ 關 ]:系統輸出隔行訊號。 系統,請選擇 [ 自動 ]。 [ 開...
- Page 183 [1280 × 720p]:系統輸出 1280 × 720p* 視 x [HDMI 聲音 ] 頻訊號。 您可以從 HDMI OUT 插孔選擇聲音輸出狀態。 [720 × 480/576p]:系統輸出 720 × 480p* 或 720 × 576p* 視頻訊號。 [ 關 ]:系統不從 HDMI OUT 插孔輸出聲音。 [ 開 ]:系統通過將 Dolby Digital、DTS 或 * i:隔行,p:逐行 96 kHz/24 位元...
- Page 184 聲音設定 其他設定 [ 聲音設定 ] [ 系統設定 ] x [ 屏幕節能 ] x [ 音頻動態範圍控制 ] (僅適用於 DVD 您可以降低顯示裝置的損壞(重影) 。按任何 VIDEO) 鍵 (如:H 鍵) ,取消屏幕節能。 您可以壓縮聲音軌跡的動態範圍。[ 音頻動 態範圍控制 ] 在深夜以低音量觀看電影非常 [ 開 ]:如果您不操作系統達約 15 分鐘,則將 有效。 出現屏幕節能圖像。 [ 關 ]:關閉。 [ 關...
-
Page 185: 調節圖像和聲音間的延遲
[ 開 ]:系統最多將 10 個光碟的續播點儲存 調節圖像和聲音間的延 到記憶體。 [ 關 ]:系統不將續播點儲存到記憶體。僅 遲 對控制器當前光碟在續播點重新開始播放。 (A/V SYNC) x [ 重新設定 ] 您可以將 [ 視聽者控制 ] 以外的 [ 設定 ] 設 定返回預設設定。詳細說明,請參閱 “[ 設 定 ] 設定返回預設設定” (第 82 頁) 。 當聲音與電視機螢幕上的圖像不符時,您可 以調節圖像和聲音間的延遲。 揚聲器設定 [ 揚聲器設定... -
Page 186: 改變聲音輸入電平
改變聲音輸入電平 欣賞低音量音效 當您聆聽連接至控制器上 TV(AUDIO IN)插 即使是低音量,您仍可以享受音效或影片對 孔的裝置時,可能會發生失真。失真並非故 話,就像在電影院一樣。這對於在晚上觀賞 障,而且會視連接裝置而定。 電影時十分實用。 為防止失真,請降低控制器的輸入電平。 NIGHT FUNCTION X/x/c, SYSTEM MENU 按 NIGHT 鍵。 反覆按 FUNCTION 鍵,直至前面板顯示幕中 前面板顯示幕出現 “NIGHT ON” 並啓用音效。 出現 “TV” 。 關閉聲音效果 按 SYSTEM MENU 鍵。 再次按 NIGHT 鍵。 反覆按 X/x 鍵,直至前面板顯示幕中出現 “ATTENUATE”... -
Page 187: 使用睡眠定時器
使用睡眠定時器 更改前面板顯示幕和照 明的亮度 您可以將系統設定為在預設的時間關閉,這 樣您便能聽著音樂入睡。預設時間可以以 前面板顯示幕和照明的亮度可以設定為 2 個 10 分鐘遞減。 等級中的任一個。 SLEEP DIMMER 按 SLEEP 鍵。 按 DIMMER 鍵,直至前面板顯示幕中出現想要的 每按一次此鍵,前面板顯示幕中的分鐘顯示 模式。 (剩餘時間)改變如下: •“DIMMER OFF” :亮起。 •“DIMMER ON” :變暗。 SLEEP OFF t SLEEP 90M t SLEEP 80M SLEEP 10M ..SLEEP 60M T SLEEP 70M 當您設定睡眠定時器時,... - Page 188 改變顯示模式 照明前面板按鍵 (INFORMATION MODE) (ILLUMINATION MODE) 您可以設定前面板的照明類型。 您可以改變前面板顯示幕中顯示的資訊。 X/x/c, X/x/c, SYSTEM MENU SYSTEM MENU 按 SYSTEM MENU 鍵。 按 SYSTEM MENU 鍵。 反覆按 X/x 鍵,直至前面板顯示幕中出現 反覆按 X/x 鍵,直至前面板顯示幕中出現 “ILLUM MODE” ,然後按 鍵或 鍵。 “INFO MODE” ,然後按 鍵或 c 鍵。 按 X/x 鍵選擇一項設定。 按...
-
Page 189: 觀看關於光碟的資訊
x Super VCD 觀看關於光碟的資訊 1 當前軌跡的播放時間 2 軌跡文字 3 軌跡和索引編號 x DATA CD(MP3 檔案)/DATA DVD(MP3 檔案) 1 播放時間和當前軌跡編號 2 軌跡 (檔案)名稱 * 檢視前面板顯示幕中的播放 * 如果MP3檔案具有ID3標誌, 本系統就會依據ID3 時間和剩餘時間 標誌資訊而顯示資料夾名稱 / 軌跡 (檔案)名 稱。 本系統支援 ID3 版本 1.0/1.1/2.2/2.3。 當單一 MP3 檔案使用 ID3 版本 1.0/1.1 和版本 2.2/2.3 的標誌時,會優先顯示... - Page 190 x VIDEO CD (不帶 PBC 功能)/CD 檢視電視機螢幕中的播放時 • T **:** 當前軌跡的播放時間 間和剩餘時間 • T-**:** 當前軌跡的剩餘時間 • D **:** DISPLAY 當前光碟的播放時間 • D-**:** 當前光碟的剩餘時間 x DATA CD(MP3 檔案)/DATA DVD(MP3 檔 案) • T **:** 當前軌跡的播放時間 x DATA CD (DivX 視頻檔案)/DATA DVD (DivX 視頻檔案)...
- Page 191 查看 DVD/CD 文字 檢查 JPEG 圖像檔案的日期資 在播放過程中反覆按 DISPLAY 鍵顯示 DVD/CD 訊 上錄製的文字。 僅當文字錄製在光碟上時,才會出現 DVD/CD 文字。您無法更改文字。如果光碟不含有文 如果 JPEG 圖像檔案中錄有 Exif* 標誌, 則在 字,則出現 “NO TEXT” 。 播放過程中您可以查看日期資訊。 Dvorak/Tchaikovsky /NedPho/Kreizberg Adagio - Allegro molto 查看 DATA CD/DATA DVD (MP3 檔案 /DivX 視頻檔案)文字 播放...
-
Page 192: 用提供的遙控器控制電視機
輸入直到找到對您的電視機有效的代碼號。 視機 電視機 通過調節遙控訊號,您可以用提供的遙控器 製造商 代碼號 控制您的電視機。 SONY 501 (預設) AIWA • 當您更換遙控器電池時,代碼號會自行復原為預 AKAI 設 (SONY)設定。重新設定適當的代碼號。 DAEWOO 503, 506, 515, 544 FISHER 508, 545 準備控制電視機的遙控器 503, 509, 510, 544 GOLDSTAR/LG 503, 515, 517, 544, 568 GRUNDIG TV "/1 HITACHI 503, 514, 515, 517, 544,... - Page 193 RETURN 返回上一個頻道或電視機菜單 的上一層。 MUTING 暫時關閉電視機聲音。 用遙控器控制電視機 選擇菜單上的項目。 C/X/x/c, 您可以使用下列鍵控制電視機。若要使用這 • 這些鍵的功能和 SONY 電視機的遙控器鍵功能一 些鍵 (THEATER/THEATRE 和 TV [/1 以外) , 樣。詳細說明,請參閱電視機的使用說明書。 請按 TV 鍵而將遙控器設為電視機模式, TV 鍵 將亮起 1 秒鐘。 若要離開電視機模式,按 TV 鍵,TV 鍵將閃 爍四次。 視地區而定,可能不支援有些鍵。 • 在電視機模式下,如果按以下任何鍵,TV 鍵將亮 起。 (視製造商設定而定,有些鍵可能無效,且...
-
Page 194: 返回預設設定
[ 設定 ] 設定返回預設設定 返回預設設定 您可以將 [ 視聽者控制 ] 以外的 [ 設定 ] 設 定 (第 68 頁)返回預設設定。 將預設電臺等系統參數恢復 到預設設定 FUNCTION A.F.D. STD D.C.S. FUNCTION DVD HOME THEATRE SYSTEM DAV-F500 "/1 C/X/x/c, 關閉電源。 DISPLAY 按住控制器上的 "/1 約 5 秒鐘。 “MEMORY CLR”和 “PUSH POWER”在 前 面板顯示幕中交替出現約... -
Page 195: 注意事項
關於清潔 • 請用蘸有少量中性清潔劑的軟布擦拭機殼、面板 附加資訊 和控制器。切勿使用任何類型的砂紙、拋光粉或 溶液 (如酒精、汽油等) 。 注意事項 如果您有關於本系統的任何疑問或問題,請就近 與 Sony 經銷商聯絡。 關於電源 關於清潔光碟、光碟 / 鏡頭清潔劑 • 如果您打算長期不使用本系統,請從電源插座上 • 切勿使用清潔光碟或光碟 / 鏡頭清潔劑 (包括液 拔掉本系統的電源插頭。若要拔掉電源線,請抓 體或噴霧型) 。這些清潔劑可能會引起設備故 住插頭拔,切勿拉電線。 障。 關於放置 關於您電視機的色彩 • 請將本系統放在通風良好的地方,以防止系統內 • 如果揚聲器造成電視機螢幕色彩不正常,請關閉 積熱。 電視機,15 至 30 分鐘後再打開。若是色彩仍然... -
Page 196: 關於光碟注意事項
關於光碟注意事項 關於操作光碟 • 為了保持光碟清潔, 請拿光碟的邊緣部分。 請勿觸摸光碟表面。 • 切勿在光碟上粘貼紙張或膠帶紙。 • 切勿將光碟放在直射陽光下,或如散熱管 等熱源附近,也勿將其留在停在直射陽光 下的汽車裡,因為車內溫度會很高。 • 播放完畢後, 請將光碟放在光碟盒內保存。 關於清潔 • 播放之前,請用乾淨的布擦拭光碟。 請從中心向外擦。 • 切勿使用汽油、稀釋劑、市售清潔劑,或用 於乙烯 LP 的防靜電噴霧劑。 本系統只能播放標準圓形光碟。使用非標準 也非圓形光碟 (如卡片形、心形或星形)可 能會造成故障。 切勿使用帶有市售附件的光碟,如標籤或圓 環。... -
Page 197: 故障排除
故障排除 在使用此系統時,如遇到以下任何疑難問題,在要求維修前先使用故障排除指南幫助解決故 障。如果無法解決問題,請就近與 Sony 經銷商聯絡。 請注意,如果服務人員在維修時更換了部分部件,應留下這些部件。 電源 症狀 修正措施 無法打開電源。 • 檢查交流電源線是否連接牢固。 • 檢查系統電纜連接是否牢固。 如果“PROTECTOR”和“PUSH 請按 "/1 鍵關閉系統,然後當 “STANDBY”消失後檢查下列項目。 POWER”交替出現在前面板顯 • 揚聲器 + 和 - 導線是否短路? 示幕中。 • 是否只使用規定的揚聲器? • 系統的通風孔是否被阻擋? • 檢查上述項目並解決所有問題後,打開系統電源。如果在檢查上述所有 項目後仍無法找到問題的原因,請聯絡附近的 Sony 經銷商。 無法關閉電源。 • 演示模式( “DEMO” ) 設定為“開” 。 將“DEMO” 設定為“關” (第 23 頁) 。... - Page 198 症狀 修正措施 電視機螢幕色彩不正常。 本系統的前置揚聲器為磁屏蔽,以防磁漏。但是在強磁場的情況下仍然有 可能發生磁漏。如發生此情況,請檢查下列項目: • 如果揚聲器搭配CRT電視機或投影機使用, 請將揚聲器安裝在距離電視機 至少 0.3 m 遠的位置。 • 如果電視機螢幕色彩仍然不正常, 請關閉電視機, 15至30分鐘後再打開。 • 如果發出嘯叫聲,請將揚聲器重新放置在距離電視機更遠的位置。 • 確認揚聲器附近沒有磁性物體 (電視架上的磁閂、保健裝置、玩具等 等) 。 聲音 症狀 修正措施 無聲音。 • 揚聲器導線未連接牢固。 • 如果前面板顯示幕中顯示 “MUTING” ,則按遙控器上的 MUTING 鍵。 • 系統處於暫停或慢動作播放模式。按 H 鍵返回正常播放模式。 • 正在執行快進或快倒。按 H 鍵返回正常播放模式。 •...
- Page 199 症狀 修正措施 遙控器不起作用。 • 遙控器和控制器之間有障礙物。 • 遙控器和控制器之間距離太遠。 • 遙控器未對準控制器上的遙控感應窗。 • 遙控器電池電力不足。 無法播放光碟。 • 沒有插入光碟。 • 光碟顛倒。 以標籤面向前插入光碟。 • 光碟未放平。 • 系統無法播放 CD-ROM 等 (第 4 頁) 。 • DVD 上地區代碼與系統不匹配。 • 控制器內部有濕氣凝結,並可能損壞鏡頭。取出光碟,讓控制器電源打 開擱置約半小時。 無法播放 MP3 檔案。 • DATA CD 不是按照符合 ISO 9660 Level 1/Level 2 或 Joliet 的 MP3 格式錄 製。...
- Page 200 無法改變角度。 • 正在播放的 DVD 未錄製多角度 (第 29 頁) 。 • 該 DVD 禁止改變角度。 光碟無法退出,並且前面板顯 • 聯絡您的 Sony 經銷商或當地授權的 Sony 服務機構。 示幕中出現 “LOCKED” 。 播放 DATA CD 或 DATA DVD 時, • 您要播放的 MP3 檔案 /JPEG 圖像檔案 /DivX 視頻檔案損壞。 [ 數據錯誤 ] 出現在電視機螢...
- Page 201 上述 FAT 格式。詳細說明,請參閱每種 USB 裝置的使用說明書或請洽製 造商。 長時間顯示 “Reading” 。 • 在以下情況下,讀取程序可能需要較長時間。 – USB 裝置上有許多資料夾或檔案。 – 檔案結構十分複雜。 – 記憶體容量過多。 – 內部記憶體已分散。 • Sony 建議以下方法。 – USB 裝置的資料夾總數:200 以下。 – 每一資料夾的檔案總數:150 以下。 顯示錯誤。 • 將音樂資料再次傳送到 USB 裝置, 因為傳送到 USB 裝置的資料可能已經損 毀。 • 本系統僅能顯示數字與字母的字元代碼。無法正確顯示其他字元。 播放 USB 裝置時,前面板顯示...
- Page 202 • 如果出現以下情況, 系統讀取 USB 裝置的所有檔案後, 可能需要比平常更 其他檔案需更長時間開始播 久的時間而播放: 放。 – 資料夾或檔案的數量非常多。 – 資料夾或檔案結構十分複雜。 – 記憶體容量非常大。 – 檔案尺寸過大。 – 記憶體的實體結構分散。 • Sony 建議以下方法。 – USB 裝置的資料夾總數:200 以下。 – 每一資料夾的檔案總數:150 以下。 您無法開始將檔案傳送到 USB • 可能發生以下問題。 裝置。 – USB 裝置記憶體已滿。 – USB 裝置上的 MP3 檔案和資料夾數量已達上限。 – USB 裝置具有防寫保護。...
- Page 203 傳送到 USB 裝置時發生錯誤。 • 您使用不受支援的 USB 裝置。請參閱 “可播放的 USB 裝置” (附件) 。 • 在傳送期間,USB 裝置斷開連線或是電源關閉。刪除部分傳送的檔案,然 後重新傳送。如果此步驟無法解決問題,USB 裝置可能已受損。請依照 USB 裝置的使用說明書程序來格式化 USB 裝置。如果仍出現此問題,請洽 您附近的 Sony 經銷商。 無法消除 USB 裝置上的音訊文 • 檢查 USB 裝置是否具有防寫保護。 件或資料夾。 • 在消除期間,USB 裝置斷開連線或是電源關閉。刪除部分消除的檔案。如 果此步驟無法解決問題,USB 裝置可能已受損。請依照 USB 裝置的使用說 明書程序來格式化 USB 裝置。如果仍出現此問題,請洽您附近的 Sony 經 銷商。...
-
Page 204: 自檢功能
電視機螢幕上出現版本號碼時 自檢功能 打開系統時,電視機螢幕上可能出現版本號 碼 [VER.X.XX] (X 表示數字) 。雖然這不是 (當顯示幕中出現字母 / 數字時) 故障並僅供 Sony 維修人員使用, 但是在這個 情況下系統無法正常操作。請關閉系統,然 當自檢功能啓動以防止系統故障時,電視機 後再次打開系統進行操作。 螢幕或前面板顯示幕上將出現由一個字母和 4 個數字組成的 5 個字元的維修號碼 (如, VER.X.XX C 13 50) 。在此情況下,請查看下表。 C:13:50 維修號碼的前 原因和 / 或糾正操作 3 個字元 C 13 • 光碟髒了。... - Page 205 視頻部分 規格 VIDEO:1 Vp - p 75 歐姆 輸出 COMPONENT: Y:1 Vp - p 75 歐姆 放大器部分 ,P : 功率輸出 (額定) 108 W + 108 W (3 歐姆, 0.7 Vp - p 75 歐姆 1 kHz,1% THD) HDMI OUT:A 型 RMS 輸出功率...
- Page 206 術語 Dolby Digital 這種電影院聲音格式比 Dolby Surround Pro Logic 更先進。在這種格式中,後置揚聲器 輸出具有擴展頻率範圍的立體聲音響,並且 單獨提供用於低音的低音揚聲器聲道。這種 格式也稱為“5.1” ,這是因為低音揚聲器聲 道被指定為 0.1 聲道 (只有在需要低音深層 效果時該聲道才起作用) 。在此格式中的所 有六個聲道被單獨錄製,以實現良好的聲道 分 離。此外,由於所 有訊 號 均 被 數位 化 處 理,因此很少發生訊號衰減。 這是由 DTS,Inc. 研發的數位聲音壓縮技 術。該技術符合 5.1 聲道環繞。此格式含有 立體聲後置聲道,並在此格式中有獨立的低 音揚聲器聲道。DTS 提供相同的高品質數位 聲音 5.1 獨立聲道。因為所有的聲道資料均 獨立錄製並經數位處理,所以可實現良好的...
-
Page 207: 語言代碼一覽表
語言代碼一覽表 語言名稱的英文拼寫符合 ISO 639:1988 (E/F)標準。 代碼 語言 代碼 語言 代碼 語言 代碼 語言 1027 Afar 1183 Irish 1347 Maori 1507 Samoan 1028 Abkhazian 1186 Scots Gaelic 1349 Macedonian 1508 Shona 1032 Afrikaans 1194 Galician 1350 Malayalam 1509 Somali 1039 Amharic 1196 Guarani 1352 Mongolian 1511 Albanian... -
Page 208: 部件和控制器索引
部件和控制器索引 詳細說明,請參閱括號內所指示的頁。 控制器 俯瞰圖 前視圖 右視圖 AUTO WIDE STAGE FUNCTION A 通風槽 G 遙控感應窗 (7) H VOL +/- (音量 +/-)鍵 (27) B "/1 (開 / 待機)鍵 (24、82) I Z (退出)鍵 (27) C AUTO (自動) (解碼模式)指示 (46) J 前面板顯示幕 (98) D WIDE STAGE 指示 (46) K 光碟槽... - Page 209 接頭面板 左視圖 A ANTENNA (FM 75Ω COAXIAL) (天線 (調 F HDMI OUT (HDMI 輸出)插孔 (17) 頻 75 歐姆同軸) )插孔 (20) G SAT/CABLE (DIGITAL IN OPTICAL) B VIDEO OUT (COMPONENT) (視頻輸出 (分 (衛星 / 電纜(數位輸入光纖) )插孔 (18) 量) )插孔 (17) H TV (DIGITAL IN OPTICAL) (電視機 (數 C TV (AUDIO IN R/L)...
- Page 210 前面板顯示幕 SLEEP MUTING TUNED TITLE CHAP STEREO MONO NTSC NIGHT REPEAT 1 DIGITAL PROGRESSIVE A 設定睡眠定時器時會閃爍。(75) K 打開夜間模式時亮起。(74) B 當系統靜音時亮起。 (28、81) L 當HDMI OUT插孔正確連接至具有HDMI或DVI (Digital Visual Interface) (數位視頻 C 顯示 USB 狀態 介面)輸入的 HDCP (Highbandwidth D 接收到電臺時會亮起。 (僅適用於無線電) Digital Content Protection)相容裝置 (50) 時亮起。(17) E 標題或章的時間資訊顯示在前面板顯示幕...
- Page 211 低音揚聲器 後視圖 仰視圖 FRONT R FRONT L SPEAKER IMPEDANCE USE 3 SYSTEM CONTROL ONLY FOR HCD-F200 A 通風槽 C SYSTEM CONTROL (系統控制)插孔 (14) B SPEAKER(FRONT R/FRONT L) (揚聲器(右 側前置揚聲器 / 左側前置揚聲器))插孔 (15)
- Page 212 遙控器 字母順序 按鍵說明 A - L M - Z ANALOG ws (81) MENU/HOME wl (81) 數字鍵 4 (31、50、80) ANGLE 6 (29) MUTING wh (27) [/1 (開/待機) 1 (23、 24、 27) AUDIO ea (29、49) NIGHT ed (74) TV [/1 (開 / 待機) w; (80) CLEAR es (33、52、68)...
-
Page 213: 控制菜單顯示指南
控制菜單顯示指南 您可以使用控制菜單顯示選擇一個功能並查看相關資訊。 DISPLAY 反覆按 DISPLAY 鍵。 您每按一次 DISPLAY 鍵,控制菜單顯示會變更: 1 t 2 t ... t 1 t ... 1 控制菜單顯示 1 2 控制菜單顯示 2 (可用時出現) 3 控制菜單顯示關閉 • 控制菜單顯示在 “DVD”或 “USB”功能中出現。... - Page 214 控制菜單顯示 視光碟類型而定,控制菜單顯示 1 和 2 將出現不同的項目。詳細說明,請參閱括號內的頁數。 例如:播放 DVD VIDEO 時的控制菜單顯示 1。 當前播放的標題編號 當前播放的章編號 標題的總數 播放狀態 章的總數 (N 播放, 控制菜單項目 X 暫停, x 停止等) 正在播放光碟類型 所選擇的項目 播放時間 當前設定 選項 所選擇的控制菜單項目 功能名稱 操作資訊 關閉顯示 按 DISPLAY 鍵。 控制菜單項目列表 項目 項目名稱,功能,相關光碟類型 [ 標題 ] (第 36 頁)/[ 場面 ] (第 36 頁)/[ 軌跡 ] (第 36 頁) 您可以選擇要播放的標題、場面或軌跡。...
- Page 215 [ 隨機 ] (第 33 頁) 您可以以隨機順序播放軌跡 / 檔案。 [ 重複 ] (第 34 頁) 您可以重複播放整張光碟 (所有標題 / 所有軌跡 / 所有資料夾 / 所有檔案) ,或一個 標題 / 章 / 軌跡 / 資料夾 / 檔案。 [ 光碟選單 ] (第 35 頁) 您可以顯示 DVD 菜單。 [ 瀏覽中...
- Page 216 USB 裝置的控制菜單項目列表 項目 項目名稱,功能 [ 重複 ] (第 60 頁) 您可以重複播放整個 USB 裝置 (所有資料夾 / 所有檔案) ,或一個資料夾 / 檔案。 [ 瀏覽中 ] (第 59 頁) 您可以顯示資料夾 /JPEG 圖像檔案的列表。 [ 日期 ] (第 63 頁) 您可以顯示數位照相機拍攝圖像的日期。 [ 時間間隔 ] (第 59 頁) 您可以選擇電視機螢幕上顯示幻燈片的持續時間。...
- Page 217 索引 數字 4:3 輸出 70 HDMI SLEEP 75 5.1 聲道環繞 30 YCBCR/RGB (HDMI) 71 SUBTITLE 29 HDMI 解析度 70 SYSTEM MENU 23, 46, 51, HDMI 控制 53, 71 74, 76 HDMI 設定 70 設定 68, 82 A/V SYNC 73 HDMI 聲音 71 聲音軌跡選擇...