Sony DAV-FR1 Operating Instruction corrections (pgs. 27, 42, & 91) Operating Instructions Manual
Home theater systems: dvd dream® system
Hide thumbs
Also See for DAV-FR1 Operating Instruction corrections (pgs. 27, 42, & 91):
- Supplementary manual (2 pages) ,
- Specifications (2 pages) ,
- Speakers connection (1 page)

Related Manuals for Sony DAV-FR1 Operating Instruction corrections (pgs. 27, 42, & 91)


Summary of Contents for Sony DAV-FR1 Operating Instruction corrections (pgs. 27, 42, & 91)
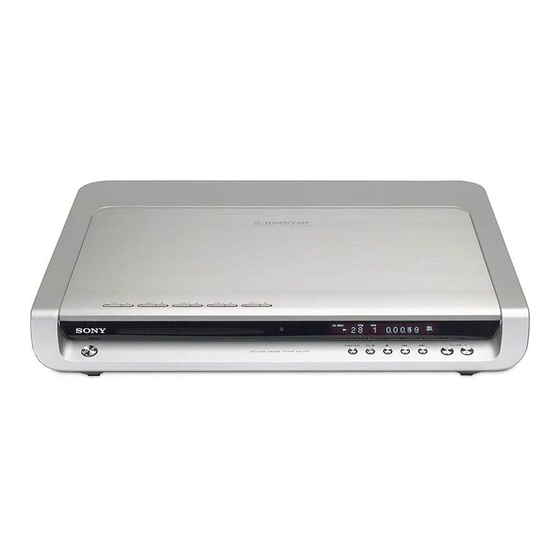
- Page 1 4-255-434-13(2) DVD Home Theatre System Operating Instructions DAV-FR1/FR8/FR9 ©2004 Sony Corporation...
- Page 2 The model and serial numbers are located at the bottom of the unit. Record the serial number in the space provided below. Refer to them whenever you call upon your Sony dealer regarding this product. Model No. DAV-FR1/FR8/FR9 Serial No.______________...
-
Page 3: Welcome
Sony Corporation has determined that this product meets the ® ENERGY STAR energy efficiency. Welcome! Thank you for purchasing Sony DVD Home Theatre System. Before operating this system, please read this manual thoroughly and retain it for future reference. Precautions On power sources AC power cord must be changed only at the qualified service shop. -
Page 4: On Cleaning Discs
If you have any questions or problems concerning your system, please consult your nearest Sony dealer. On cleaning discs Do not use a commercially available CD/DVD cleaning disc. -
Page 5: Table Of Contents
CONTROL, PARENTAL CONTROL) Other Operations Controlling TV with the Supplied Remote ... 67 Using the SONY TV DIRECT Function... 69 Using the Video or Other Units... 70 Enjoying Multiplex Broadcast Sound (DUAL MONO) ... 71 Enjoying the Radio ... 72 Using the Sleep Timer ... - Page 6 Settings and Adjustments Using the Setup Display... 77 Setting the Display or Sound Track Language ... 78 (LANGUAGE SETUP) Settings for the Display... 78 (SCREEN SETUP) Custom Settings ... 80 (CUSTOM SETUP) Settings for the Speakers... 81 (SPEAKER SETUP) Quick Setup and Resetting the System...
-
Page 7: About This Manual
About This Manual • The instructions in this manual describe the controls on the remote. You can also use the controls on the system if they have the same or similar names as those on the remote. • The instructions in this manual are for DAV- FR1, DAV-FR8, and DAV-FR9. - Page 8 Title structure Chapter VIDEO CD, Super Track Audio CD, or CD structure Index Album structure Track Album JPEG structure File Note on PBC (Playback Control) (VIDEO CDs) This system conforms to Ver. 1.1 and Ver. 2.0 of VIDEO CD standards. You can enjoy two kinds of playback depending on the disc type.
-
Page 9: Notes About Discs
Notes about CD-R/CD-RW/DVD-R/DVD-RW (Video mode)/DVD+R/DVD+RW In some cases, CD-R/CD-RW/DVD-R/DVD-RW (Video mode)/DVD+R/DVD+RW cannot be played on this player due to the recording quality or physical condition of the disc, or the characteristics of the recording device and authoring software. The disc will not play if it has not been correctly finalized. -
Page 10: Note On Dvd 5-Disc Changer
Note on DVD 5-DISC changer Disc changer system Disc DISC 3 Playing unit The disc changer consists of a playing unit and a stocker which transports the discs to the disc slot and the playing unit. For example, if you press DISC 3, the stocker moves until the DISC 3 comes to the position of the playing unit and then moves the DISC 3 over the playing unit. -
Page 11: Guide To The Control Menu Display
Guide to the Control Menu Display Use the Control Menu to select a function that you would like to use. The Control Menu display appears when the DVD DISPLAY button is pressed. For details, refer to the page in parentheses. Currently playing title number (VIDEO CD/Super Audio CD/CD: track number) Disc number and... - Page 12 FILE (JPEG only) (page 36) DATE (JPEG only) (page 50) ANGLE (DVD only) (page 60) PLAYMODE (VIDEO CD/Super Audio CD/CD/MP3/JPEG only) (page 38, 41) REPEAT (page 42) CUSTOM PARENTAL CONTROL (page 62) Tips • Each time you press DVD DISPLAY, the Control Menu display changes as follows: Control Menu display Control Menu display off The Control Menu items vary, depending on the disc.
-
Page 13: Getting Started
Getting Started Unpacking Check that you have the following items: • Speakers (5) • Subwoofer (1) • AM loop antenna (aerial) (1) • FM wire antenna (aerial) (1) • Speaker cords (3.5m 3, 10m 34ft. • Video cord (1) • Remote Commander (remote) RM-SP350 (1) •... -
Page 14: Step 1: Speaker System Hookup
Step 1: Speaker System Hookup Connect the supplied speaker system using the supplied speaker cords by matching the colors of the jacks to those of the cords. Do not connect any speakers other than those supplied with this system. To obtain the best possible surround sound, specify the speaker parameters (distance, level, etc.) on page 29. -
Page 15: Terminals For Connecting The Speakers
Terminals for connecting the speakers Connect the Front speakers Surround speakers Center speaker Subwoofer DAV-FR1 Front speaker (R) Surround speaker (R) To the SPEAKER FRONT L (white) and R (red) jacks SPEAKER SURR L (blue) and R (gray) jacks SPEAKER CENTER (green) jack SPEAKER WOOFER (purple) jacks Center speaker VIDEO... - Page 16 DAV-FR8 Front speaker (R) Bottom of the front speaker Surround speaker (R) Center speaker VIDEO S VIDEO (DVD ONLY) AUDIO IN SPEAKER FRONT R CENTER FRONT L WOOFER COMPOMEMT VIDEO OUT SURROUND BACK AUDIO IN VIDEO MONITOR SURR R SURR L WOOFER Surround speaker (L) Subwoofer...
- Page 17 DAV-FR9 Front speaker (R) Bottom of the front speaker Surround speaker (R) Bottom of the surround speaker Front speaker (L) Center speaker VIDEO S VIDEO (DVD ONLY) AUDIO IN SPEAKER FRONT R CENTER FRONT L WOOFER COMPOMEMT VIDEO OUT SURROUND BACK AUDIO IN VIDEO...
- Page 18 Note on placing speakers • Do not set the speakers in an inclined position. • Do not place the speakers in locations that are: – Extremely hot or cold – Dusty or dirty – Very humid – Subject to vibrations –...
-
Page 19: To Avoid Short-Circuiting The Speakers
To connect the surround back speaker This system is compatible with the 6.1 surround system. When you enjoy a DVD that is compatible with the 6.1 surround system such as a DTS-ES disc, connect the surround back speaker (not supplied) and set its parameters (see “Settings for the Speakers”... -
Page 20: To Change The Speaker Cables
To change the speaker cables If you want to use a different speaker cable, you can detach the plug for attachment to another cable. Detaching With the catcher facing down, press and hold the plug down against a flat surface and remove the cords from plug. -
Page 21: Step 2: Antenna (Aerial) Hookups
Step 2: Antenna (aerial) Hookups Connect the supplied AM/FM antennas (aerials) for listening to the radio. Terminals for connecting the antennas (aerials) Connect the AM loop antenna (aerial) FM wire antenna (aerial) Notes • To prevent noise pickup, keep the AM loop antenna (aerial) away from the system and other components. •... - Page 22 If you have poor FM reception, use a 75-ohms coaxial cable (not supplied) to connect the system to an outdoor FM antenna (aerial) as shown below. Outdoor FM antenna (aerial) FM 75 System COAXIAL...
-
Page 23: Step 3: Tv And Video Component Hookups
Step 3: TV and Video Component Hookups Required cords Video cord for connecting a TV Audio cords (not supplied) When connecting a cord, be sure to match the color-coded sleeves to the appropriate jacks on the components. Terminals for connecting video components Connect the To the TV (VIDEO IN) - Page 24 Digital satellite receiver or Notes • Make connections securely to prevent unwanted noise. • Refer to the instructions supplied with the TV. • The system cannot output an audio signal to the connected TV. Only the audio signal of the TV is output from the system speakers.
- Page 25 When connecting to a standard 4:3 screen TV Depending on the disc, the image may not fit your TV screen. If you want to change the aspect ratio, please refer to page 78. Does your TV accept progressive signals? Progressive is the method for displaying TV images which reduces flickering, and sharpens the image. To display using this method, you need to connect to a TV that accepts progressive signals and set the output signal of COMPONENT VIDEO OUT to the progressive format.
- Page 26 Output the TV or VCR sound from the speakers Connect audio cords. Connect the AUDIO OUT (L/R) jacks of TV or VCR to the VIDEO jacks (AUDIO IN L/R) of this system with audio cords. TV or VCR * AUDIO OUT (L/R) jacks If your TV does not have AUDIO OUT (L/R) jacks, you cannot output the TV sound from the speakers of this system.
-
Page 27: Step 4: Connecting The Ac Power Cord (Mains Lead)
Step 4: Connecting the AC Power Cord (Mains Lead) Before connecting the AC power cord (mains lead) of this system to a wall outlet (mains), connect the speakers to the system (see page 15). Step 5: Performing the Quick Setup After completing the first 4 steps, make initial settings using the Quick Setup. - Page 28 Select a suitable room size from [SMALL], [MEDIUM], or [LARGE] using , then press ENTER. Setting is selected and [LISTENING POSITION] appears. LISTENING POSITION The [LISTENING POSITION] number you can select varies, depending on the [ROOM SIZE] setting. [SMALL]: Three positions [MEDIUM]: Four positions [LARGE]: Five positions Select a suitable listening position...
-
Page 29: Speaker Setup
Speaker Setup Positioning the speakers For the best possible surround sound, all the speakers other than the subwoofer should be the same distance from the listening position (A). However, this system allows you to place the center speaker up to 1.6 meters (5 ft) (B) and the surround speakers up to 4.6 meters (15 ft) closer (C) to the listening position. -
Page 30: Playing Discs
Playing Discs Playing Discs Depending on the DVD or VIDEO CD, some operations may be different or restricted. Refer to the operation details supplied with your disc. Disc1-5/Z/ Disc slot indicators "/1 STANDBY indicator DISC SKIP Turn on your TV. Switch the input selector on the TV to this system. -
Page 31: Additional Operations
After following Step 6 Depending on the disc, a menu may appear on the TV screen. You can play the disc interactively by following the instructions on the menu. (DVD: page 33), (VIDEO CD: page 33). To remove the disc Press DISC1-5 Z on the system. -
Page 32: Resuming Playback From The Point Where You Stopped The Disc
Resuming Playback from the Point Where You Stopped the Disc (Resume Play) When you stop the disc, the system remembers the point where you pressed x and “RESUME” appears in the front panel display. As long as you do not remove the disc, Resume Play will work even if the system enters standby mode by pressing "/1. -
Page 33: Using The Dvd's Menu
Using the DVD’s Menu A DVD is divided into a lot of sections, which make up a picture or music feature. These sections are called “titles.” When you play a DVD which contains several titles, you can select the title you want using DVD TOP MENU/ALBUM–. -
Page 34: Playing An Mp3 Audio Track
Notes • Depending on the VIDEO CD, the menu does not appear in Step 1. • Depending on the VIDEO CD, “Press ENTER” in Step 3 may appear as “Press SELECT” in the instructions supplied with the disc. In this case, press To play without using PBC, press ./>... - Page 35 Selecting an album and track DVD TOP MENU/ ALBUM– DISPLAY Press DVD DISPLAY. The Control Menu and name of the MP3 data disc appears. Press X/x to select then press ENTER or c. The list of albums contained in the disc appears.
-
Page 36: Playing Jpeg Image Files
Playing JPEG Image Files You can play JPEG image files on CD-ROMs, CD-Rs, or CD-RWs. However, the discs must be recorded according to ISO9660 level 1, level 2 or Joliet format for the system to recognize the files. You can also play discs recorded in Multi Session. - Page 37 When the list of all files or albums cannot be displayed on the window, the jump bar appears. Press c to select the jump bar icon, and then scroll the jump bar to display the rest of the list using X/x. Press C or O RETURN to return to the file or the album list.
-
Page 38: Selecting The Play Mode
To rotate the current image Rotate the current image using C/c. Each time you press c, the image turns clockwise by 90º. Each time you press C, the image turns anticlockwise by 90º. Note You cannot rotate the image during Slide show. Press H to return to normal play before this operation. -
Page 39: Creating Your Own Program
ALL/ONE/ALBUM • ALL: The system plays all discs in the system consecutively in the order of the disc slot number, and you can set Shuffle Play or Repeat Play for all the discs. • ONE: The system plays only the one disc you have selected, and you can set Shuffle Play or Repeat Play for 1 disc only. - Page 40 To check the tracks or albums that you have already created once, press C to select the jump bar icon, and then scroll the jump bar to display the rest of the list using X/x. Press c or O RETURN to return to the track list.
-
Page 41: Playing In Random Order
Playing in Random Order (Shuffle Play) You can have the system “shuffle” tracks and play them in random order. Subsequent “shuffling” will produce a different playing order. With cover opened. In stop mode, press PLAY MODE repeatedly until “SHUF” appears in the front panel display. -
Page 42: (Shuffle Play) Playing Repeatedly
Note While shuffling all discs, you cannot operate DISC SKIP on the remote or DISC1-5 on the system. Playing Repeatedly (Repeat Play) You can play all the titles/tracks/files or a single title/chapter/track on a disc. In Shuffle or Program Play mode, the system repeats tracks in shuffled or programmed order. -
Page 43: Searching For A Particular Point On A Disc
x When playing a DVD • OFF: does not play repeatedly. • ALL: repeats all the titles (except SHUFFLE (ALL)). • TITLE: repeats the current title on a disc. • CHAPTER: repeats the current chapter. x When playing a VIDEO CD/Super Audio CD/CD/MP3, and when Program Play is set to OFF •... -
Page 44: Searching For A Title/Chapter/Track/Index/Album/File
To change the scan speed (DVD/ VIDEO CD only) Each time you press m or M during scan, the playback speed changes. Two speeds are available. With each press, the indication changes as follows: Playback direction 1M t 2M Opposite direction 1m t 2m The 2M/2m playback speed is faster than 1M/1m. -
Page 45: Searching For A Chapter/Index
x When playing a DVD (TITLE) x When playing a VIDEO CD (TRACK) x When playing a Super Audio CD (TRACK) x When playing a CD (TRACK) x When playing an MP3 (ALBUM) or (TRACK) x When displaying a JPEG file (ALBUM) or Example: when you select (TRACK) -
Page 46: Viewing Disc Information
Press ENTER. The system starts playback from the selected number. Note When you play a VIDEO CD with PBC functions, the index search function does not work. To turn off the Control Menu Press DVD DISPLAY repeatedly until the Control Menu is turned off. To search for a particular point using the time code (TIME SEARCH) - Page 47 When playing back a DVD Playing time and number of the current title TITLE CHAP Remaining time and number of the current title TITLE CHAP Playing time and number of the current chapter CHAP Remaining time and number of the current chapter CHAP Title name Current sound field...
- Page 48 When playing back an MP3 Playing time and current track number Remaining time of the current track Track (file) name Album (folder) name Current sound field When playing back a JPEG Current file number File name Album (folder) name Current sound field Notes •...
-
Page 49: Checking The Playing Time And Remaining Time
Checking the Playing Time and Remaining Time You can check the playing time and remaining time of the current title, chapter, or track, and the total playing time or remaining time of the disc. You can also check the DVD/CD/Super Audio CD text and MP3 folder name/file name/ID3 tag (only song title) recorded on the disc. -
Page 50: Checking The Date Information (Jpeg Only)
Checking the date information (JPEG only) You can check the date information during playback when the Exif* tag is recorded in the JPEG image data. DISPLAY Press DVD DISPLAY during playback. The Control Menu appears. 2:MOUNTAIN FAMILY 1 ( 2 0 ) BIRTHDAY 01 / 01/ 2004 Date information * “Exchangeable Image File Format”... -
Page 51: Sound Adjustments
Sound Adjustments Changing the Sound If a DVD is recorded with multilingual tracks, you can select the language you want while playing the DVD. If the DVD is recorded in multiple audio formats (PCM, Dolby Digital, MPEG audio, or DTS), you can select the audio format you want while playing the DVD. -
Page 52: Dvd Only
To turn off the Control Menu Press DVD DISPLAY repeatedly until the Control Menu is turned off. Notes • For discs not in multiple audio format, you cannot change the sound. • During DVD playback, the sound may change automatically. You can select [AUDIO] directly by pressing AUDIO. -
Page 53: Enjoying Surround Sound
Enjoying Surround Sound You can take advantage of surround sound simply by selecting one of system’s pre- programmed sound fields. They bring the exciting and powerful sound of movie theaters into your home. To select sound field, press AUTO FORMAT DIRECT or MODE on the remote repeatedly until the sound field you want appears in the front panel display. - Page 54 Using only the front speaker and subwoofer (2 CHANNEL STEREO) This mode outputs the sound from the front left and right speakers and subwoofer. Standard two channel (stereo) sources completely bypass the sound field processing. Multi channel surround formats are downmixed to two channels. This allows you to play any source using only the front left and right speakers and subwoofer.
- Page 55 In collaboration with Sony Pictures Entertainment, Sony measured the sound environment of their studios and integrated the data of the measurement and Sony’s own DSP (Digital Signal Processor) technology to develop “Digital Cinema Sound.” “Digital Cinema Sound” simulates in a home theater an ideal movie theater sound environment based on the preference of the movie director.
- Page 56 C. ST. EX C (Cinema Studio EX C) Reproduces the sound characteristics of the Sony Pictures Entertainment scoring stage. This mode is ideal for watching musicals or classic films where music is featured in the soundtrack.
-
Page 57: Selecting The Surround Back Decoding Mode
To turn the surround effect off Press AUTO FORMAT DIRECT repeatedly until “A.F.D. AUTO” appears in the front panel display. When connecting the headphones to the PHONES jack Press AUTO FORMAT DIRECT or MODE repeatedly until “HP 2CH” appears in the front panel display. - Page 58 Press X/x to select the surround back mode you want according to the input stream, then press ENTER or AMP MENU. The default setting is “SB MATRIX.” When selecting “SB MATRIX” Dolby Digital EX or DTS-ES is applied to decode the surround back signal regardless of the 6.1 channel decode flag This decoder conforms to Dolby Digital EX or DTS-ES.
-
Page 59: Using The Sound Effect
Using the Sound Effect This system provides you with 2 types of sound effect, simply by pressing a button. Choose the sound to suit your needs. DSGX With cover opened. Press NIGHT MODE or DSGX on the remote. The sound effect is activated. x NIGHT MODE In this mode, you can enjoy sound effects or dialogue, as you would in a movie theater, even... -
Page 60: Using Various Additional Functions
Using Various Additional Functions Changing the Angles If various angles (multi-angles) for a scene are recorded on a DVD, you can change the viewing angle. For example, while playing a scene of a train in motion, you can display the view from either the front of the train, the left window of the train, or from the right window without having the train’s movement interrupted. -
Page 61: Displaying Subtitles
Displaying Subtitles If subtitles are recorded on a disc, you can turn the subtitles on or off while playing. If multilingual subtitles are recorded on the disc, you can change the subtitle language while playing, or turn the subtitles on or off whenever you want. -
Page 62: Locking Discs
Locking Discs (CUSTOM PARENTAL CONTROL, PARENTAL CONTROL) You can set two kinds of playback restrictions for a disc. • Custom Parental Control You can set the playback restrictions so that the system will not play inappropriate discs. • Parental Control Playback of some DVDs can be limited according to a predetermined level, such as the age of the viewer. - Page 63 Enter your 4-digit password by using the number buttons, then press ENTER. [Custom parental control is set.] appears and the screen returns to the Control Menu display. If you make a mistake entering your password Press C before you press ENTER and input the correct number.
-
Page 64: Parental Control
Limiting playback for children (Parental Control) (DVD only) Playback of some DVDs can be limited according to a predetermined level, such as the age of the viewer. The “Parental Control” function allows you to set a playback limitation level. A scene that is limited is not played, or it is replaced by a different scene. - Page 65 Press X/x to select [STANDARD], then press ENTER or c. The selection items for [STANDARD] are displayed. CUSTOM SETUP PARENTAL CONTROL LEVEL: STANDARD: CHANGE PASSWORD OTHERS Press X/x to select a geographic area as the playback limitation level, then press ENTER. The area is selected.
-
Page 66: Area Code
Playing the disc for which Parental Control is set Insert the disc and press H. The [PARENTAL CONTROL] display appears. Enter your 4-digit password using the number buttons, then press ENTER. The system starts playback. Notes • If you play a DVD which does not have the Parental Control function, playback cannot be limited on this system. -
Page 67: Other Operations
• If you enter a new code number, the code number previously entered will be erased. • When you replace the batteries of the remote, the code number may reset itself to the default (SONY) setting. Reset the appropriate code number. Controlling TVs with the... -
Page 68: Controlling The Tv
Manufacturer Code number Videch 002, 015 WARDS 002, 020 ZENITH 016, 017 CATV Manufacturer Code number SONY HAMLIN/REGAL 123, 124, 125, 126, 127 128, 129, 130 PANASONIC 120, 121, 122 PIONEER 115, 116 SCIENTIFIC 110, 111, 112 ATLANTA TOCOM 117, 118, 131... -
Page 69: Using The Sony Tv Direct Function
Using the SONY TV DIRECT Function SONY TV DIRECT allows you to turn on your SONY TV and this system, change the system mode to “DVD,” and then switch the TV’s input source you set with one button push. TV/VIDEO... -
Page 70: Using The Video Or Other Units
Notes • This function is only for SONY TV series. • If distance between TV and this system is too far, this function may not work. Install the system near the • Keep the remote pointed in the direction of the TV and this system while the TV button is flashing. -
Page 71: Enjoying Multiplex Broadcast Sound (Dual Mono)
Enjoying Multiplex Broadcast Sound (DUAL MONO) You can enjoy multiplex broadcast sound when the system receive the AC-3 multiplex broadcast signal. Note To receive the AC-3 signal, you need to connect a digital satellite tuner to the system with an OPTICAL cable (page 24) and set the digital output mode of the digital satellite tuner to AAC. -
Page 72: Enjoying The Radio
Enjoying the Radio Presetting Radio Stations You can preset 20 FM stations, and 10 AM stations. Before tuning, make sure to turn down the volume to minimum. TUNER/ BAND C/X/x/c/ ENTER With cover opened. Press TUNER/BAND repeatedly until the band you want appears in the front panel display. -
Page 73: Listening To The Radio
Listening to the Radio Preset radio stations in the system’s memory first (see “Presetting Radio Stations” on page 72). TUNER/ BAND DISPLAY PRESET –/+ With cover opened. Press FUNCTION repeatedly until “FM” or “AM” appears in the front panel display. The last received station is tuned in. -
Page 74: Naming Preset Stations
Naming Preset Stations You can enter a name of up to 8 characters for preset stations. These names (for example, “XYZ”) appear in the system’s front panel display when a station is selected. Note that no more than one name can be entered for each preset station. -
Page 75: Using The Sleep Timer
Using the Sleep Timer You can set the system to turn off at a preset time, so you can fall asleep listening to music. You can preset the time in 10 minutes decrements. SLEEP Press SLEEP. Each time you press this button, the minutes display (the remaining time) changes as follows: AUTO t 90MIN t 80MIN t 70MIN SLEEP OFF T 10MIN ... -
Page 76: Returning To The Default Settings
Returning to the Default Settings You can return the system parameters such as speaker settings and preset stations, to the default settings. DISC1 Z Press , or DISC1 Z on the system at the same time. “COLD RESET” appears in the front panel display and the default settings are returned. -
Page 77: Settings And Adjustments
Settings and Adjustments Using the Setup Display By using the Setup Display, you can make various adjustments to items, such as picture and sound. You can also set the subtitle language and the Setup Display, among other things. For details on each Setup Display item, see page 78- 84. -
Page 78: Setting The Display Or Sound Track Language
Setting the Display or Sound Track Language (LANGUAGE SETUP) [LANGUAGE SETUP] allows you to set various languages for the on-screen display or sound track. Select [LANGUAGE SETUP] in the Setup Display. For details on using the display, see “Using the Setup Display” (page 77). LANGUAGE SETUP OSD : DVD MENU :... - Page 79 4:3 LETTER BOX 4:3 PAN SCAN 16:9 Note Depending on the DVD, [4:3 LETTER BOX] may be selected automatically instead of [4:3 PAN SCAN] or vice versa. x SCREEN SAVER Turns the screen saver on and off so that the screen saver image appears when you leave the system in pause or stop mode for 15 minutes, or when you playback a CD, a Super Audio CD, an...
-
Page 80: (Screen Setup) Custom Settings
Notes • If your TV accepts progressive signals, connect COMPONENT VIDEO OUT of the system to the TV using a component video cord (not supplied), and set progressive format. • When [PROGRESSIVE] is selected in [SCREEN SETUP], no signal is output from the MONITOR OUT jacks. -
Page 81: Settings For The Speakers
x AUDIO DRC* Narrows the DYNAMIC range of the sound track. Useful for watching movies at low volume late at night. * Dynamic Range Compression No compression of DYNAMIC range. Reproduces the sound track with the kind of DYNAMIC range that the recording engineer intended. - Page 82 FRONT CENTER YES: Normally select this. NONE: Select this if no center speaker is used. SURROUND BEHIND: Select this if surround speakers are located in section B. SIDE: Select this if surround speakers are located in section A. NONE: Select this if no surround speaker is used.
- Page 83 x LEVEL You can vary the level of each speaker as follows. Be sure to set [TEST TONE] to [ON] for easy adjustment. CENTER Adjusts the level of the center 0 dB* speaker (–6 dB to +6 dB, 1 dB (appears when increments).
-
Page 84: Test Tone
Adjusting the speaker balance and level by using the test tone Press DVD SETUP in stop mode. The Setup Display appears. Press X/x repeatedly to select [SPEAKER SETUP], then press ENTER or c. Press X/x repeatedly to select [TEST TONE], then press ENTER or c. Press X/x repeatedly to select [ON], then press ENTER. - Page 85 CUSTOMIZE DUAL MONO MAIN MAIN+SUB MAIN/SUB SB DEC SB MATRIX SB AUTO SB OFF DIMMER DIM OFF DIM ON C/X/x/c/ ENTER With cover opened. Press AMP MENU. Press X/x repeatedly until the item you want to set appears in the front panel display.
- Page 86 xLEVEL TEST TONE T. TONE OFF: The test tone is (test tone) not emitted from the speakers. T. TONE ON: The test tone is emitted from both left and right speakers simultaneously while adjusting balance. When you select one of the “LEVEL”...
-
Page 87: (Speaker Setup) Quick Setup And Resetting The System
Quick Setup and Resetting the System (SETUP) Select [SETUP] in the setup display. For details, see “Using the Setup Display” (page 77). SETUP QUICK RESET x QUICK Normally, when you turn the system on for the first time or after resetting the system, the guide message appears on the TV screen and you can perform the Quick Setup. -
Page 88: Additional Information
If you experience any of the following difficulties while using the system, use this troubleshooting guide to help remedy the problem before requesting repairs. Should any problem persist, consult your nearest Sony dealer. Power The power is not turned on. - Page 89 The sound loses stereo effect when you play a VIDEO CD, a CD, or an MP3. • Set [AUDIO] to [STEREO] in the Control Menu display (page 51). • Make sure the system is connected appropriately. The surround effect is difficult to hear when you are playing a Dolby Digital, DTS, or MPEG audio sound track.
- Page 90 • The DVD prohibits changing the angles. A disc cannot be ejected and “LOCKED” appears in the front panel display. • Contact your Sony dealer or local authorized Sony service facility. “C-32” appears in the front panel display. • Turn the power off and then on again by pressing [/1 on the system.
-
Page 91: Specifications
Specifications AUDIO POWER SPECIFICATIONS POWER OUTPUT AND TOTAL HARMONIC DISTORTION: With 4 ohm loads, both channels driven, from 20 – 20,000 Hz; rated 75 watts per channel minimum RMS power, with no more than 0.7 % total harmonic distortion. (from 250 milli watts to rated output) Amplifier section (DAV-FR1) Surround mode Front:... - Page 92 Speakers (DAV-FR1) Front/Surround Speaker system Speaker unit Rated impedance Dimensions (approx.) Mass (approx.) Center Speaker system Speaker unit Rated impedance Dimensions (approx.) Mass (approx.) Subwoofer Speaker system Speaker unit Rated impedance Dimensions (approx.) Mass (approx.) Speakers (DAV-FR8) Front Speaker system Speaker unit Rated impedance Dimensions (approx.)
-
Page 93: Glossary
Digital Cinema Sound (DCS) This is the generic name of the surround sound produced by digital signal processing technology developed by Sony. Unlike previous inches) dia. surround sound fields mainly directed at the reproduction of music, Digital Cinema Sound is designed specifically for the enjoyment of movies. - Page 94 x Movie mode The Movie mode is for use with stereo television shows and all programs encoded in Dolby Surround. The result is enhanced sound field directionality that approaches the quality of discrete 5.1-channel sound. x Music mode The Music mode is for use with any stereo music recordings, and provides a wide and deep sound space.
- Page 95 Multi-angle function Various angles of a scene, or viewpoints of the video camera are recorded on some DVDs. Multilingual function Several languages for the sound or subtitles in a picture are recorded on some DVDs. Neo:6 Developed by Digital Theater Systems, Inc., applies a conventional 2-channel or Dolby Digital source signal to a high-precision, digital matrix decoder to achieve 6.1 channel surround...
- Page 96 only, you do not have to turn the disc over during playback. You can play this CD layer using a conventional CD player. • 2 channel + Multi-channel Super Audio CD This disc consists of a 2 channel playback area and a multi-channel playback area.
-
Page 97: Index To Parts And Controls
Index to Parts and Controls For more information, refer to the pages indicated in parentheses. Front Panel A [/1 (power) switch/STANDBY indicator (30) B DISC1-5 (eject)/indicators (30) (remote sensor) (13) D Front panel display (98) E PHONES (on the side of the system) jack (30) F VOLUME +/–... -
Page 98: Front Panel Display
Front Panel Display When playing back a DVD Playing status Play mode DISC S REP 1 Current mode When playing back a Super Audio CD, CD, VIDEO CD (without PBC functions), or MP3 Play mode Playing status Current mode DISC PGM SHUF REP 1 SA–... - Page 99 When playing back a JPEG file Play mode DISC S JPEG Playing status Current file number...
- Page 100 Rear Panel A SPEAKER jacks (15) B SURROUND BACK jack (19) C VIDEO AUDIO IN (L/R) jacks (23) D COMPONENT VIDEO OUT jacks (23) E SAT OPTICAL DIGITAL IN jack (24) VIDEO (DVD ONLY) AUDIO IN SPEAKER FRONT R CENTER FRONT L WOOFER COMPOMEMT VIDEO OUT...
- Page 101 P ENTER Q TUNER MENU (72, 74) R TV [/1 (on/standby) (67) S "/1 (standby) (27, 30, 72, 73) T SONY TV DIRECT (69) U TUNER/BAND (72, 73, 74) V FUNCTION (27, 30, 70, 73, 74) W m/M/ SLOW, TUNING –/+ (37,...
-
Page 102: Language Code List
Language Code List The language spellings conform to the ISO 639: 1988 (E/F) standard. Code Language 1027 Afar 1028 Abkhazian 1032 Afrikaans 1039 Amharic 1044 Arabic 1045 Assamese 1051 Aymara 1052 Azerbaijani 1053 Bashkir 1057 Byelorussian 1059 Bulgarian 1060 Bihari 1061 Bislama 1066... -
Page 103: Dvd Setup Menu List
DVD Setup Menu List You can set the following items with the DVD Setup menu. The order of the displayed items may be different from the actual display. LANGUAGE SETUP (Selects the language you want to use from the displayed language list.) DVD MENU (Selects the language you want to use from the... - Page 104 SPEAKER SETUP SIZE FRONT CENTER SURROUND SURROUND BACK SUBWOOFER DISTANCE FRONT CENTER SURROUND SURROUND BACK LEVEL CENTER SURROUND LEFT SURROUND RIGHT SURROUND BACK SUBWOOFER BALANCE FRONT TEST TONE * The setting range changes depending on the front speaker setting (page 82). SETUP QUICK RESET...
-
Page 105: Amp Menu List
AMP Menu List You can set the following items with AMP MENU on the remote. SP SETUP CENTER SP CENTER Y CENTER N SURR SP SURR Y SURR N SURR B N SURR B SP SURR B Y F DIST 1.0 m –... -
Page 106: Index
Index Numerics 16:9 78 4:3 LETTER BOX 78 4:3 PAN SCAN 78 ALBUM 35, 44 Album 7, 93 ANGLE 60 Antenna (aerial) Hookups 21 AUDIO 51, 78 AUDIO DRC 81 BACKGROUND 79 BALANCE 83 Batteries 13 CHAPTER 45 Chapter 7, 93 COMPONENT OUT 79 Continuous play CD/VIDEO CD/Super Audio... -
Page 108: Quick Reference For Remote Commander
Note The remote control of the unit employs command signals in common with other Sony DVD products. Thus, depending on the button, other Sony DVD products may respond. A Selects a disc for playback. B Switches the item displayed on the front panel display.