Table of Contents
Advertisement
Advertisement
Table of Contents

Related Manuals for Datamax APEX 4


Summary of Contents for Datamax APEX 4
- Page 1 7A300024-2 Rev. A APEX 4 User Guide...
-
Page 3: Table Of Contents
Contents General Precautions ...................... 1 Safety ........................... 1 Getting Started ....................... 2 Unpacking the Printer ..................2 Installing and Charging the Battery Cartridge............3 1.2.1 Installing the Battery................3 1.2.2 Charging the Battery ................4 Reading the LED Status ................... 5 Attaching Shoulder Strap System .............. - Page 4 4.2.1 Important Notes on Charging Batteries ..........18 4.2.2 Important Notes on Replacing Batteries ..........18 Verifying Battery Charge State................ 19 Battery and Safety Information ............... 19 Recycling Batteries..................20 Troubleshooting .................... 20 Printer Supplies .................... 21 Specifications......................23 Printer Specifications ..................23 Supply Specifications..................
-
Page 5: General Precautions
Datamax-O’Neil is not responsible for any operational results regardless of missing information, errors or any misprinting in this manual. Datamax-O’Neil is not responsible for problems created as a result of using options and consumables not approved by them. ... -
Page 6: Getting Started
1 Getting Started 1.1 Unpacking the Printer The APEX 4 portable printer is a full featured portable receipt printer designed for varied job environments including field service, field sales, hospitality and restaurants, ticketing and many others where point of service receipts are required. The package contains: ... -
Page 7: Installing And Charging The Battery Cartridge
180 minutes whenever the low battery indicator comes on or as directed by your IT team. Datamax-O’Neil batteries must be cycled several times to achieve maximum capacity. To cycle a battery, fully charge it and then allow full discharge through normal use in the printer. -
Page 8: Charging The Battery
100-240 VAC/ 0.4A Input Frequency 47-63 HZ Do not use a charger not approved by Datamax-O’Neil for use with the APEX 4. Use of an unapproved charger could damage the battery pack or the printer and will void the warranty. -
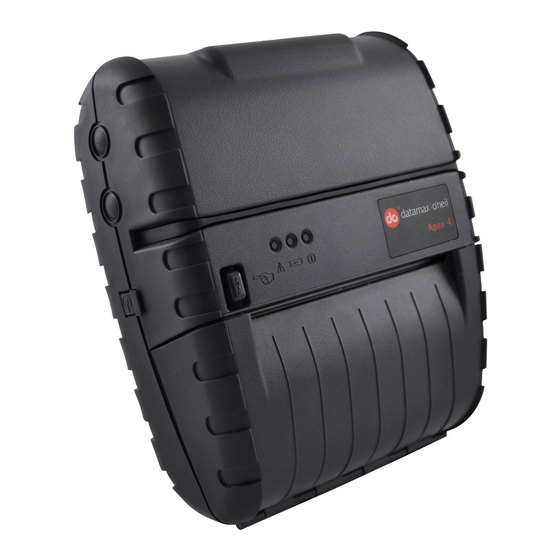
Page 9: Reading The Led Status
1.3 Reading the LED Status Figure 4 points out the location of the LED indicators described in Table 1 and Table 2 FIGURE 4 - LED INDICATOR LOCATIONS Table 1 explains the LED indicator status. Table 2 explains the Error/Warning indicator status. Refer to Figure 1 for the locations described for ON/OFF and FEED push button switches and AC... - Page 10 Table 2 - Reading the Error/Warranty LED Status LED # LED Color/ Status Description Action Required LED # 1 RED/ Steady Low power indication Charge battery Communication Printer is in RS232 or (#1) GREEN/ Press Feed to clear error. Cycling USB mode and Printer Flashing printer power will result in printer...
-
Page 11: Attaching Shoulder Strap System
1.4 Attaching Shoulder Strap System The Shoulder Strap System consists of two parts: A knob located on the back part of the printer just above the battery door A strap with click on connector To attach the strap to the knob: ... -
Page 13: Loading Supplies
2 Loading Supplies 2.1 Adding Paper or Labels The printer can print text, bar codes and graphics on thermal receipt paper. See Section 5.2, “Supply Specifications,” for the width, thickness requirements, and approved vendors. Follow these steps to load printer paper. ... -
Page 14: Tearing Paper
If fastened by tape or glue, the core will be pulled into the mechanism causing jamming and possible gear damage. Proper paper roll supplies are available from Datamax-O’Neil, see Section 4.7 for listing of part numbers. 2.2 Tearing Paper The printer’s paper door acts as a tear bar. -
Page 15: Using The Printer
SELF-TEST sample. 3.2 Connecting the Printer • The APEX 4 printer supports USB and Bluetooth ™ communication as default communication interfaces. WiFi communication and IrDA is also available as an optional feature. • USB, Bluetooth™, and 802.11 communication settings can be changed via a DIP switch located on the control card. -
Page 16: Dip Switches Location
3.2.1 Dip Switches Location • The DIP switch is located inside the battery compartment as illustrated above indicating the location of this switch. Figure 10 shows the DIP switch location. • The functions assigned to these switches are shown in Table Dip Switch Location FIGURE 10: DIP SWITCH LOCATION... -
Page 17: Dip Switch Functions
If IrDA is not installed, printer will default to RS232 mode with baud rate 115200 X stands for Don’t Care: Dip Switch 7 will override 1 and 2 Firmware Applies to Apex 4 - Version 1.10 or later. Baud Rate and Parity are applicable to RS232 and IrDA communication mode ONLY Note: In order for changes to the dip switch configuration to take effect, the printer power must be reset. -
Page 18: Communications
3.4 USB Communication The APEX 4 printer comes equipped with a USB 2.0 slave port. Everything that can be done through the RS-232 port can now be done through the USB port. You may print to or send commands to the printer from a PC or any equipment that can act as a USB master. -
Page 19: Bluetooth Communications
Note: It is necessary for the mobile computing device you are using to discover and pairing the printer to establish Bluetooth communication. Note: Systems Integrators: Refer to the Bluetooth manual provided with your mobile computer and the Bluetooth section of the APEX 4 Developer’s Manual 3.6 802.11 Communications (Option) •... -
Page 20: Magnetic Stripe Reader (Option)
3.7 Magnetic Stripe Reader (Option) • The Magnetic Card Reader is a factory-installed option. This option requires special application software to read and process cards with a magnetic stripe, such as credit cards or driver’s license Note: Refer to the Figure 12 if your printer is equipped with the optional magnetic stripe reader. •... -
Page 21: Printer Maintenance
757150, which is included with the printer. To order more cleaning pens, please contact your distributor or Datamax-O’Neil. Do not use sharp objects to clean the print head. This may damage the printer and require service. -
Page 22: Charging The Printer Battery
Important Notes on Replacing Batteries • Replace battery every 15 – 18 months or as directed by your IT department. Check for the correct Datamax-O’Neil part number for the battery and only user that part for your new battery. See Section 4.7 for printer supplies. -
Page 23: Verifying Battery Charge State
4.3 Verifying Battery Charge State We strongly recommend testing your printer before returning it to Datamax-O’Neil. Follow these steps to identify and correct any battery power problem that may be encountered. These will help to identify that the fault is with the printer and not some other part of your system. -
Page 24: Recycling Batteries
Error reading MCR. After extended printing, print head may be hot; printer will pause before resuming printing. If the problem is not identified following the troubleshooting guide, contact Datamax-O’Neil Technical Support. Support numbers and Email addresses are listed at Section... -
Page 25: Printer Supplies
4.7 Printer Supplies Part Number Description 78928U1-3 Apex 4 with USB, Class 2 Bluetooth® 78928U1R-3 Apex 4 with USB, MCR, Class 2 Bluetooth® 78928U1-2 Apex 4 with USB, 802.11b/g 78928U1R-2 Apex 4 with USB, MCR, 802.11b/g 157261 Multi-Plug Battery Charger Adapter (US, UK, Euro &... -
Page 27: Specifications
5 Specifications 5.1 Printer Specifications (subject to change without notice) Dimensions 7.4”L x 6.5”W x 2. 5”H (191L x166W x 63H mm) Weight 22 ounces (648g) Shipping weight 3.3 lbs. (1.5kg) Power Lithium-Ion battery (7.4V;2250 mAh) Operating Temp. Limits 14 to 122°F (-10 to 50°C) Storage Temp. -
Page 28: Regulatory Notes
5.3.2 Warranty This printer is warranted by Datamax-O’Neil to be free of defects in parts and workmanship for a period of one year from date of shipment. This warranty does not apply to defects resulting from action of the user such as misuse, improper wiring, operation outside of specification, improper maintenance or repair, or unauthorized modification. -
Page 29: Customer Support
Tel: + 33 (0) 4 75 75 63 00 Fax: +33 (0) 4 75 82 98 38 eurotech@datamaxcorp.com Datamax-O'Neil Asia-Pacific Singapore Monday - Friday 0830 - 1730 Tel: +65 6505 2250 Fax: +65 6769 8135 tsaspa@datamax-oneil.com COPYRIGHT © 2011, DATAMAX-O’NEIL...